Setting Up and Sharpening a Spokeshave
Note: Be careful when sharpening as the tools will become very sharp. Always face the blade away from you when sharpening.
Note: Be careful when sharpening as the tools will become very sharp. Always face the blade away from you when sharpening.
Setting Up
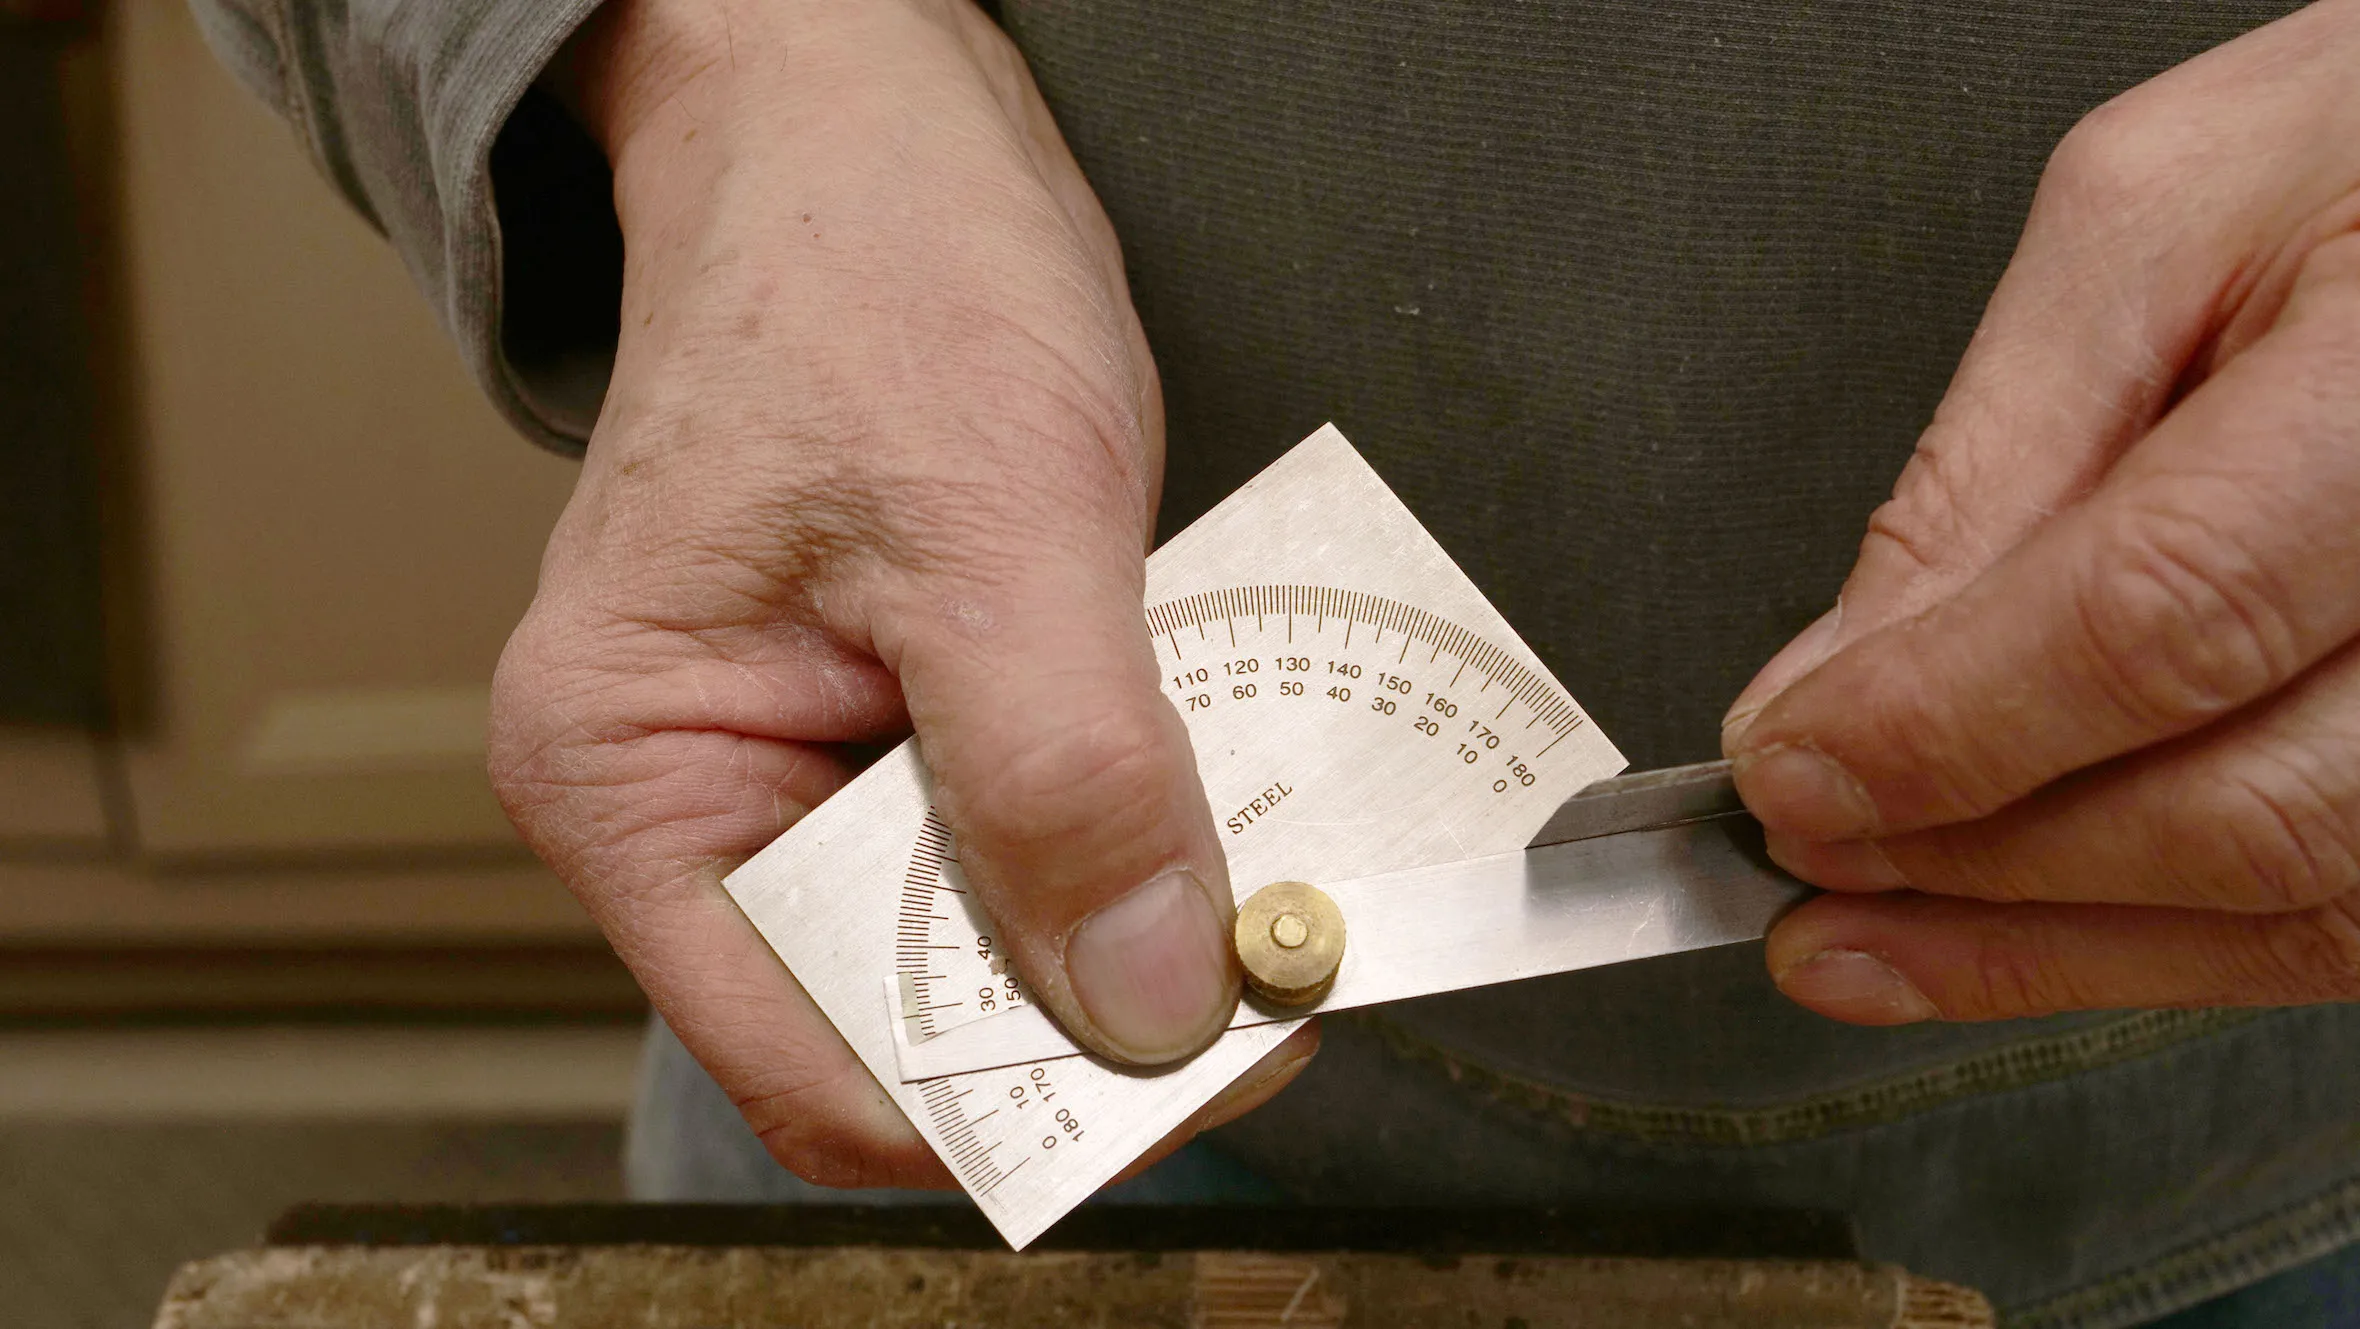
If your spokeshave is secondhand, check the angle of the bevelled edge using a protractor. The bevel should be no more than 30°.
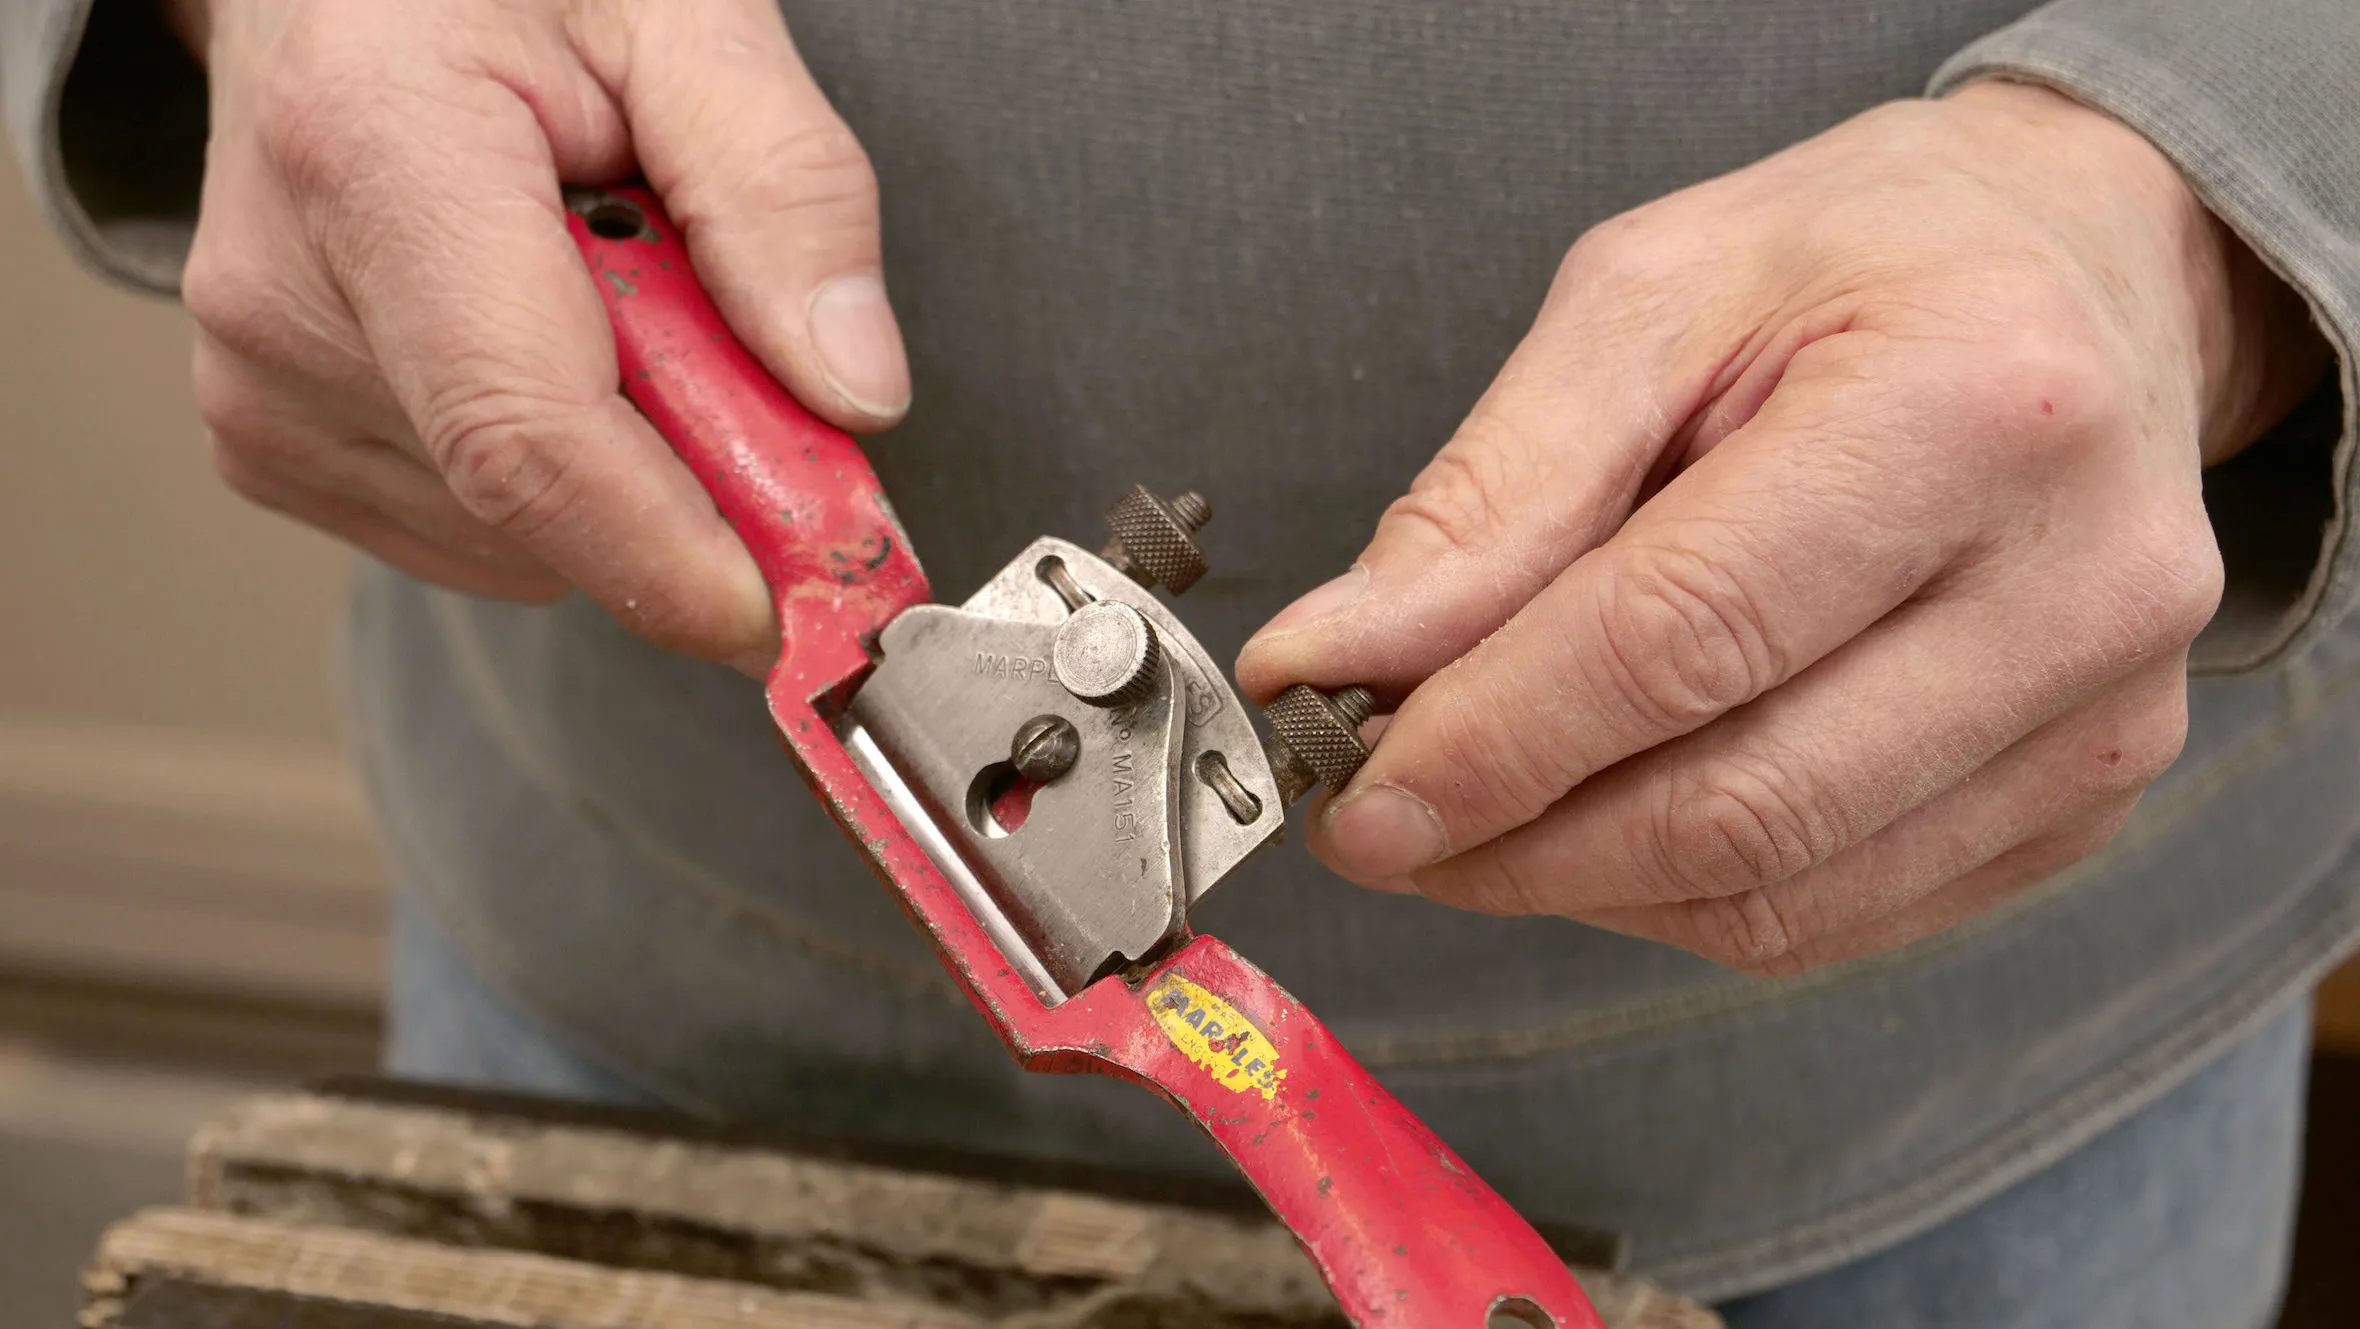
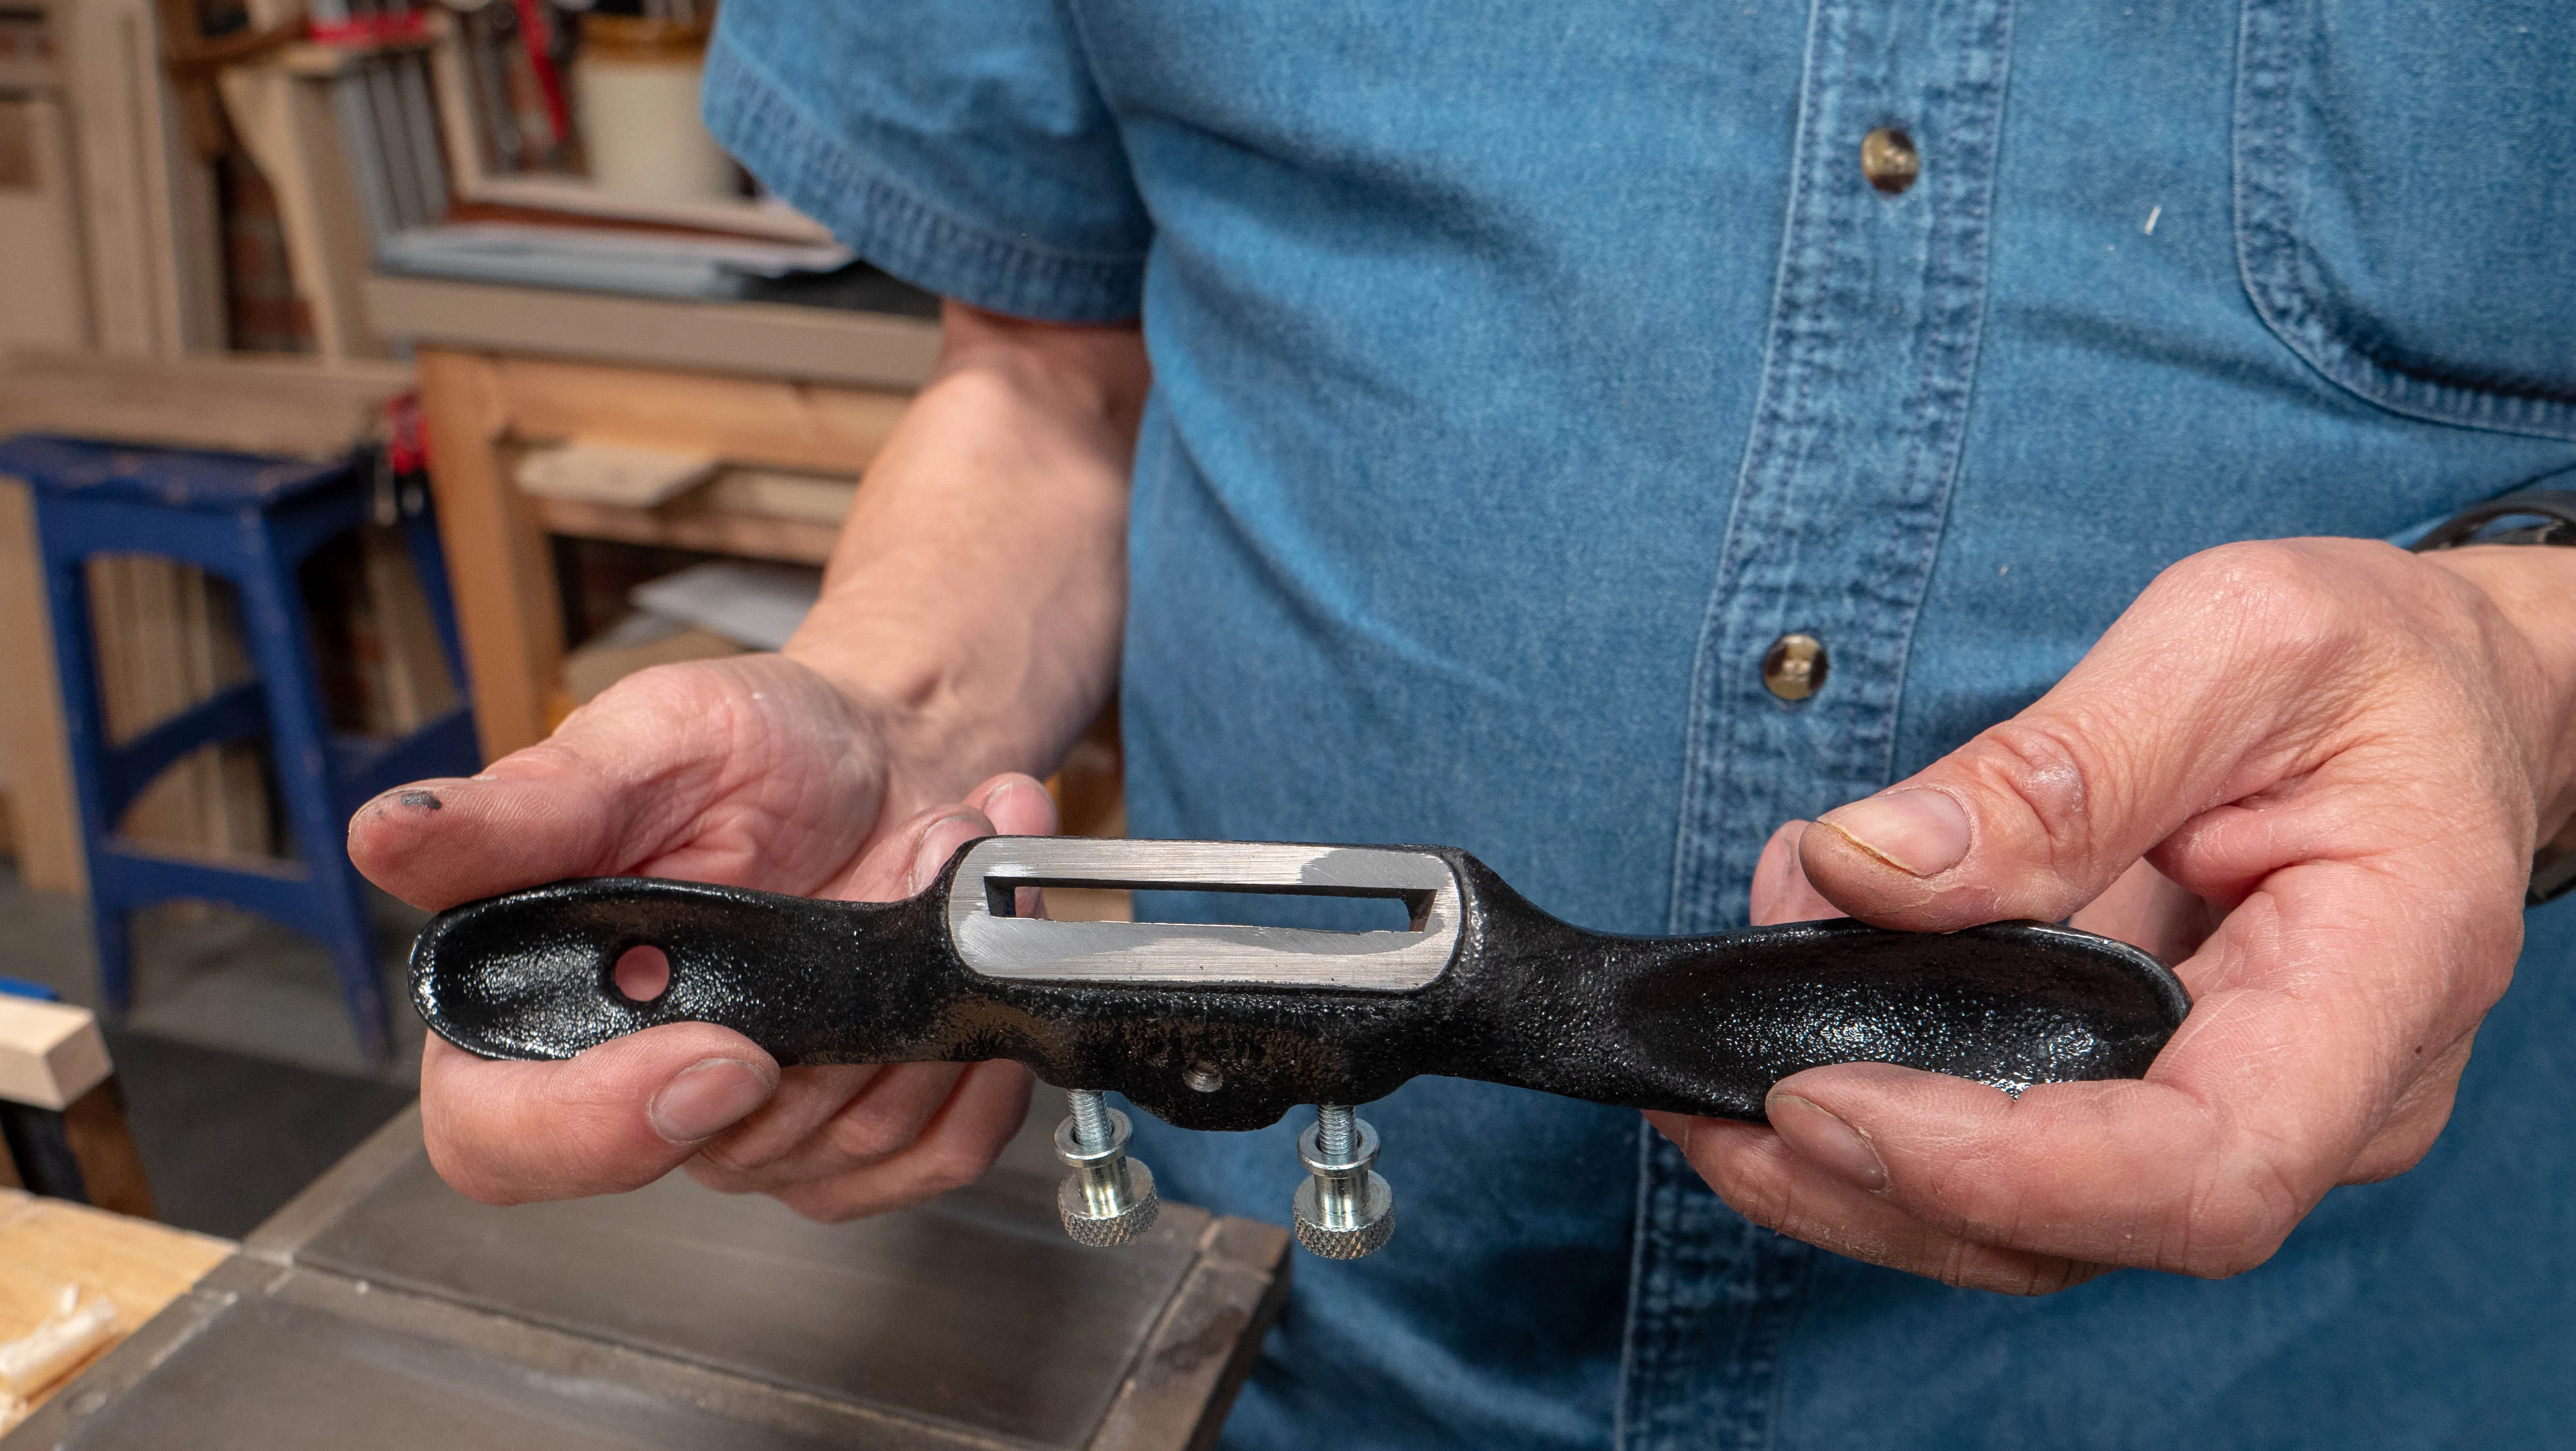
To set the cutting iron depth, use the two adjusters one at a time to lower or retract the blade until it looks parallel to the sole of the spokeshave when viewing the sole of the spokeshave from the front edge. The more the blade is visible, the deeper the cut will be. To test out the depth, use a long thin piece of wood about ½” thick. Take a shaving from one side of the blade and then, using the same pressure, take a shaving using the other side of the blade. If the thickness of the shavings are similar, this means that the depth of the cutting iron is similar on both sides. If the shavings are different, adjust one side until they match.
Some spokeshaves may clog when used for the first time due to the shape of the cap iron. Follow the steps below to refine the cap iron and improve the spokeshave’s performance.
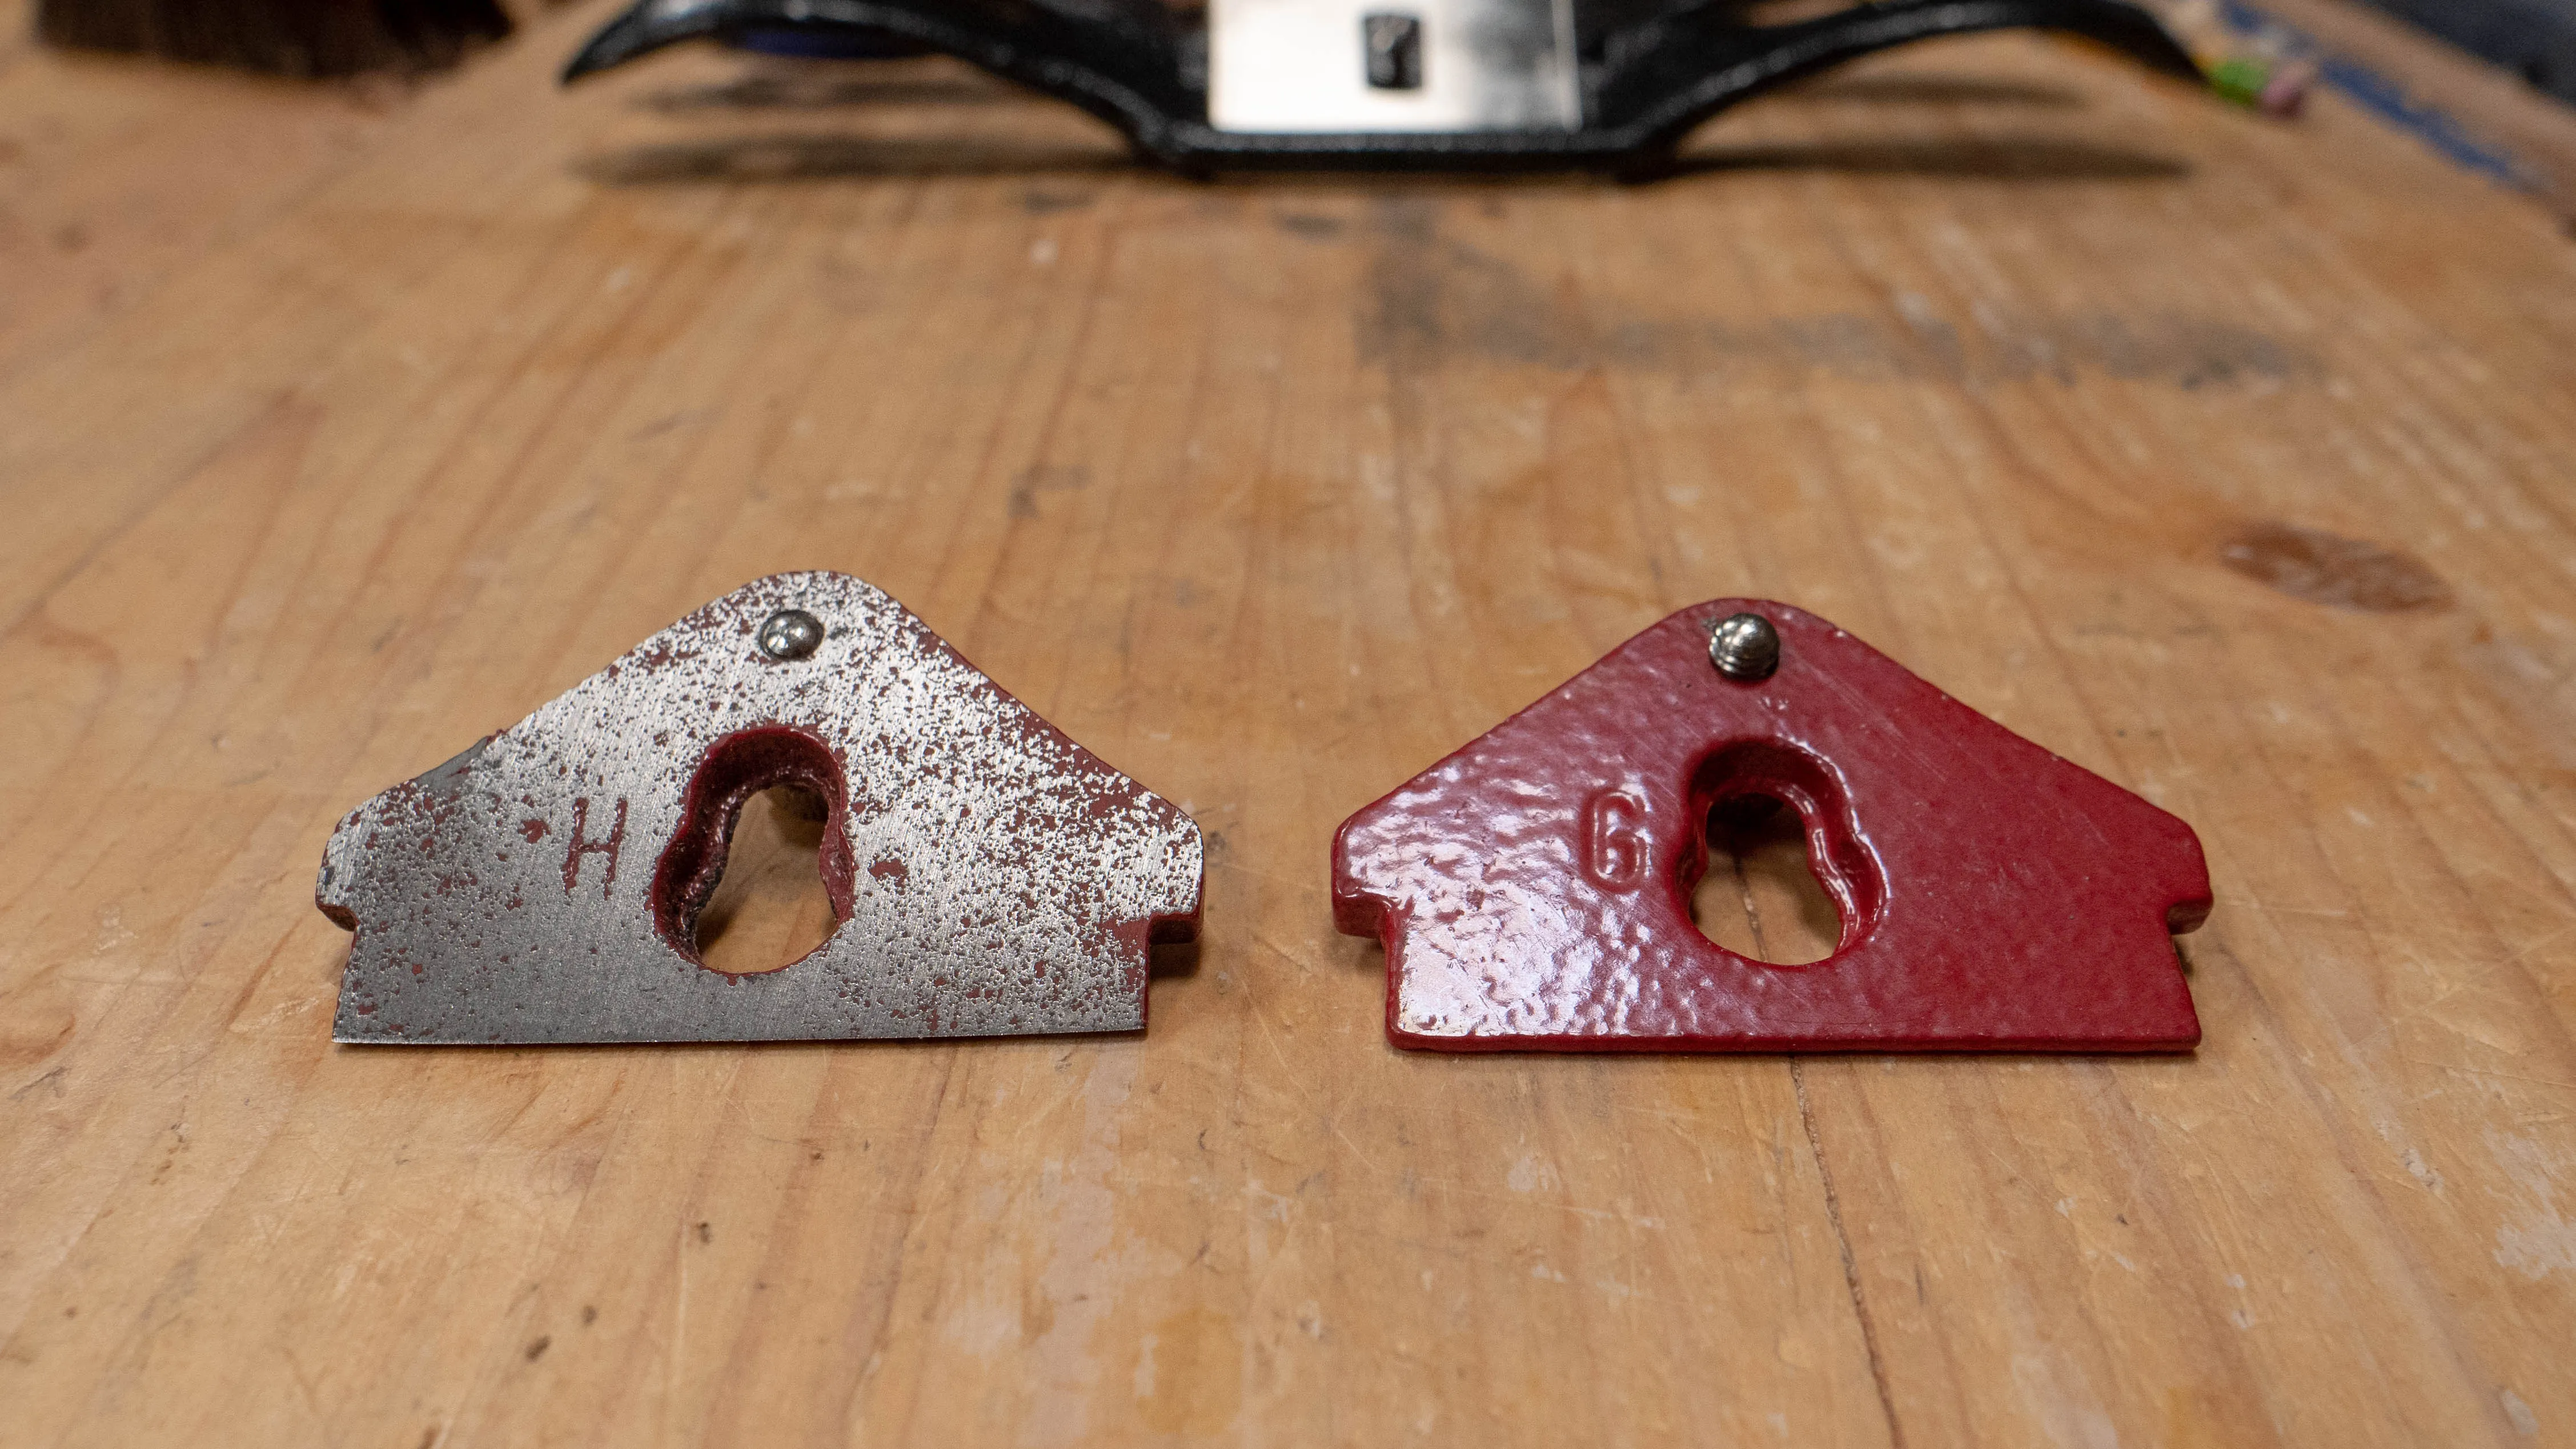
Cap Iron before and after gallery:
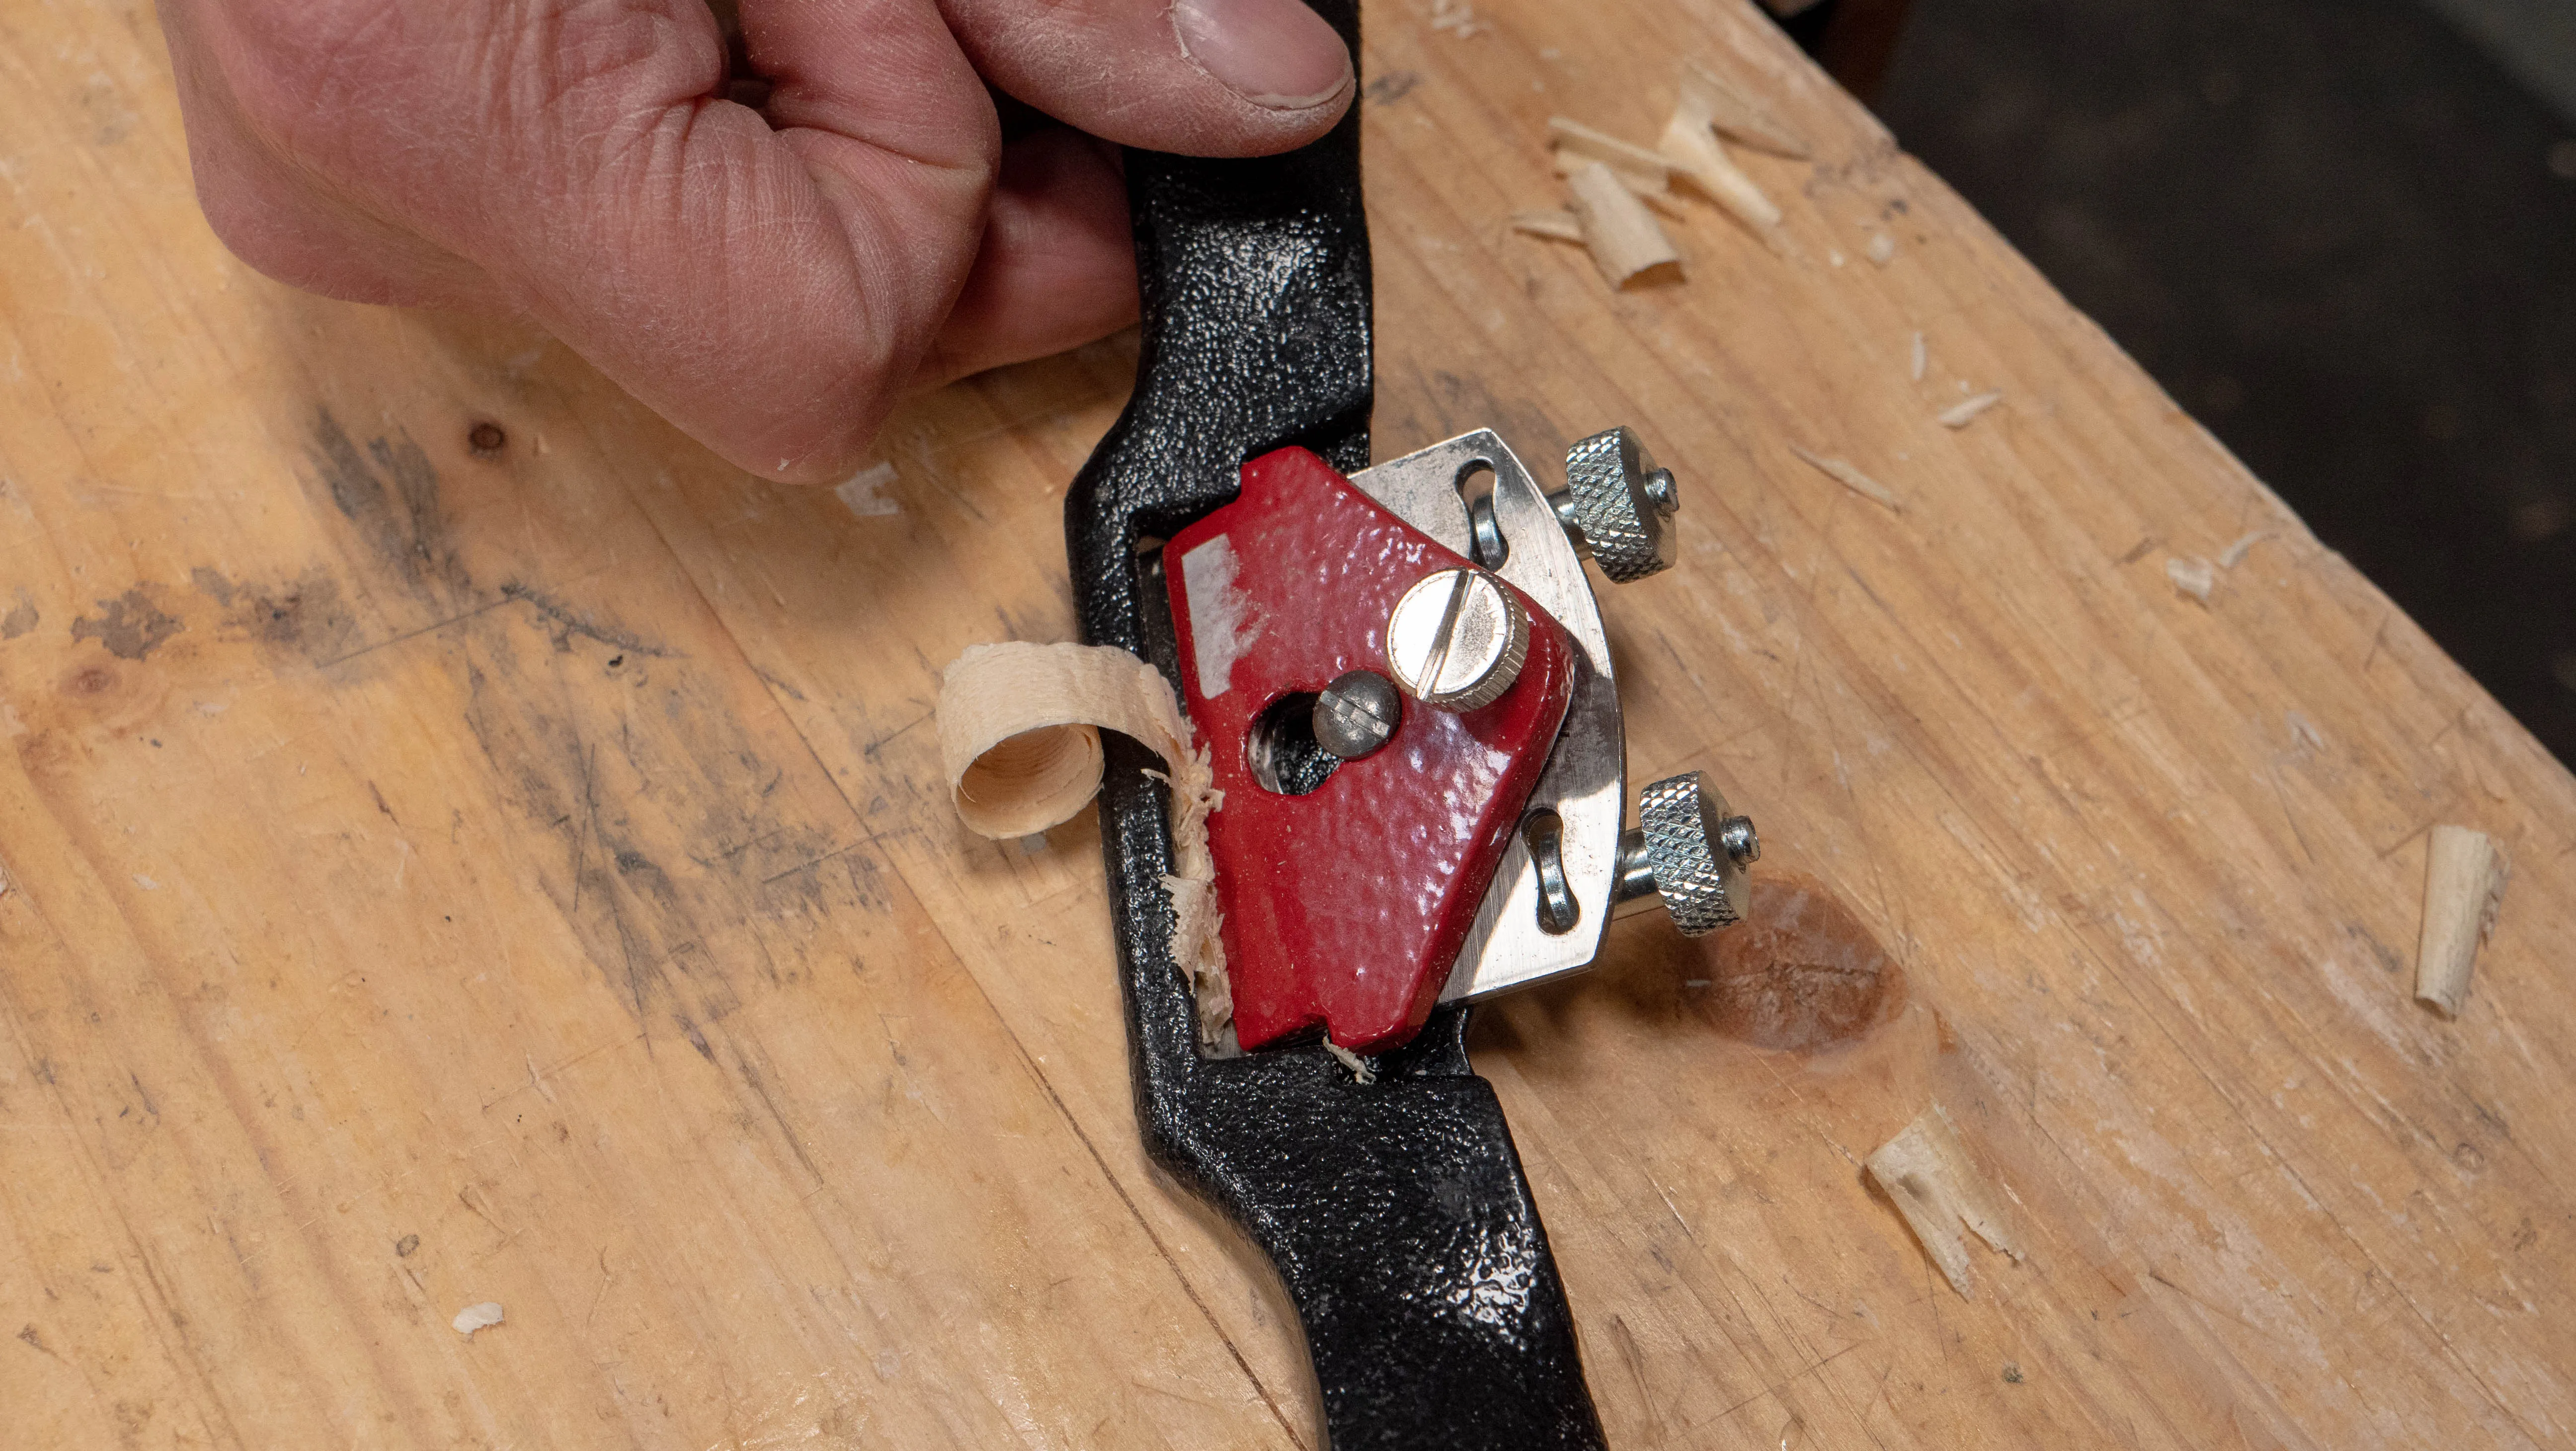
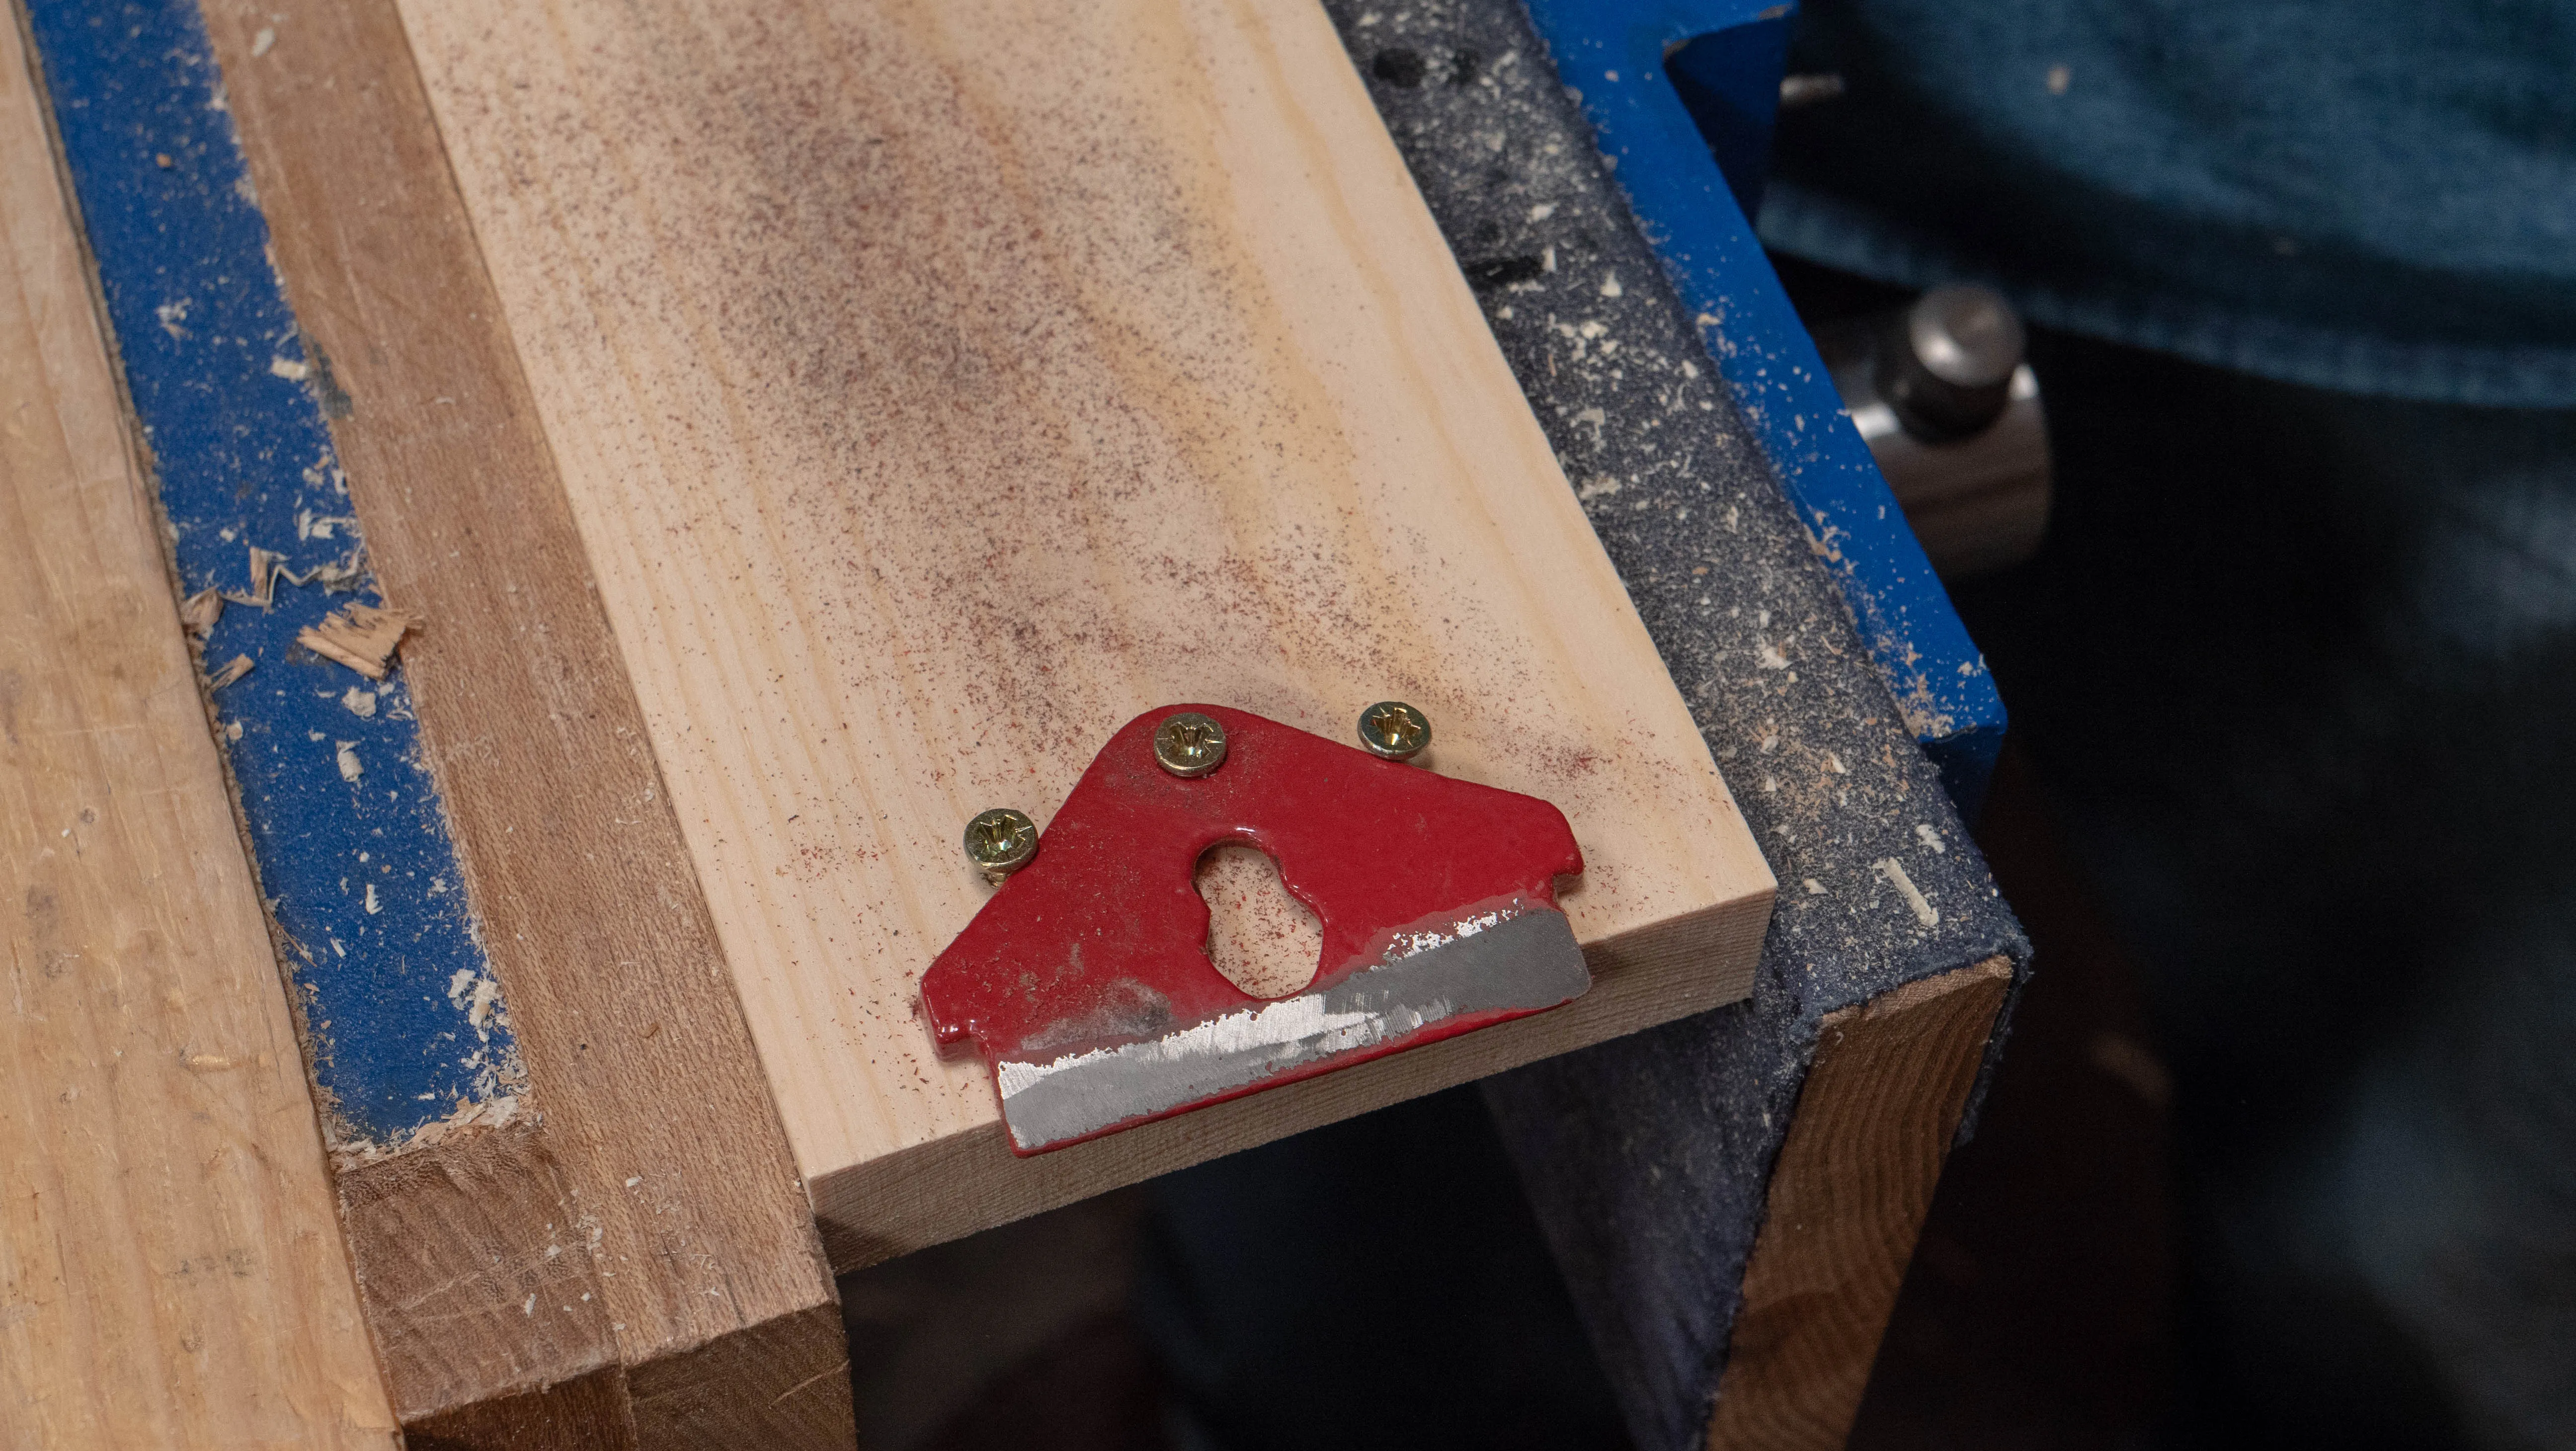
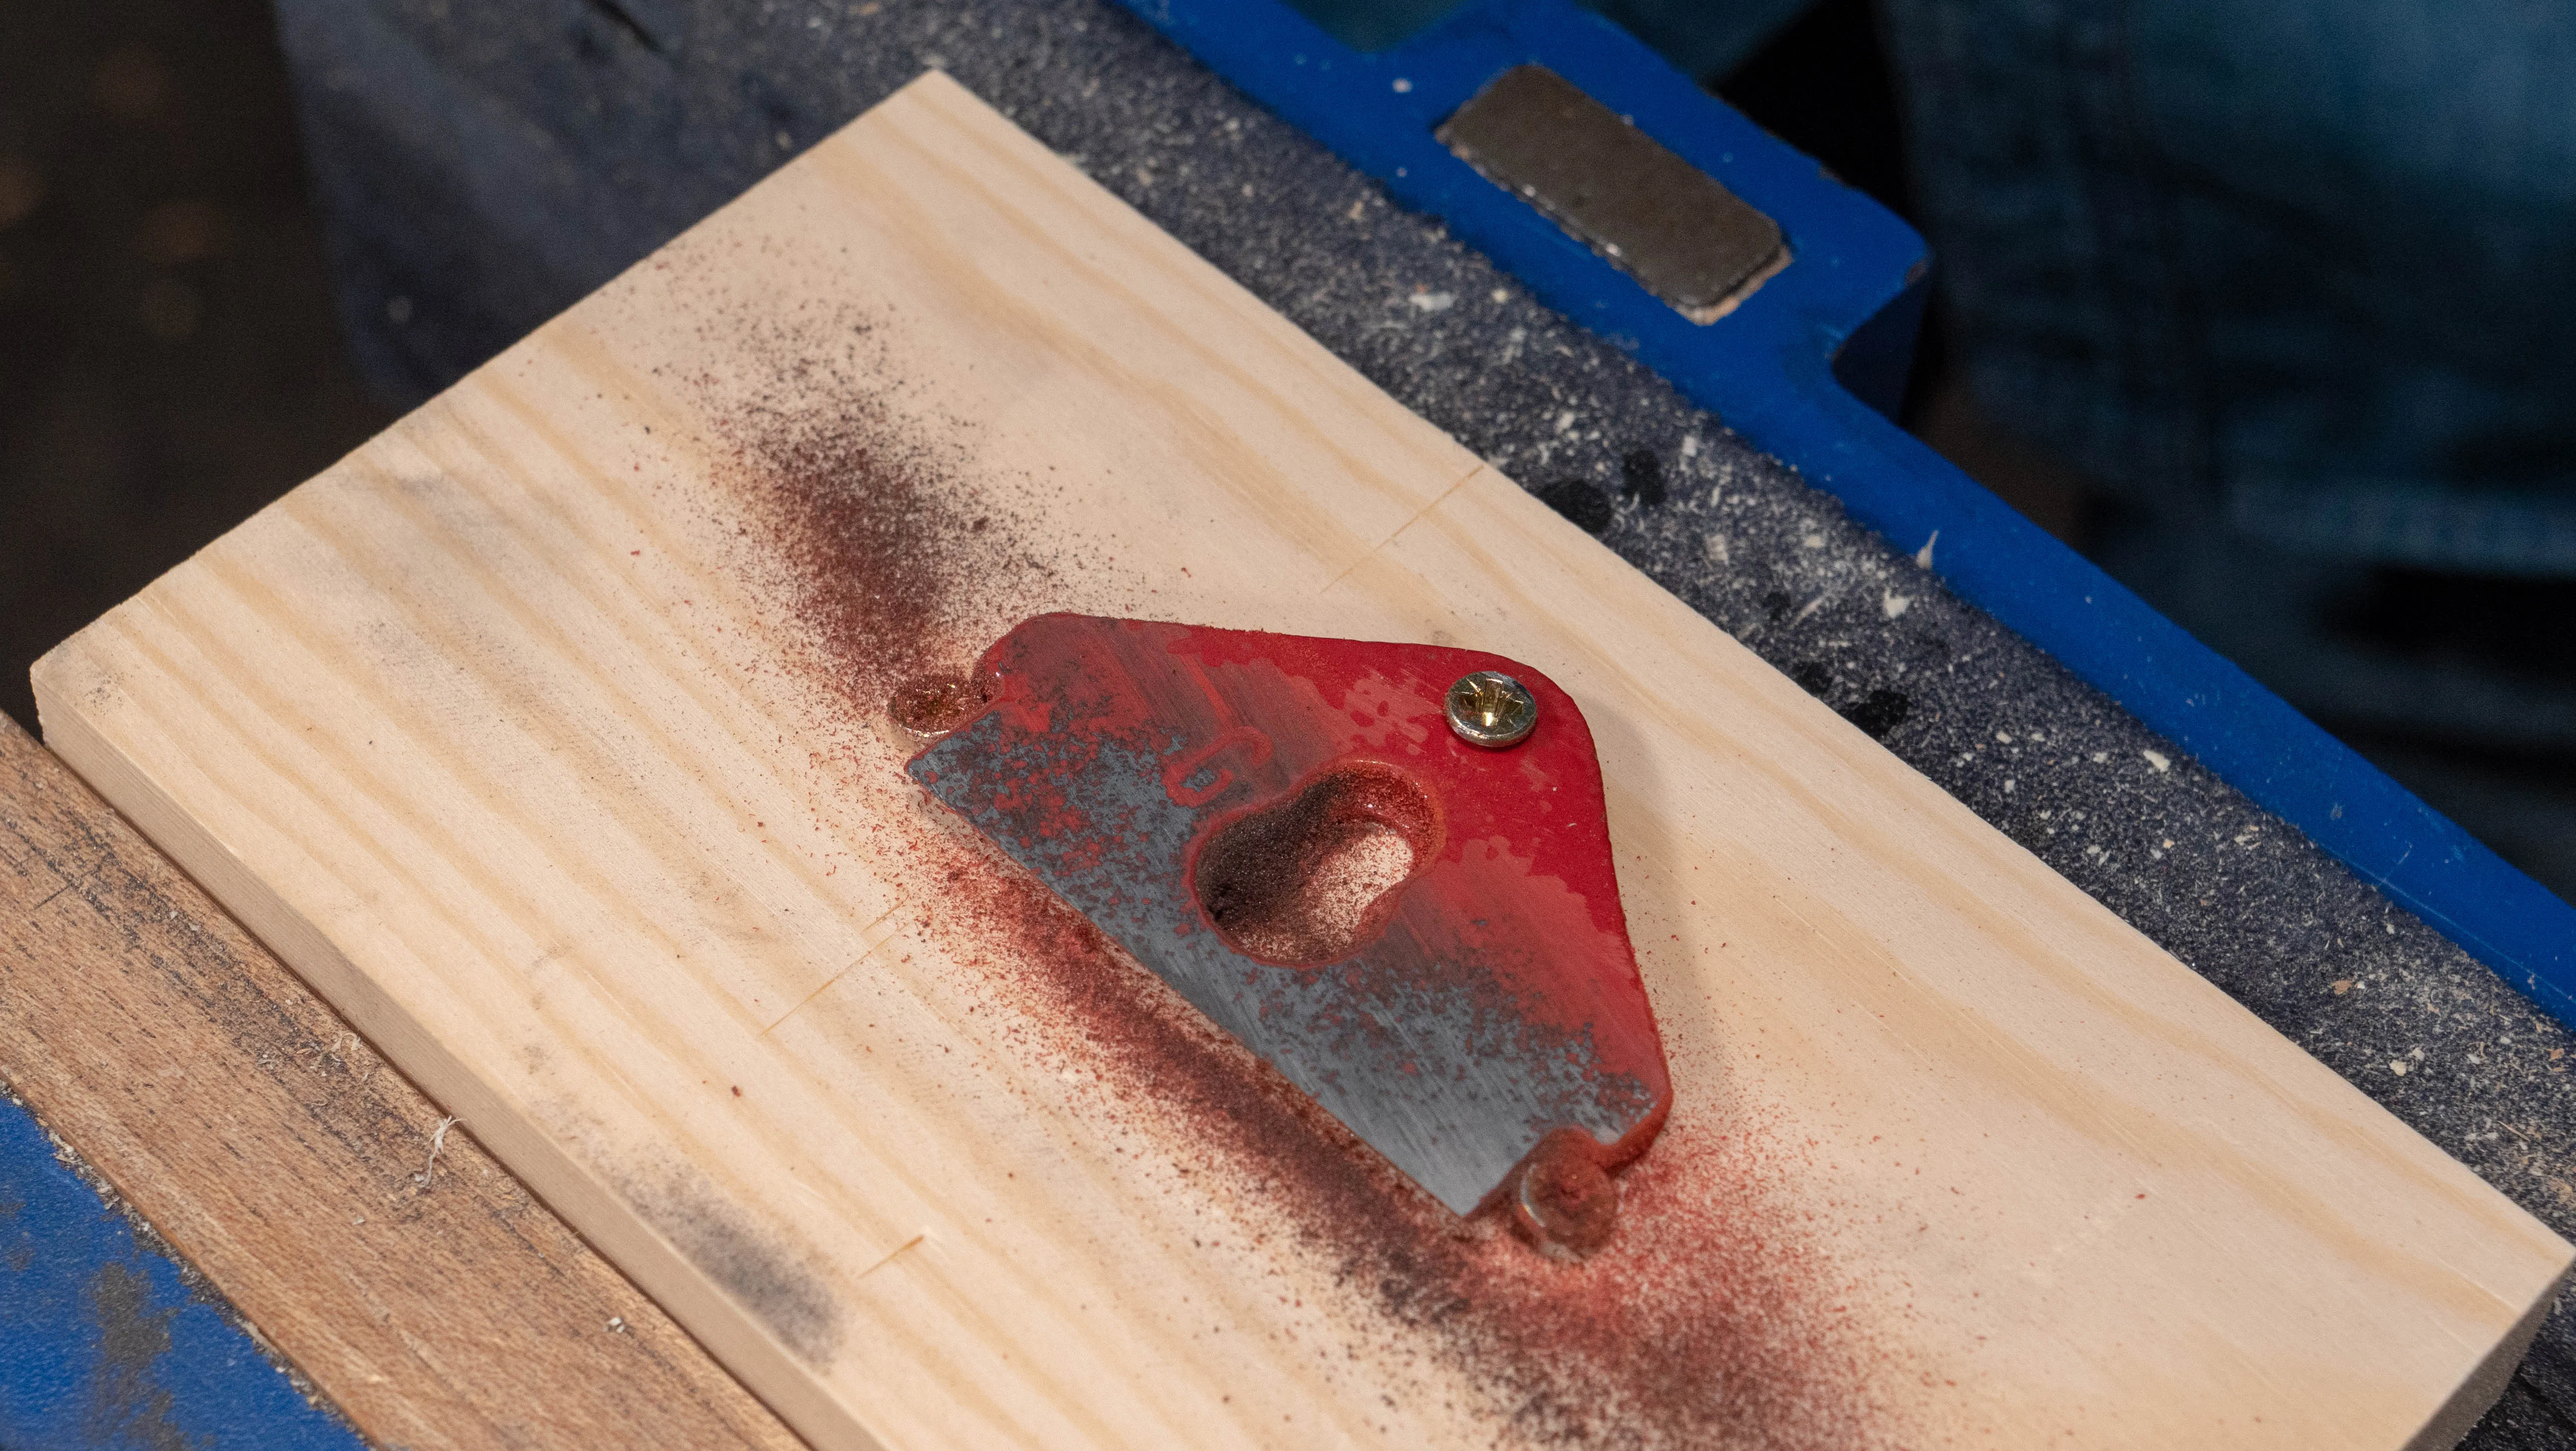
The first picture shows what the underside of the cap iron looked like before and after refining. When we received it, the red paint was thick and rounded at the point where the cap iron meets the cutting iron. The second picture shows another comparison between what it looked like before and after it was refined.
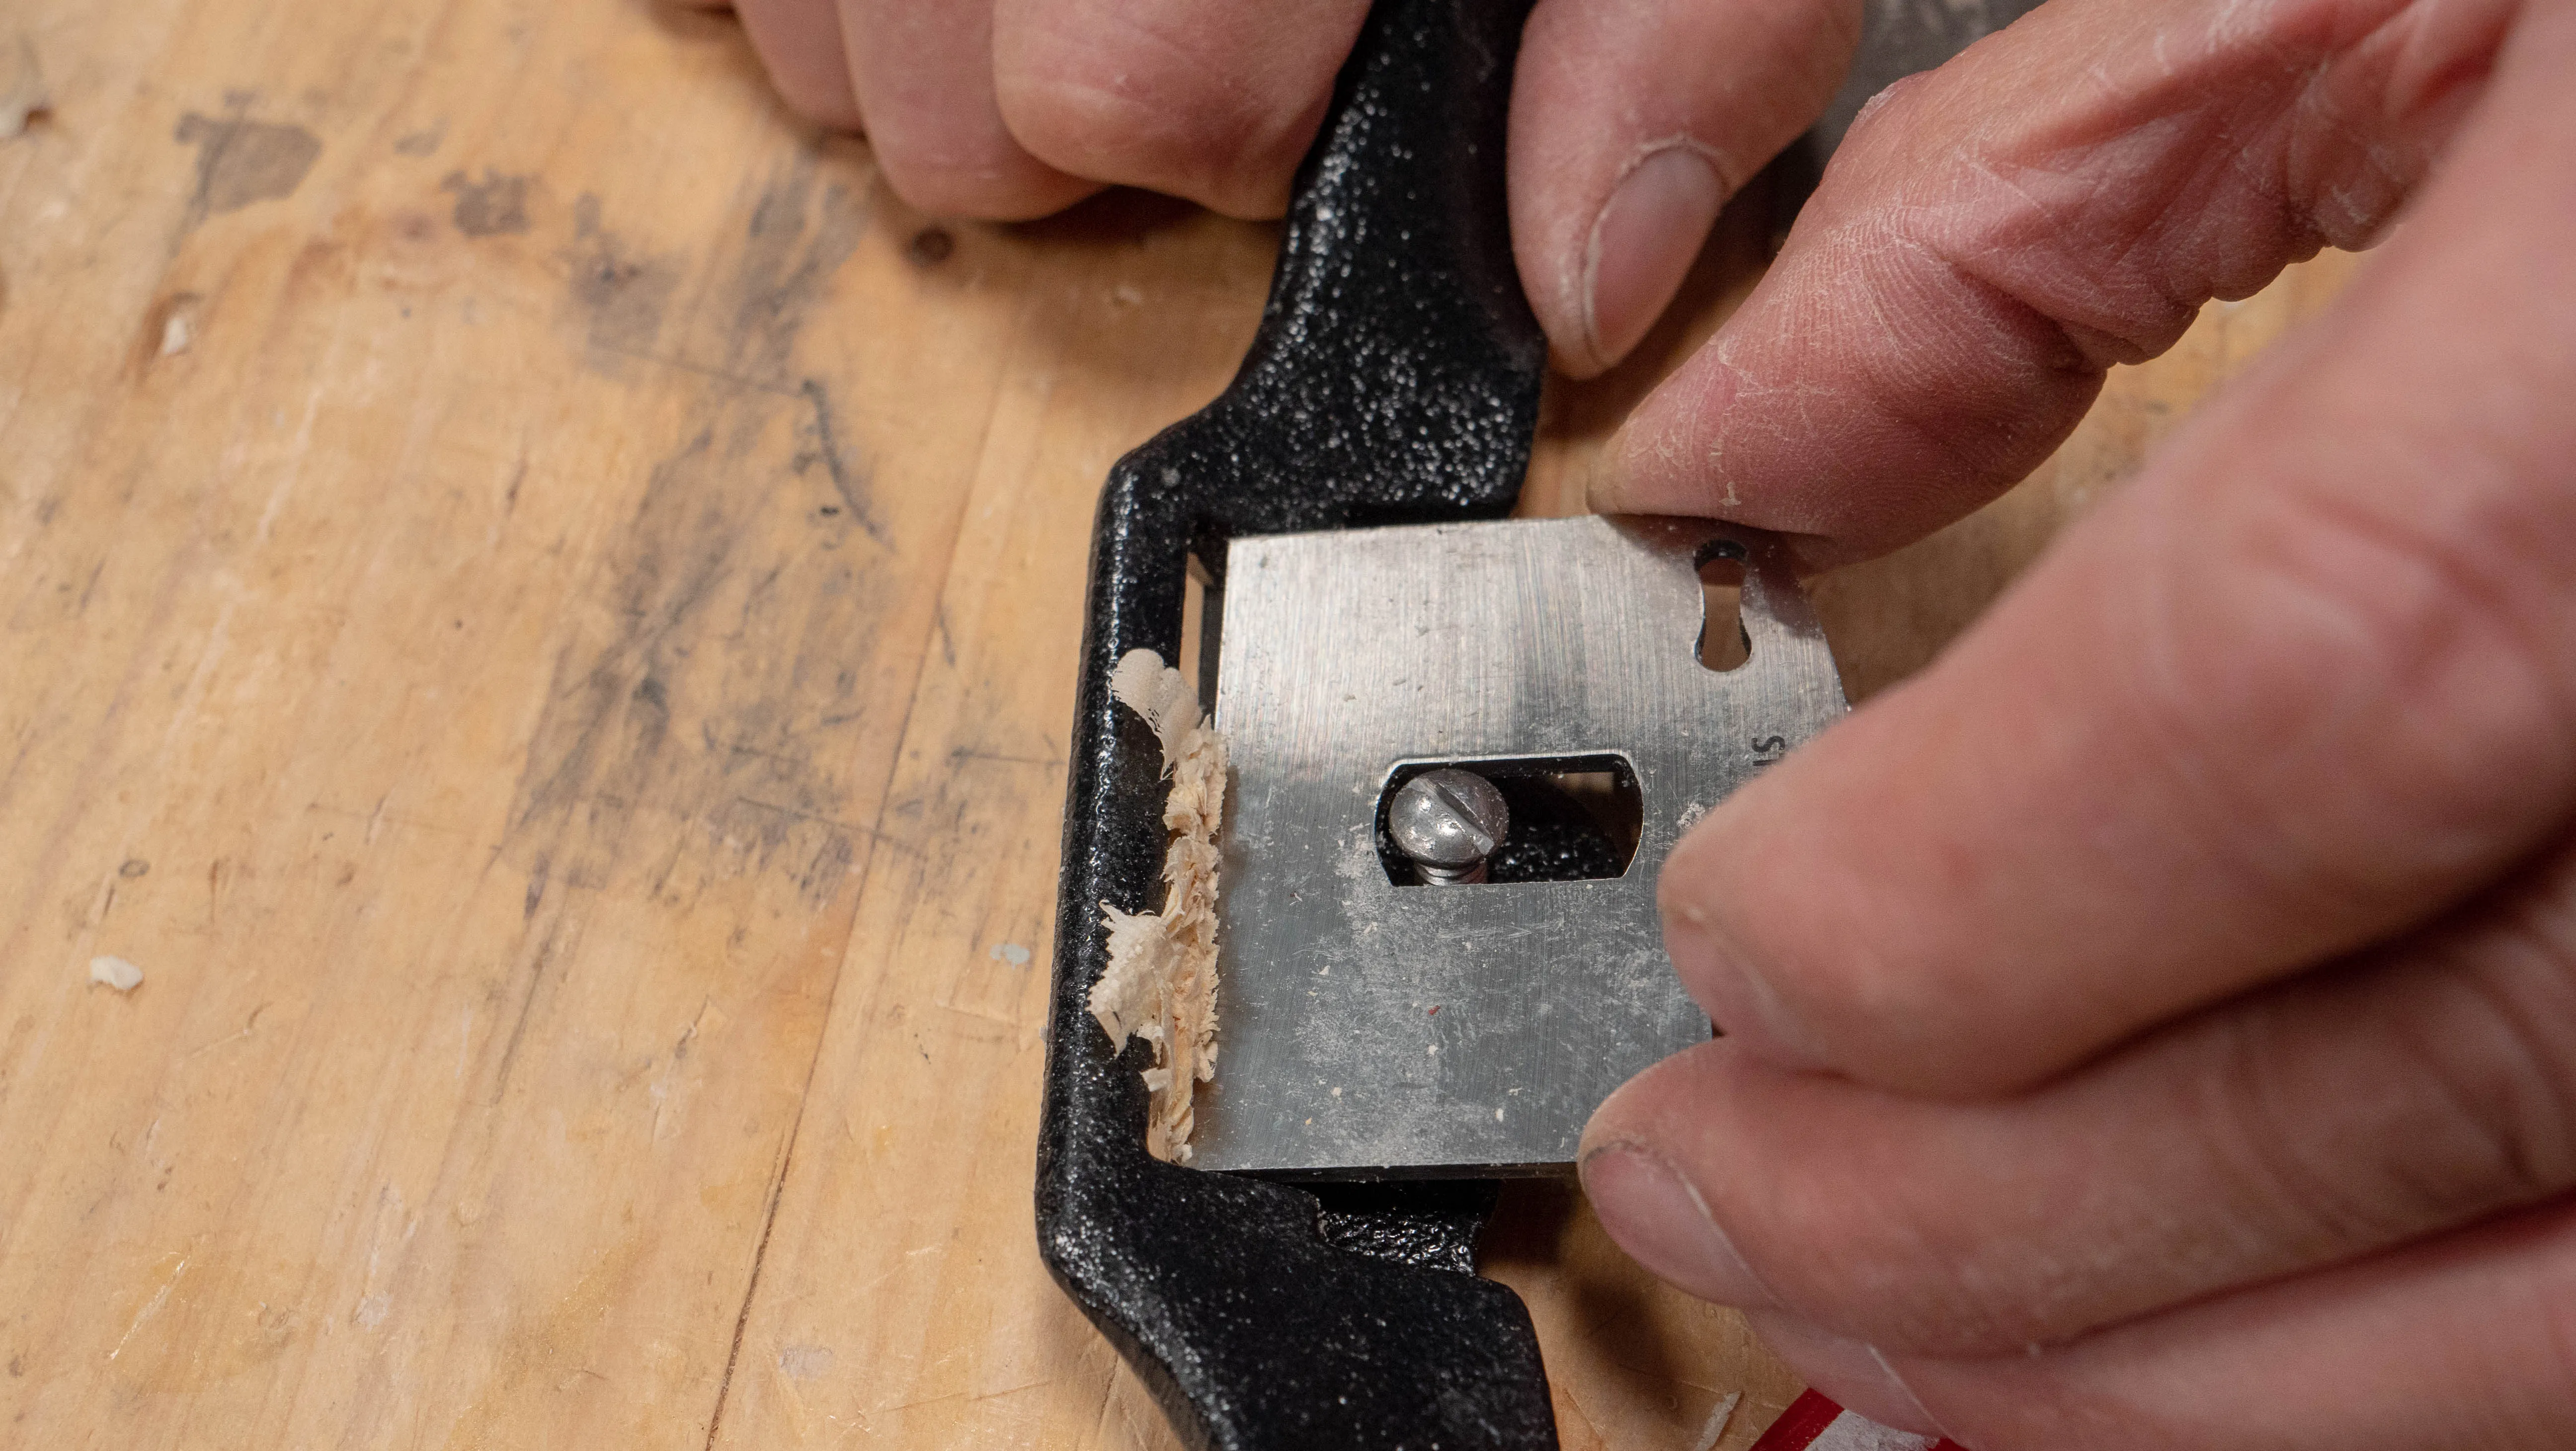
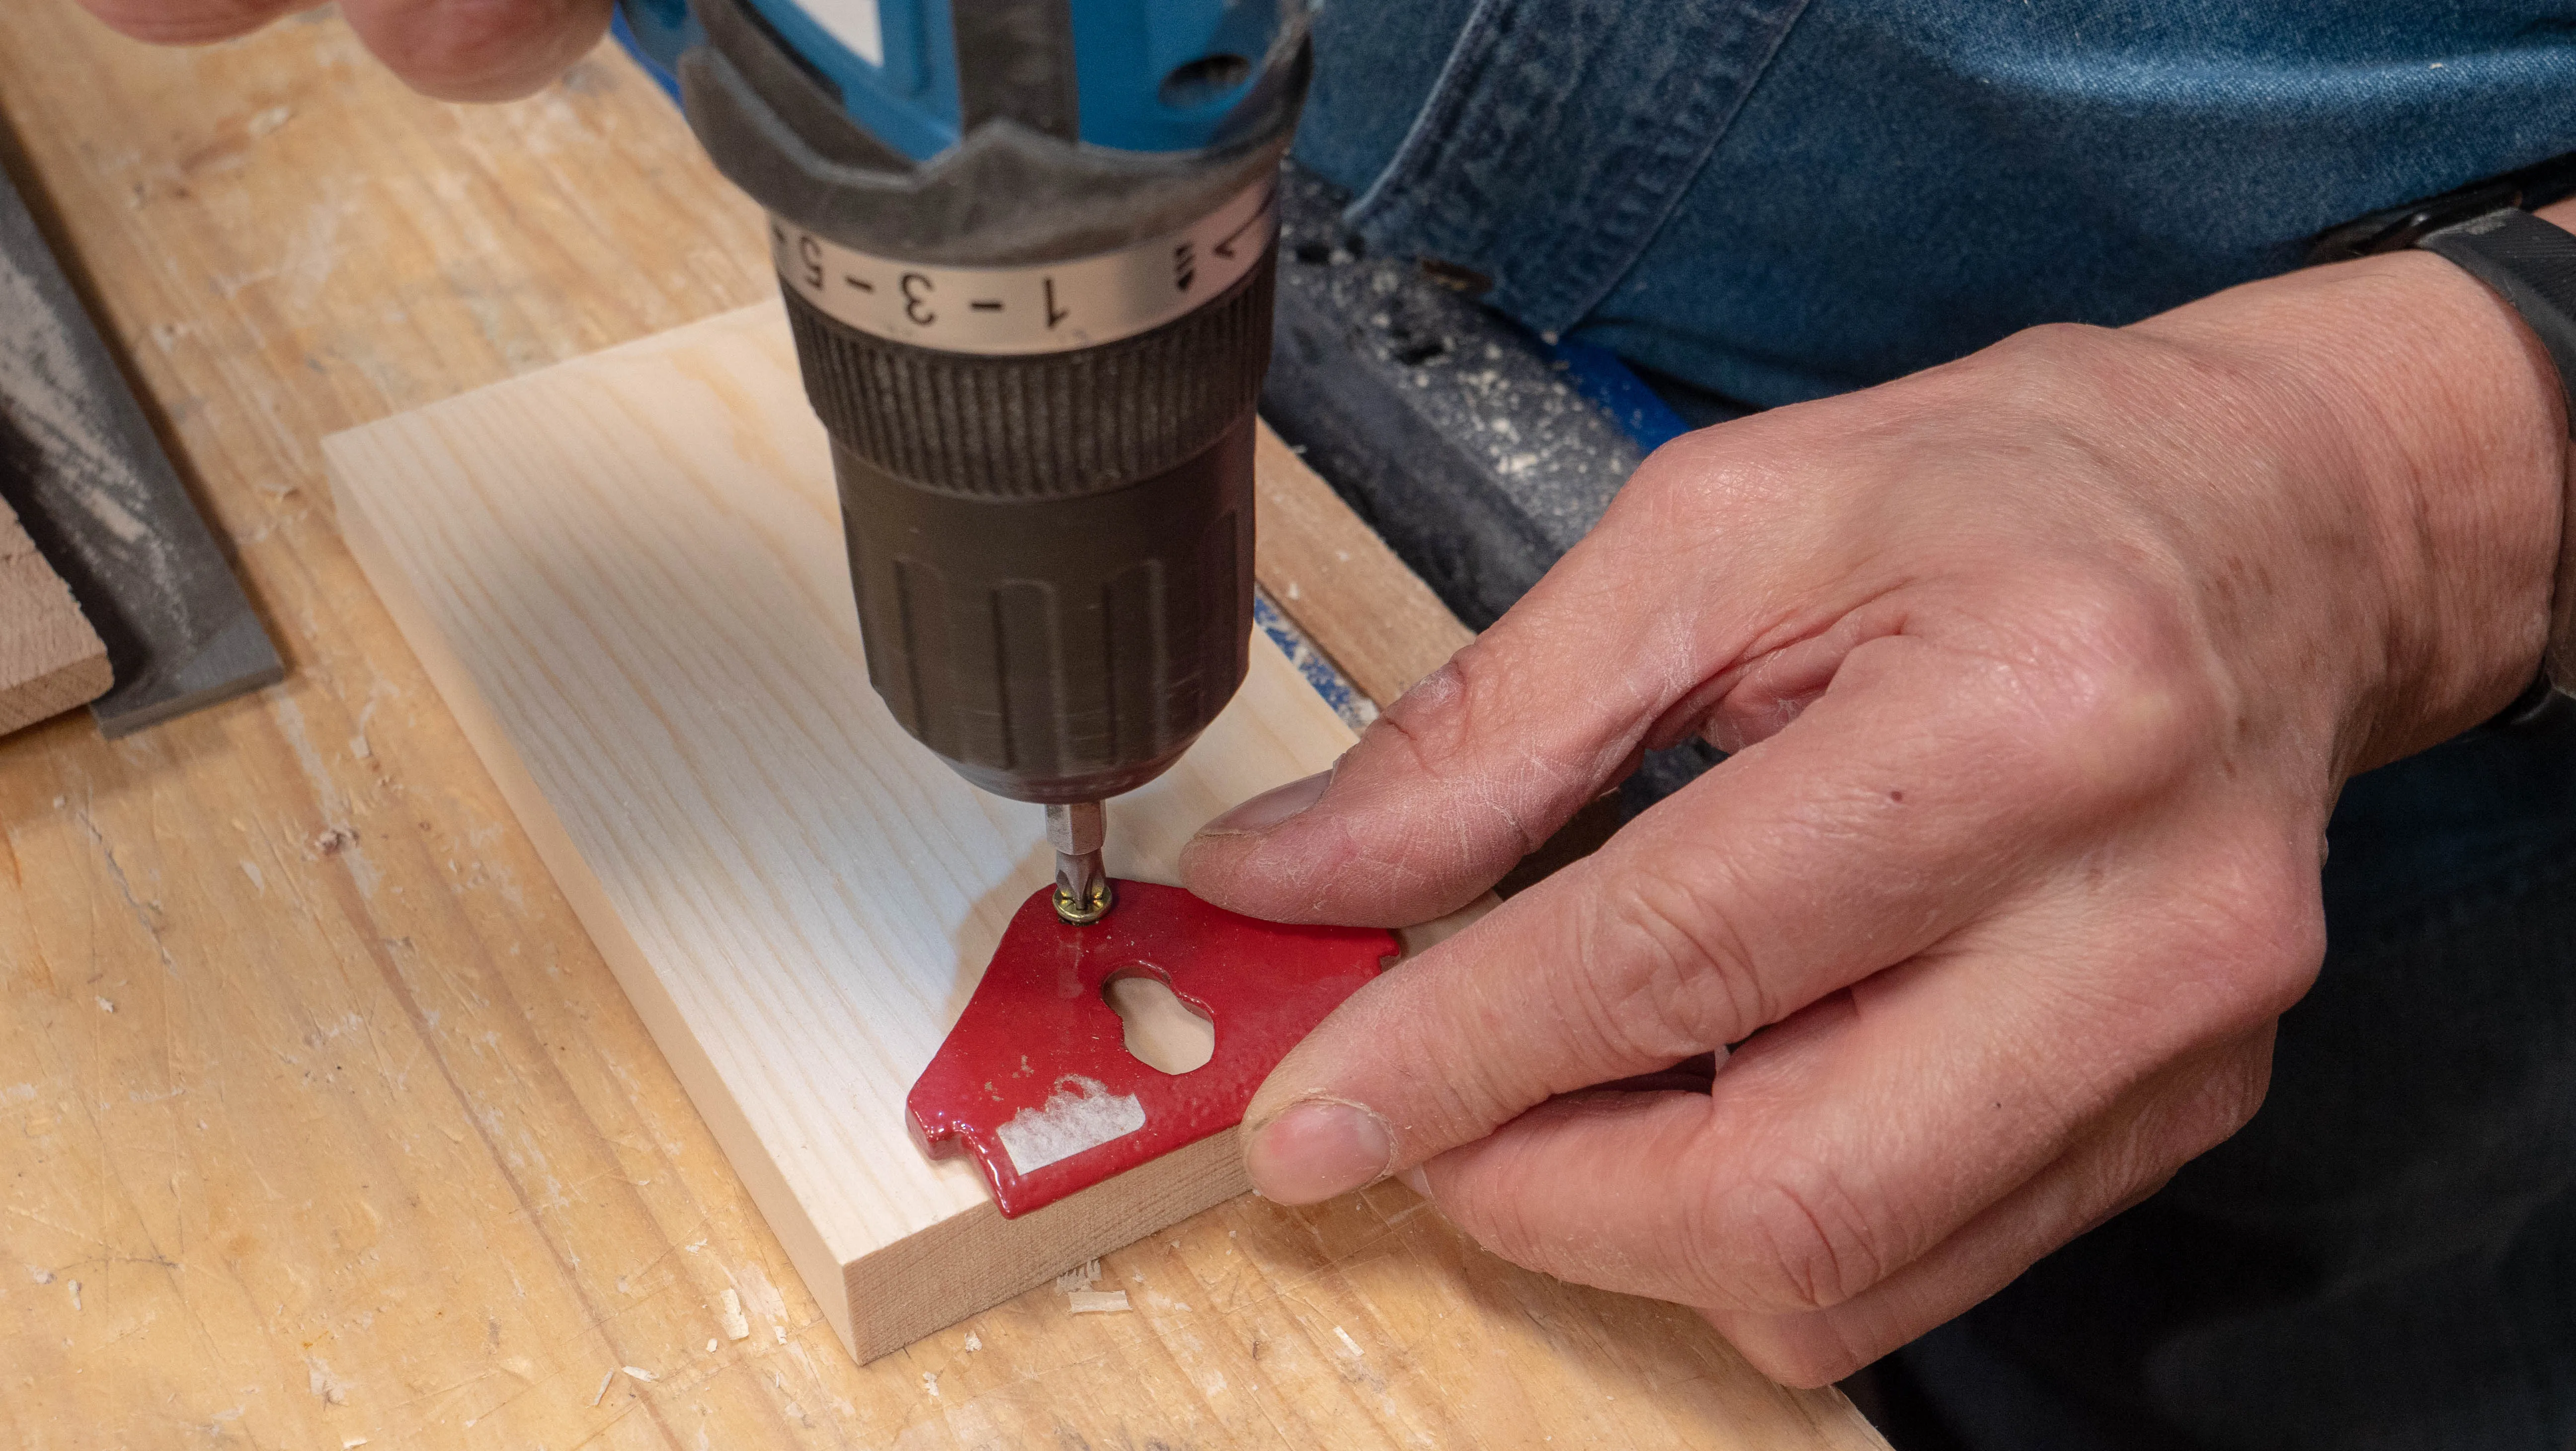
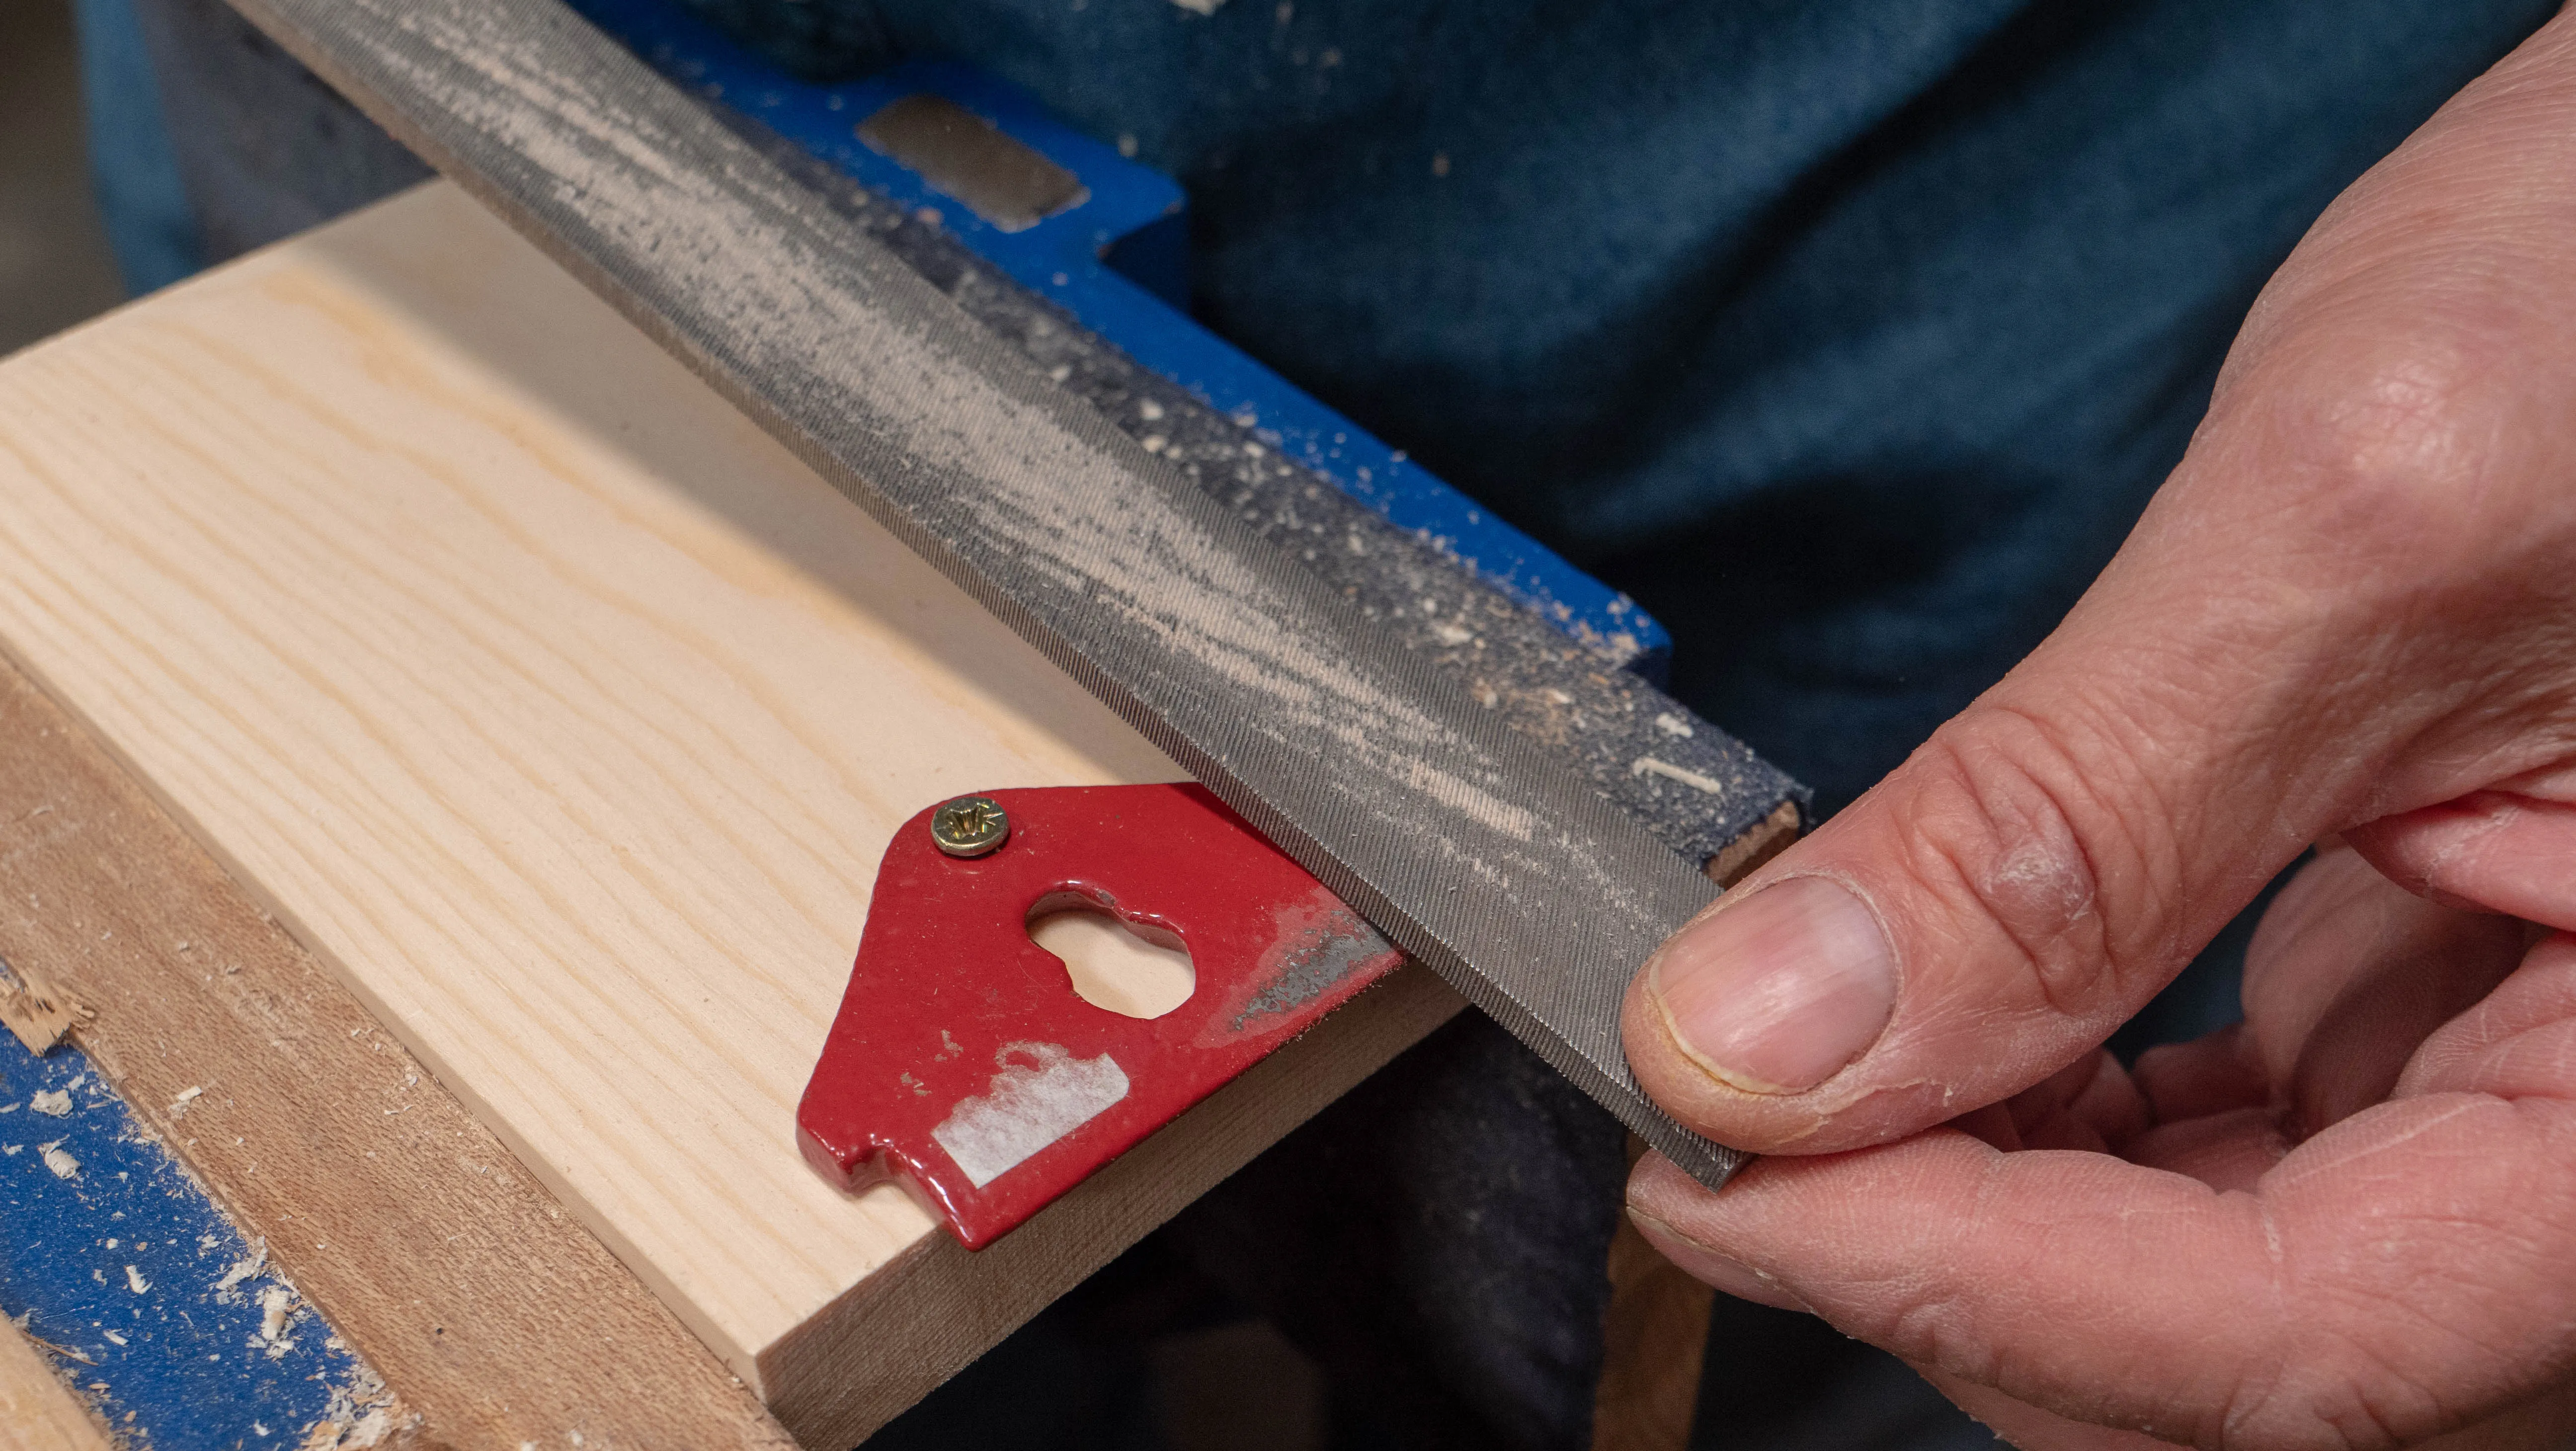
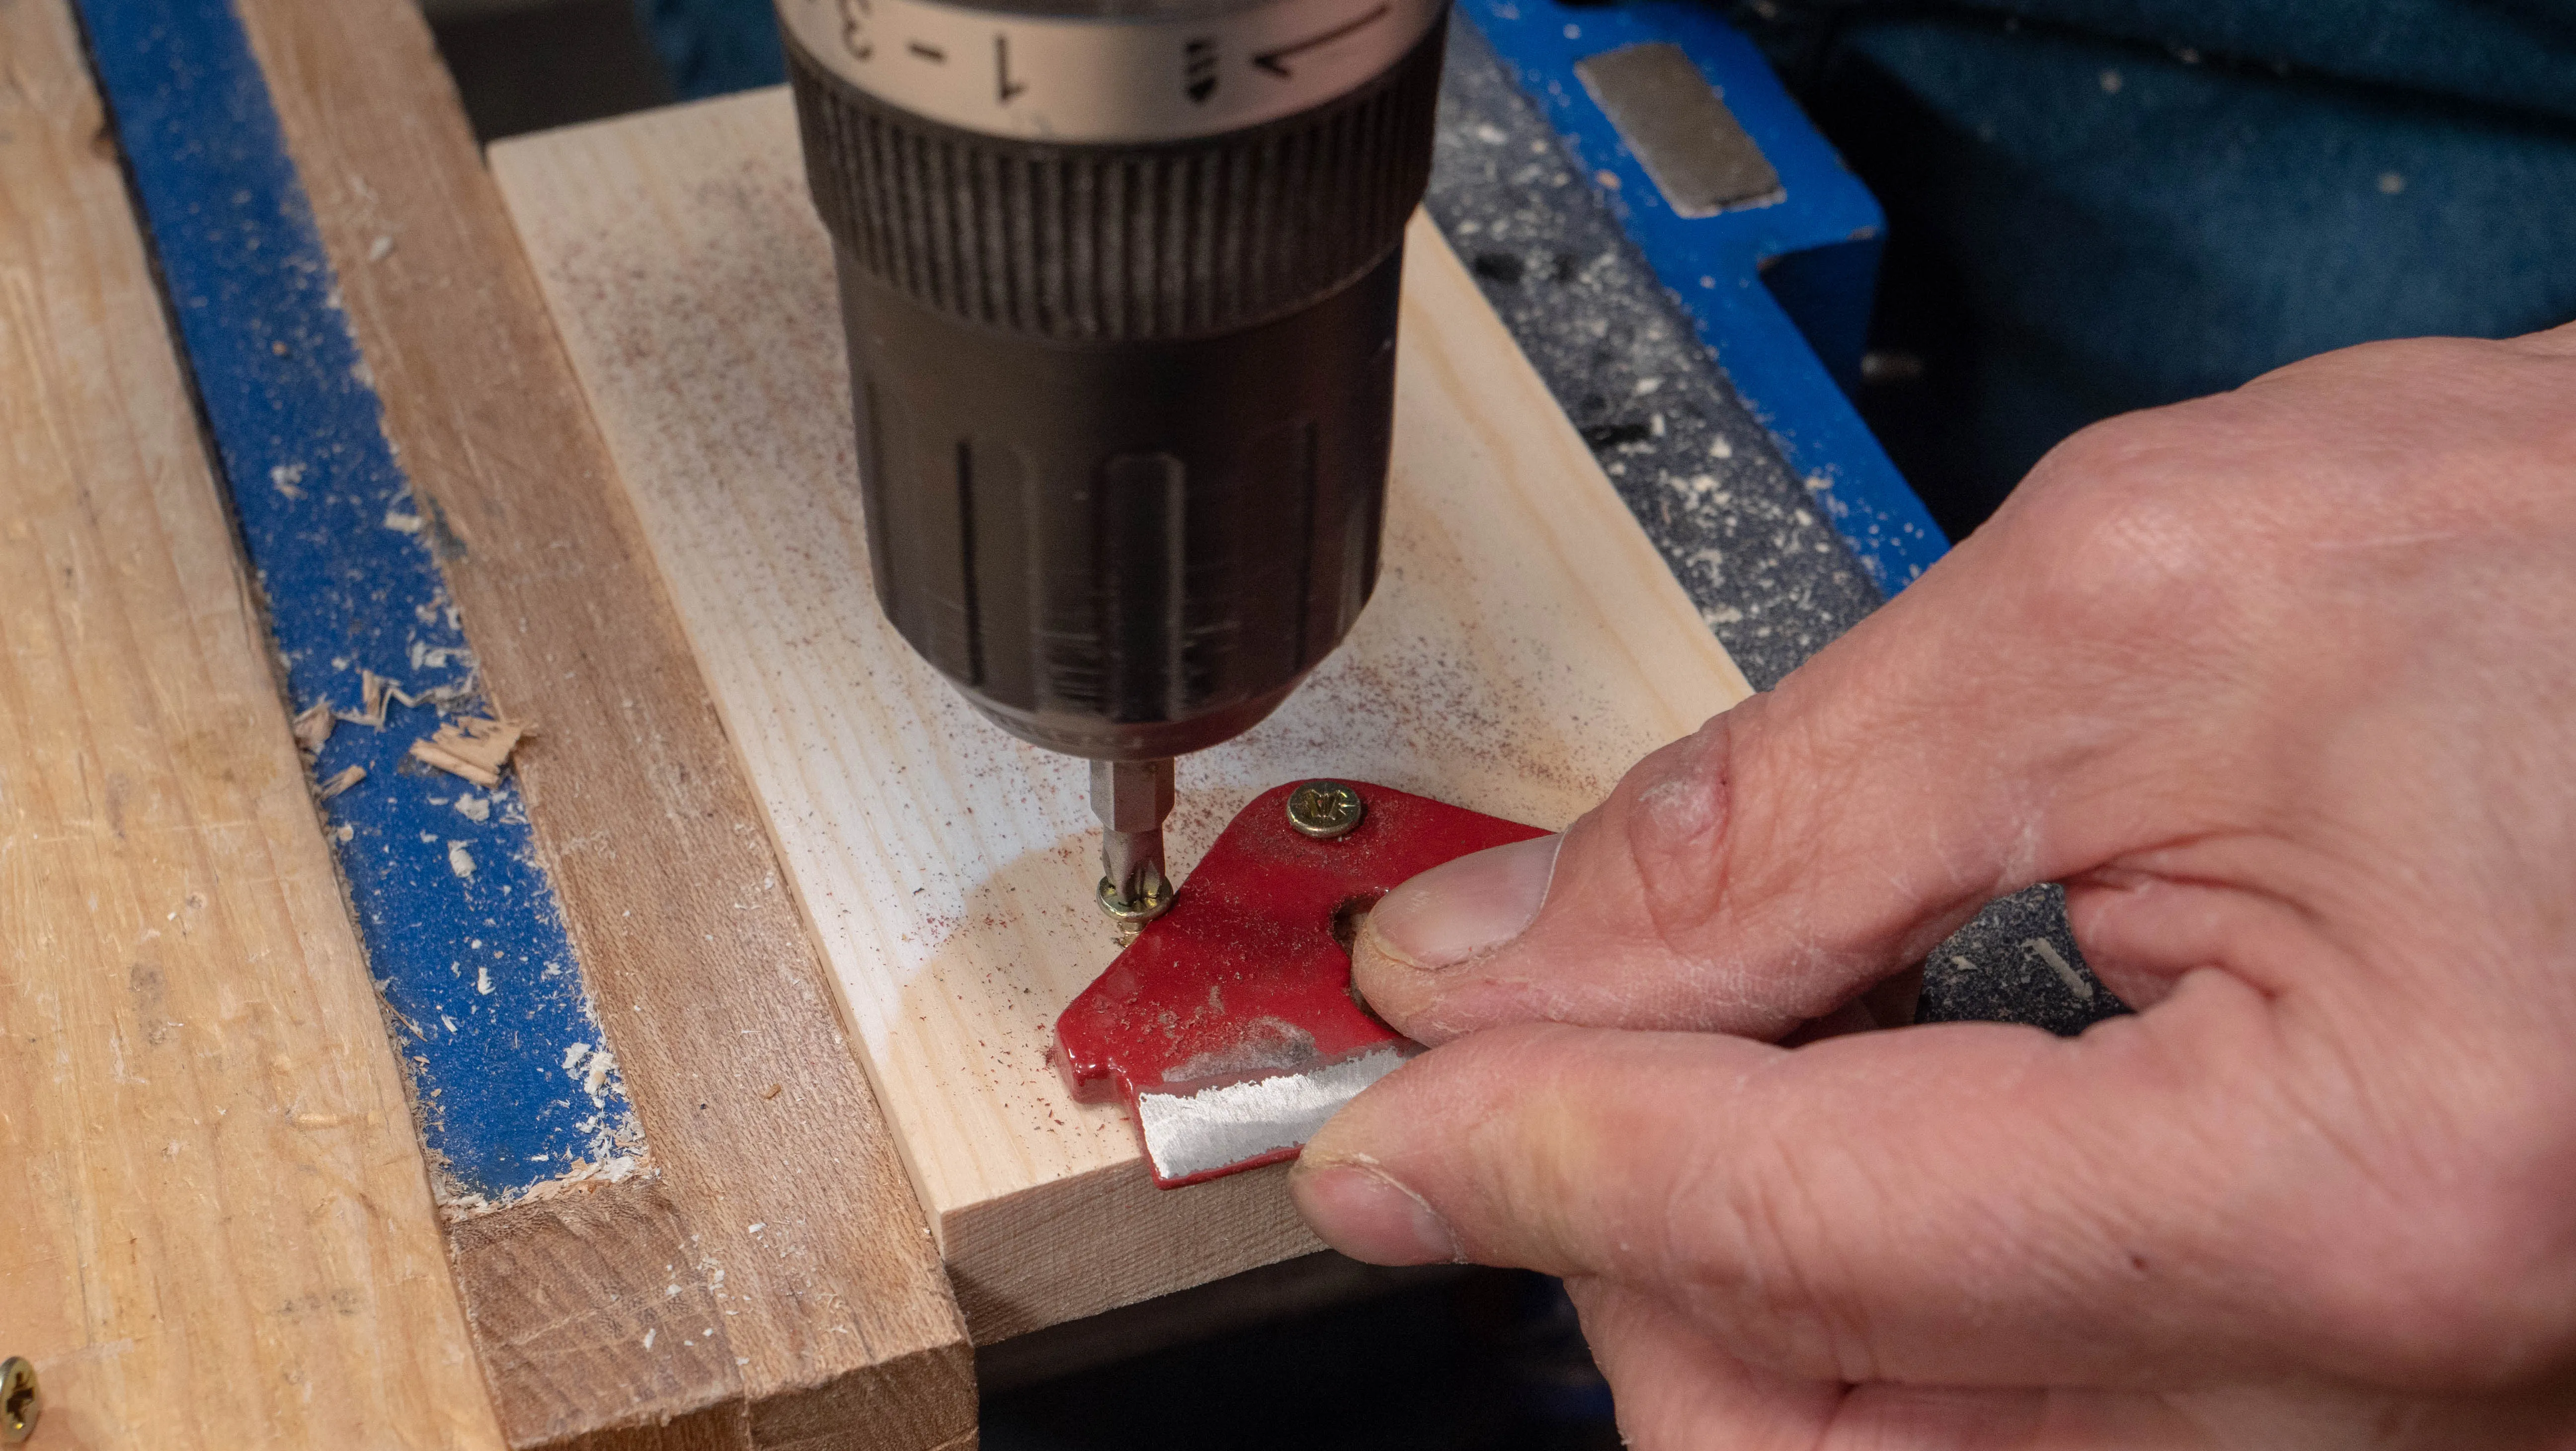
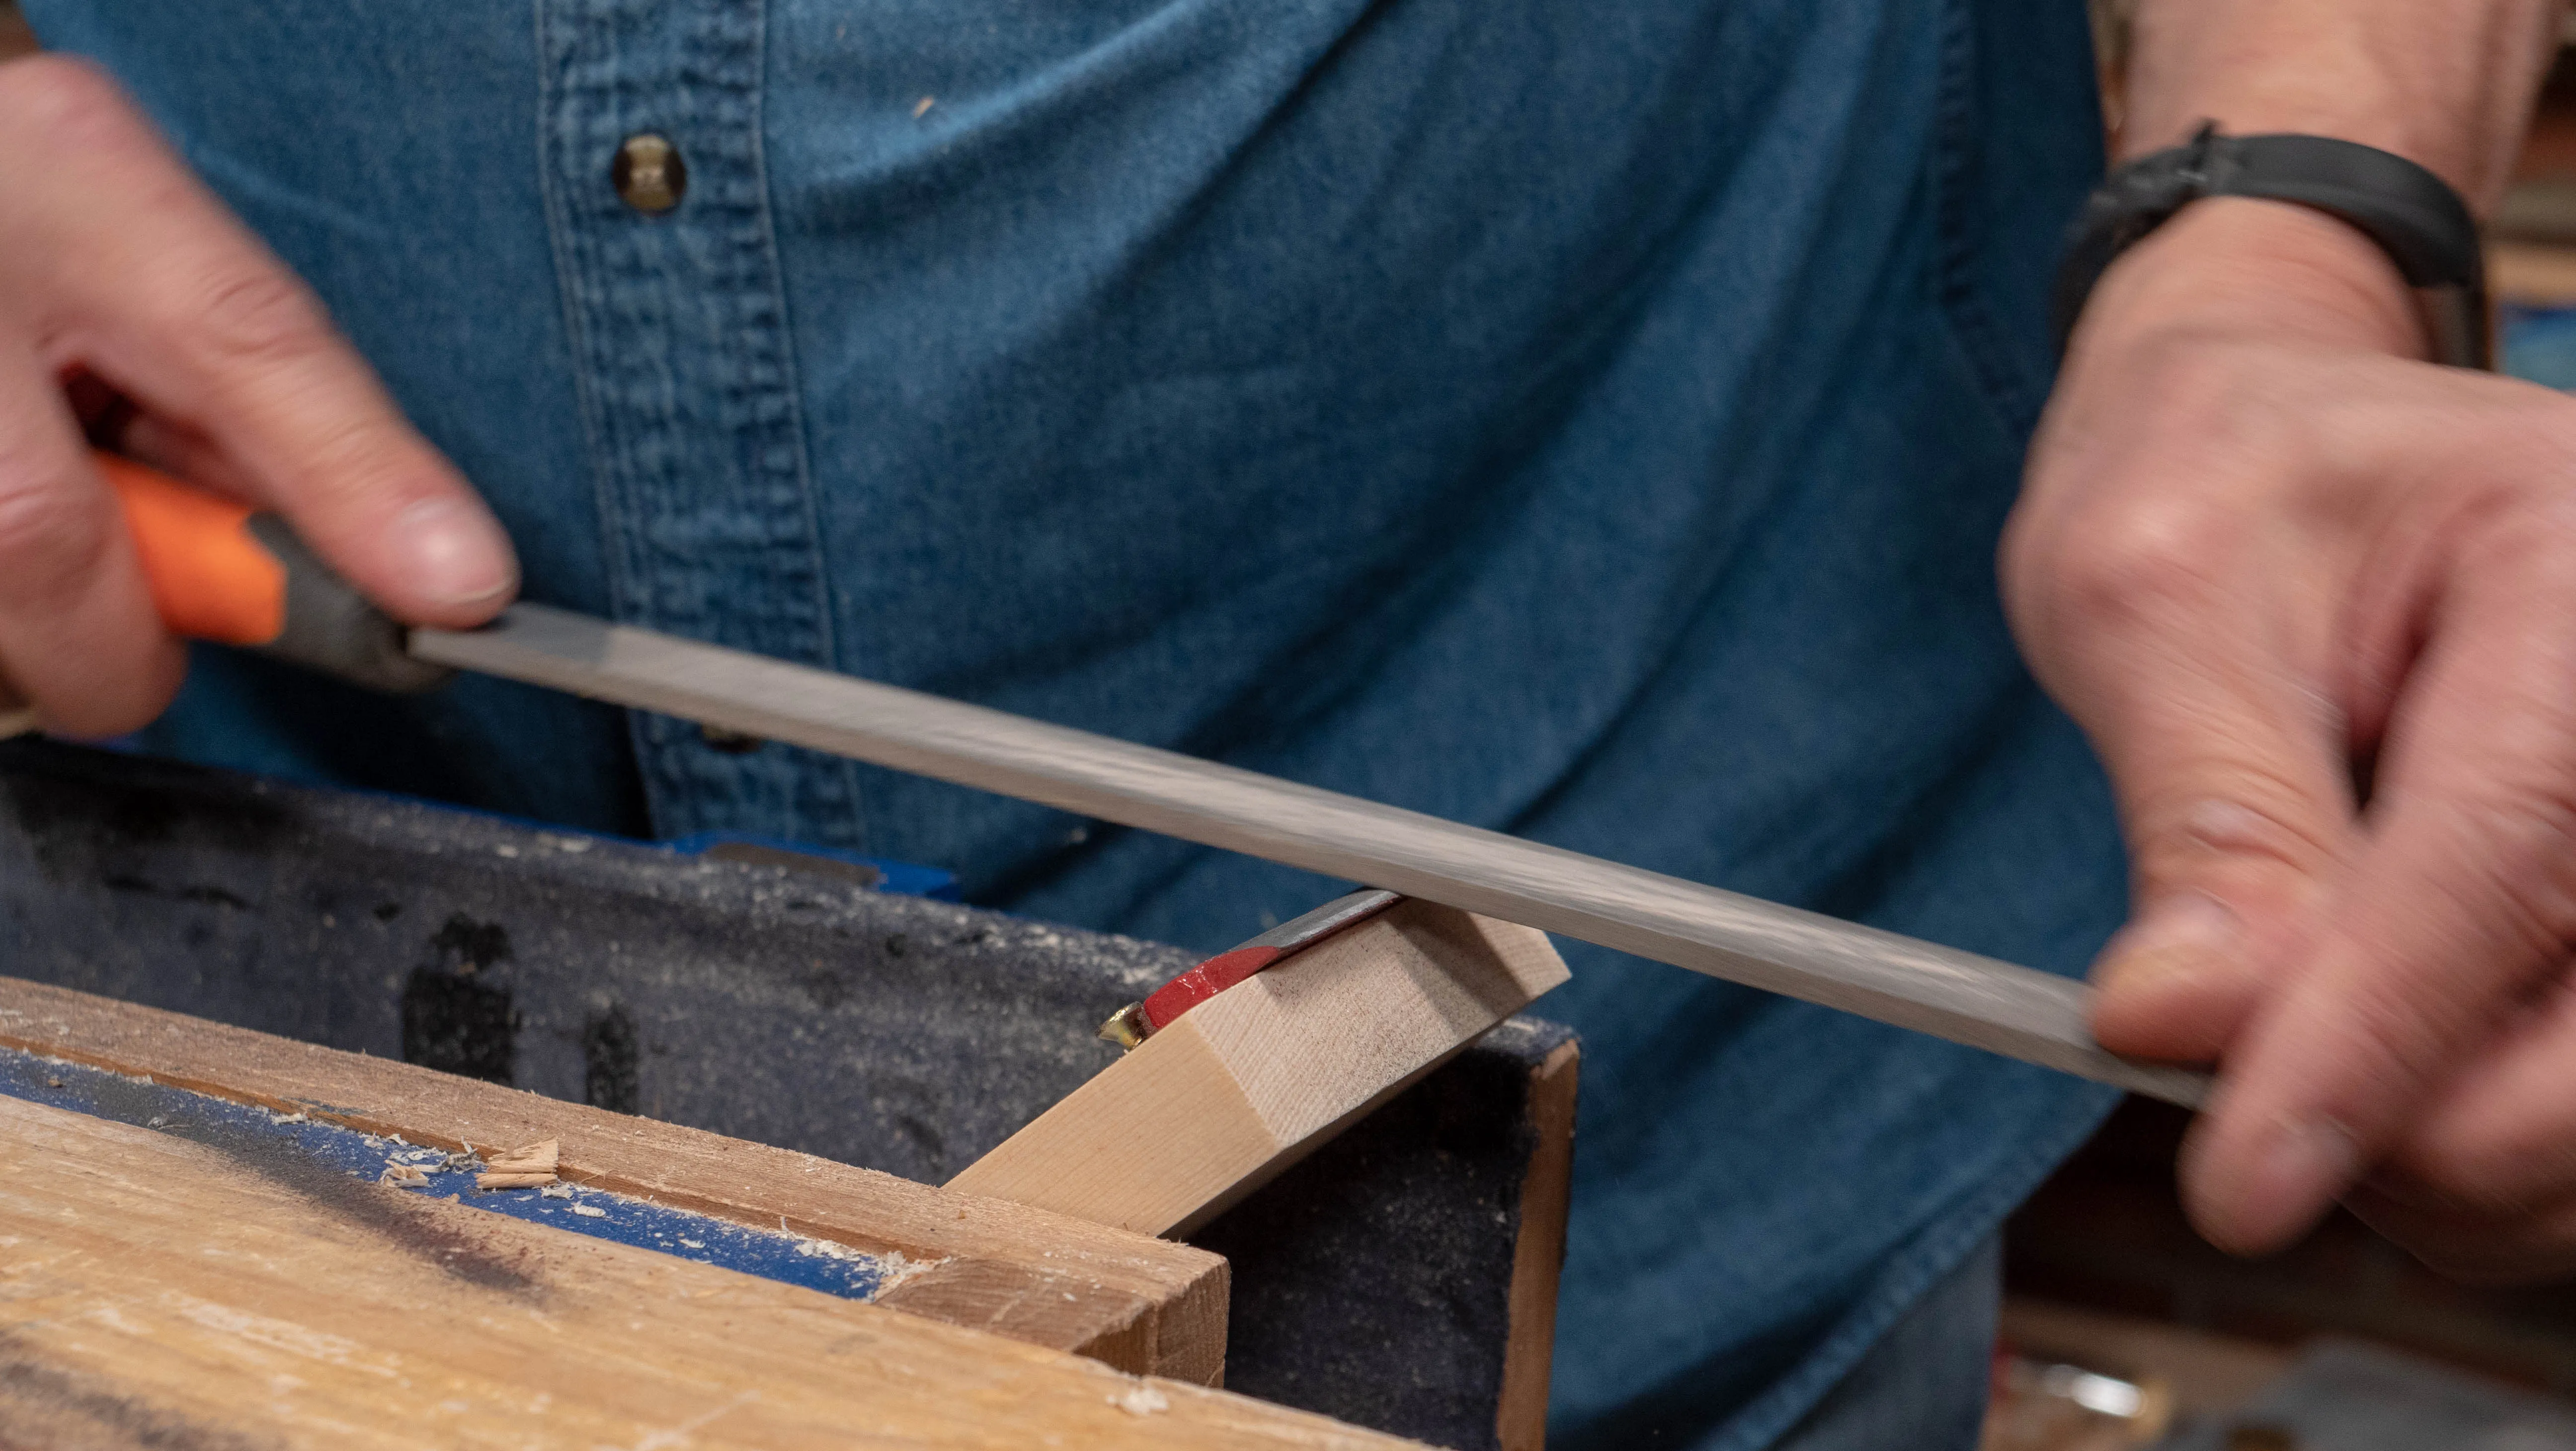
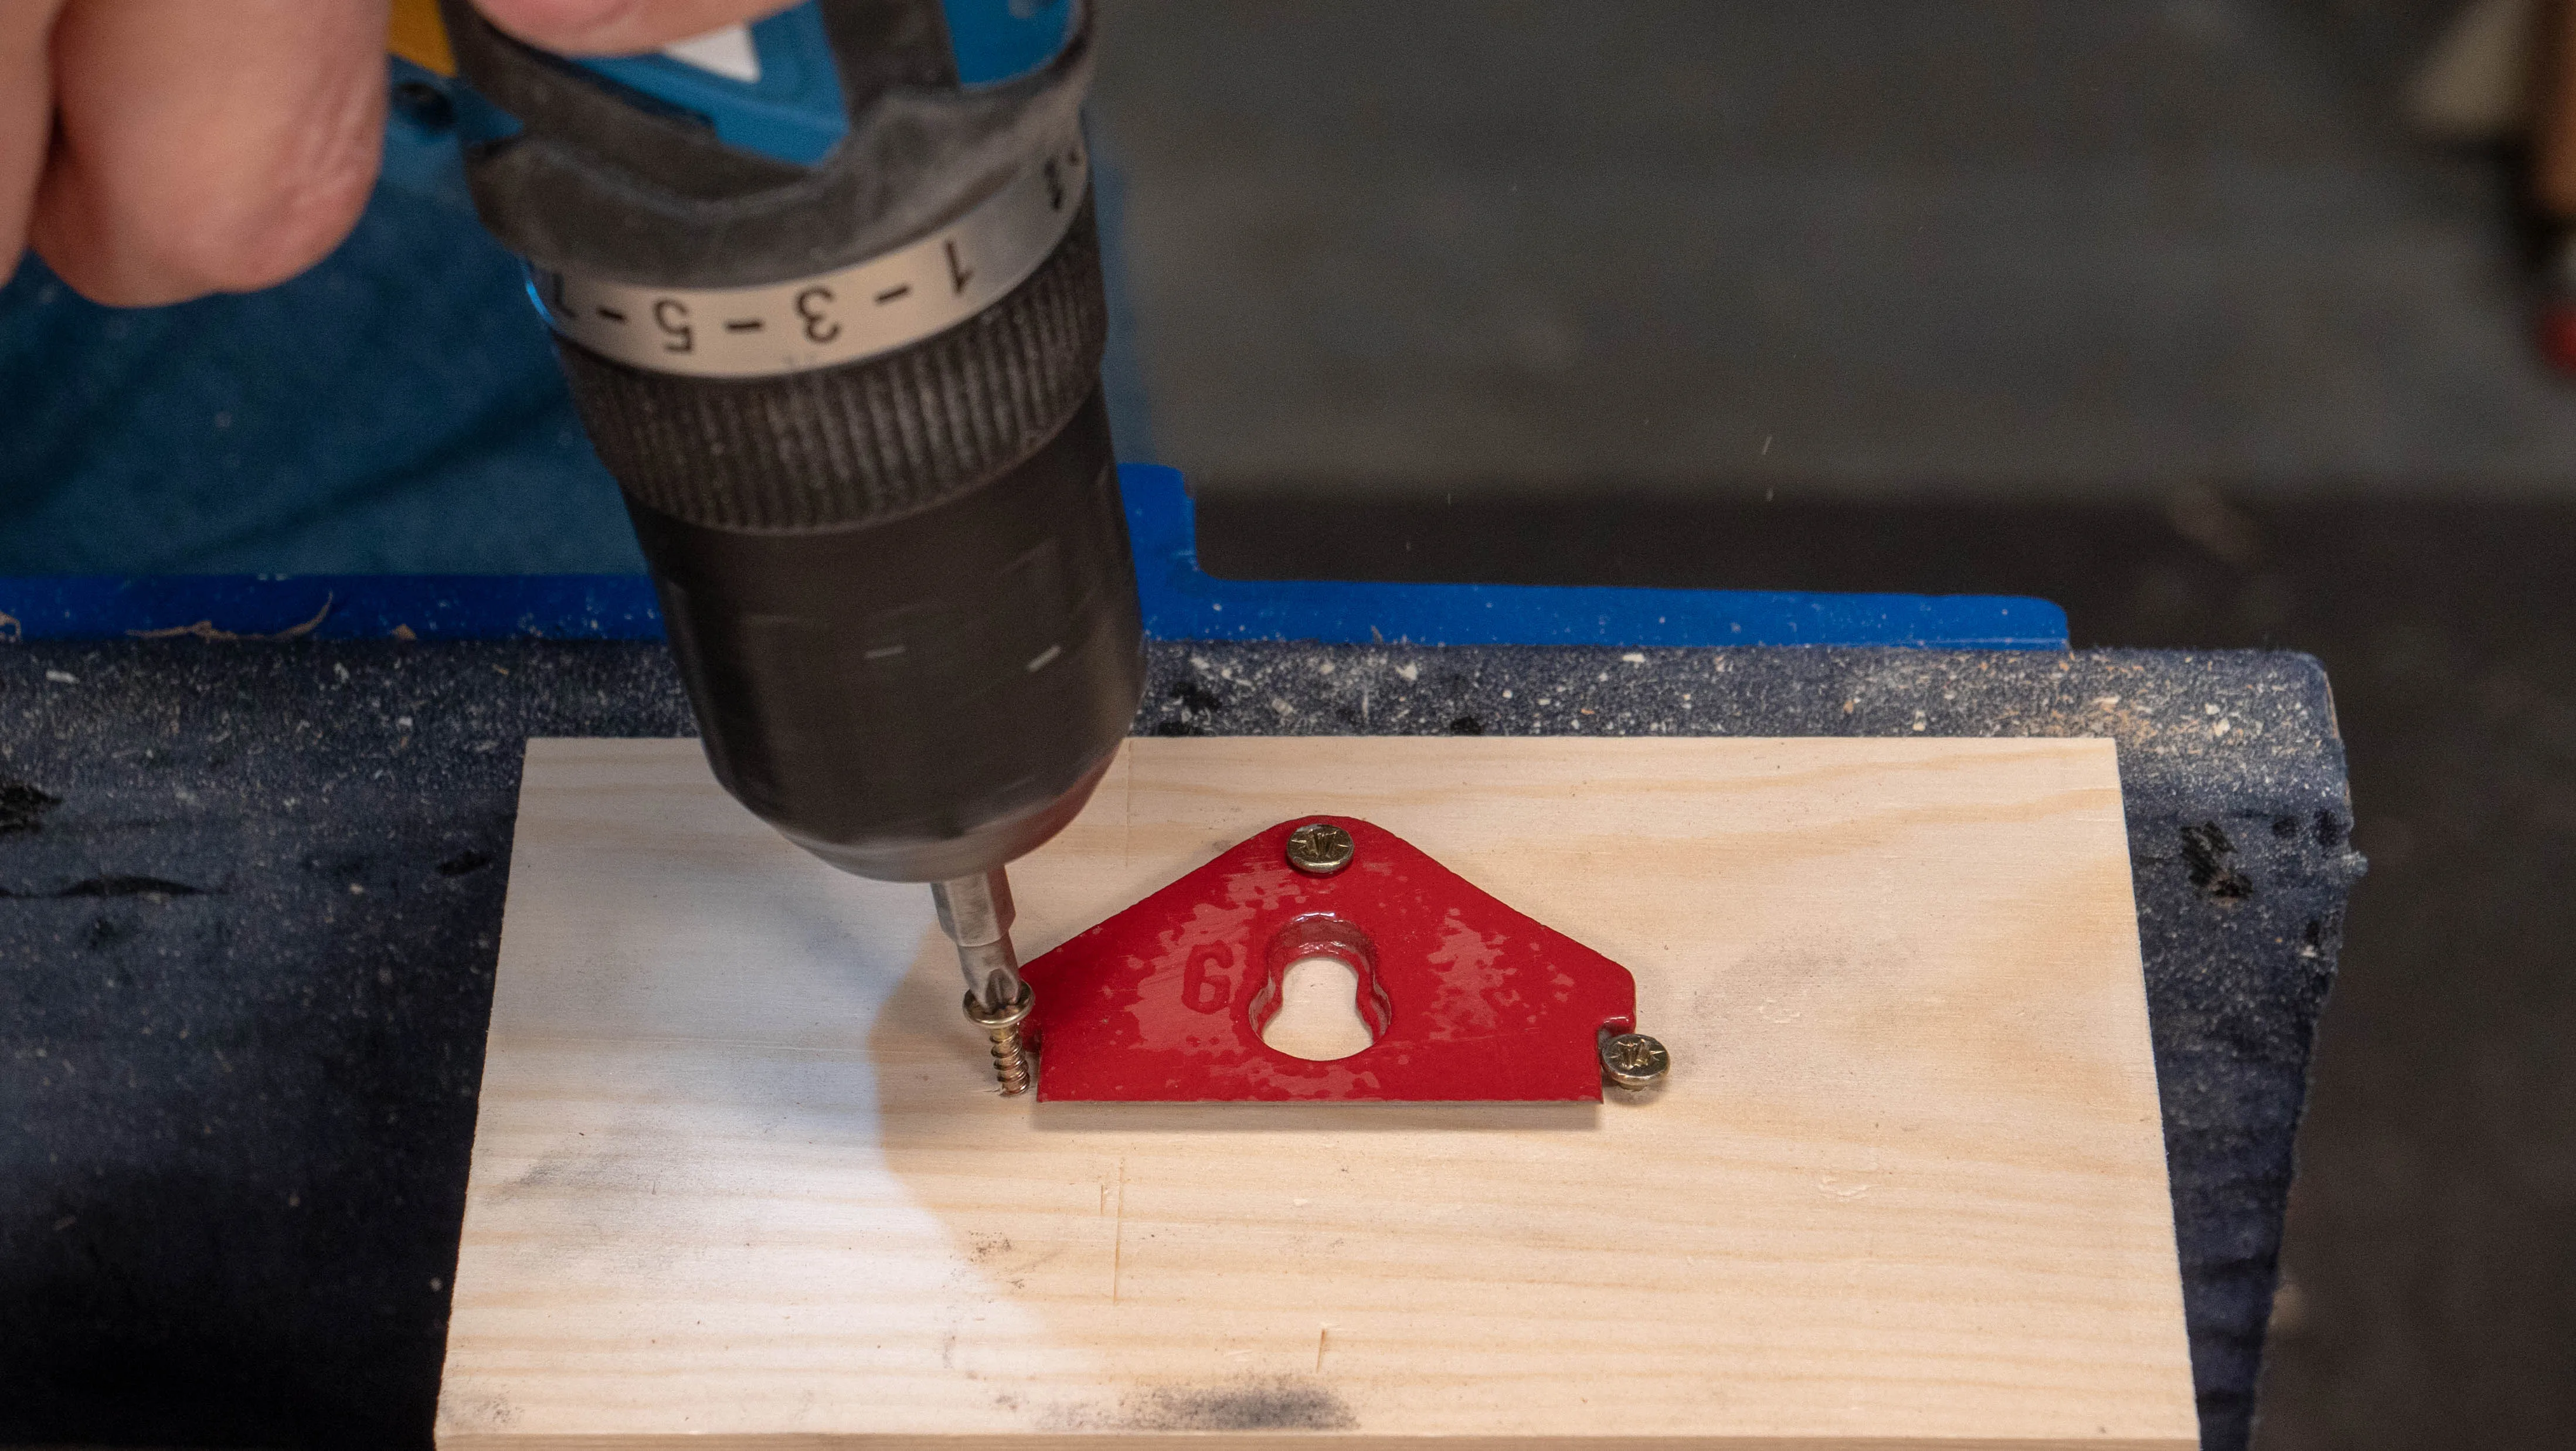
To refine this front edge of the cap iron, place it on a scrap piece of wood and position it so it slightly overhangs the edge. Put a screw in the hole to keep the cap iron in place. Make sure not to tighten this too much, as it can fracture the cap iron. Use the file to take long strokes towards the edge of the cap iron. If it the iron moves during filing, put two side screws in place as shown. Continue filing to the edge of the cap iron until you have achieved a silver band where the paint has been removed.


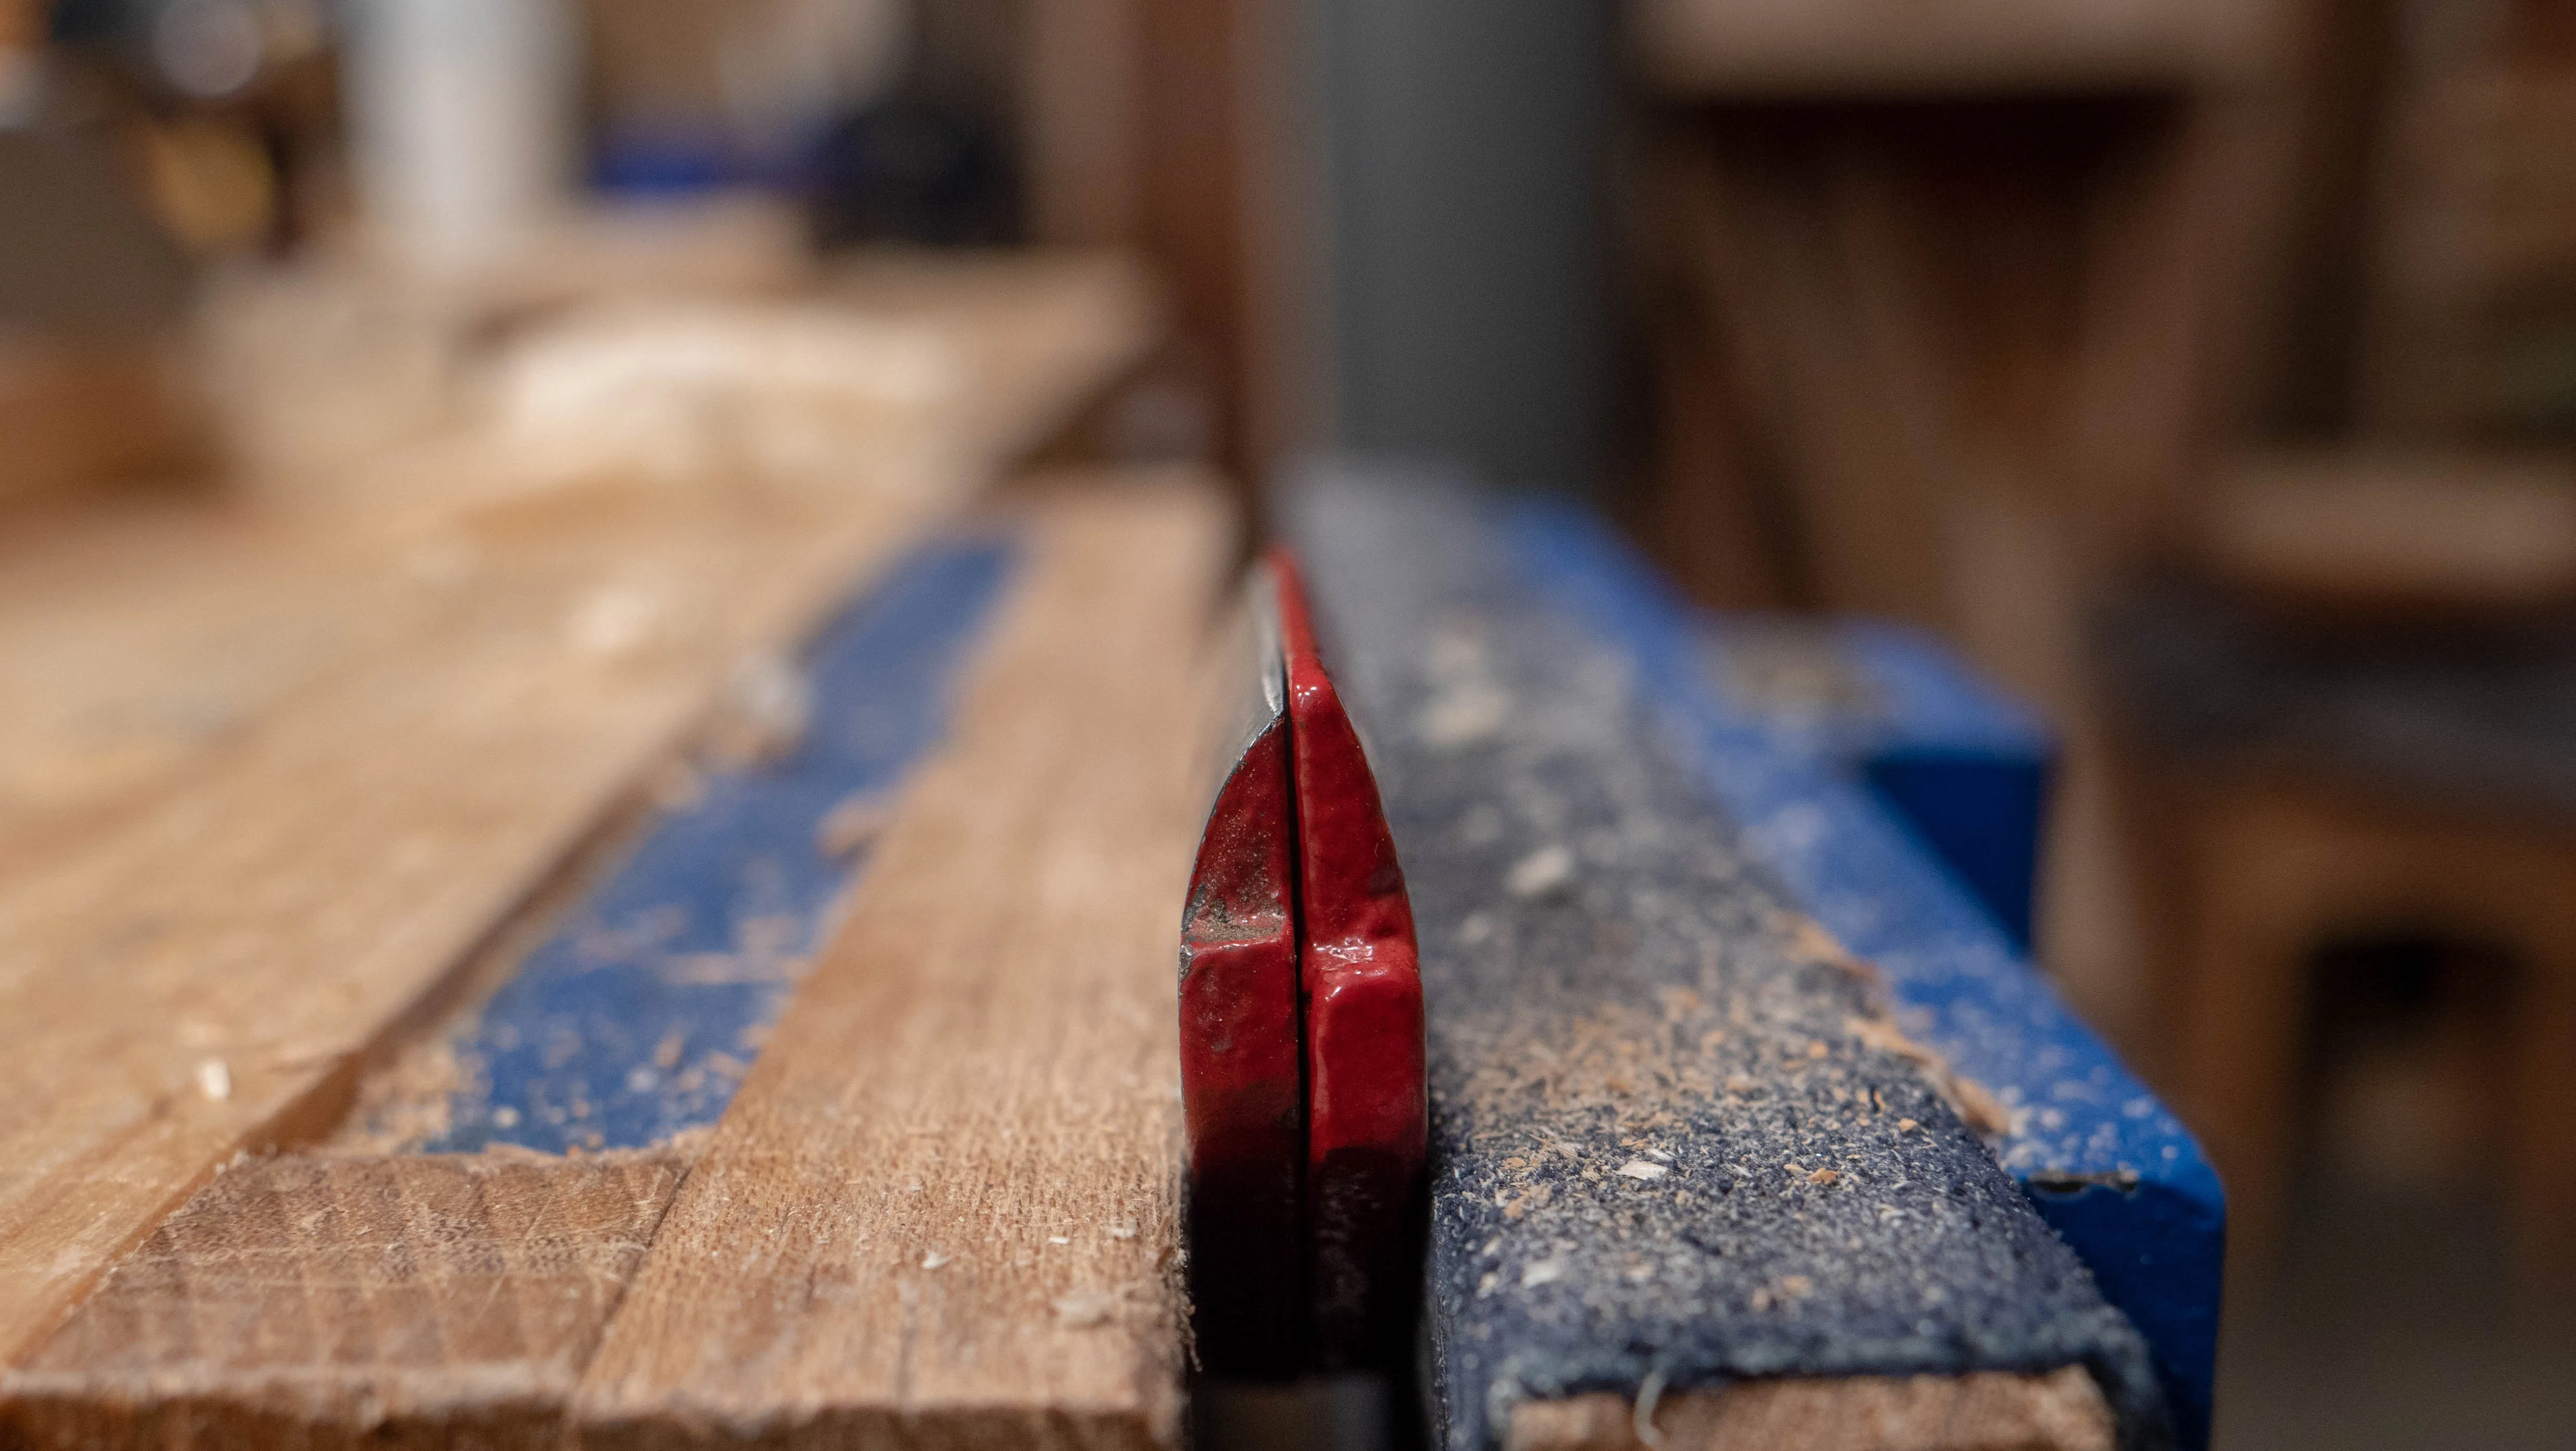
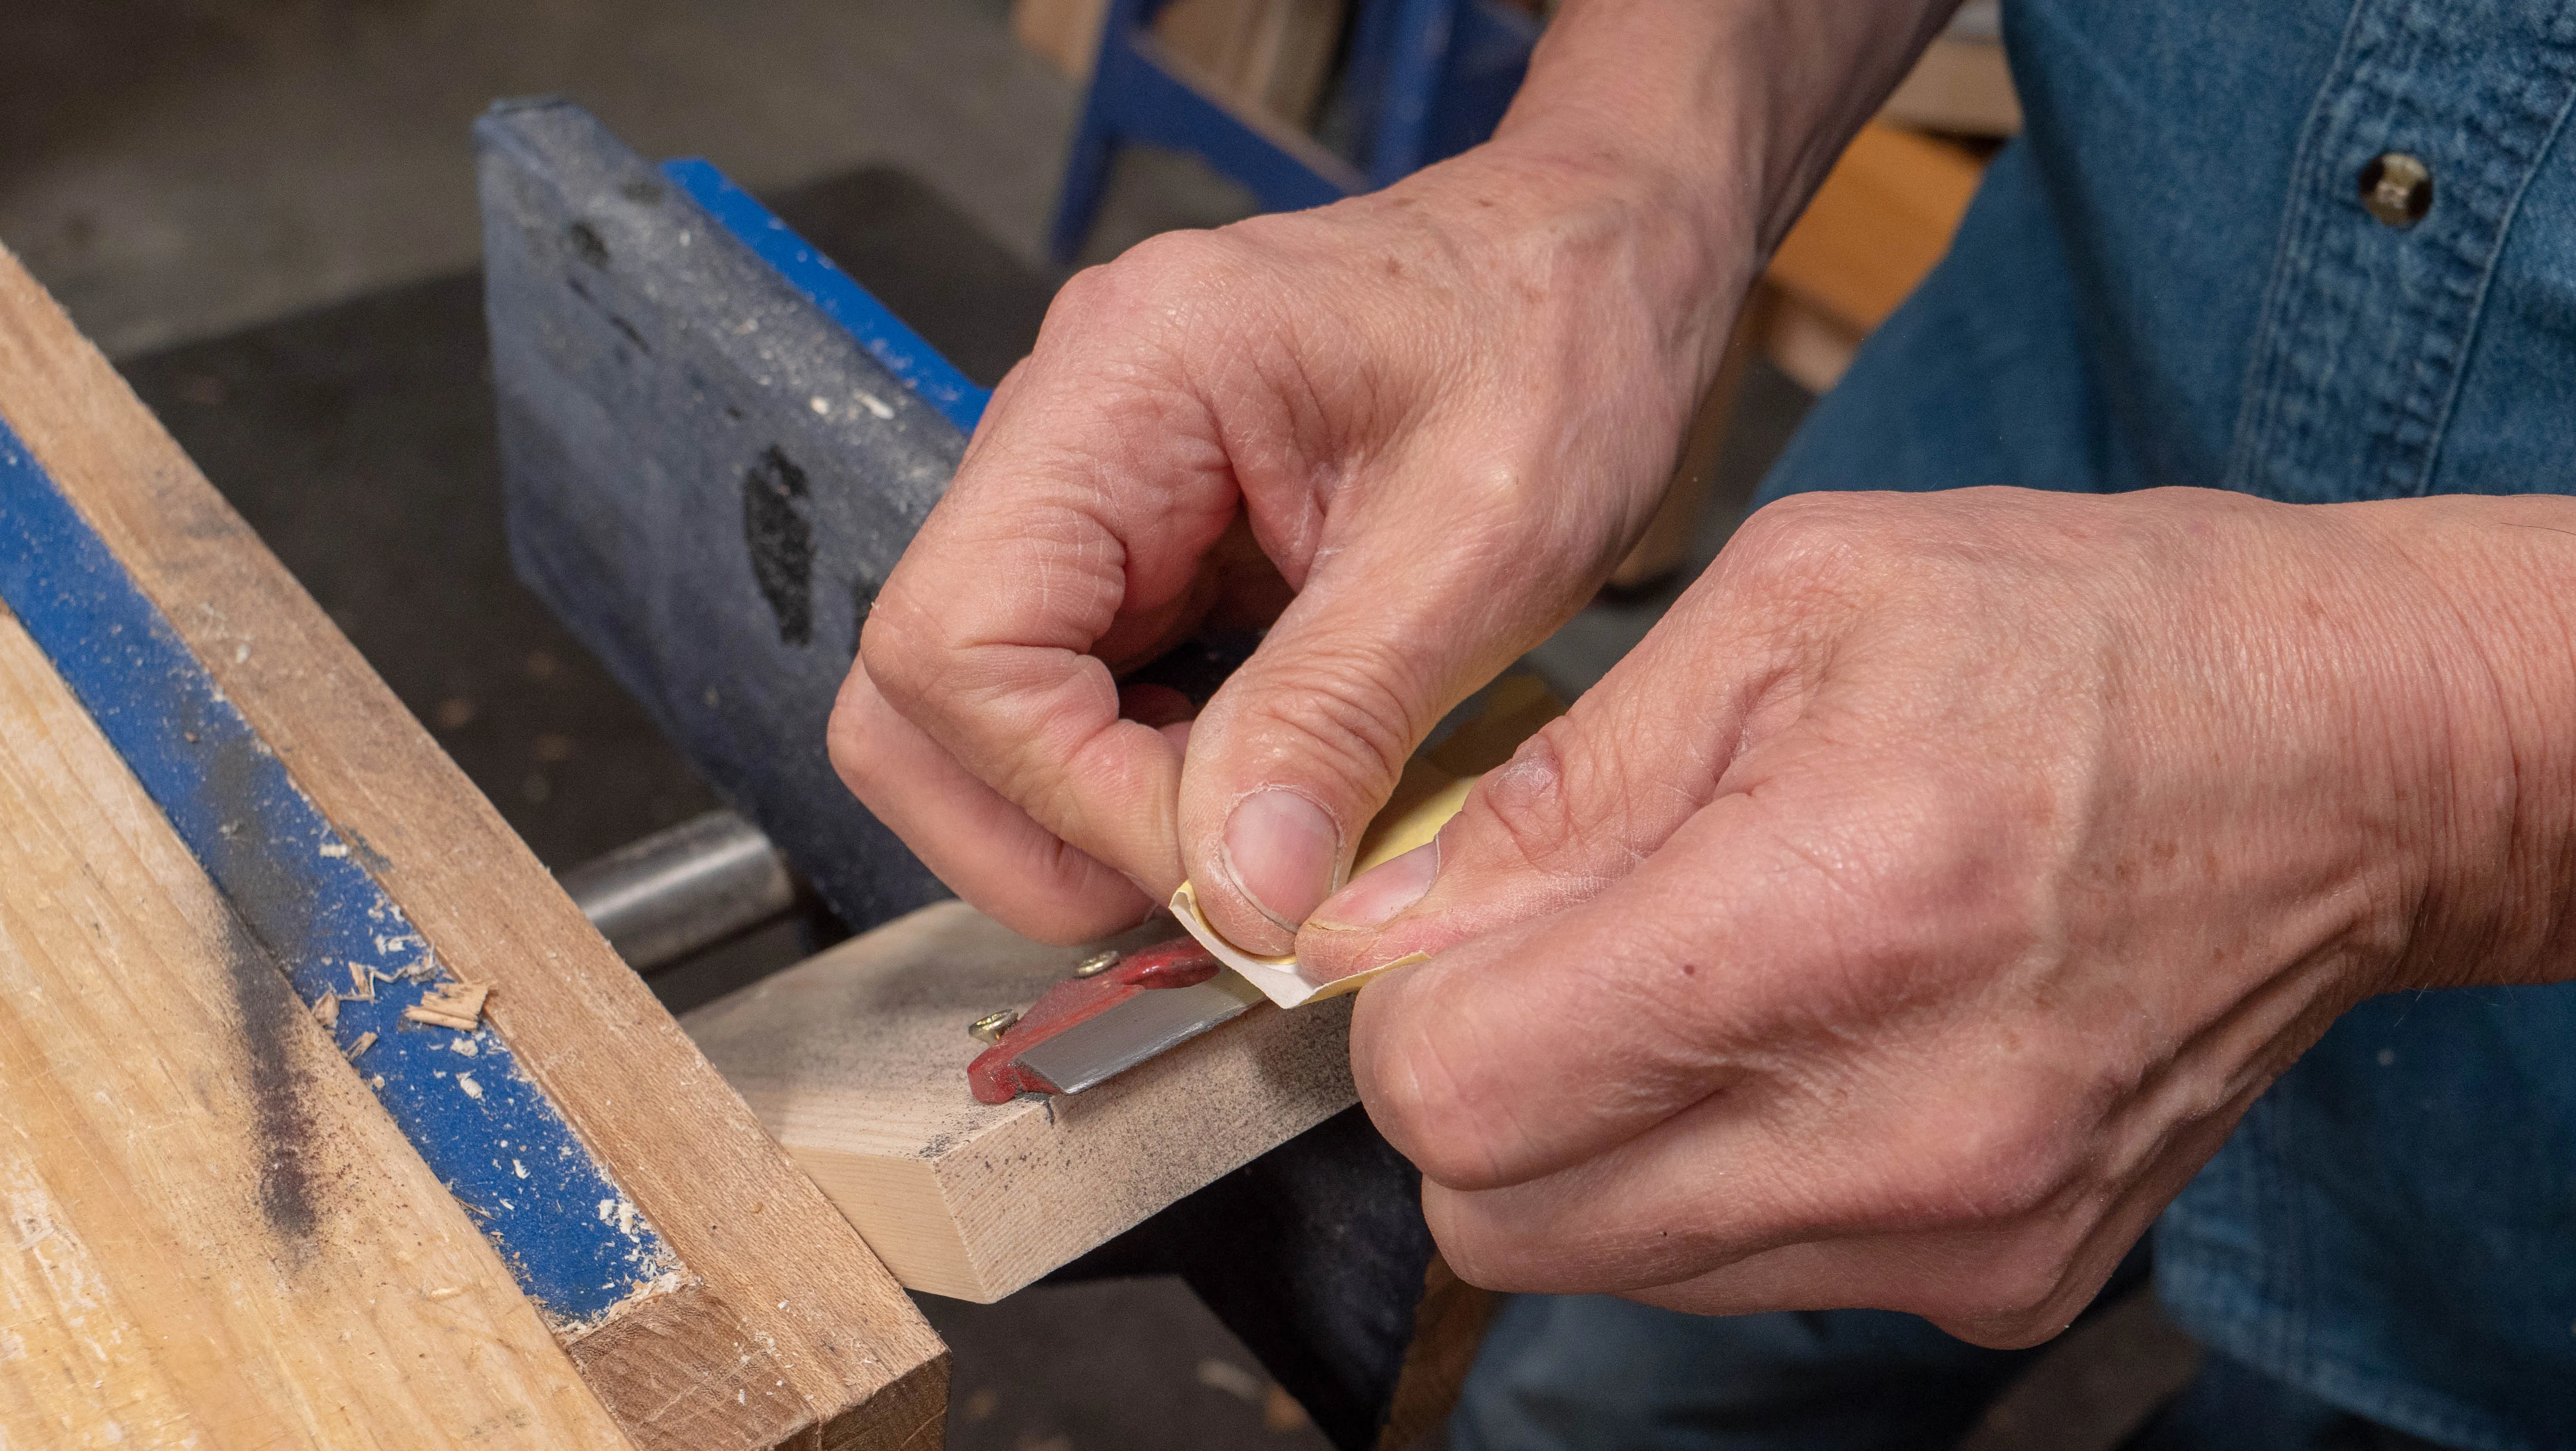
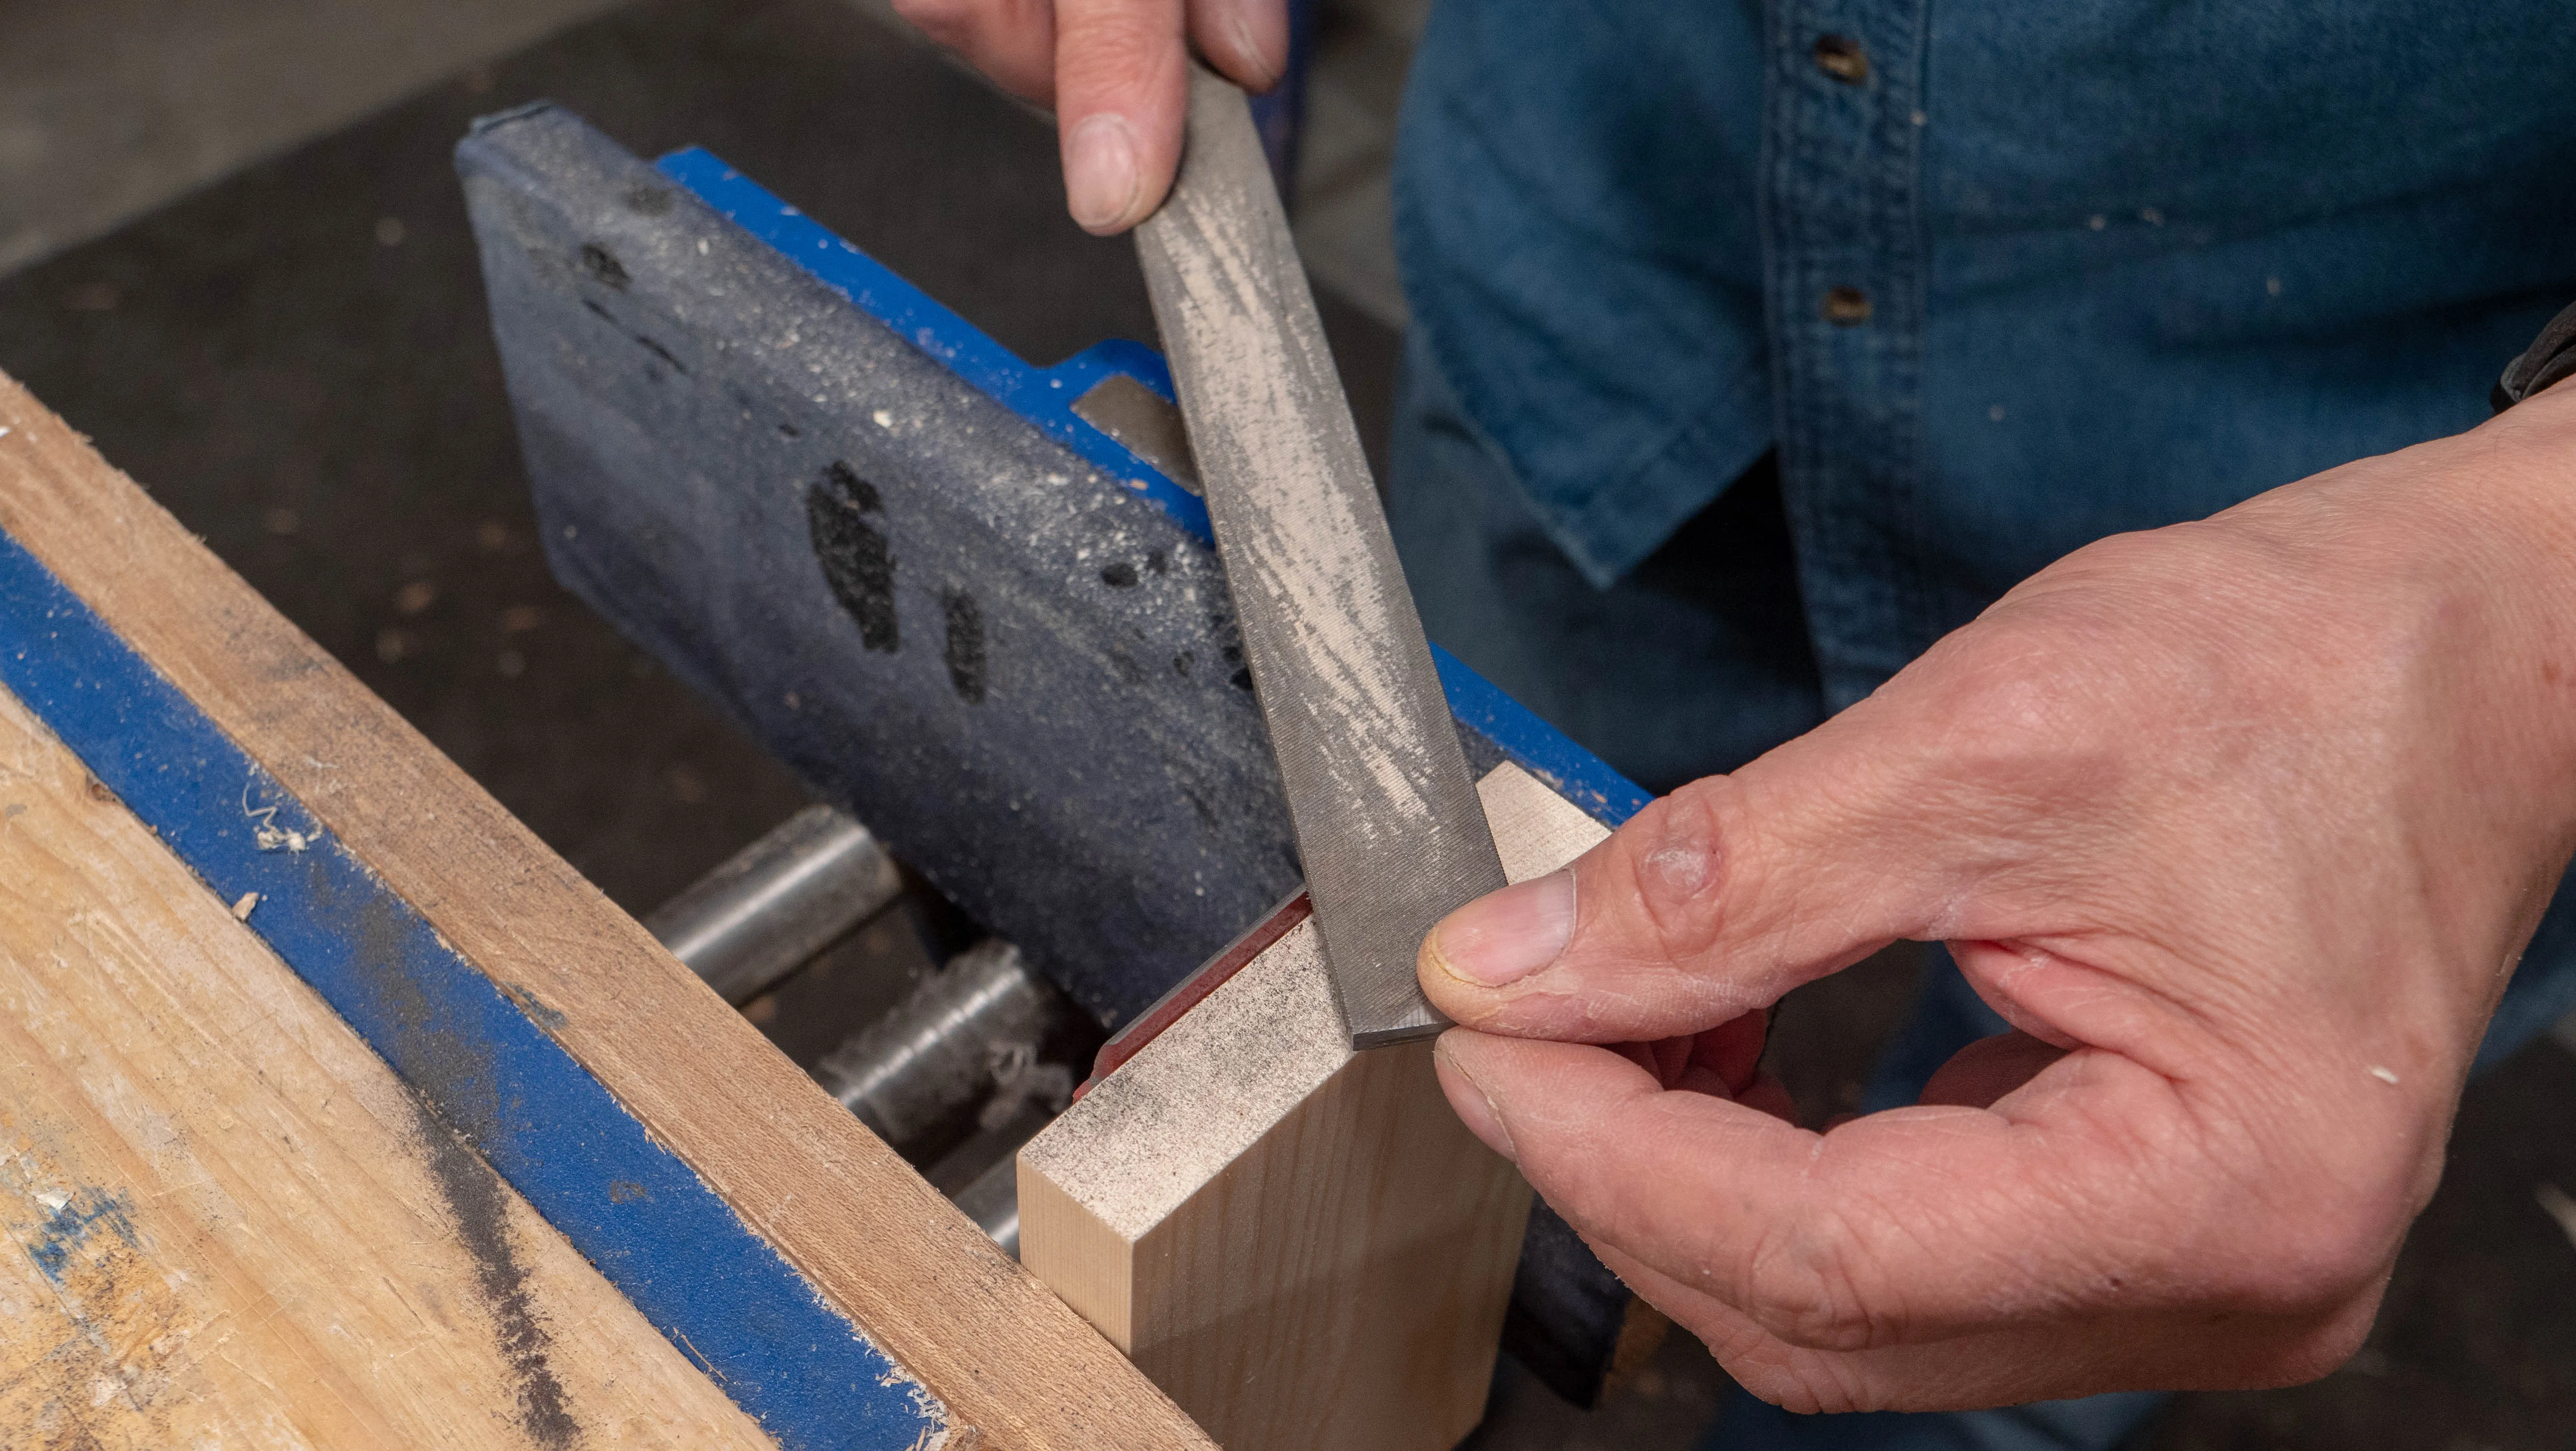
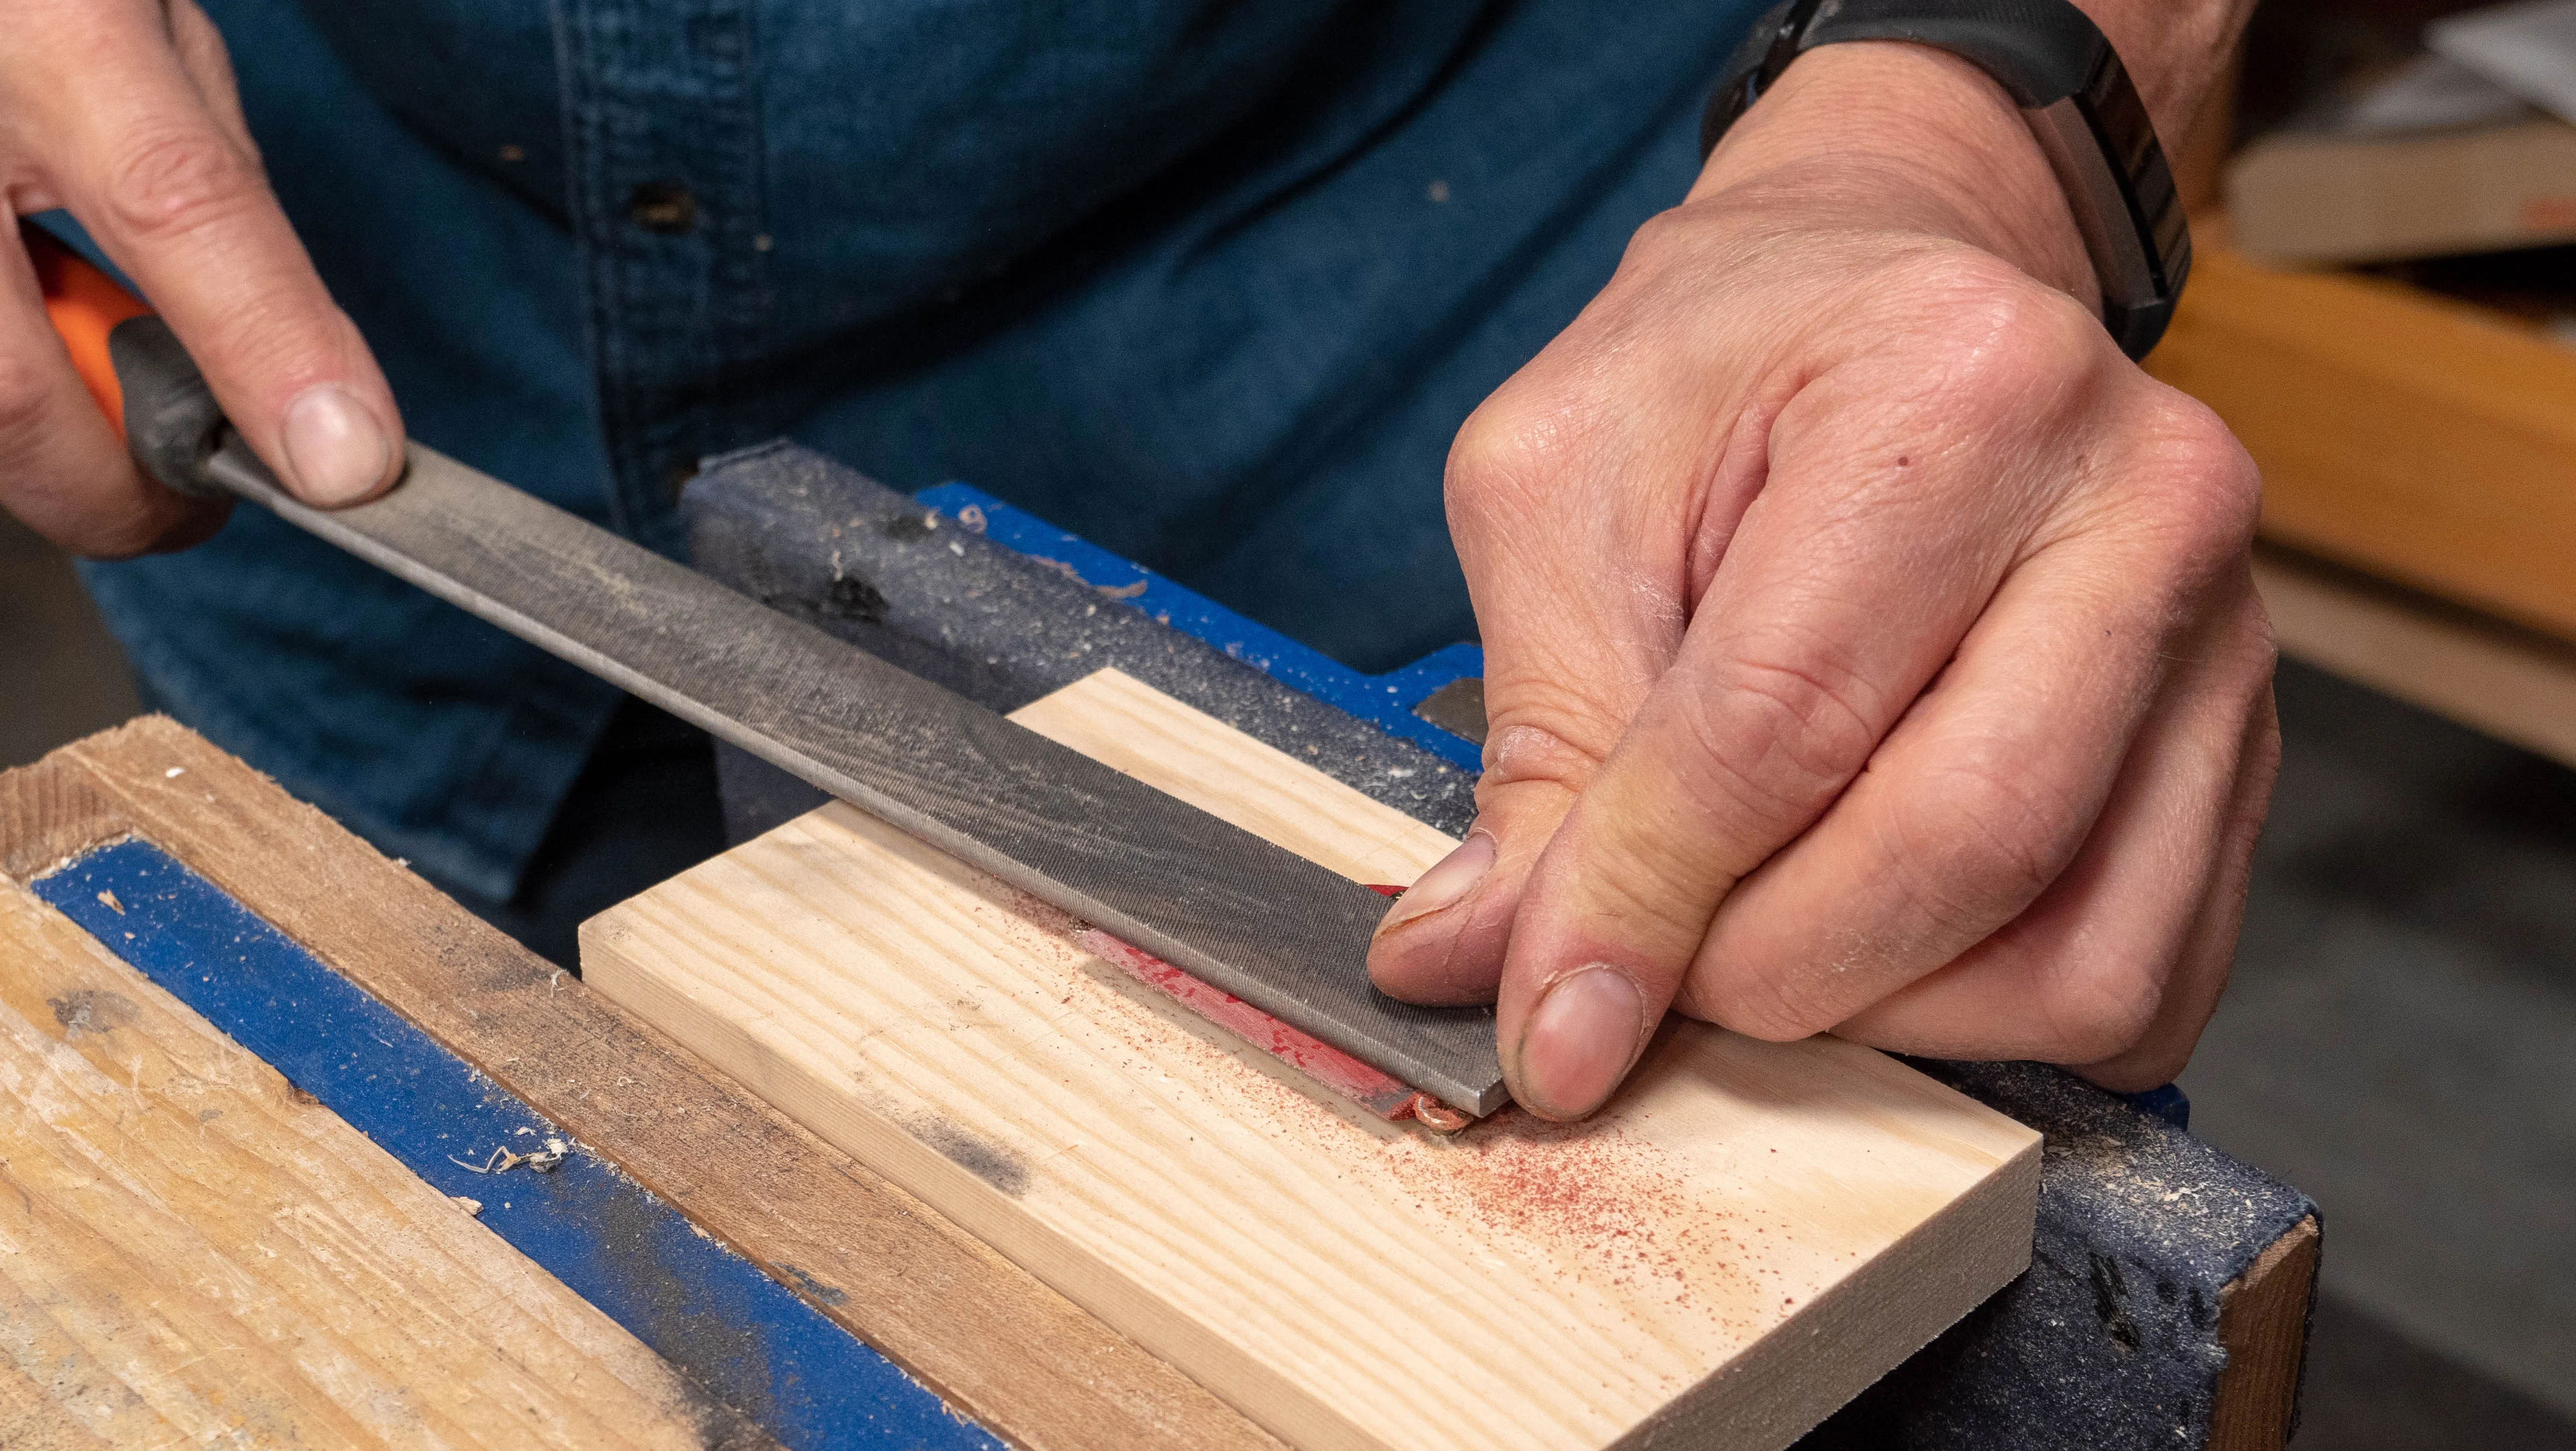
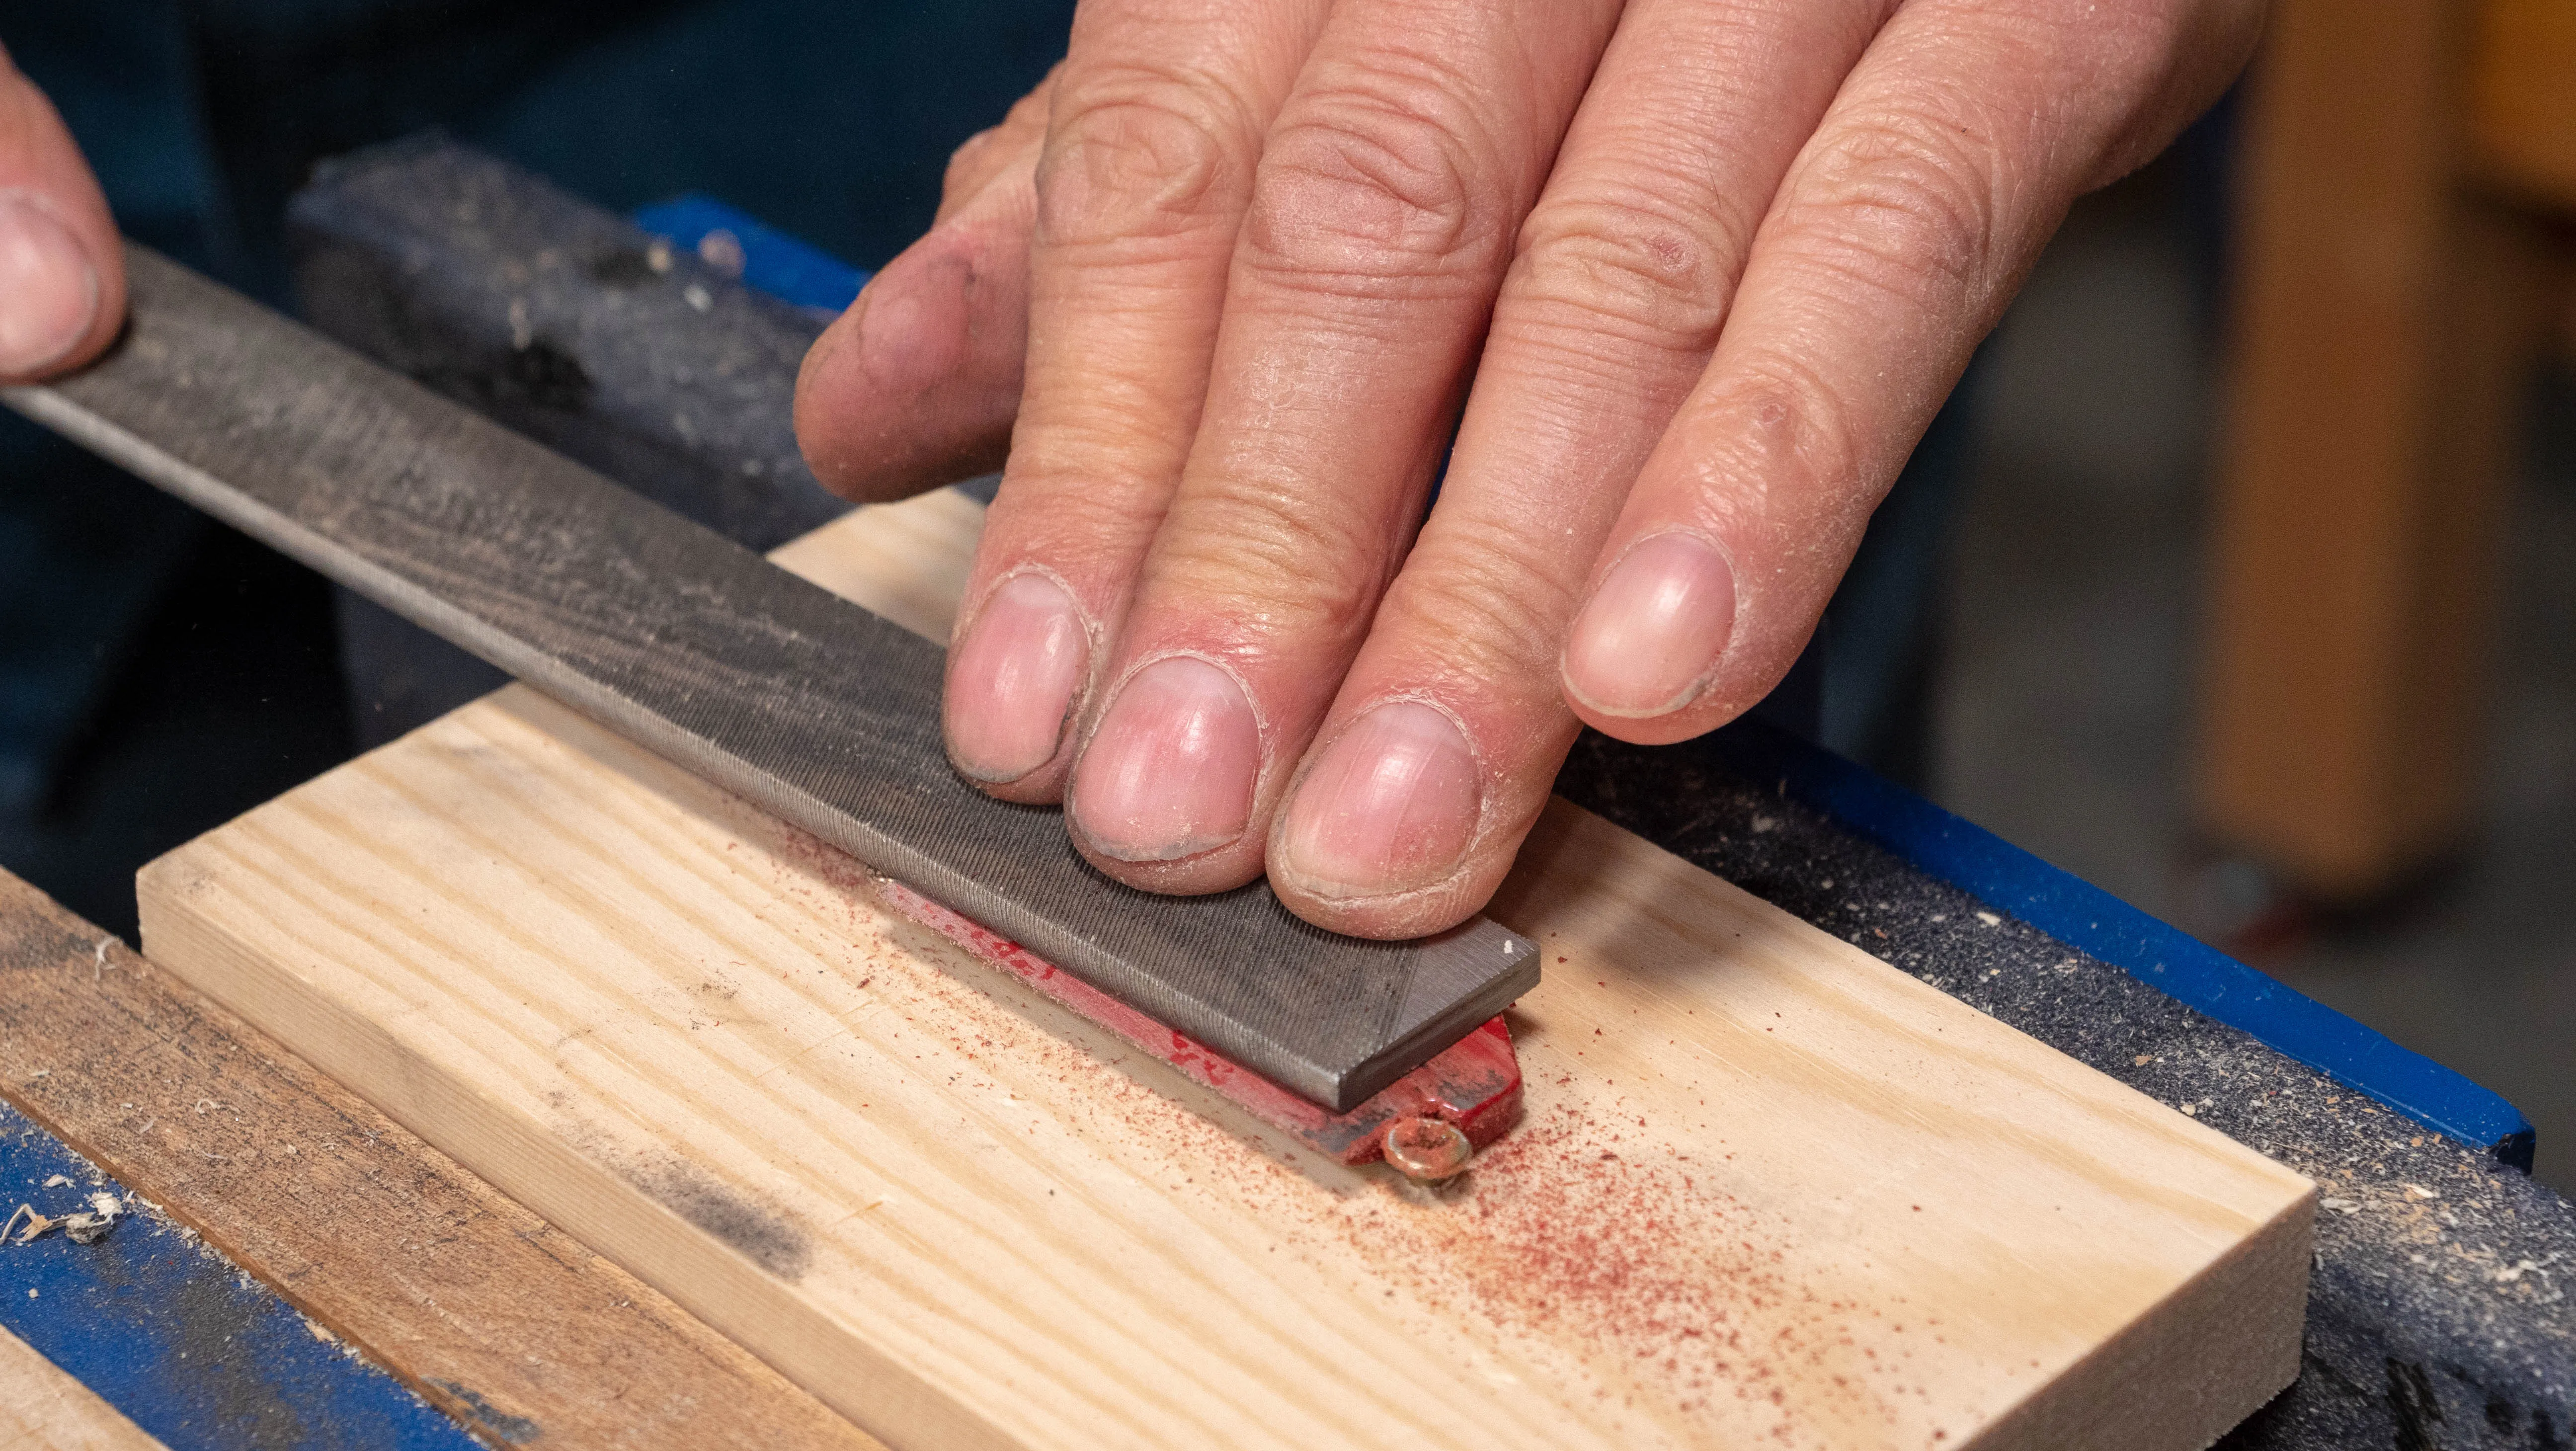
Reposition the wood in the vise at an angle. Use the file to create a camber on the edge of the cap iron. Followed up with abrasive paper. Reposition the wood once more; this time so it is vertical. Draw file along the edge of the cap iron.
Take the screws out of the wood and use the diamond stones to flatten the reverse side of the cap iron. If, as in this case, the paint is thick, secure the cap iron back onto the piece of wood and use the file to continue flattening the underside of the cap iron.
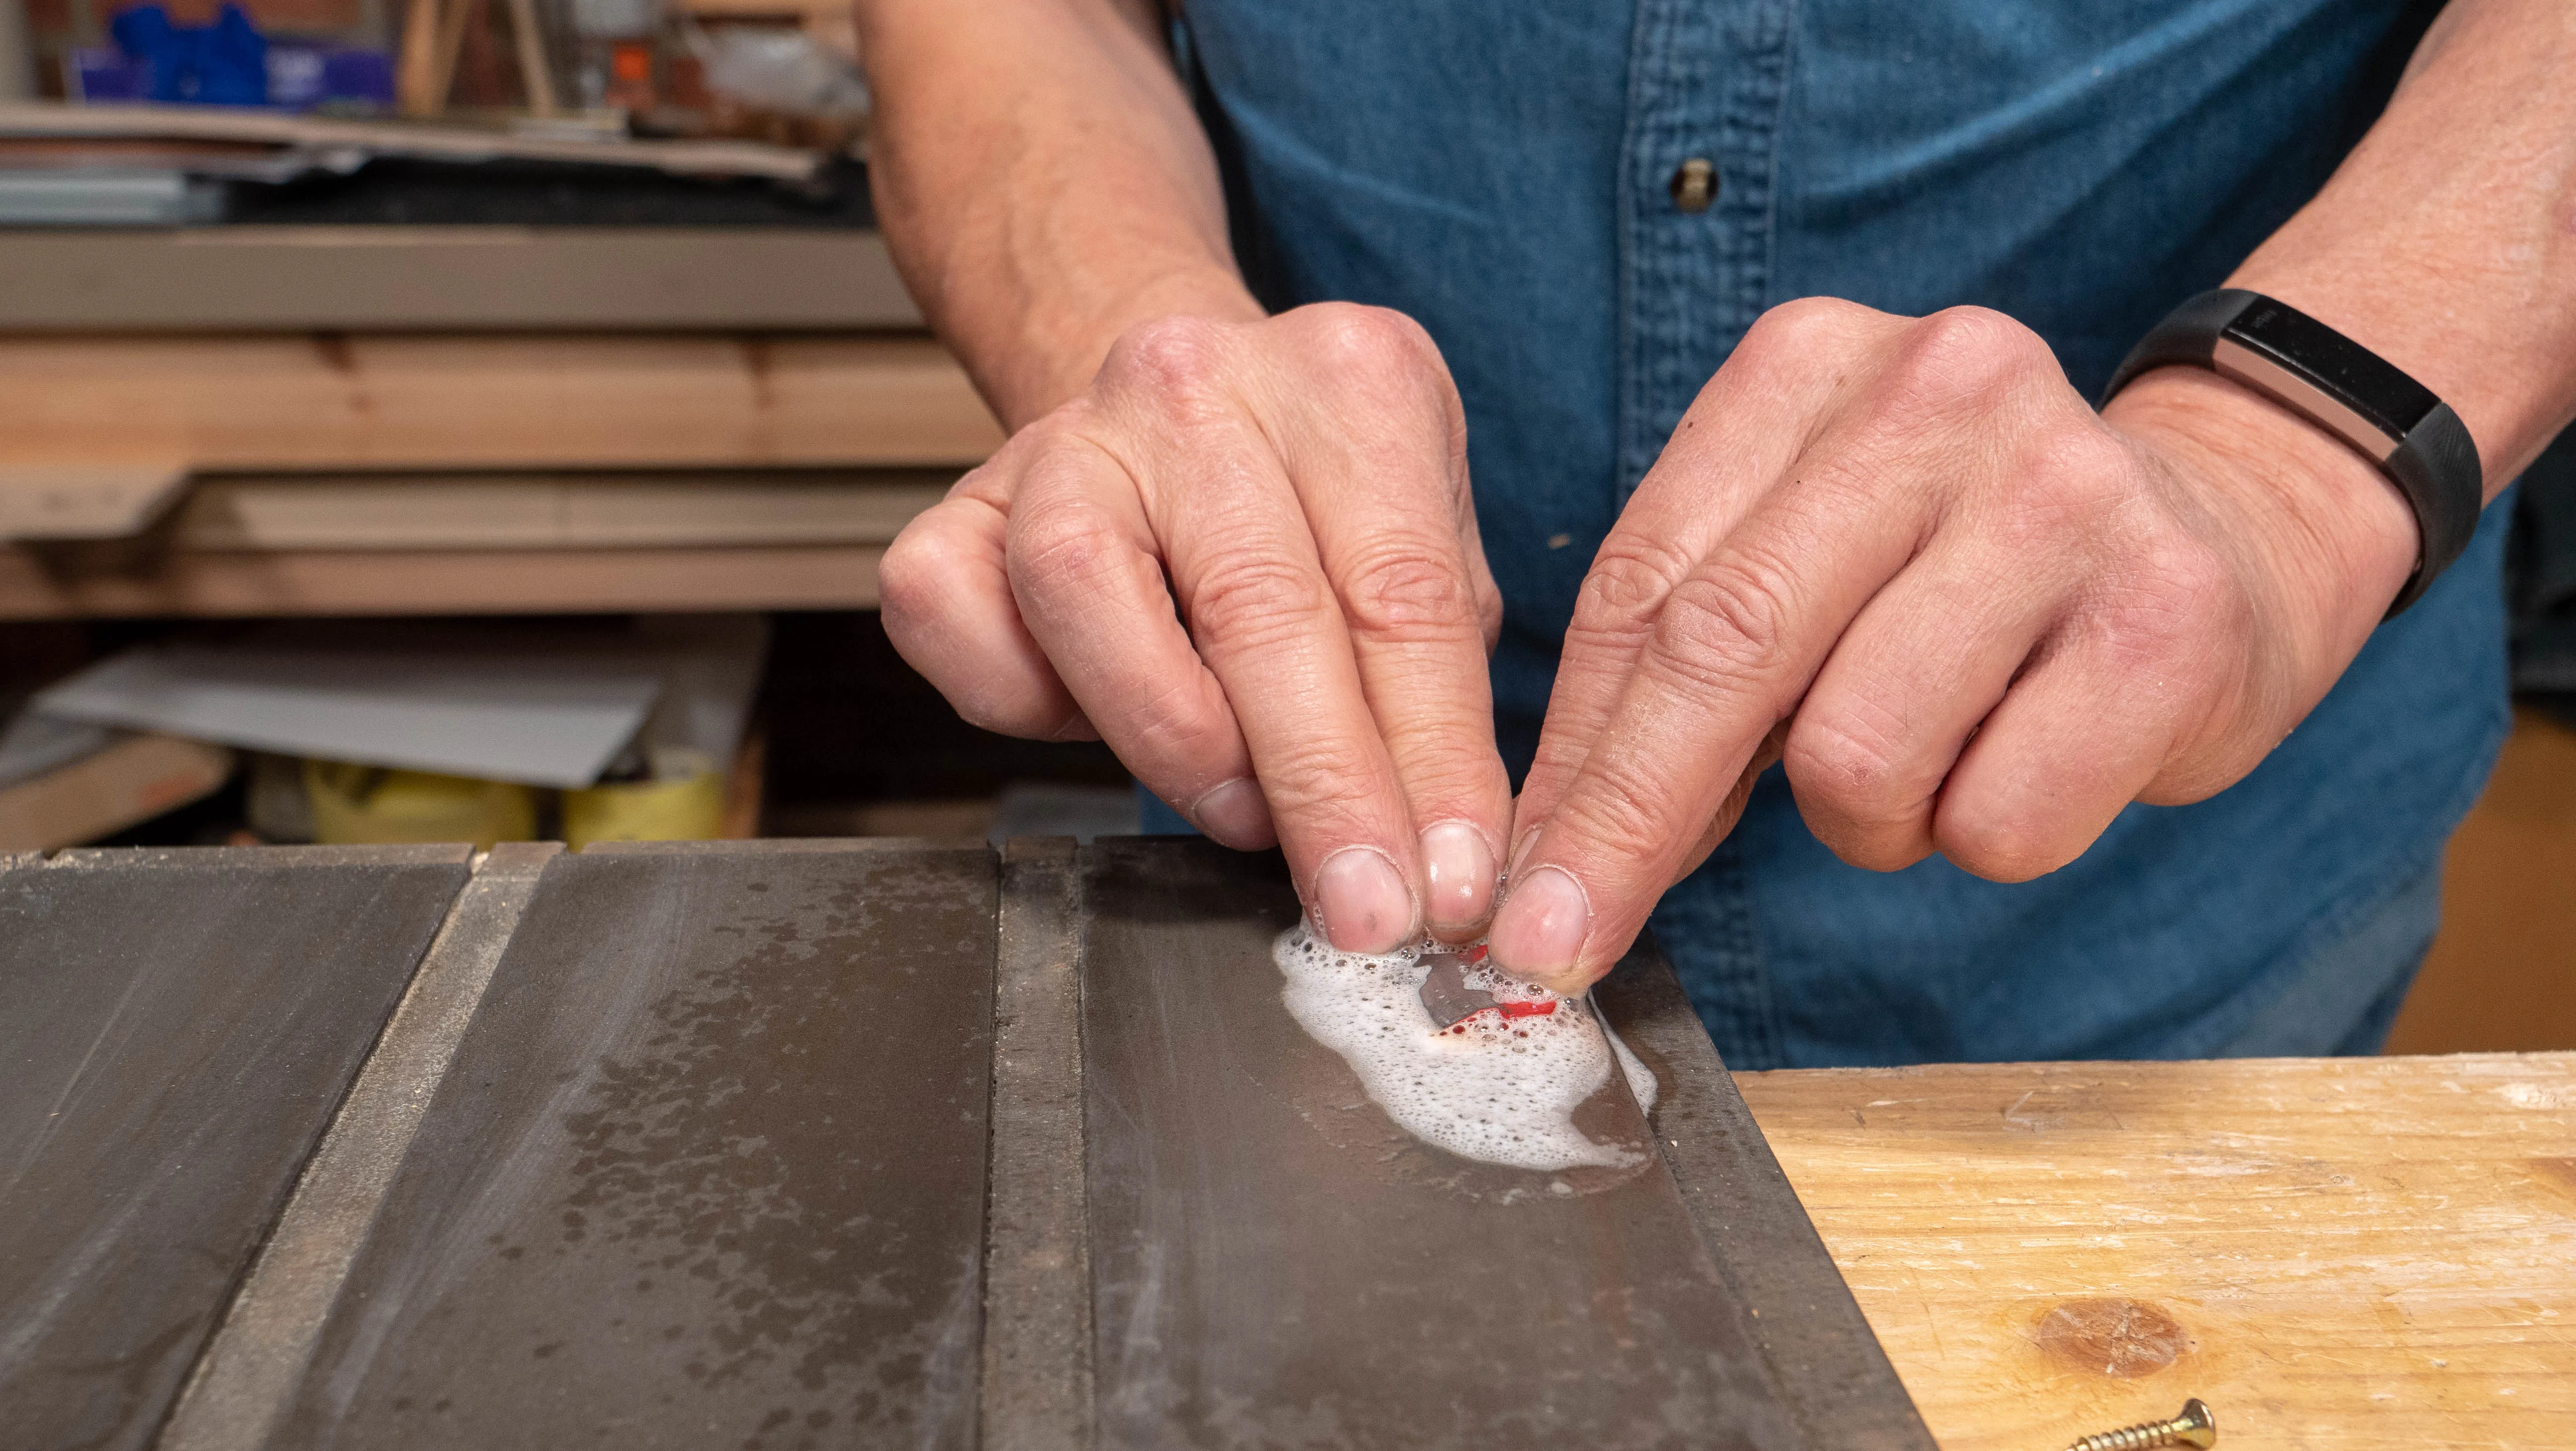
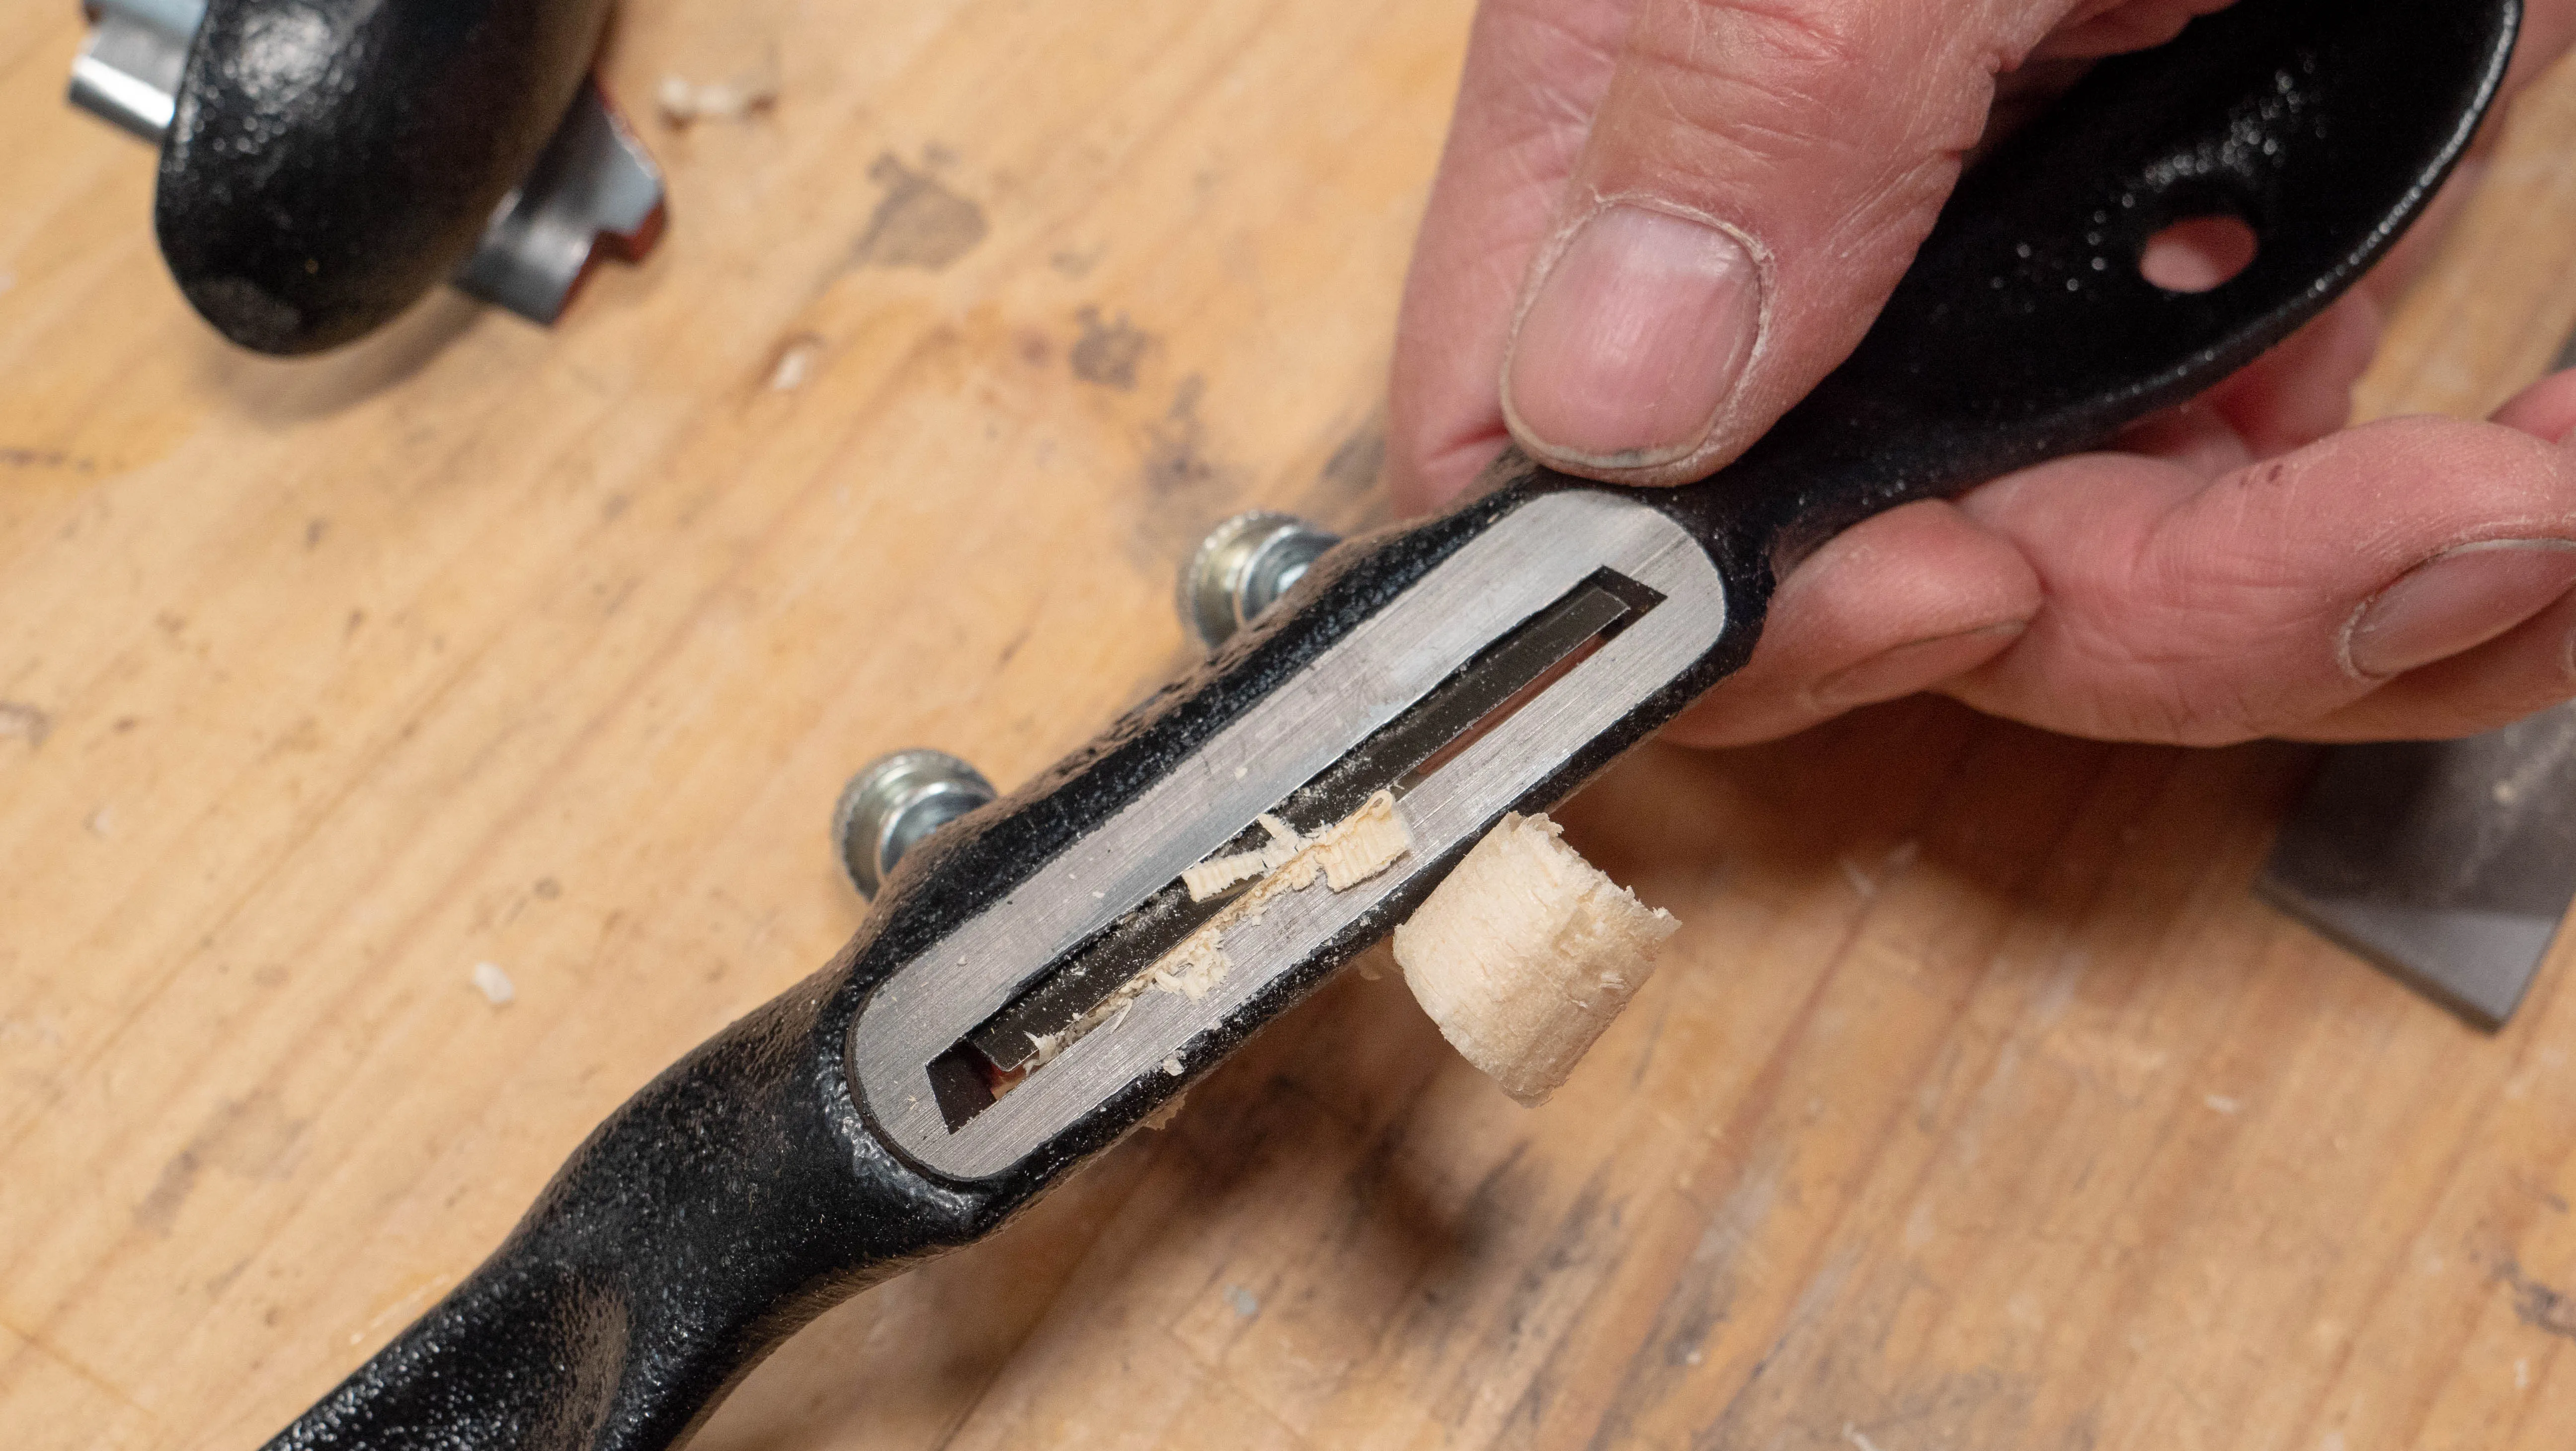
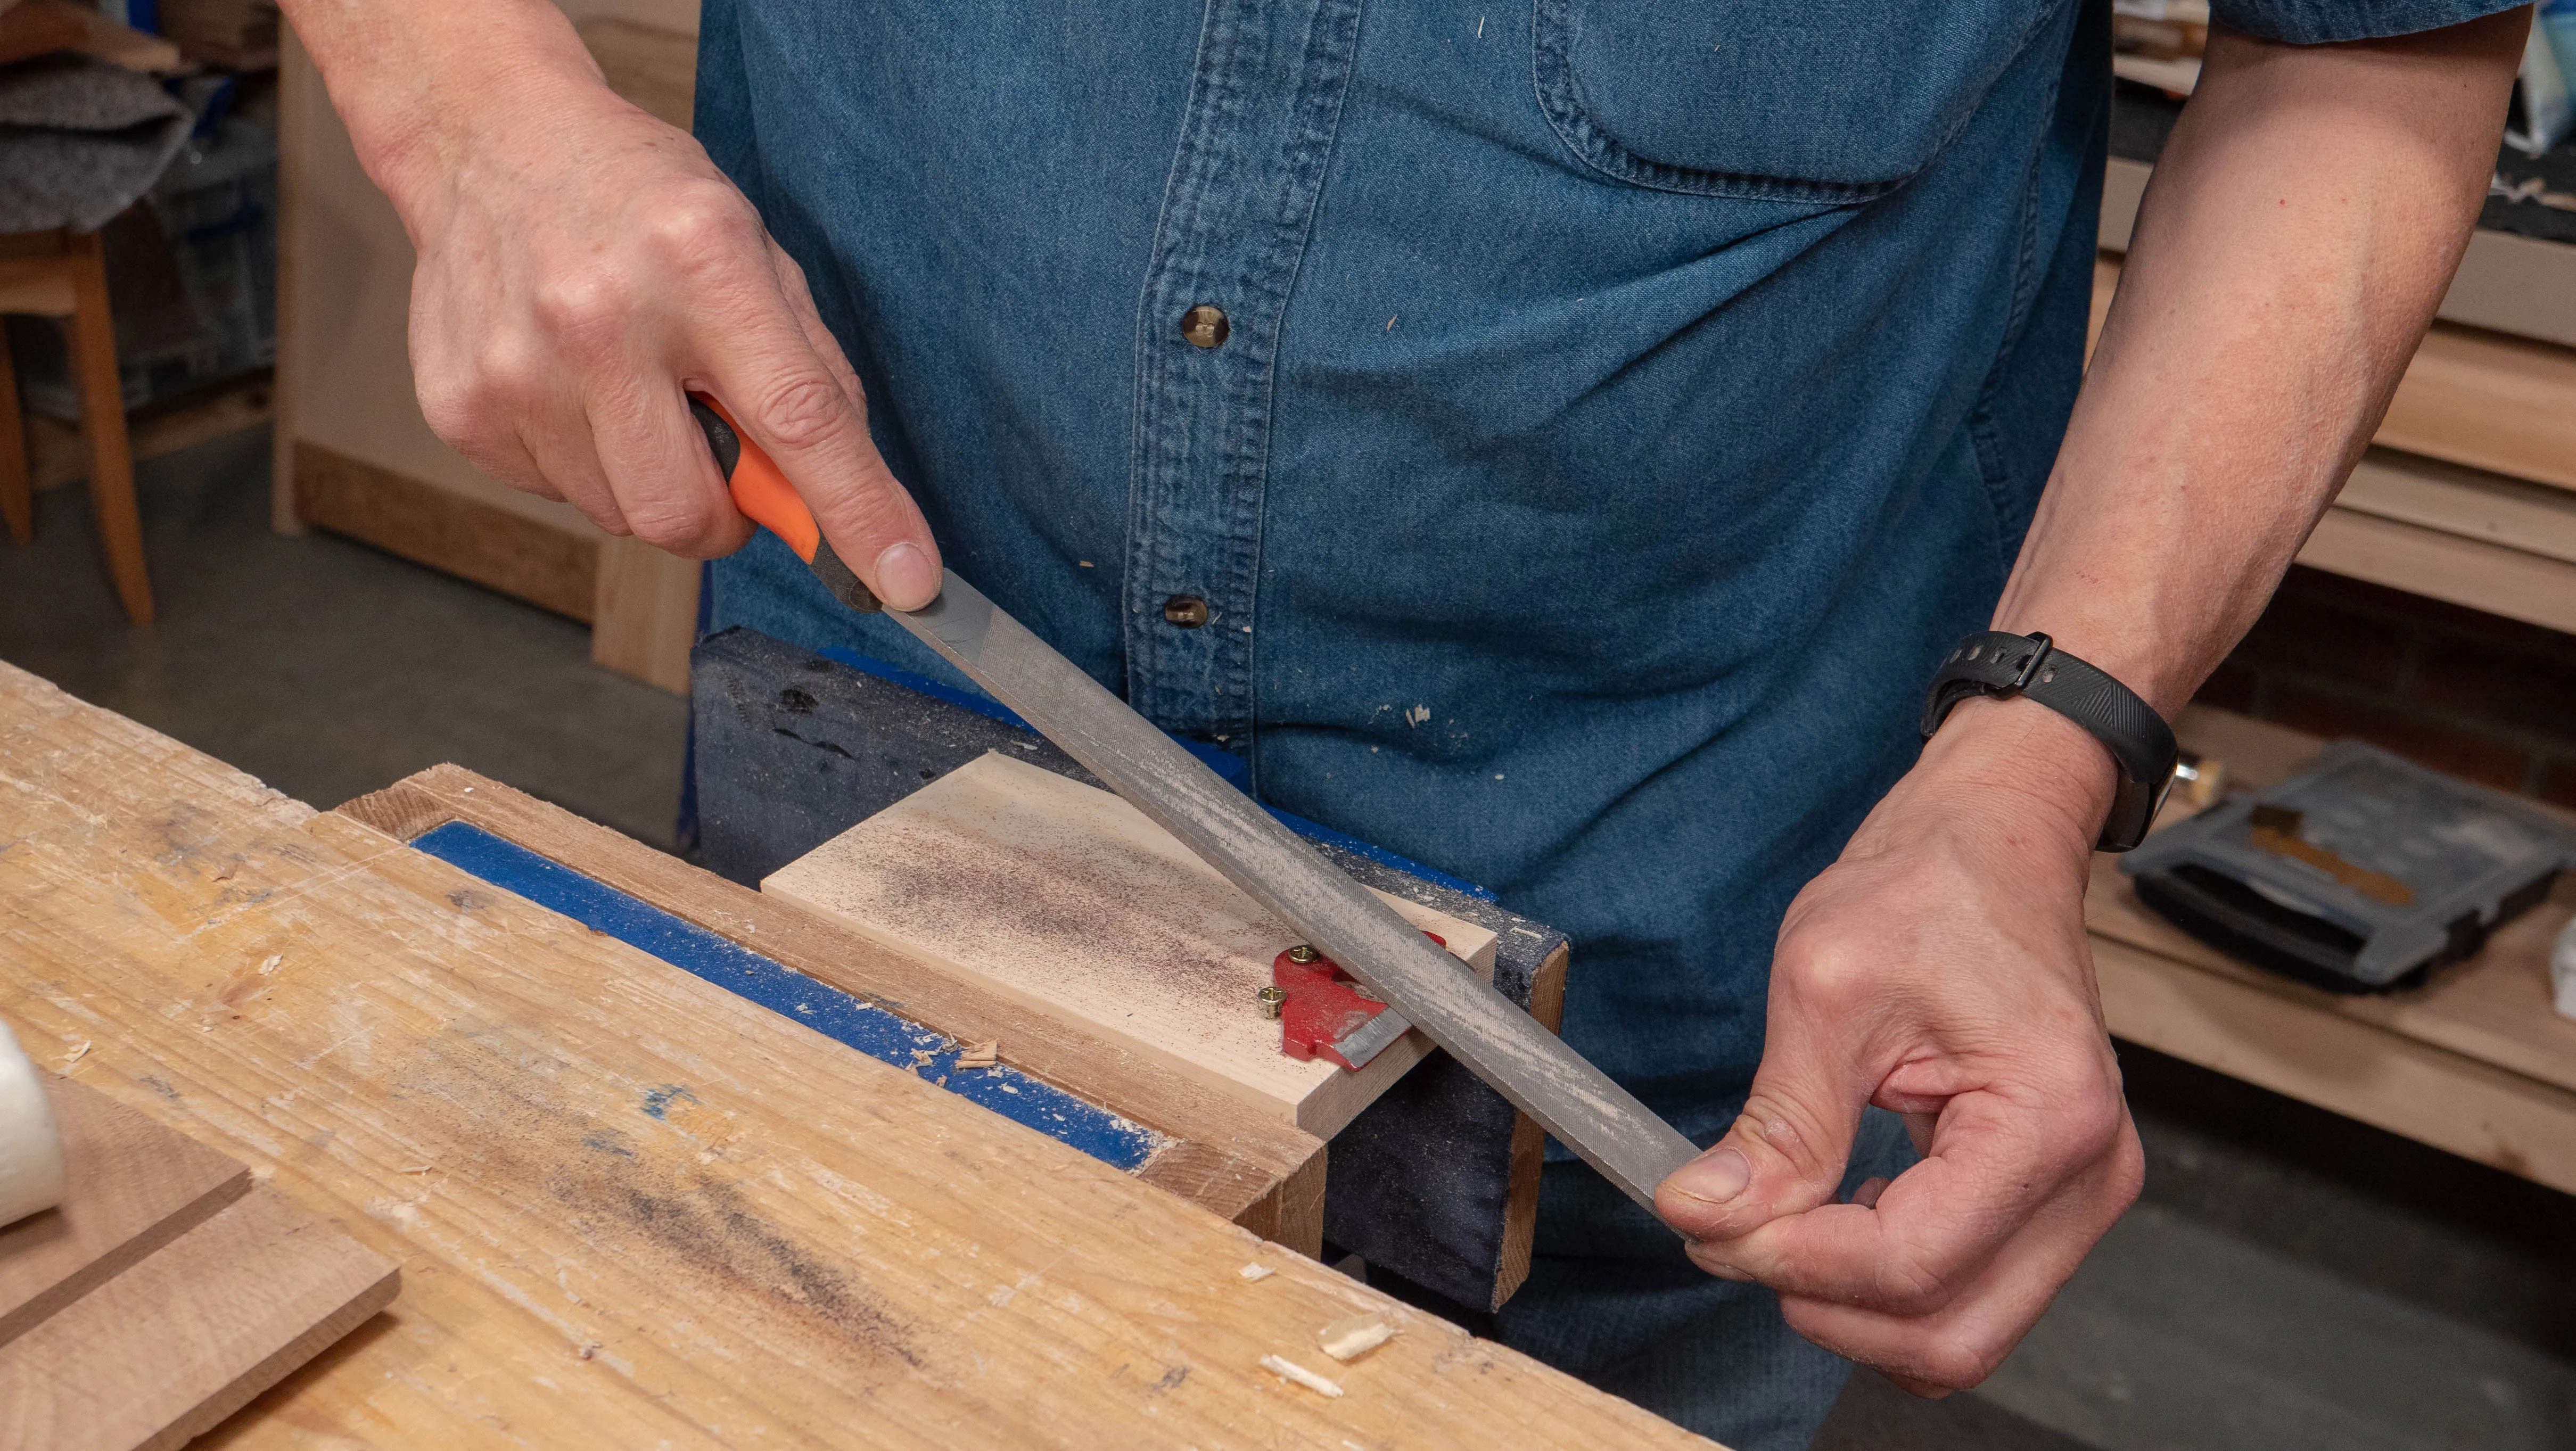
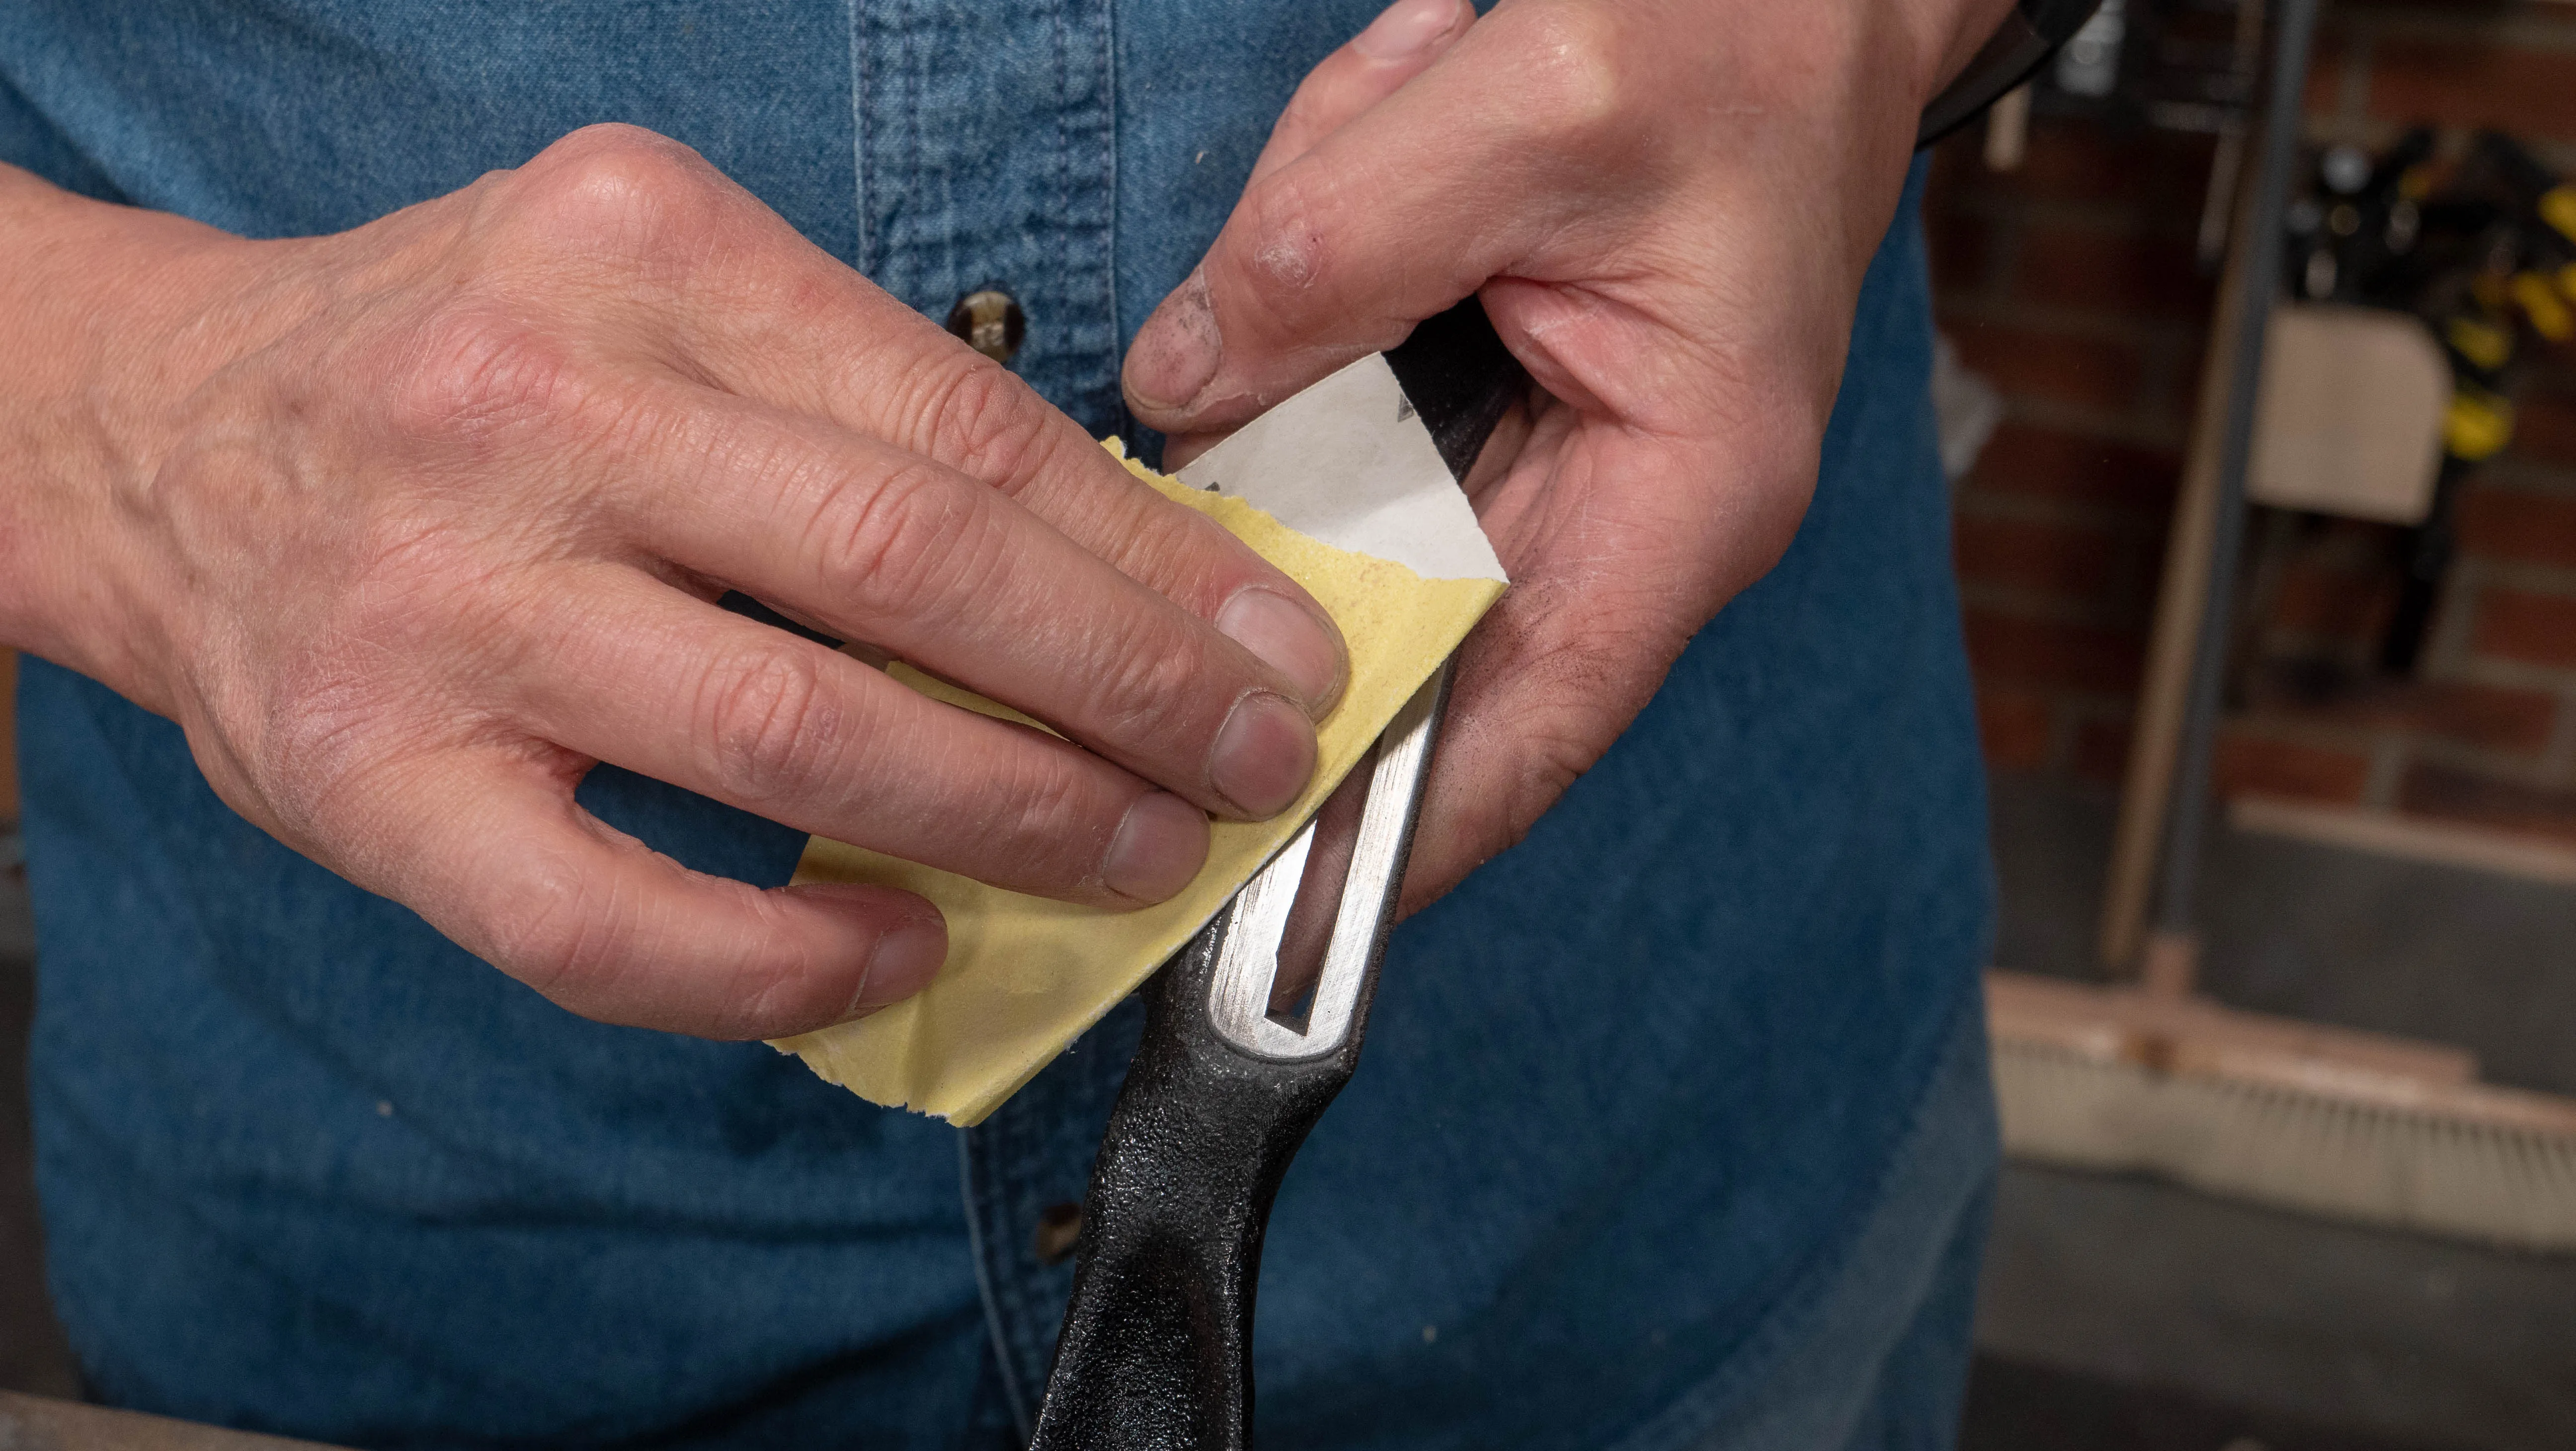
Flatten the sole of the spokeshave on the diamond stones to further refine it. Consider also using the flat file if the sole seems unevenly undulated. To soften the surface and corners use abrasive paper. Then finish with a coat of oil.

Sharpening
Note: This guide will be focused on sharpening a bevel-down spokeshave. It should be noted that this is not the same process for a bevel-up spokeshave.
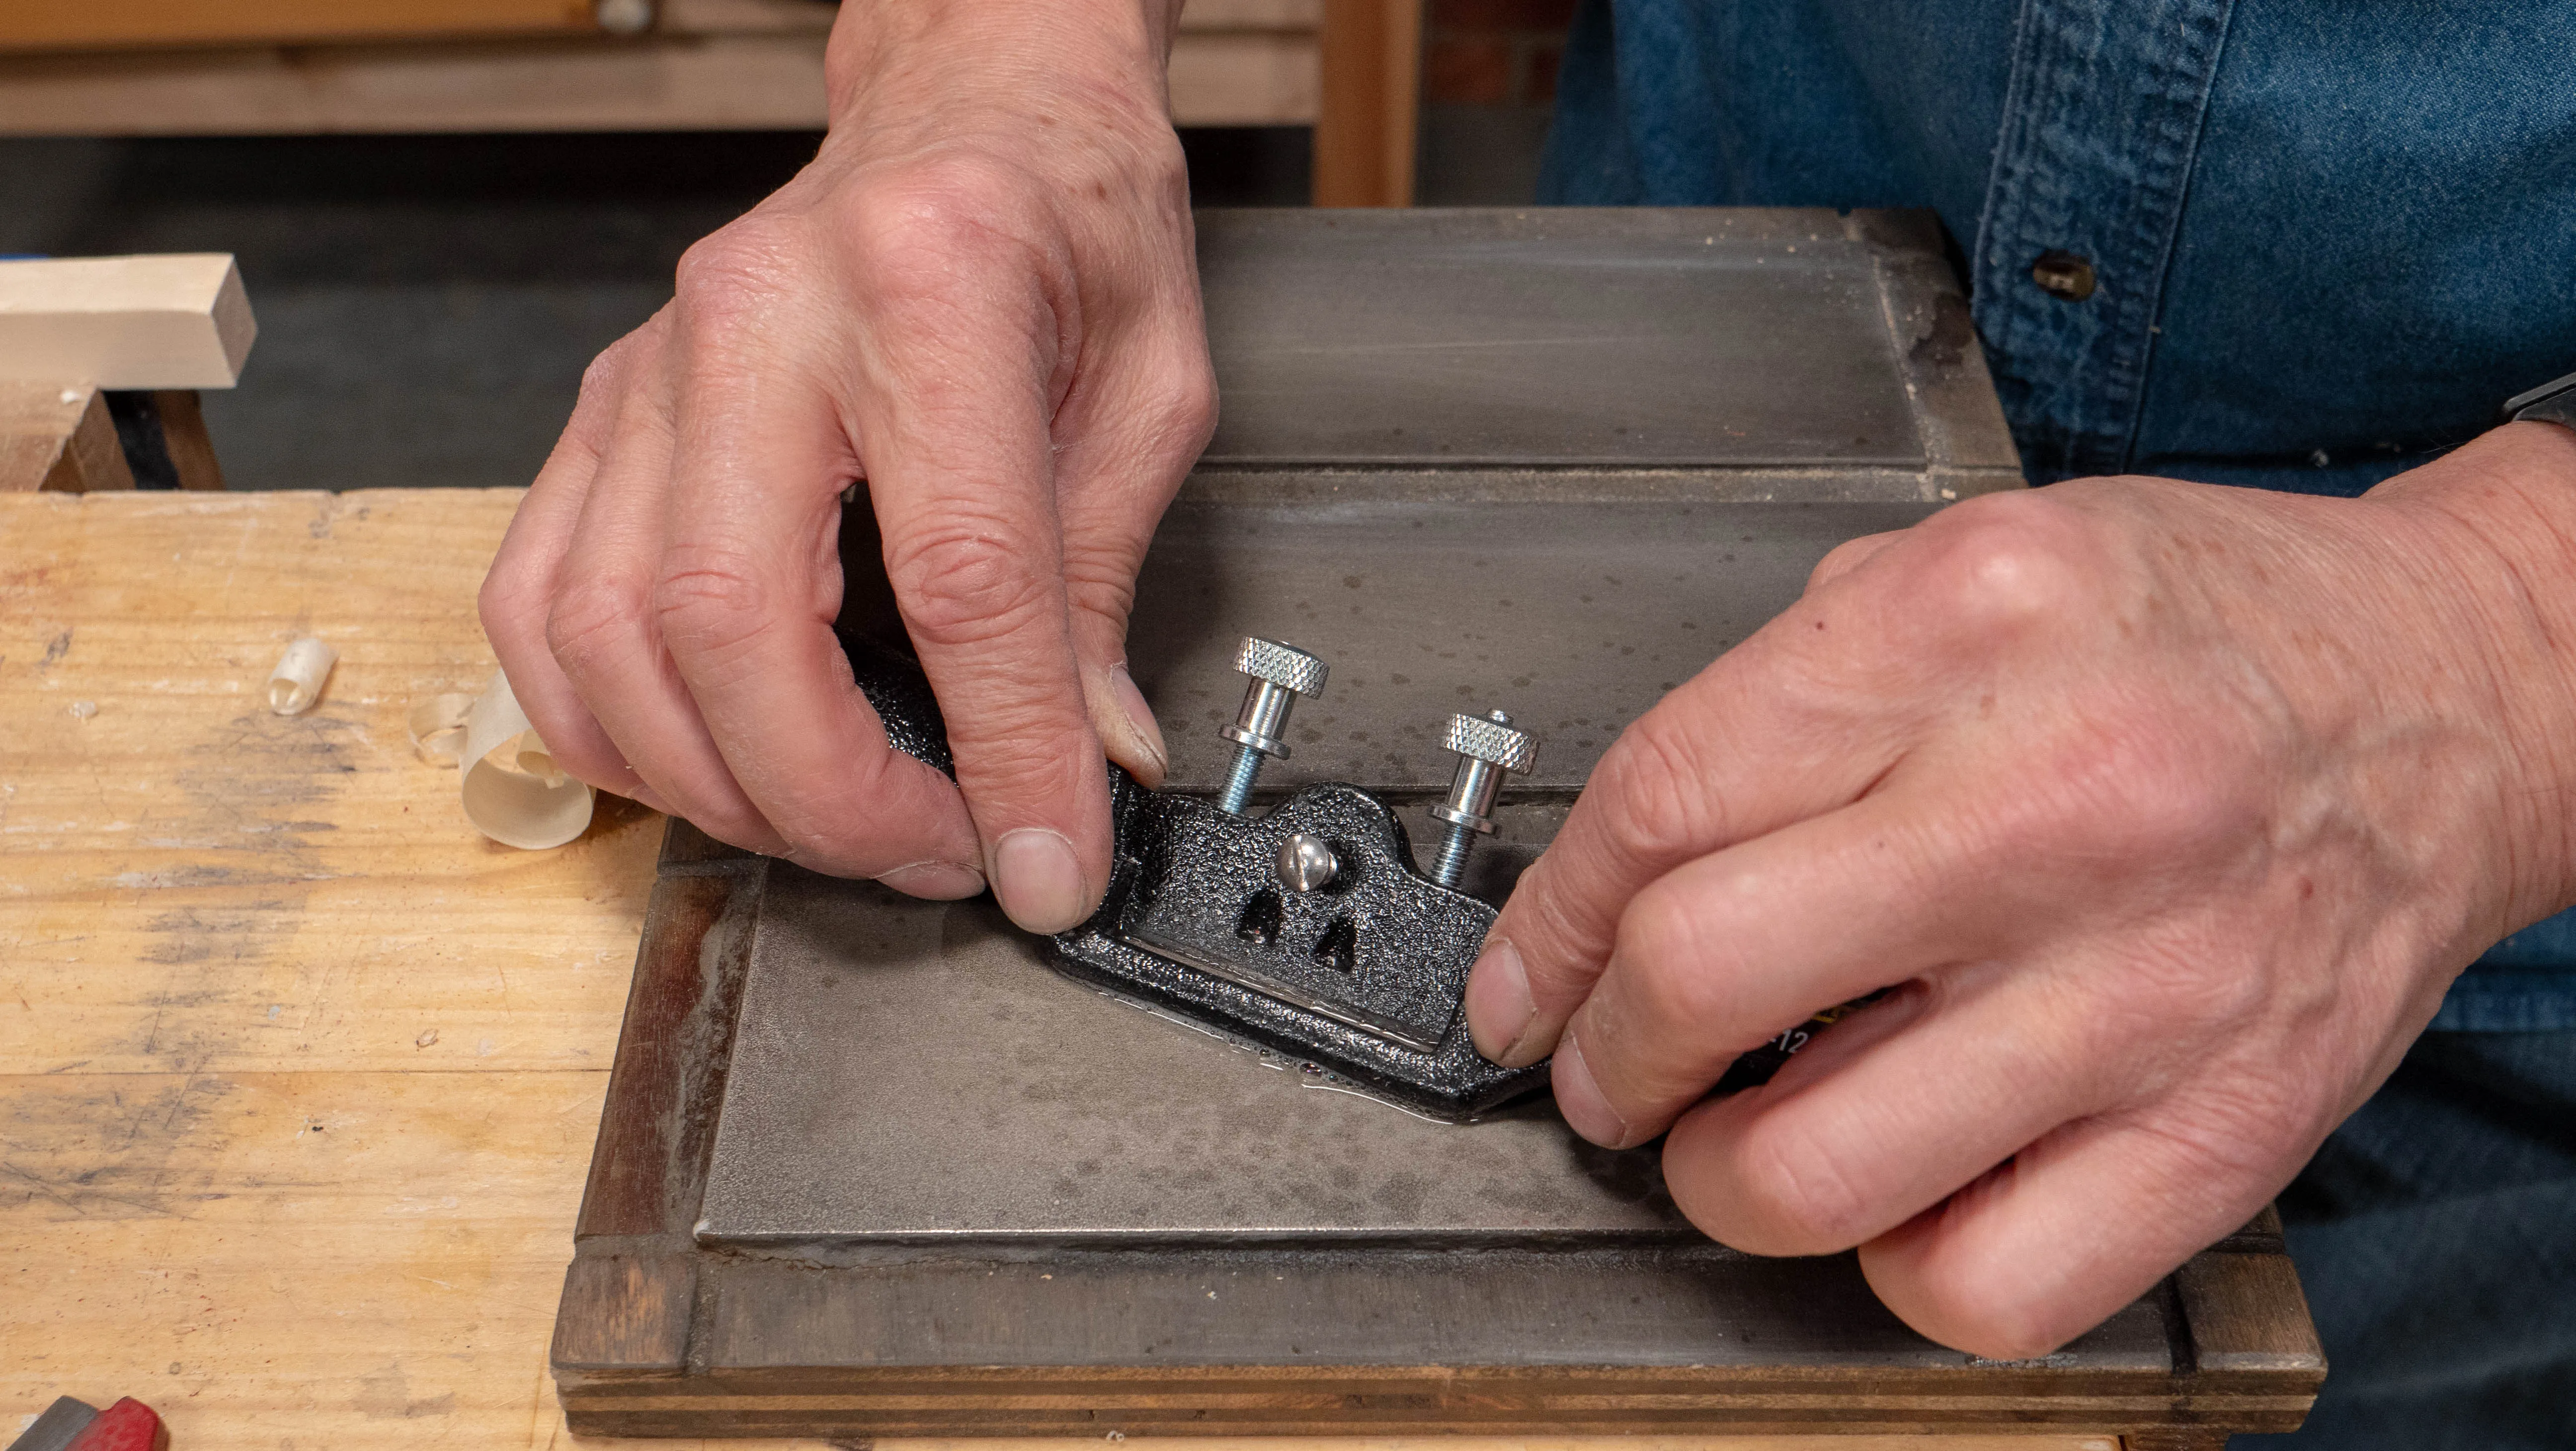
The angle at which you present the blade to the sharpening plates is important because, if it is too steep, the cutting edge will be higher than the heel of the bevel. This will prevent the blade from reaching the wood to cut. Using the same tools and techniques as sharpening a chisel, you will be using the 3 different sharpening plates. Like sharpening any other blade, you want to ensure the angle of presentation is correct to allow you to create a camber on the bevel. To do this, make sure that, when you are sharpening the bevel on the plate, you slightly lower your hand so you finish on the heel of the bevel. To create bevelled corners to each side of the cutting iron, tilt the blade slightly onto the corners. This bevels the corners, which means you don’t leave harsh lines in the surface of the wood when cutting.
Tip: Some people find it difficult to hold the blade when sharpening, as it is so short and can be hard to grip. You can extend this using a blade extender, which can be easily made by hand. See Paul’s video on how to make a blade extender here.
Further Reading
To read more on spokeshaves, we recommend the following from Paul’s blog:
Setting The Traditional Wooden Spokeshave
Final On #151 Spokeshave Restorative Work Series- Maybe!!
How To Sharpen A Traditional Wooden Spokeshave
Grinding And Honing Spokeshave Blades
Spokeshave Bevels on Bevels-Down Spokeshaves
Sharpening Traditional Spokeshaves