Sharpening a Router Plane
This page covers the ins and outs of working with a standard router plane. In order to provide a more affordable alternative, without compromising on utility and effectiveness, Paul has come up wit...
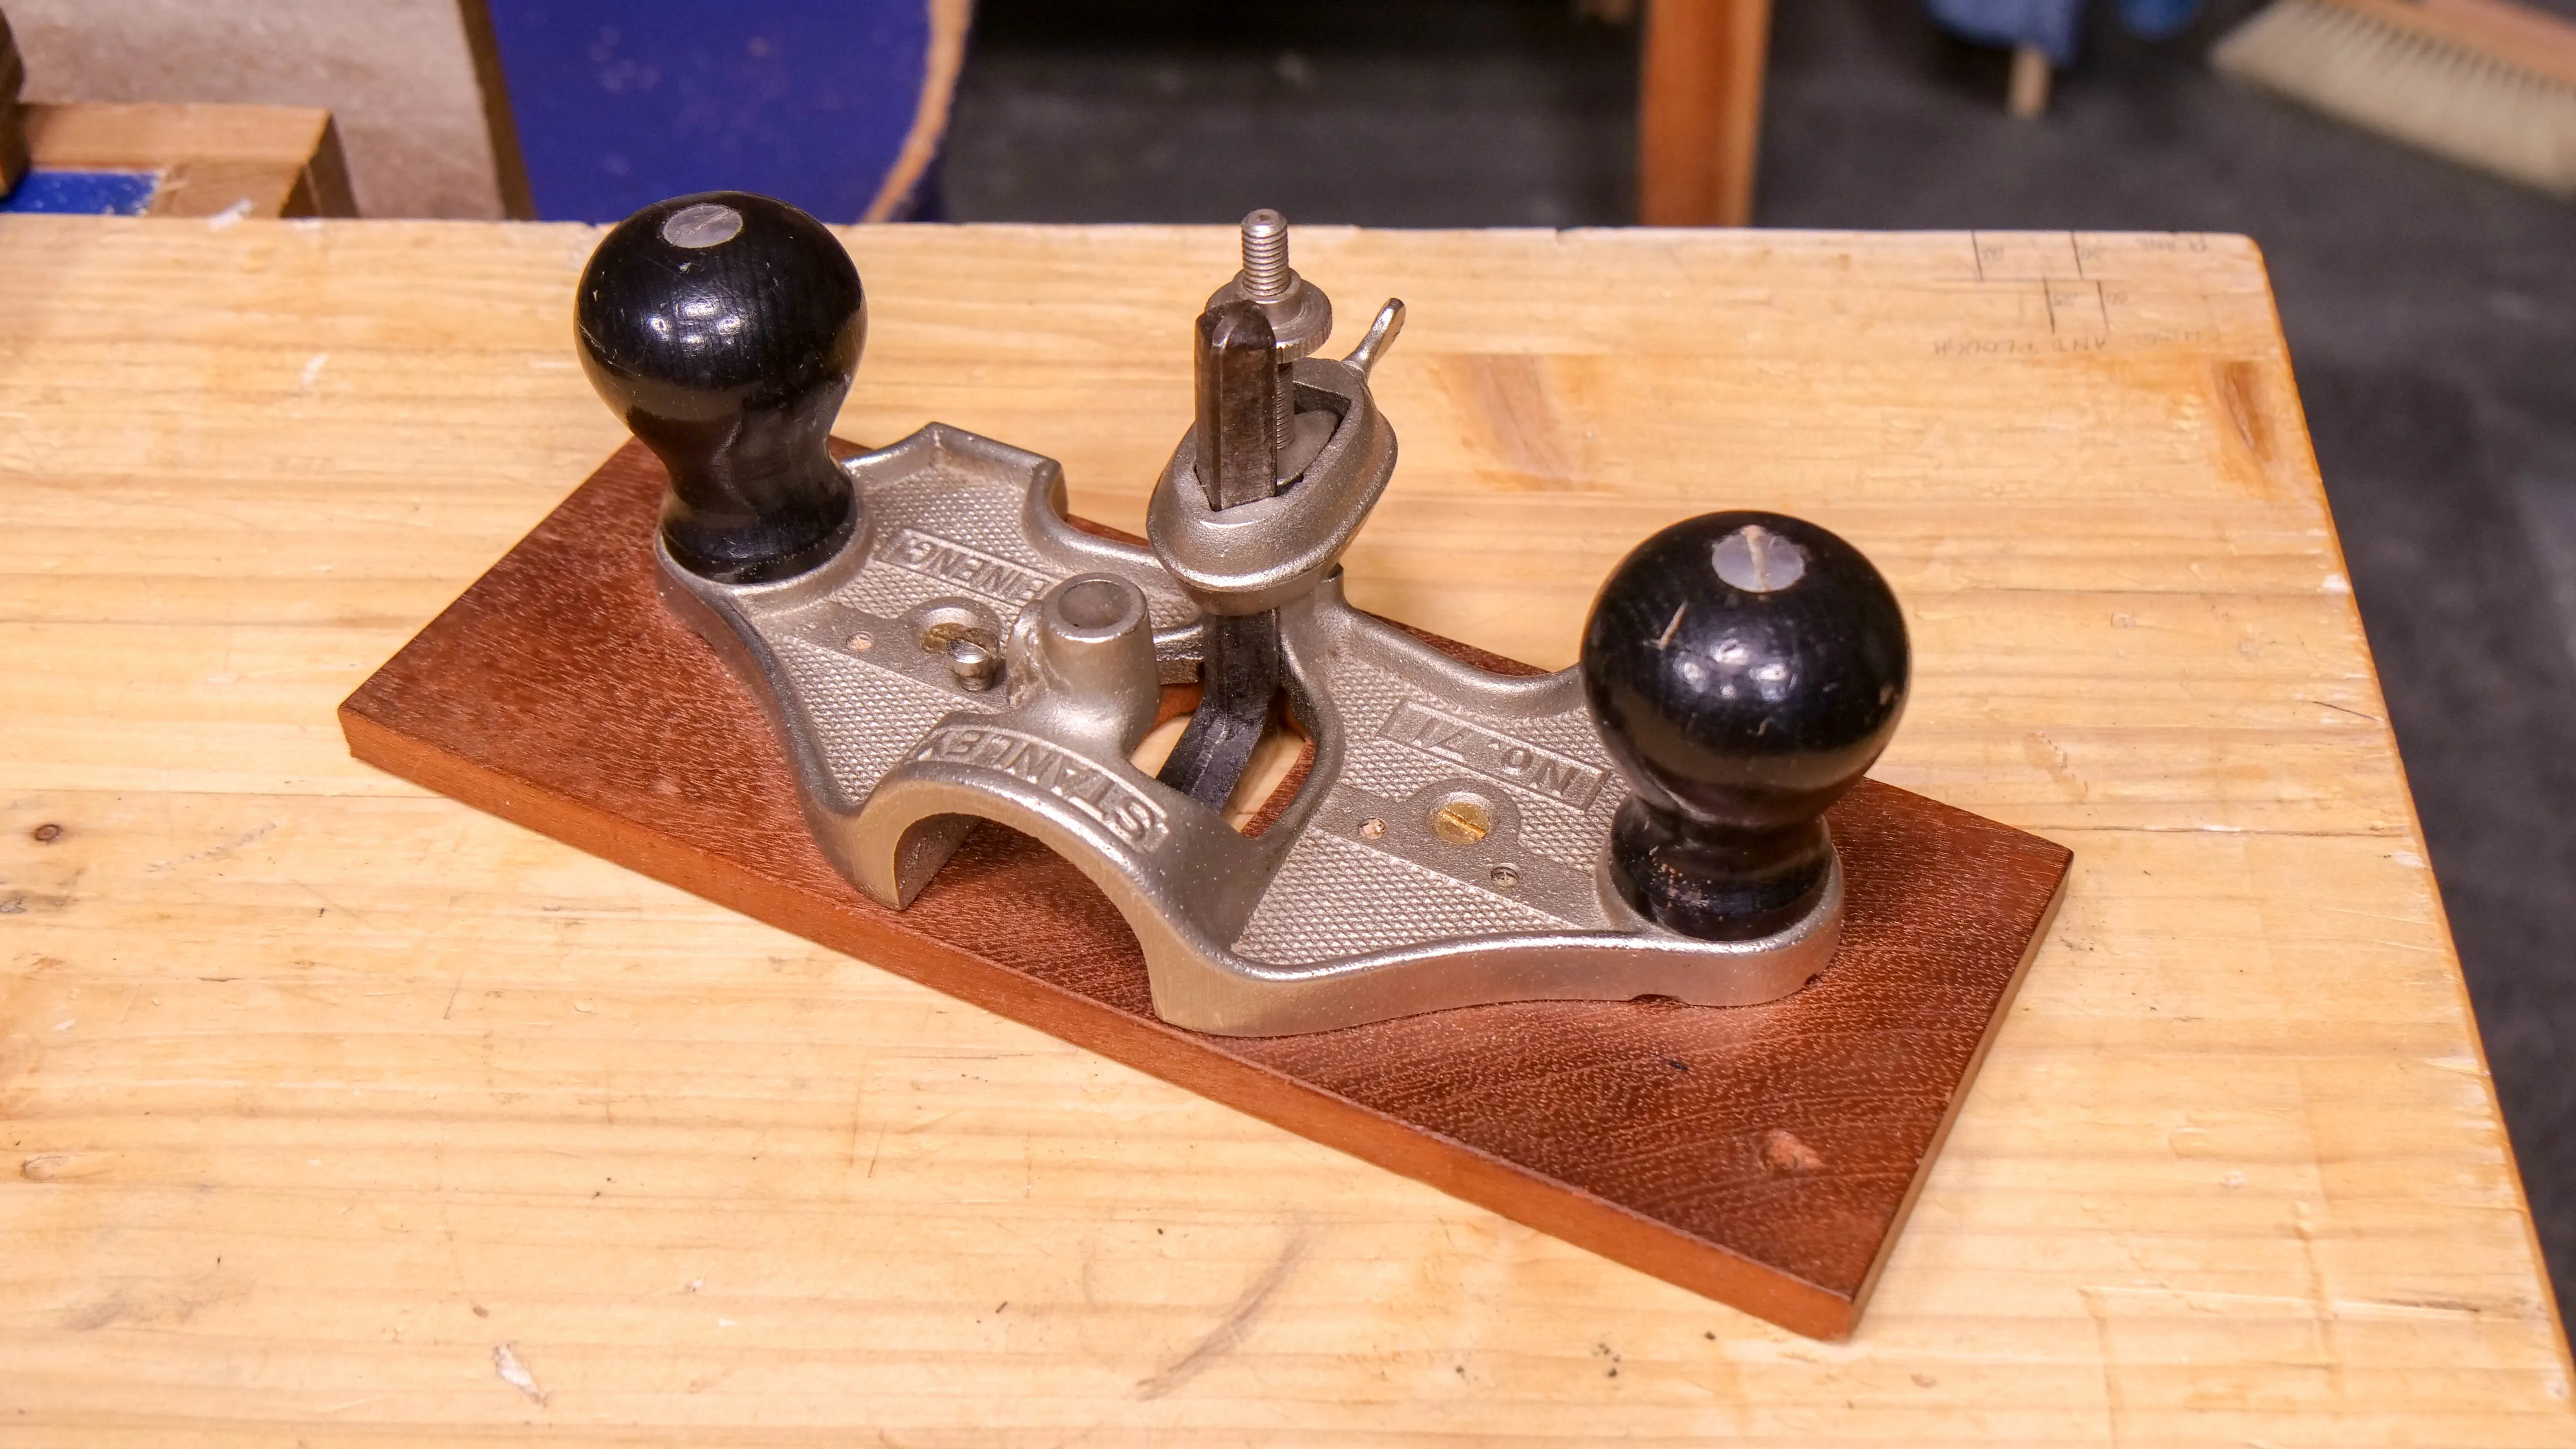
Paul Sellers Router Plane Kit
This page covers the ins and outs of working with a standard router plane. In order to provide a more affordable alternative, without compromising on utility and effectiveness, Paul has come up with his own Router Plane Kit. You can learn more about the kit, and the router plane that Paul now uses every day, here.
Setting Up
Before you use your router plane, it is important to check that the leading edge of the cutting iron, the fore edge, is parallel with the actual sole of the plane. It may need to be corrected, flattened and polished before use. (Paul sometimes refers to this process as initialising.) This process will usually only need to be done once (as long as future sharpening is consistent) and may not even need much work if the plane has been purchased brand new. Place the cutting iron into the body of the router plane and adjust the cutting iron until it is barely protruding beyond the sole.
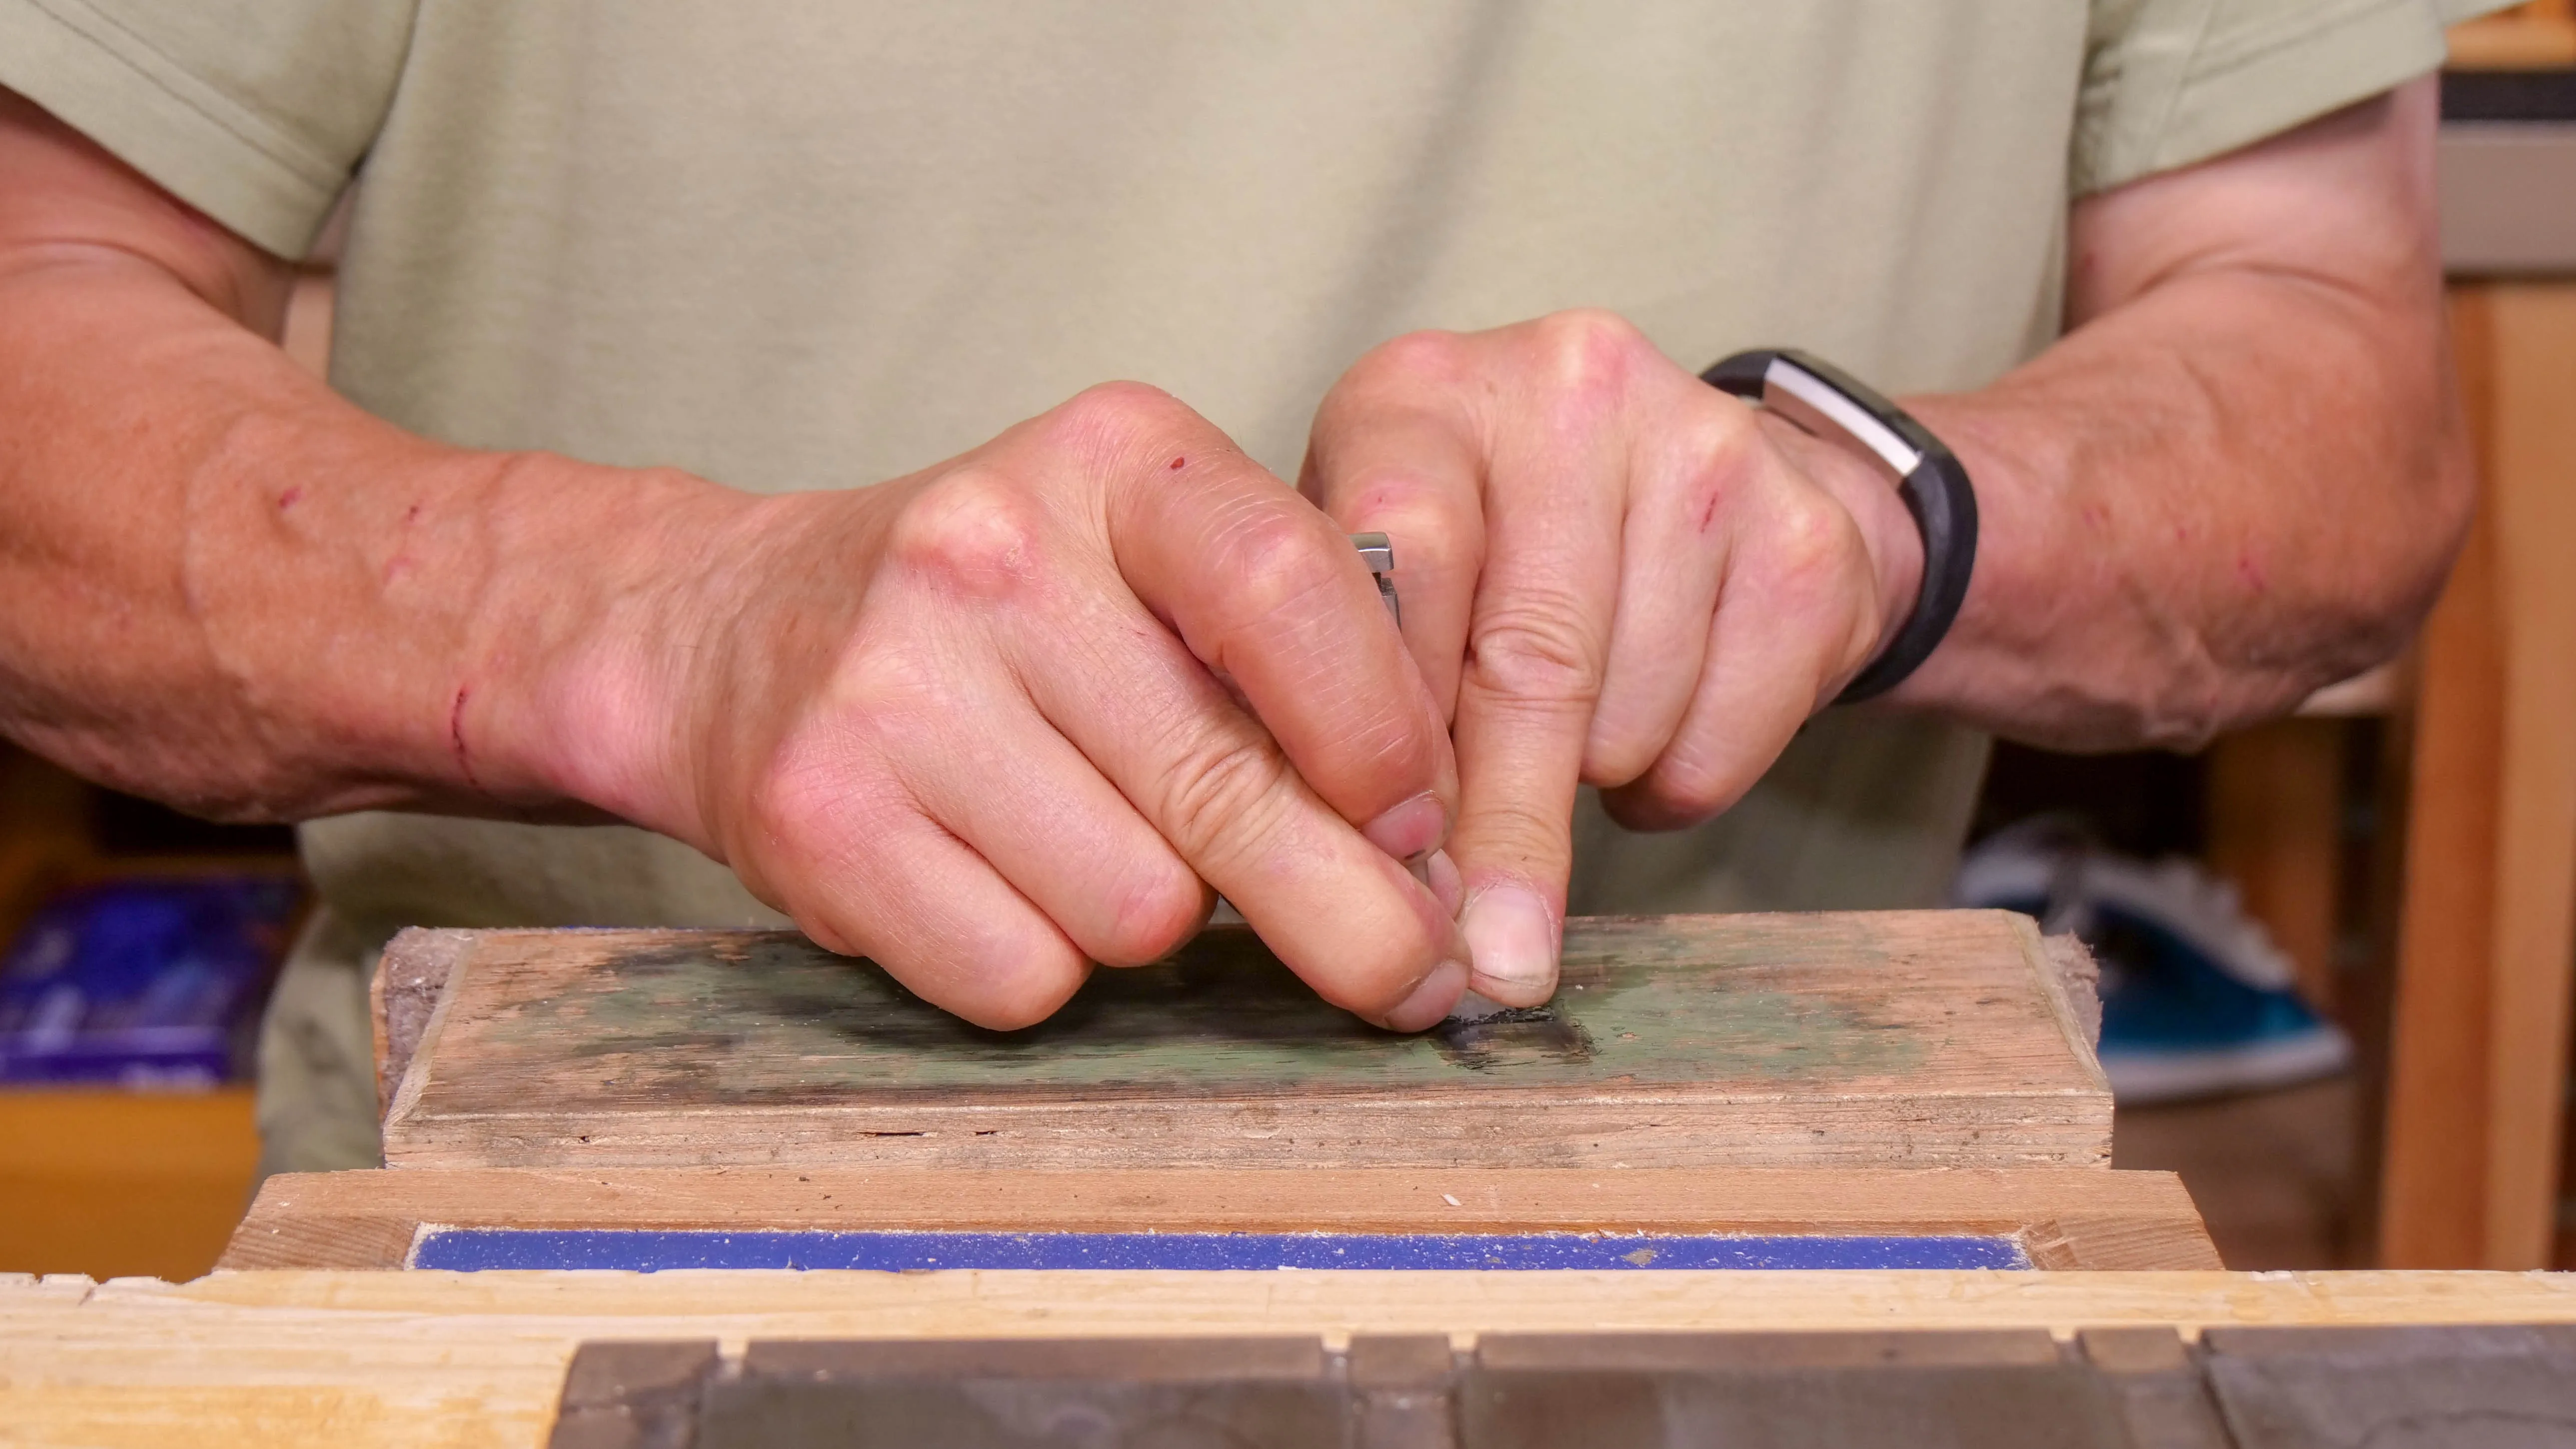
Place the router plane on the finest grit diamond plate and rub back and forth lightly two or three times. Check the underside of the cutting iron to see where the most material has been abraded away at the cutting edge. You will be able to tell as the newly abraded surfaces will appear shiny.
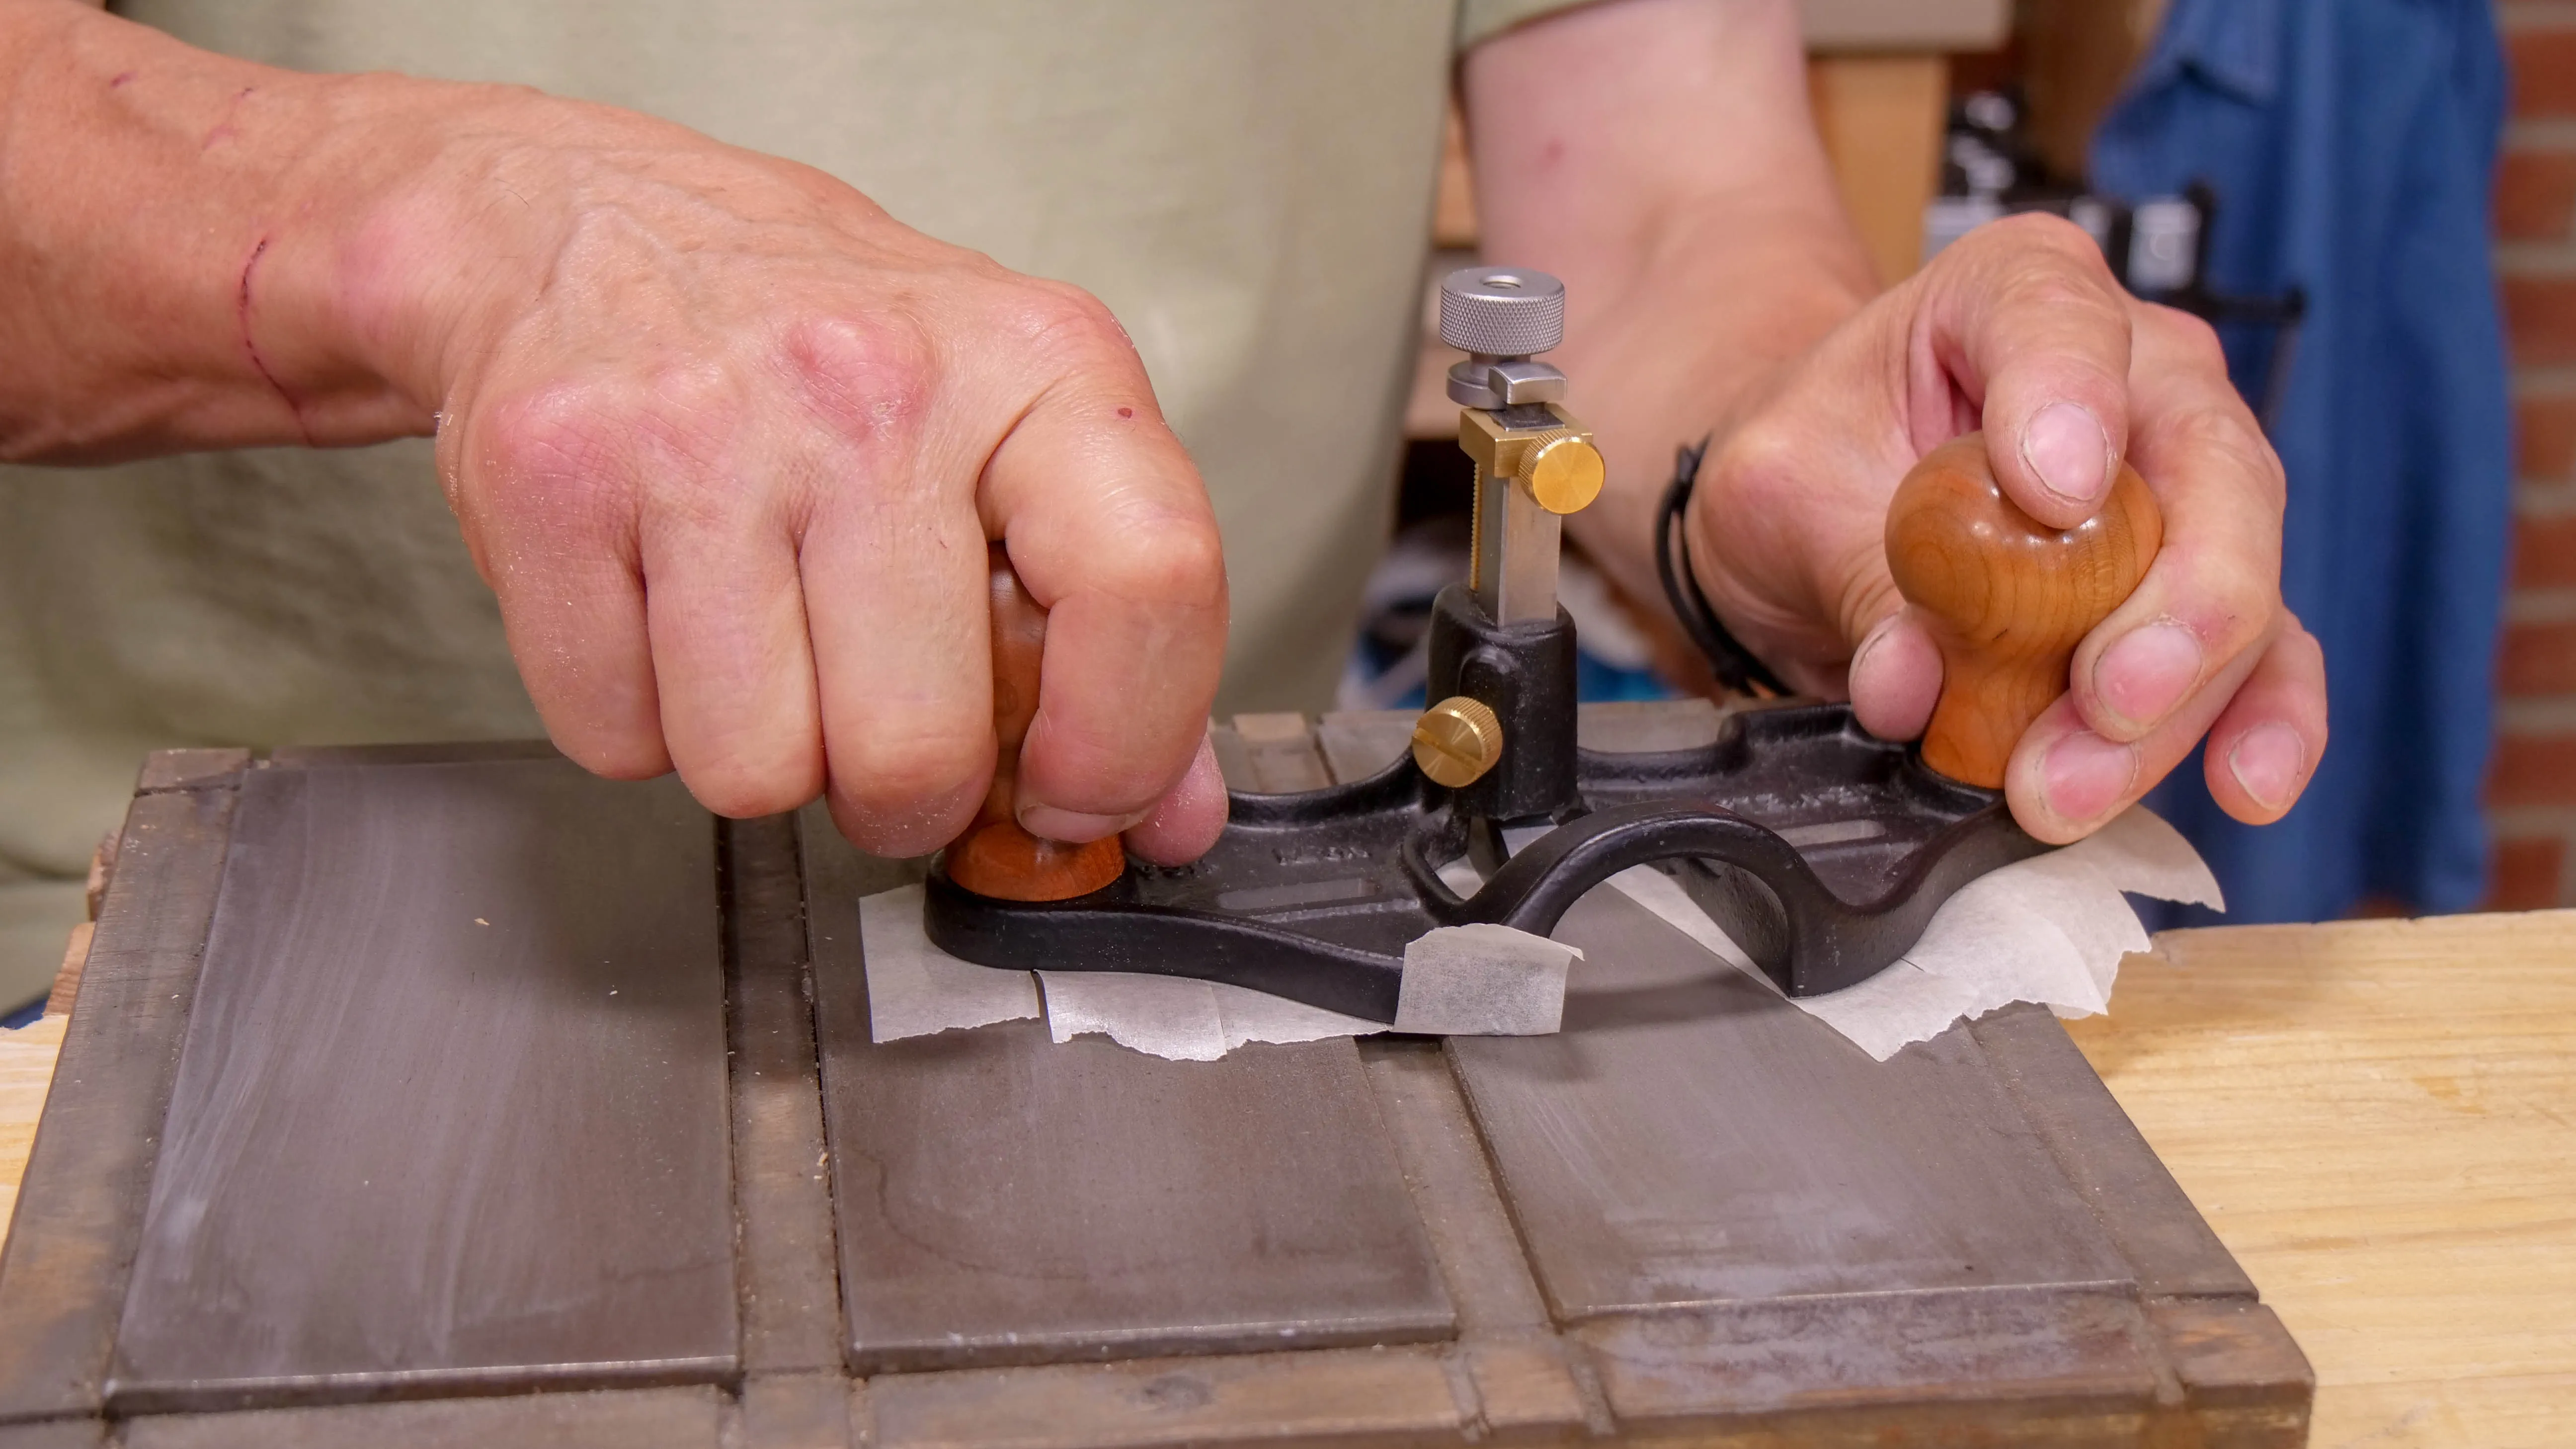
Remove the cutting iron from the body and, much like setting up a chisel, place the underside of the cutting iron flat on the sharpening stones. If the newly abraded surface is parallel to the cutting edge, the edge is in line. Use even pressure on each level of coarseness, until the whole of the underside of the cutting iron is shiny, not just the cutting edge. If the newly abraded surface is not parallel and is wider on one side, this means that one side is lower when housed in the plane and clamped. You will need to remove the cutting iron from the body of the router plane and correct the underside on the sharpening stones. To do this, apply more pressure to the lower side (in our case it was the right side of the blade), until the opposite side starts to abrade away and you are left with a parallel abraded line on the cutting edge. This means the cutting iron has been corrected. Continue to abrade away on the diamond stones until the whole of the underside is consistently flat to the new edge and shiny overall.
Finish abrading by applying buffing compound to the wooden face of the strop to polish the underside. Approximately 30 times is usually sufficient. (Do not use the leather face as this will result in rounding the cutting edge of the cutting iron and the plane will not cut).
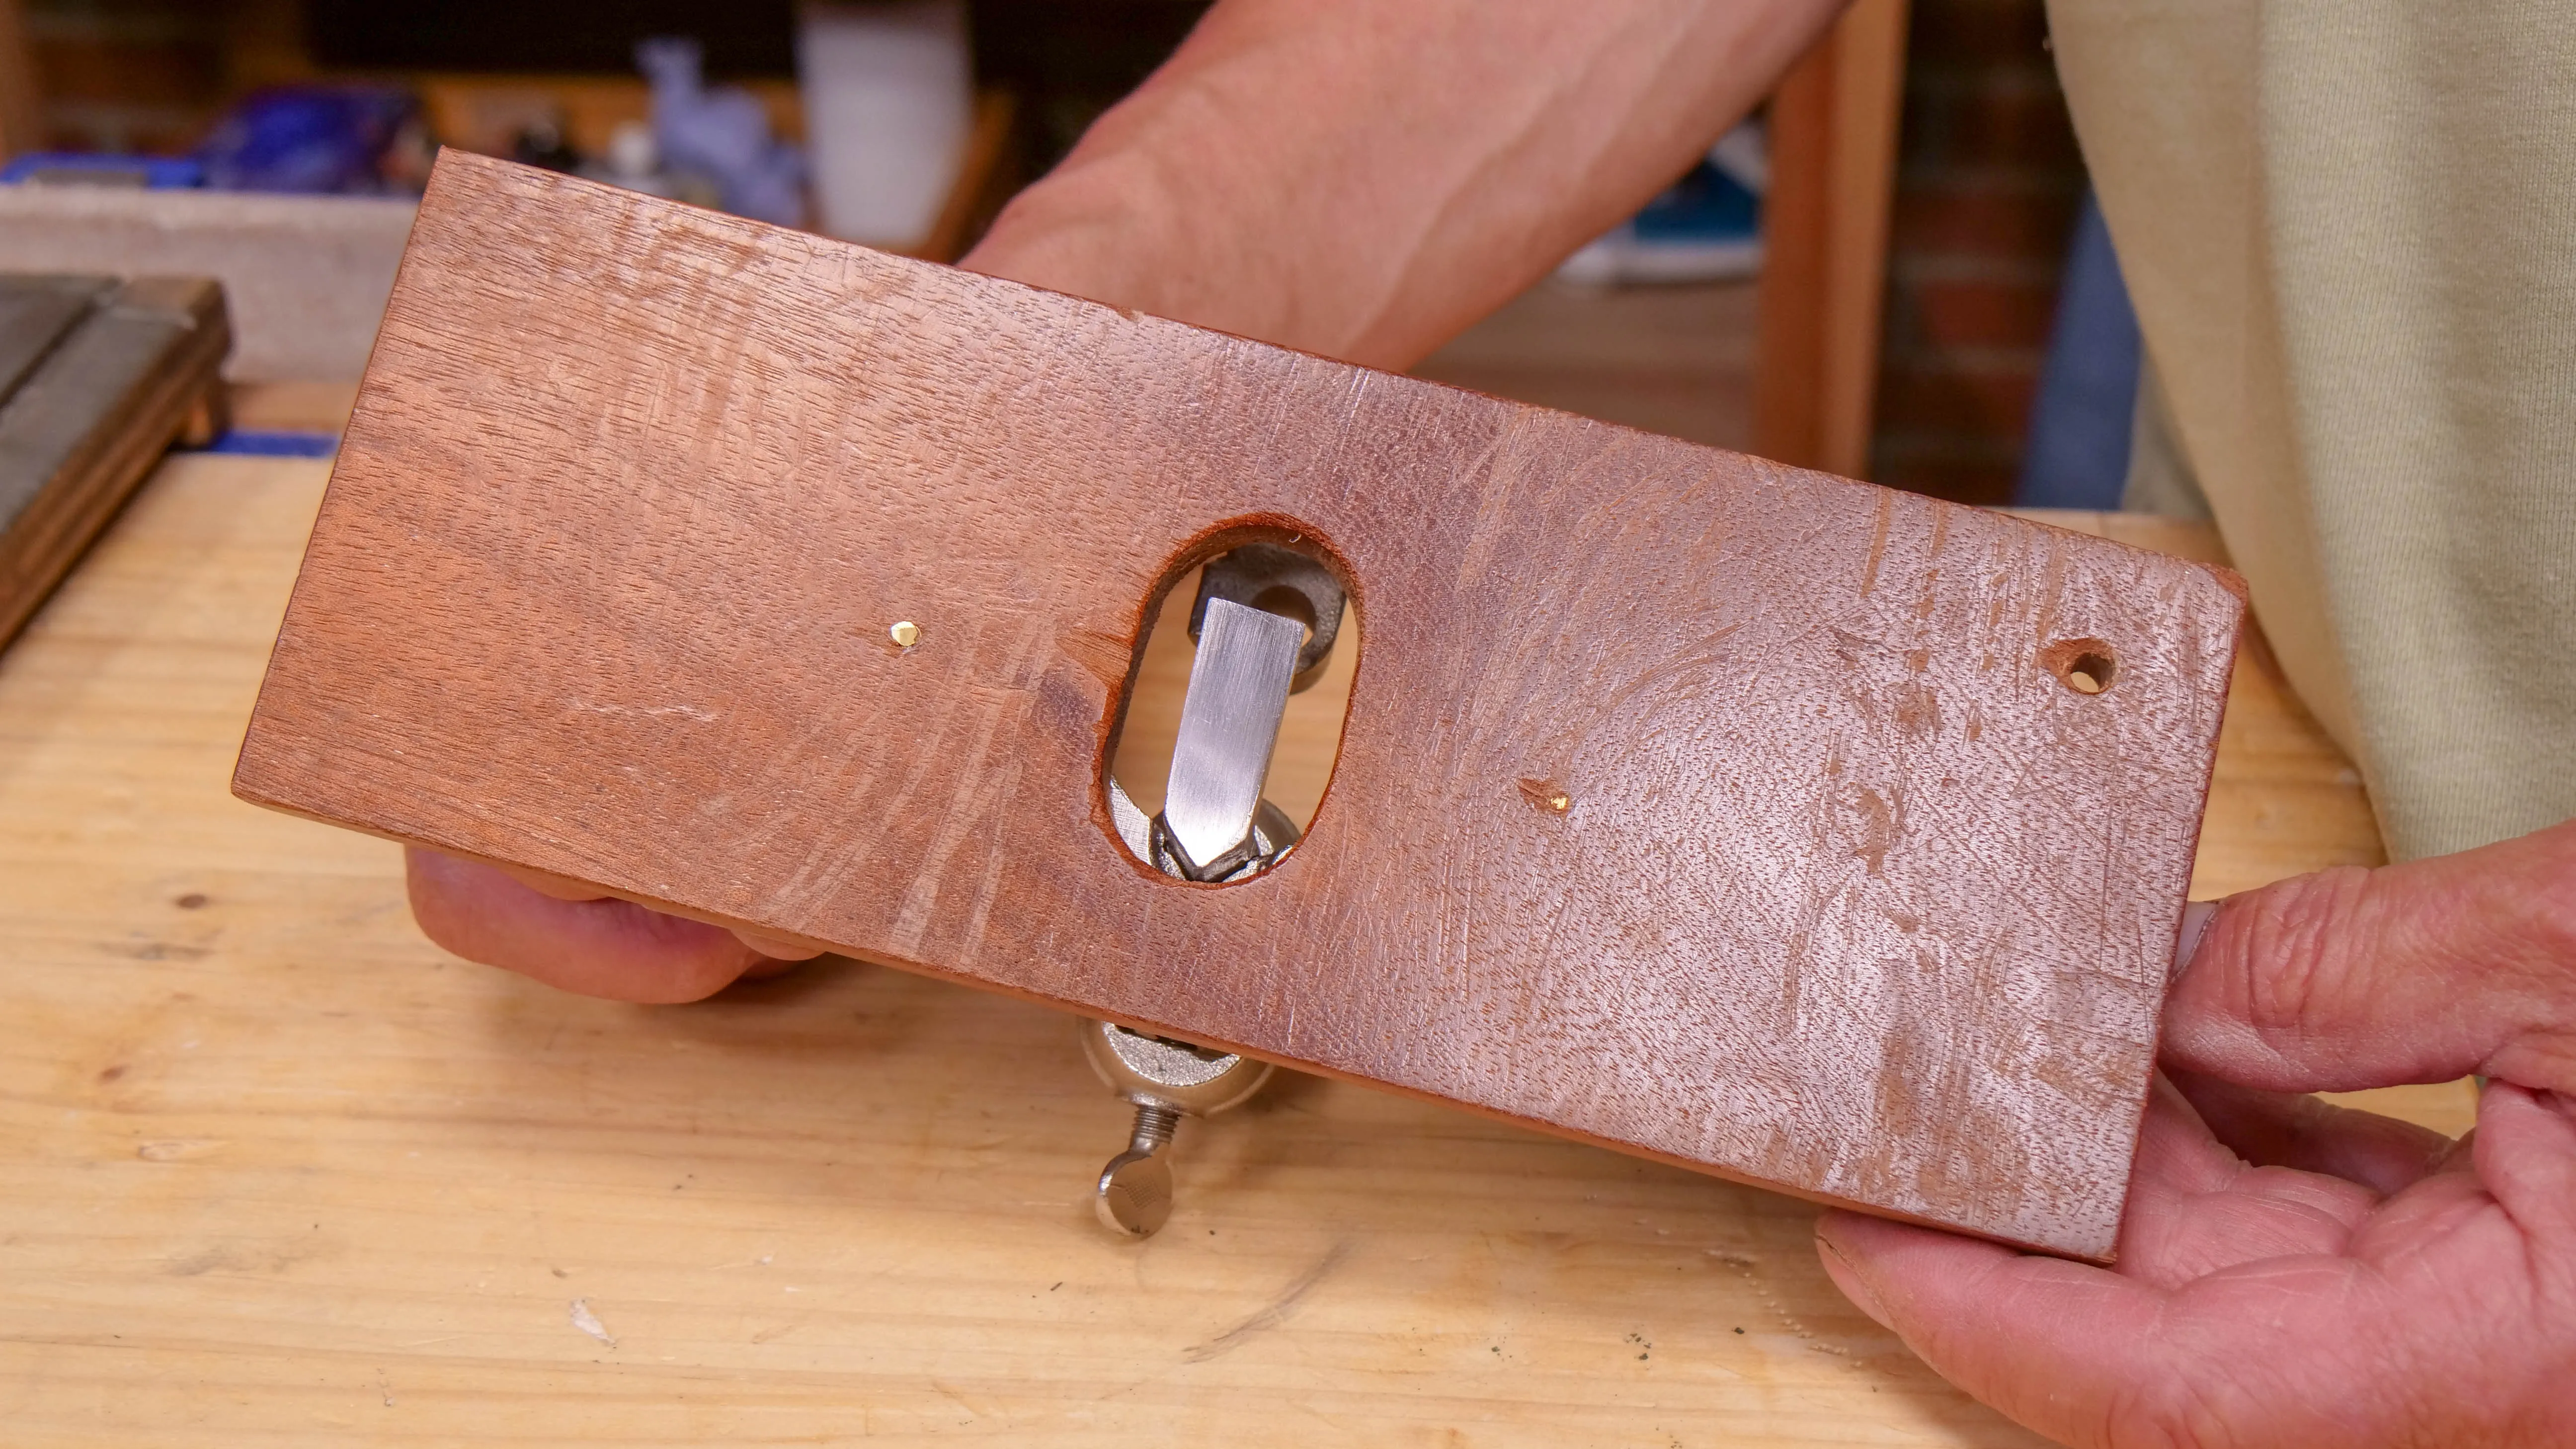
To avoid the metal sole marking your projects, you can add an additional wooden sole which can be removed if needed. You can make this longer than the actual sole, extending the width of the router plane and enabling you to work over larger recess areas. You will need wood that is around ½” (13mm) thick. Use a brace and bit to bore two adjoining 1” (25mm) diameter holes next to each other. Use a rasp to abrade these down to create one elongated hole. This will be where the cutting iron passes through the sole. Screw on the sole using the holes either side of the cutting iron and file the screws so that they sit below the surface of the wood.
Sharpening
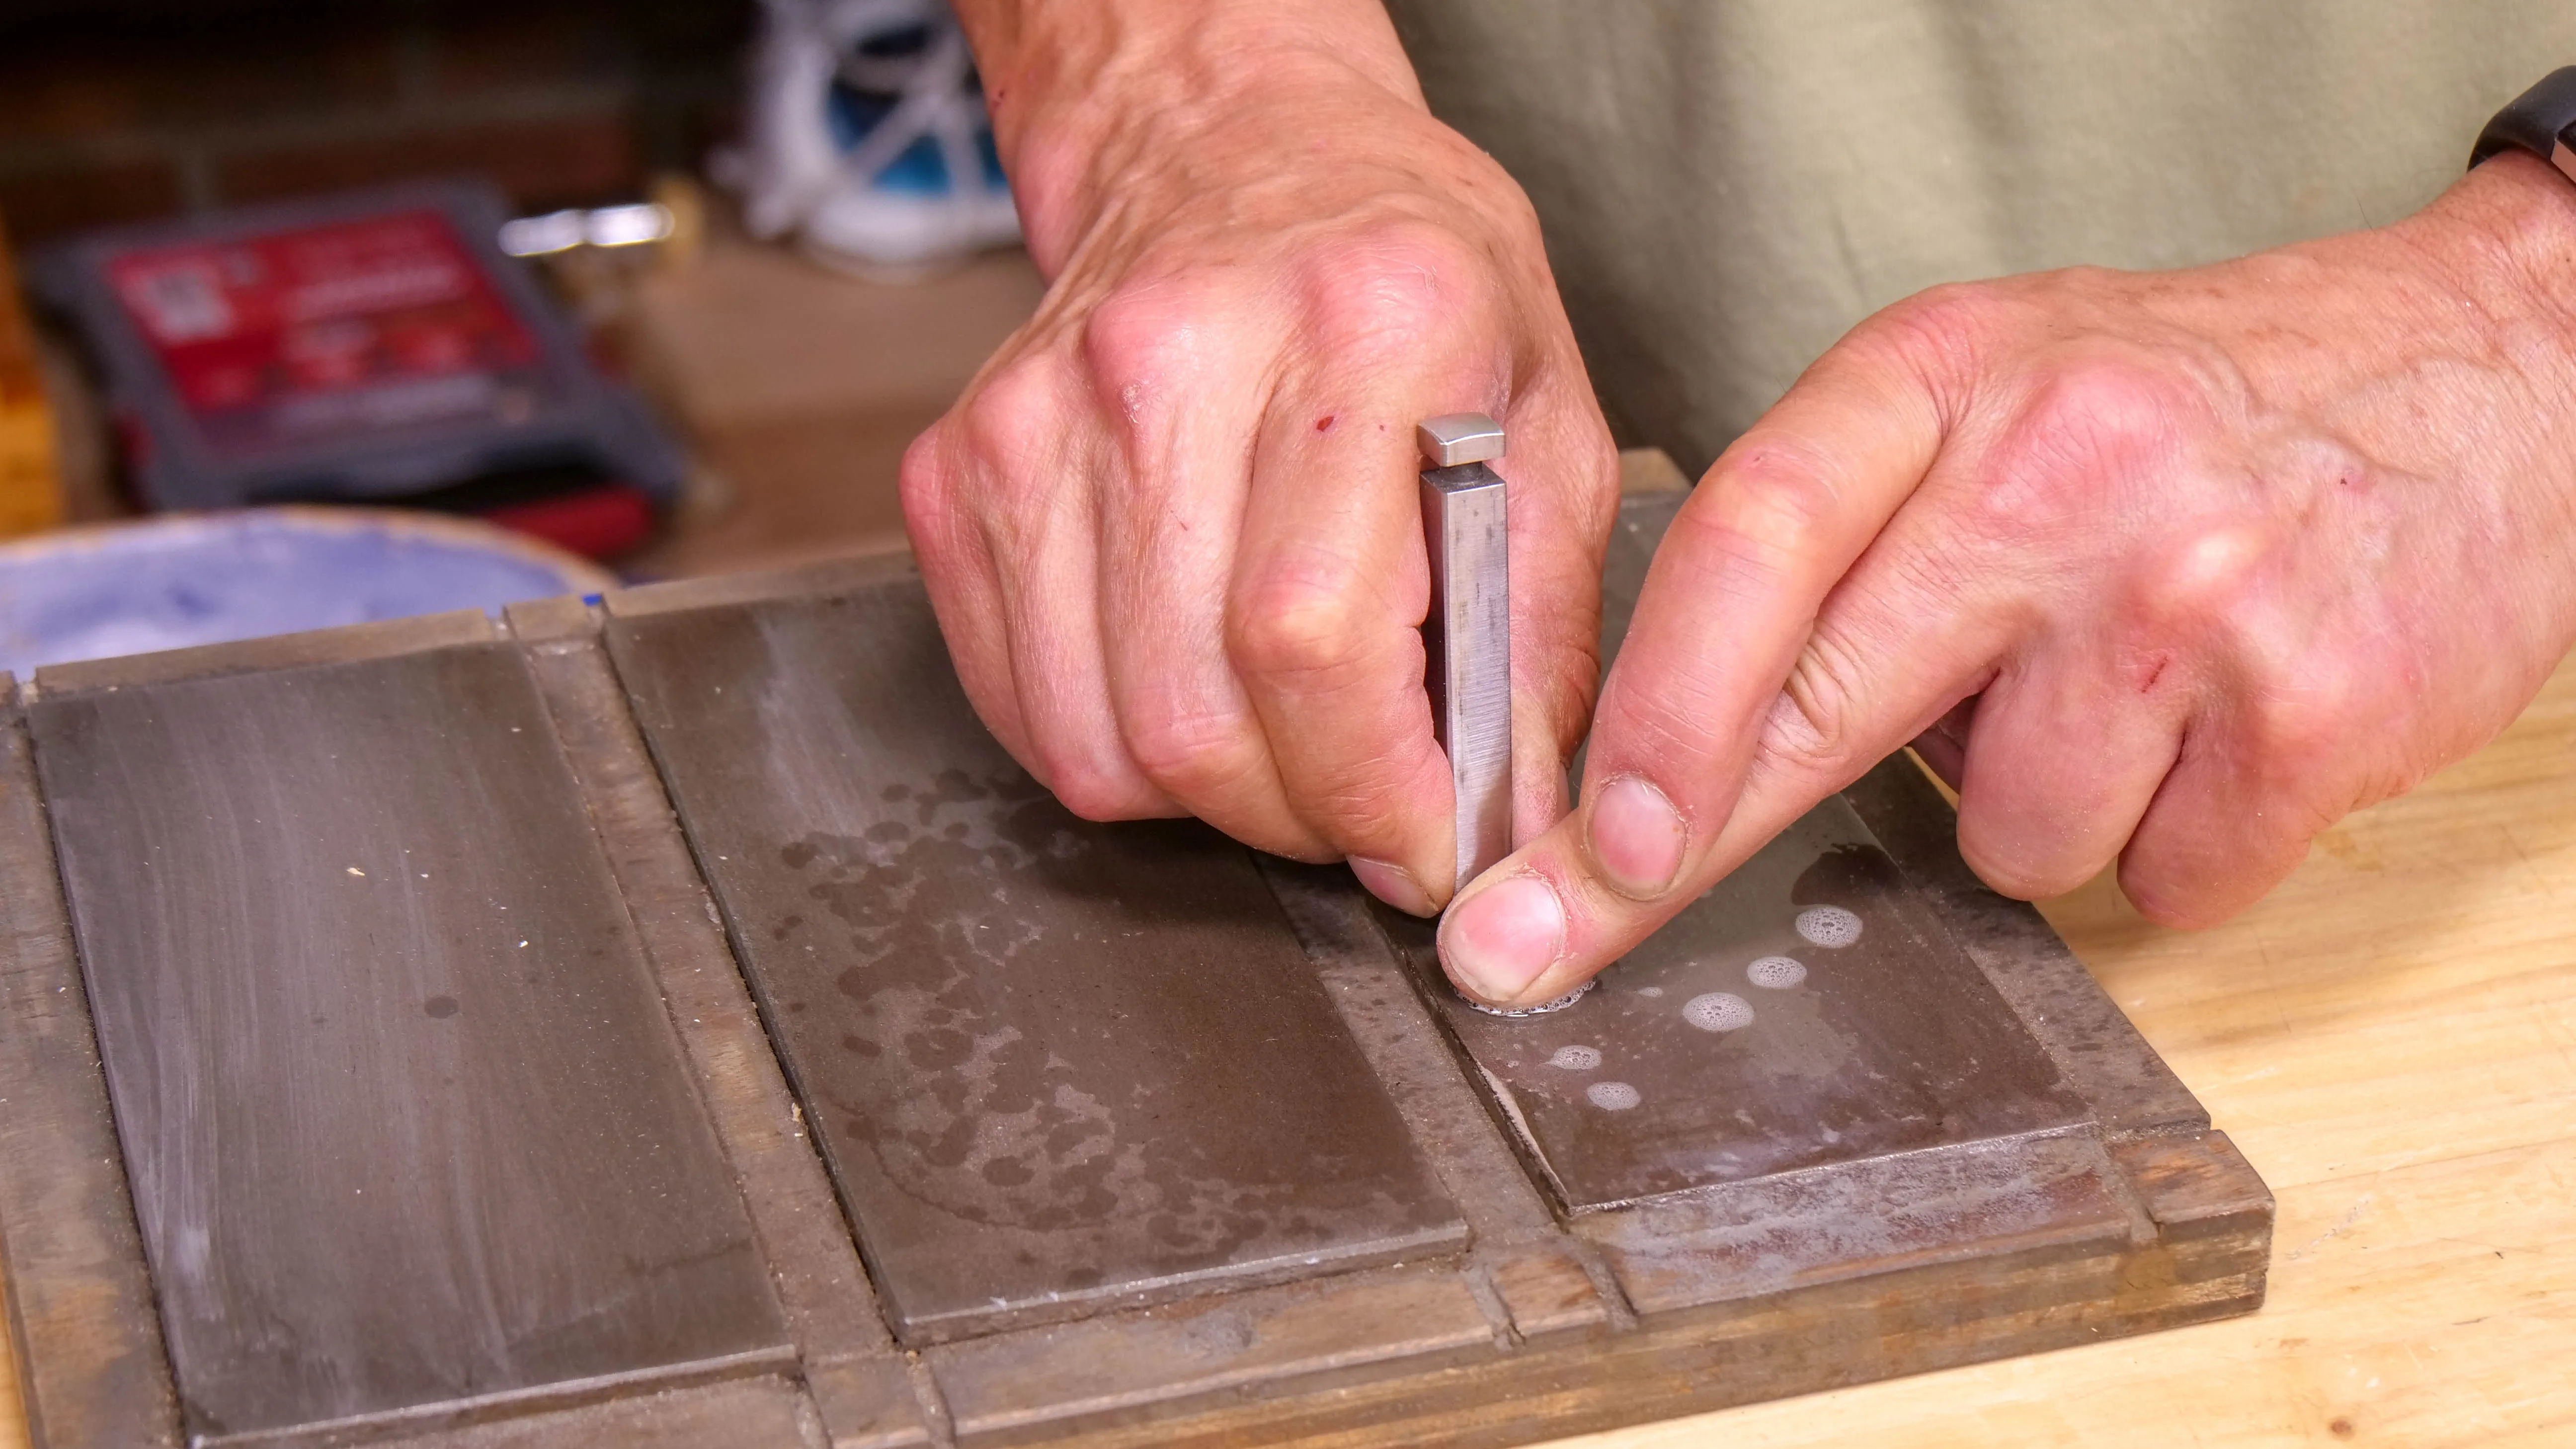
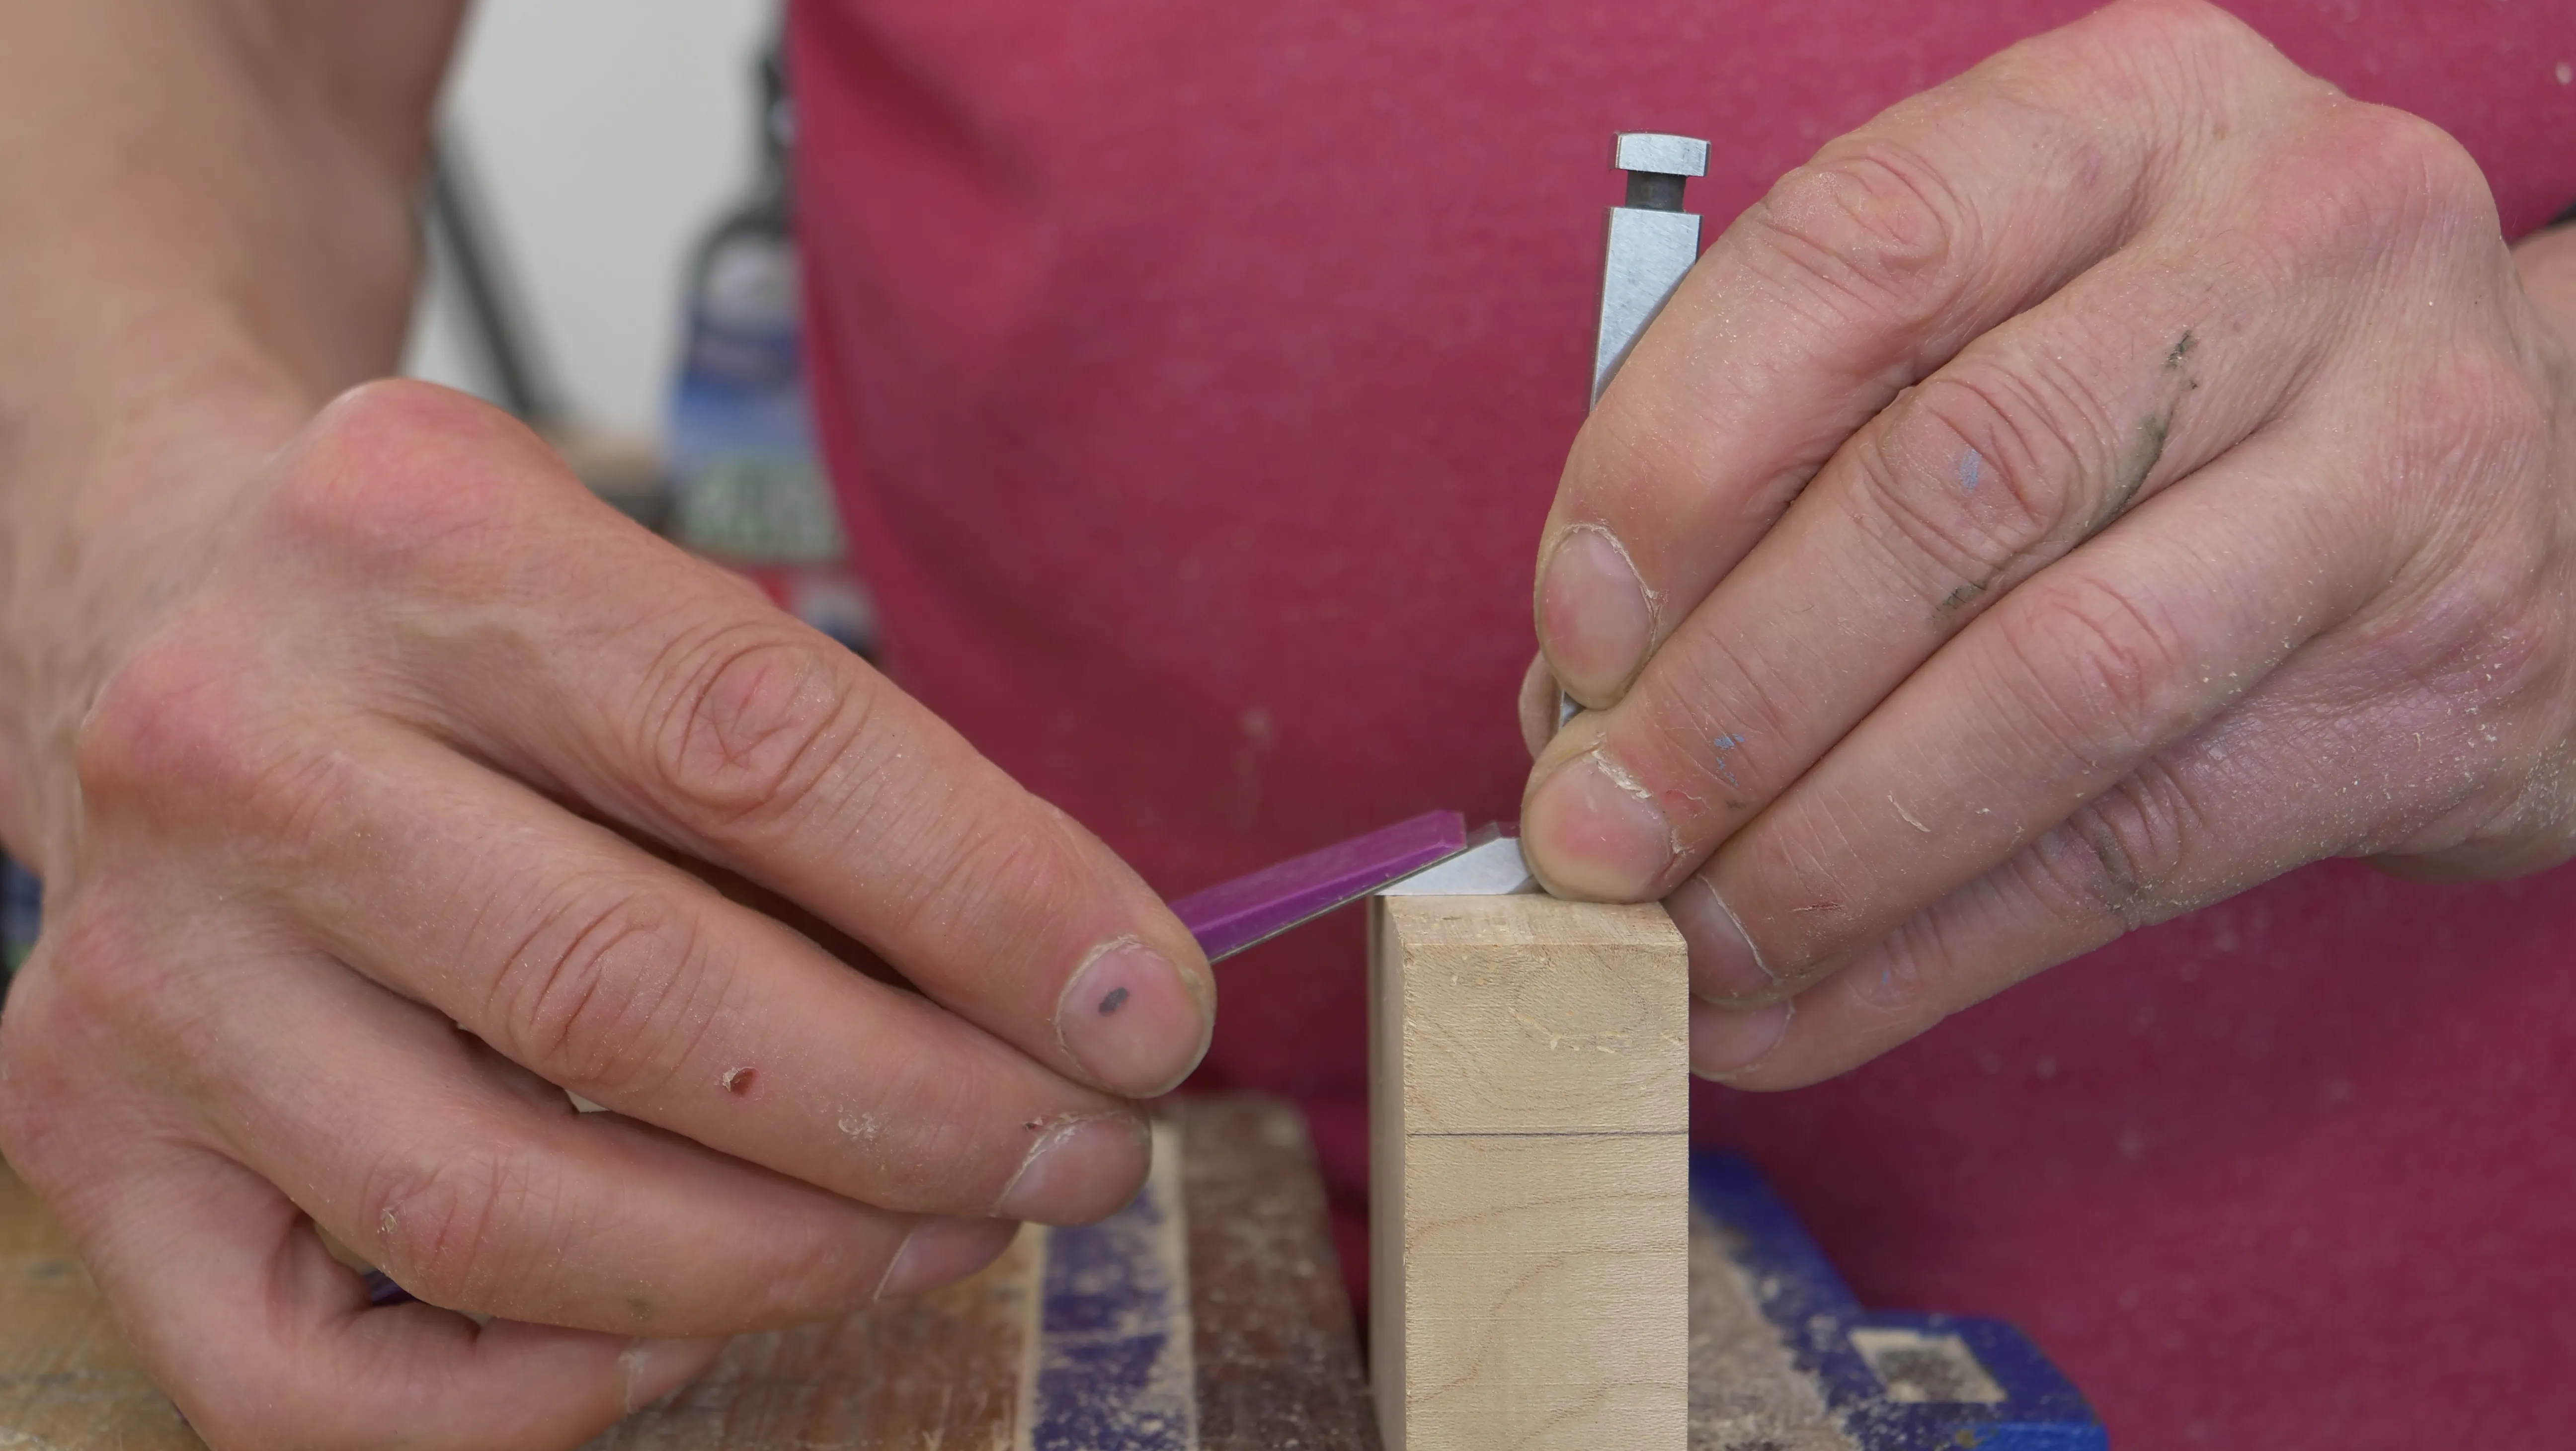
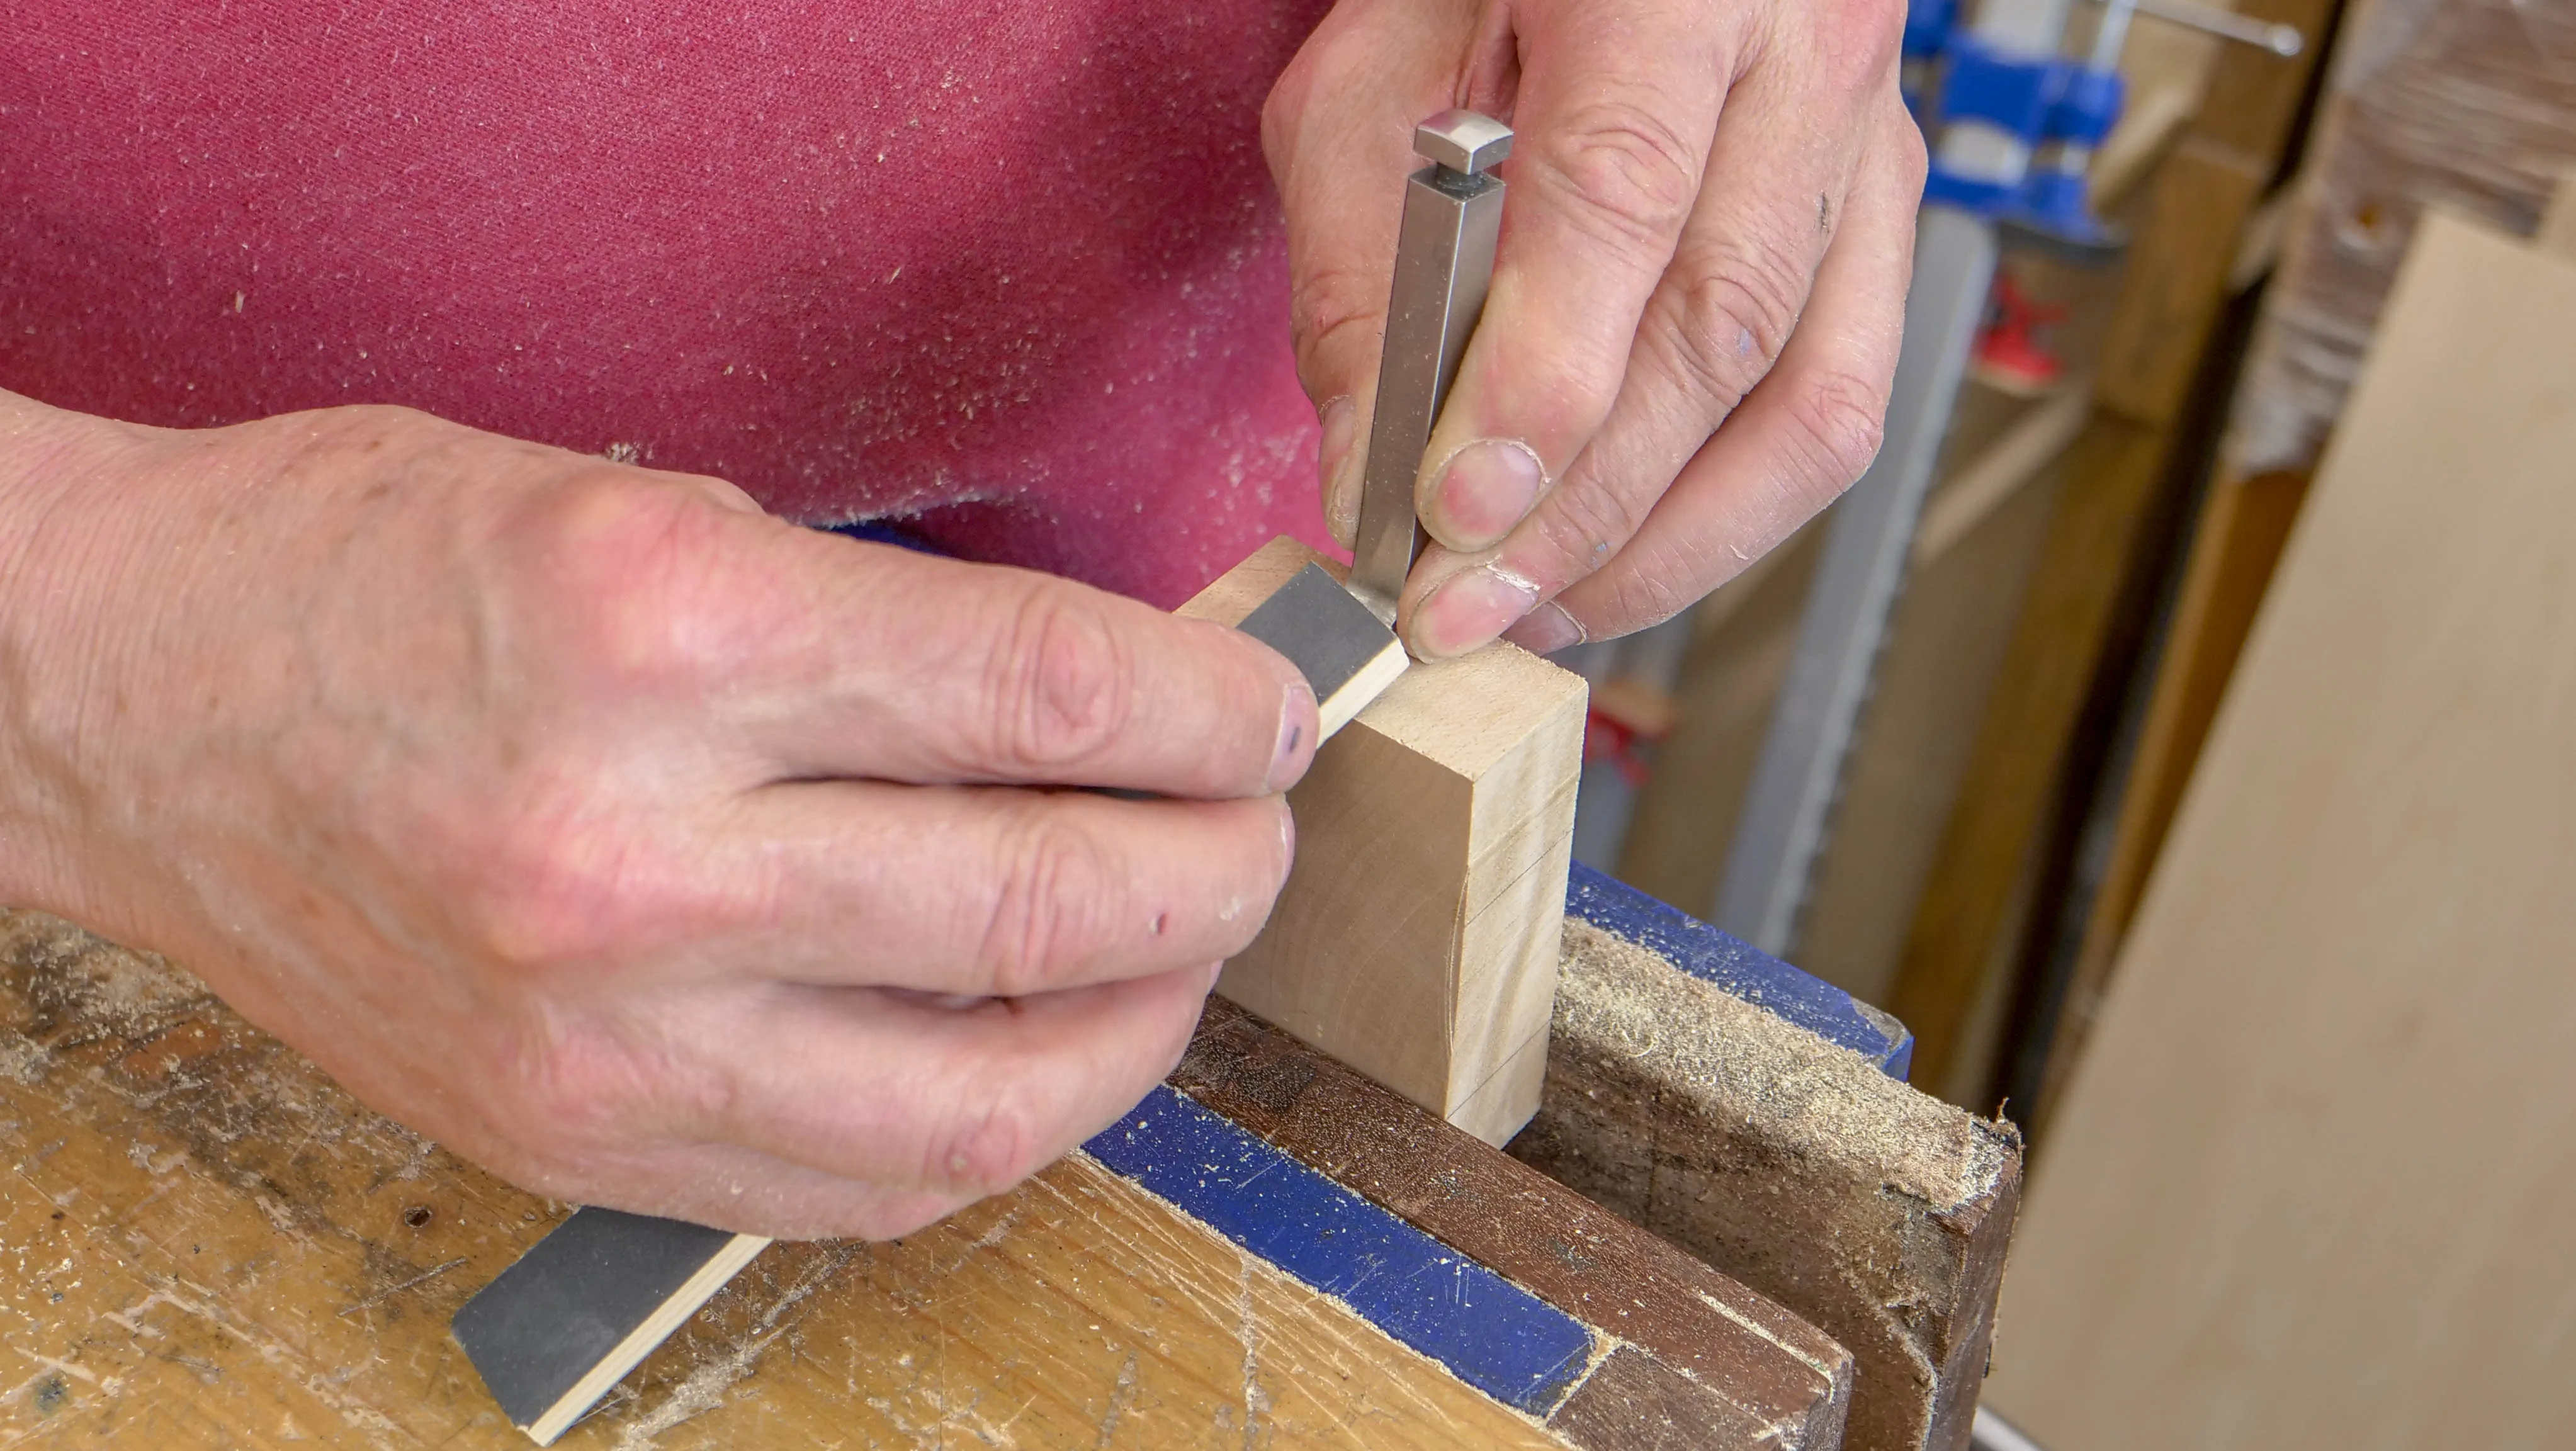
To sharpen the main bevel of the cutting iron, place the bottom of the cutting iron on a block of wood and rest a sharpening paddle on the bevel until it is at the same angle as the bevel on the iron. Make small circular motions moving across the full bevel. Then move onto the next grade paddle, until the bevel near the cutting edge is shiny. Paul uses the EZE-LAP purple (400 grit) and red (600 grit) paddles.
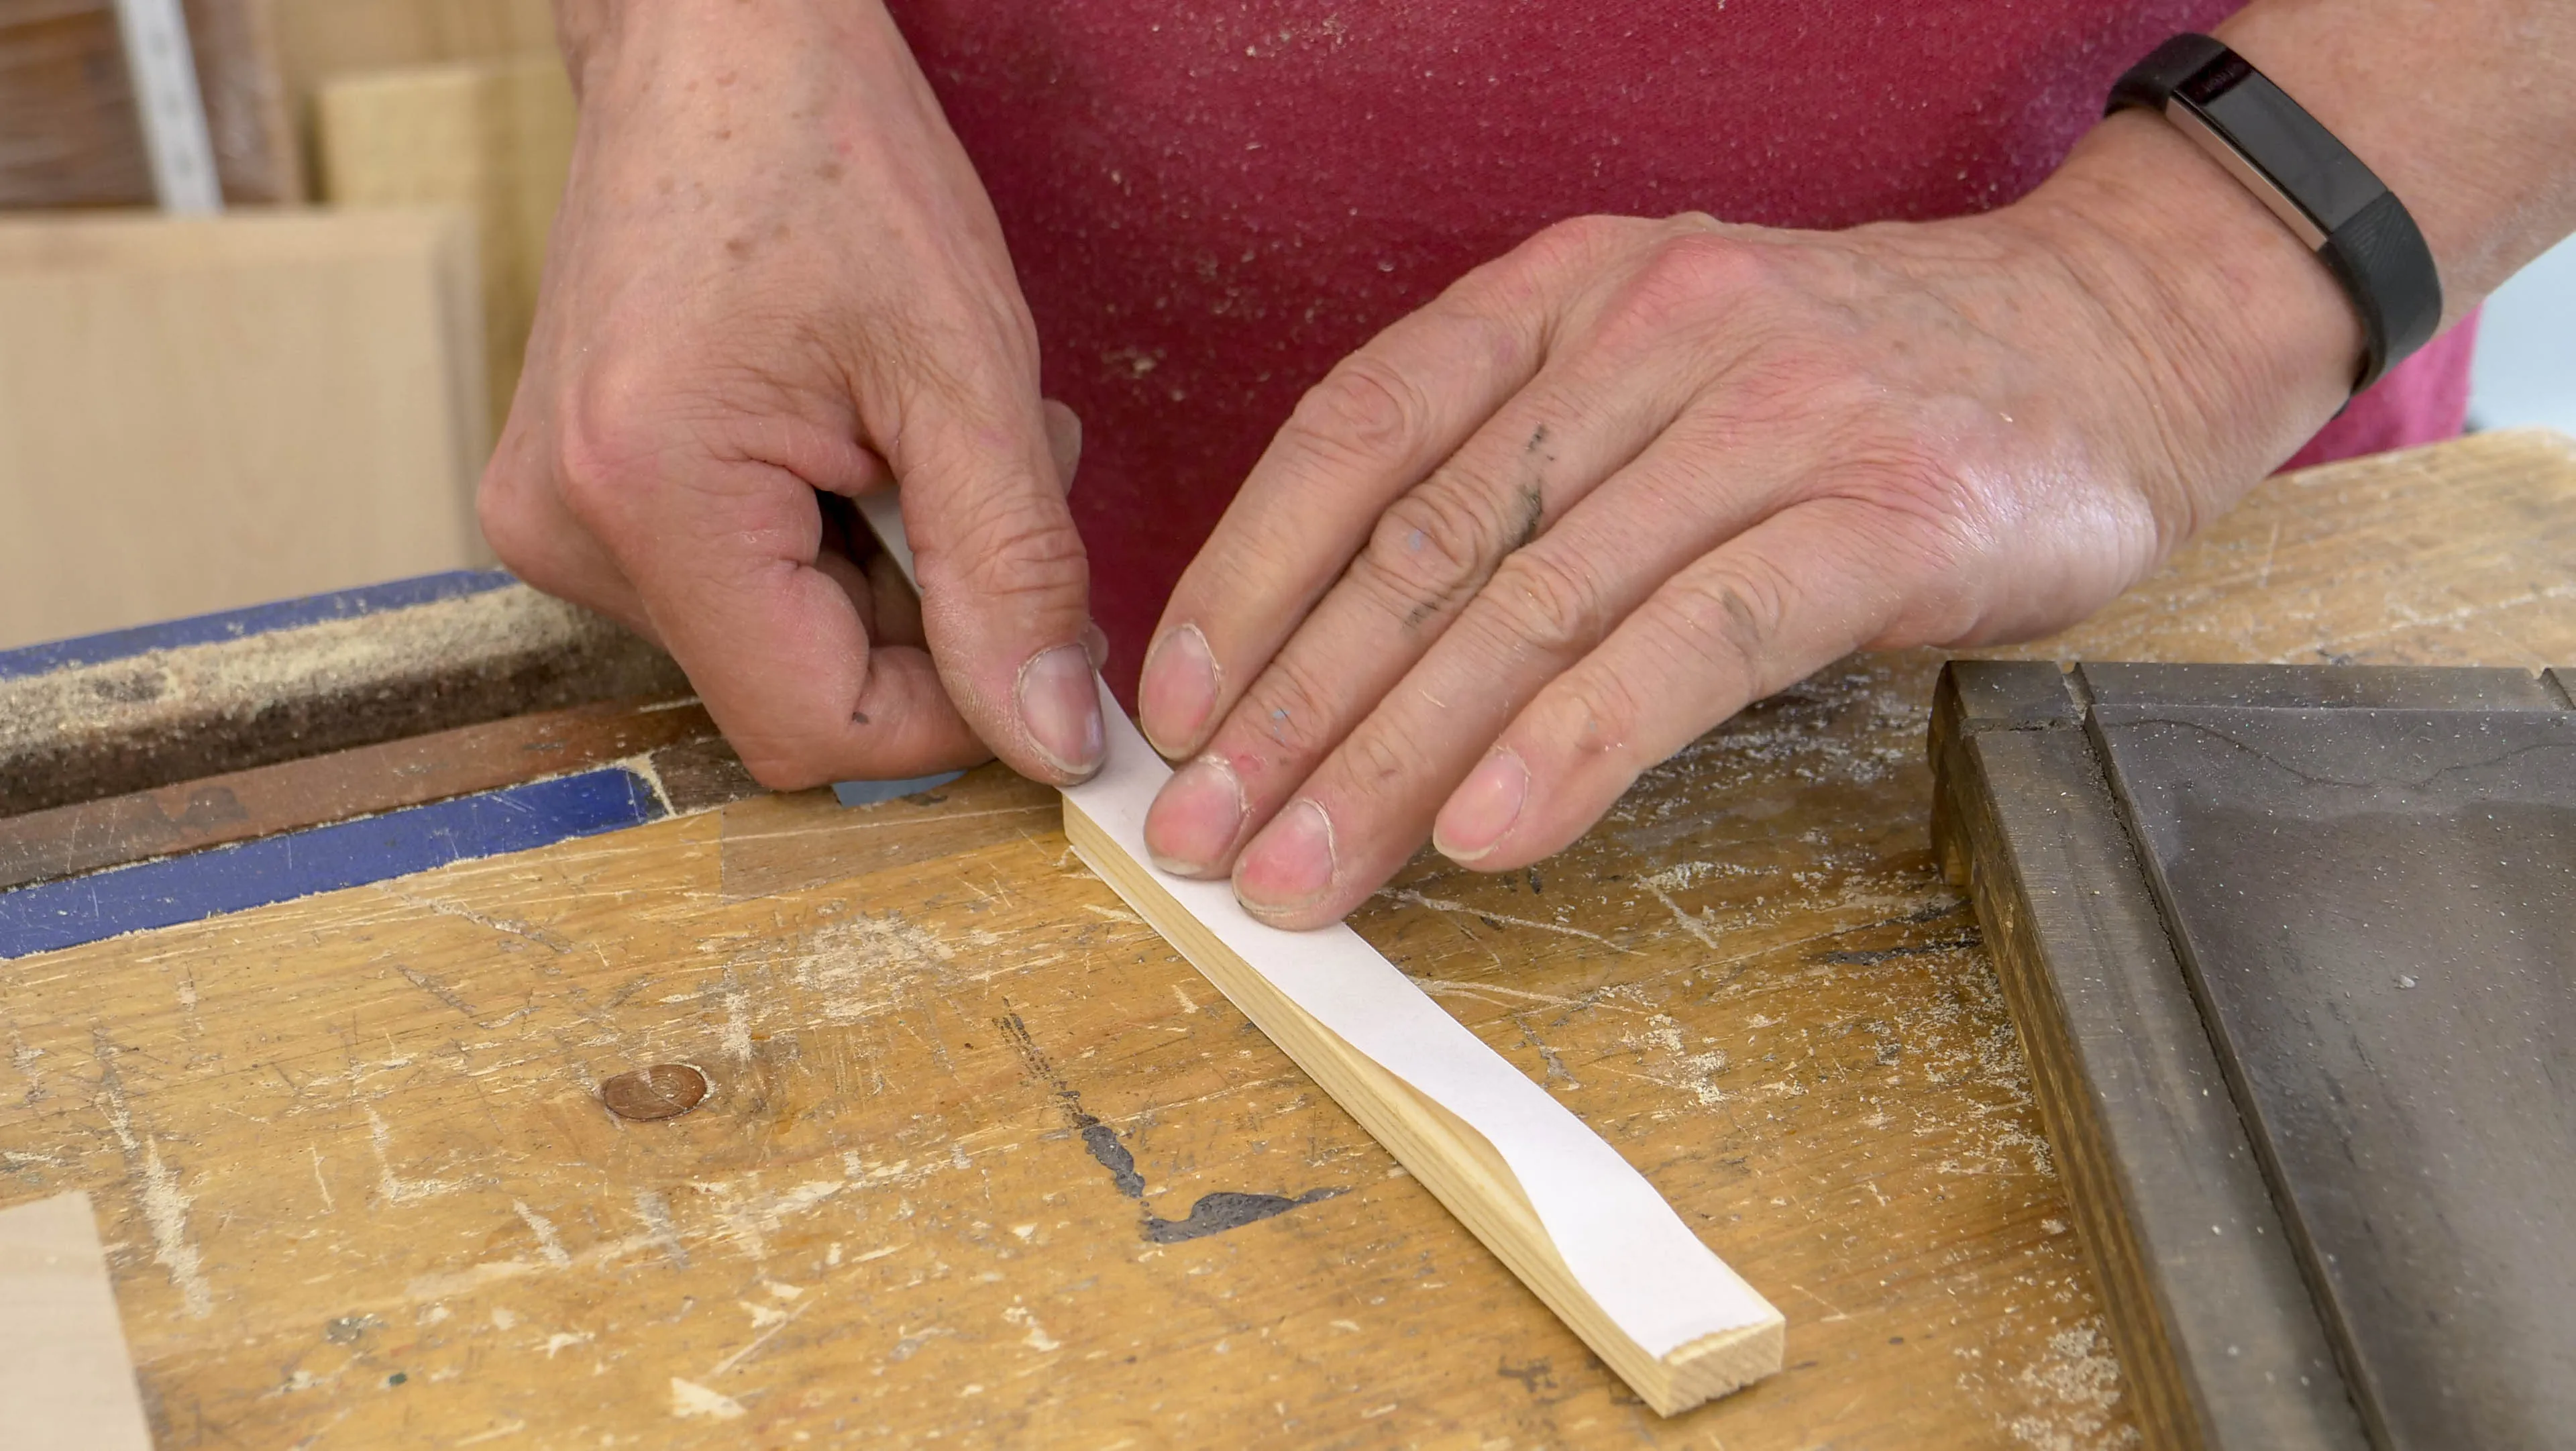
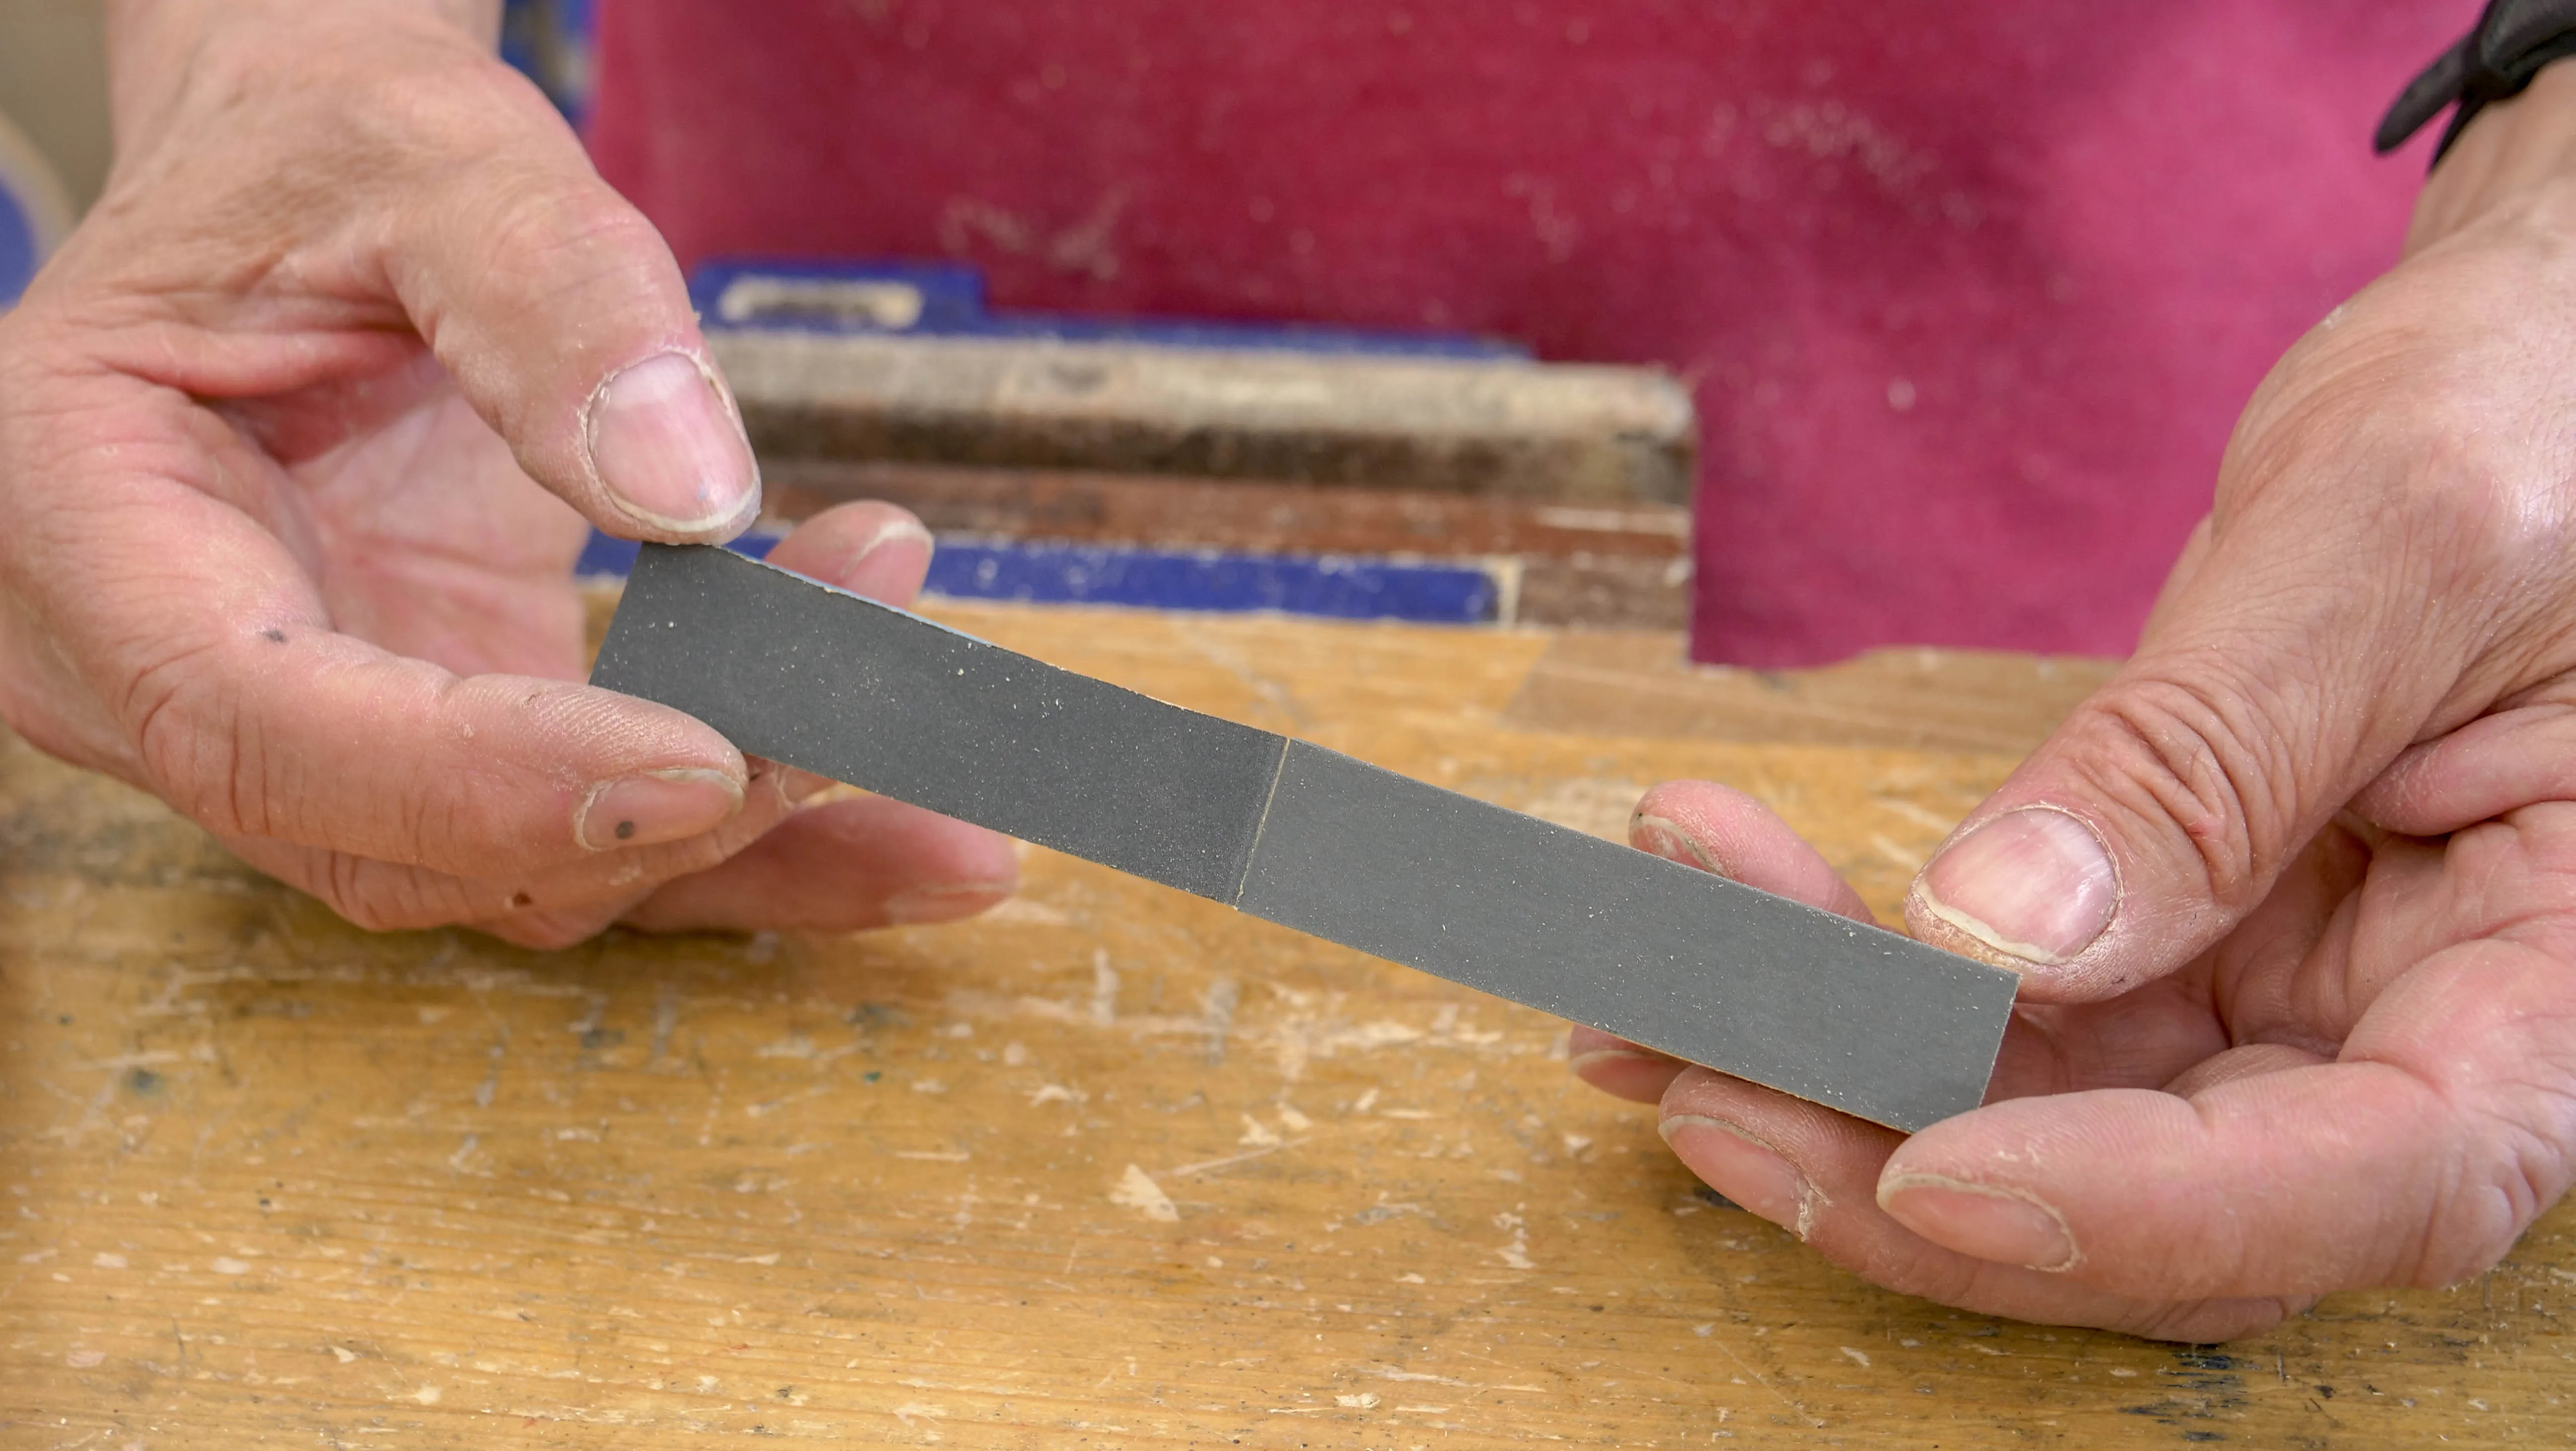
If you don’t have sharpening paddles, you can make one by using double sided tape to stick different grades of abrasive paper to each side of a ¼” by ¾” by 6” piece wood. Paul recommends 250-600 grit.
Making your own sharpening paddle gallery:
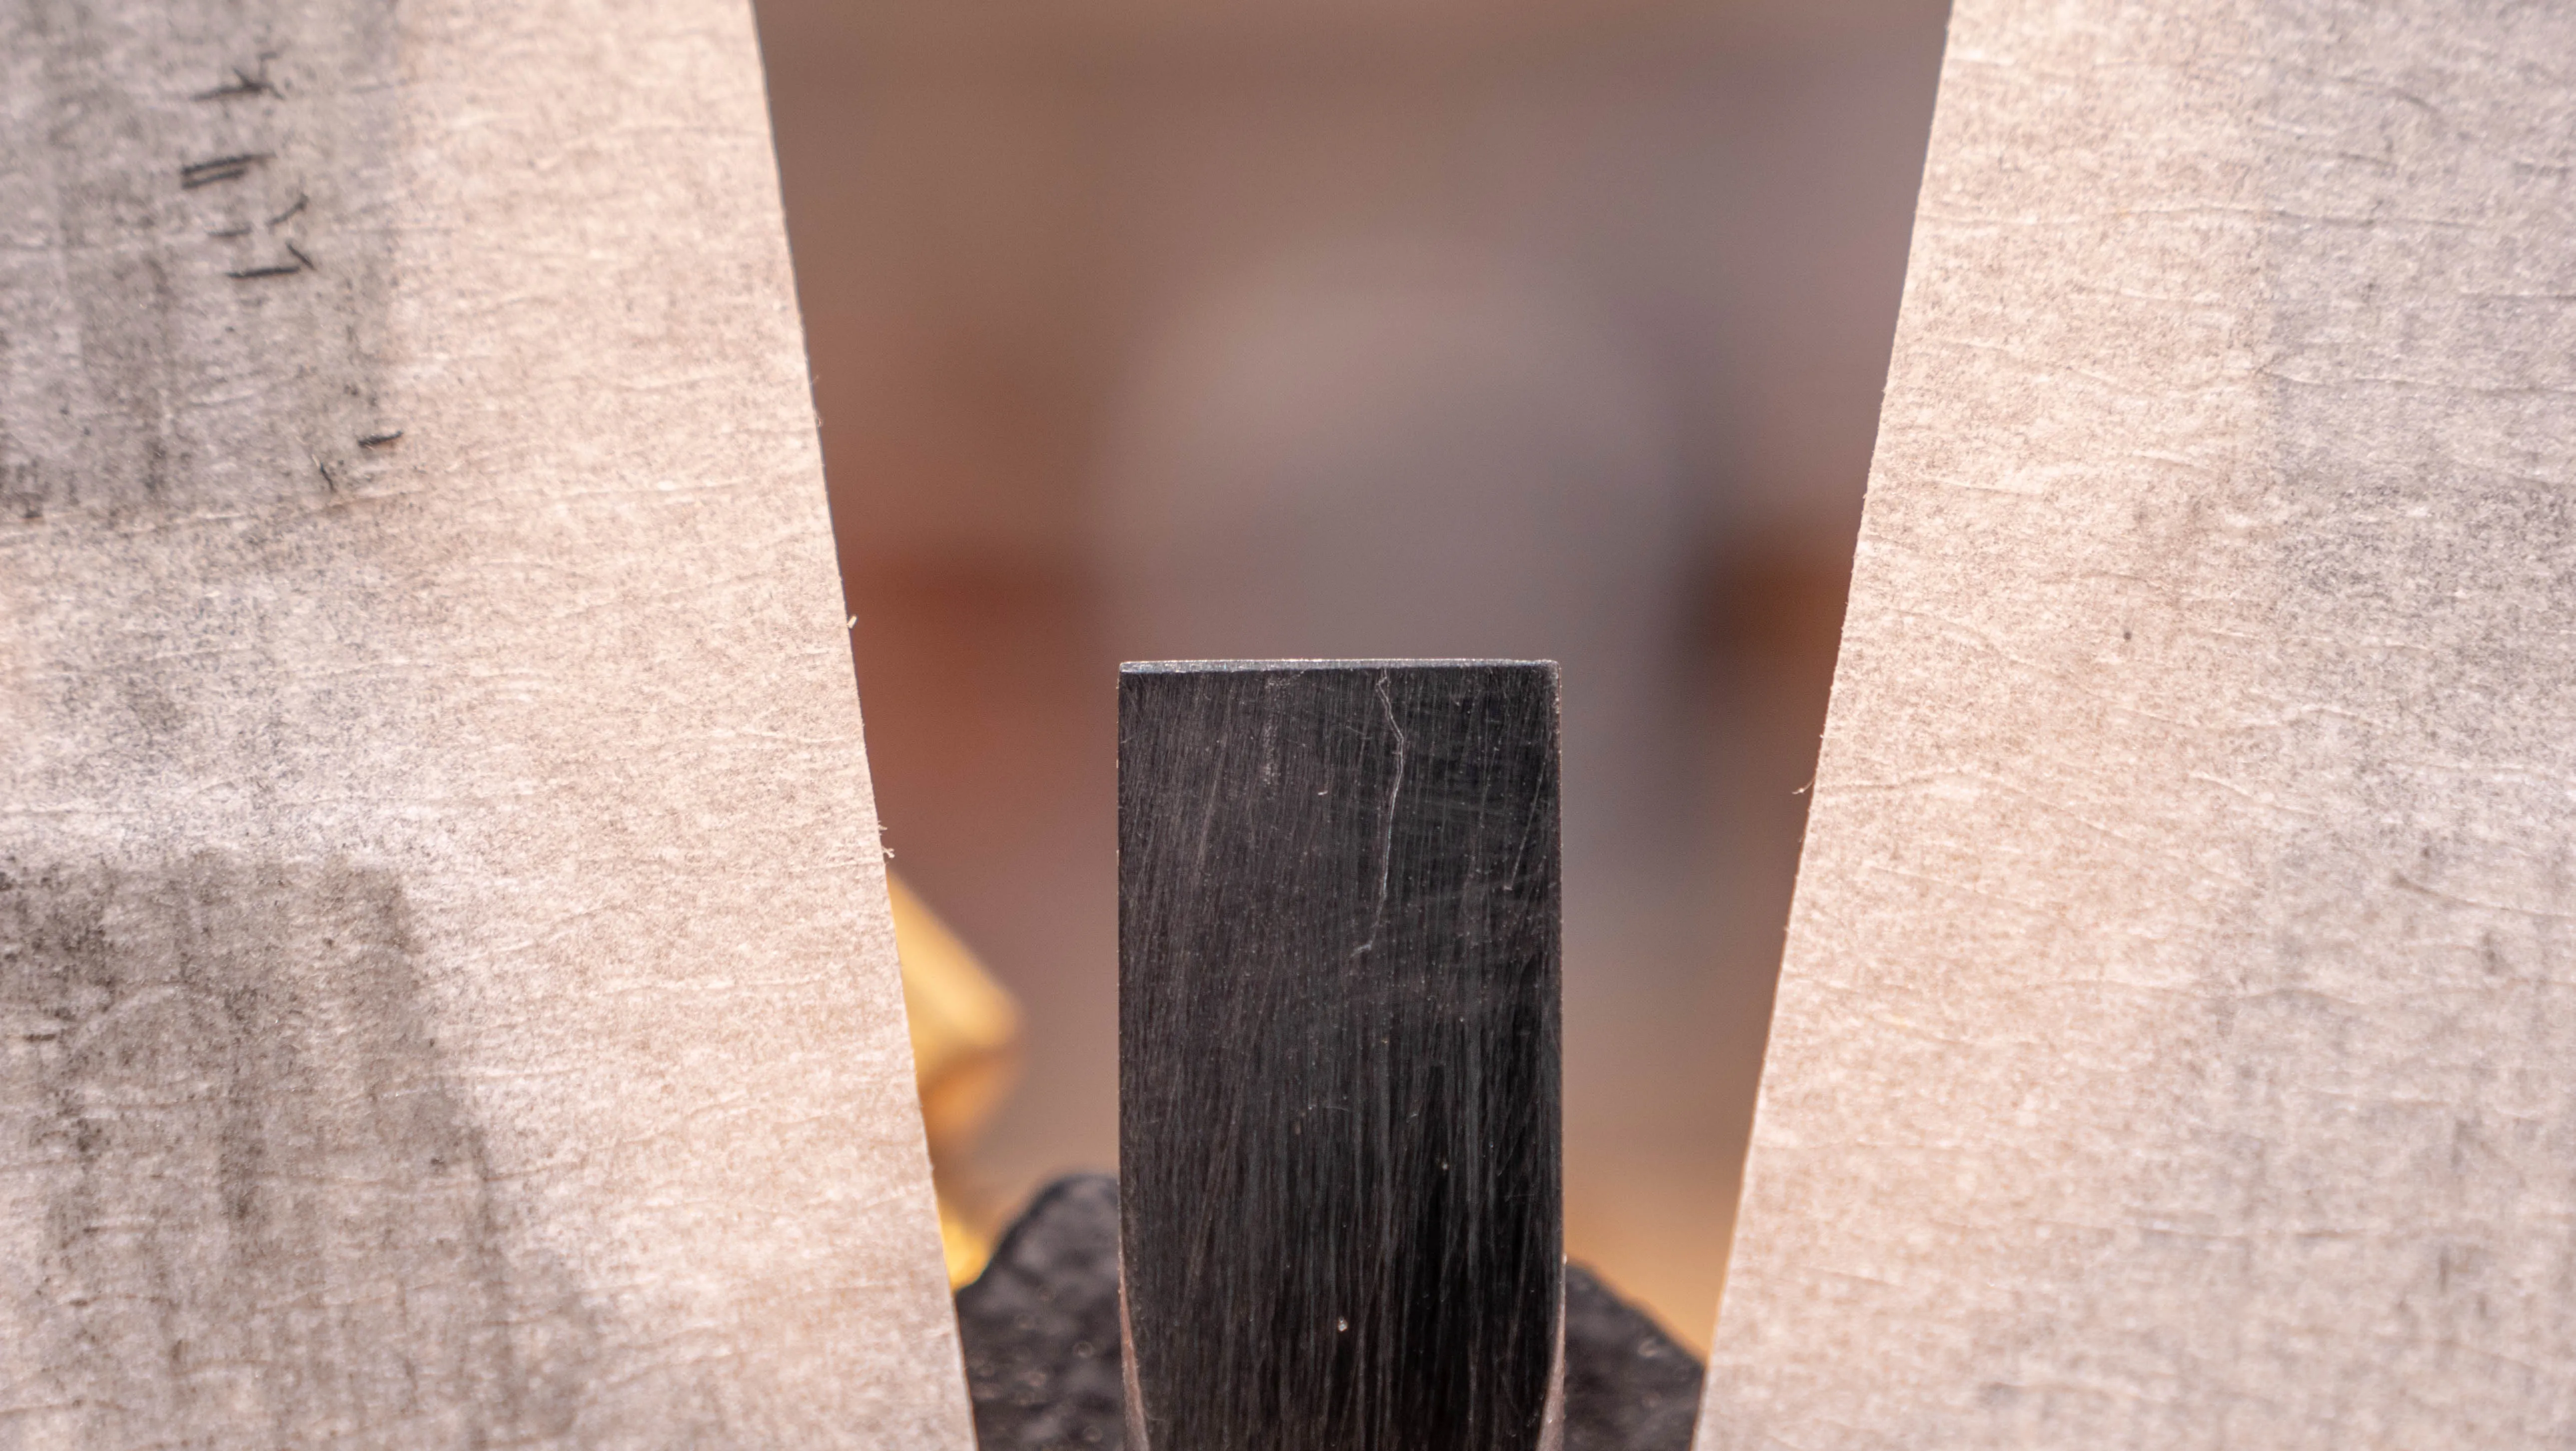
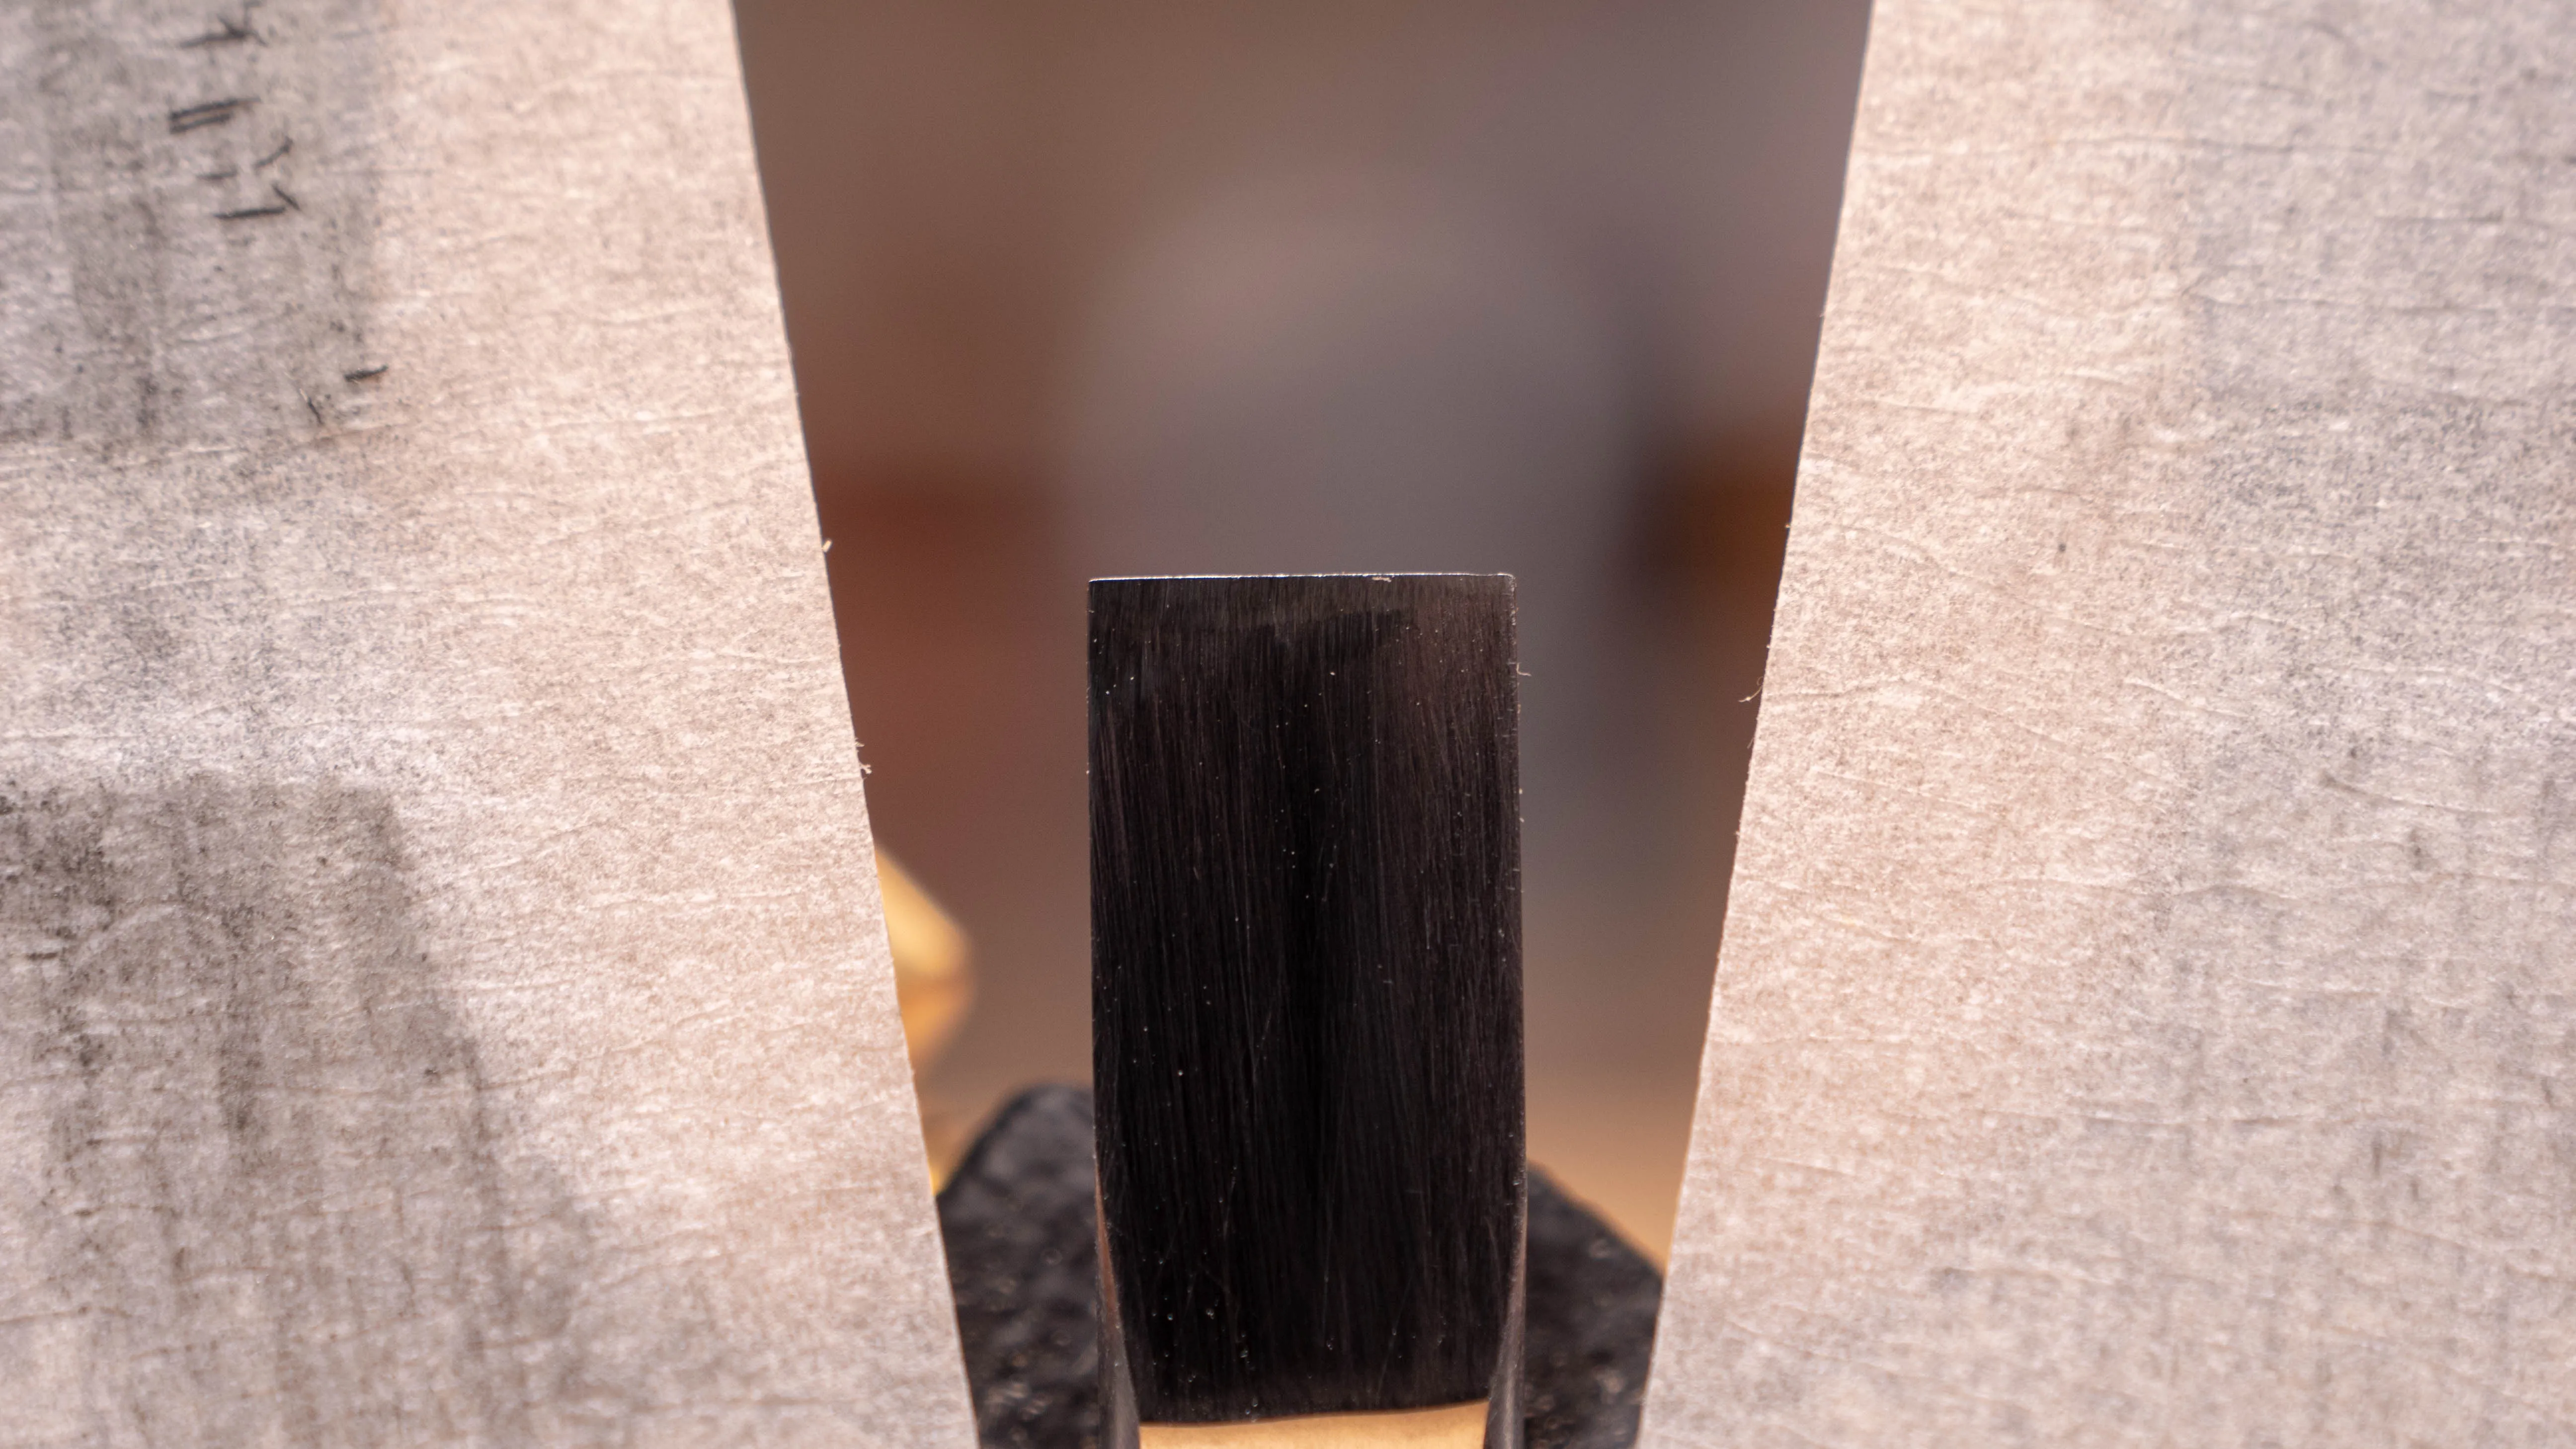
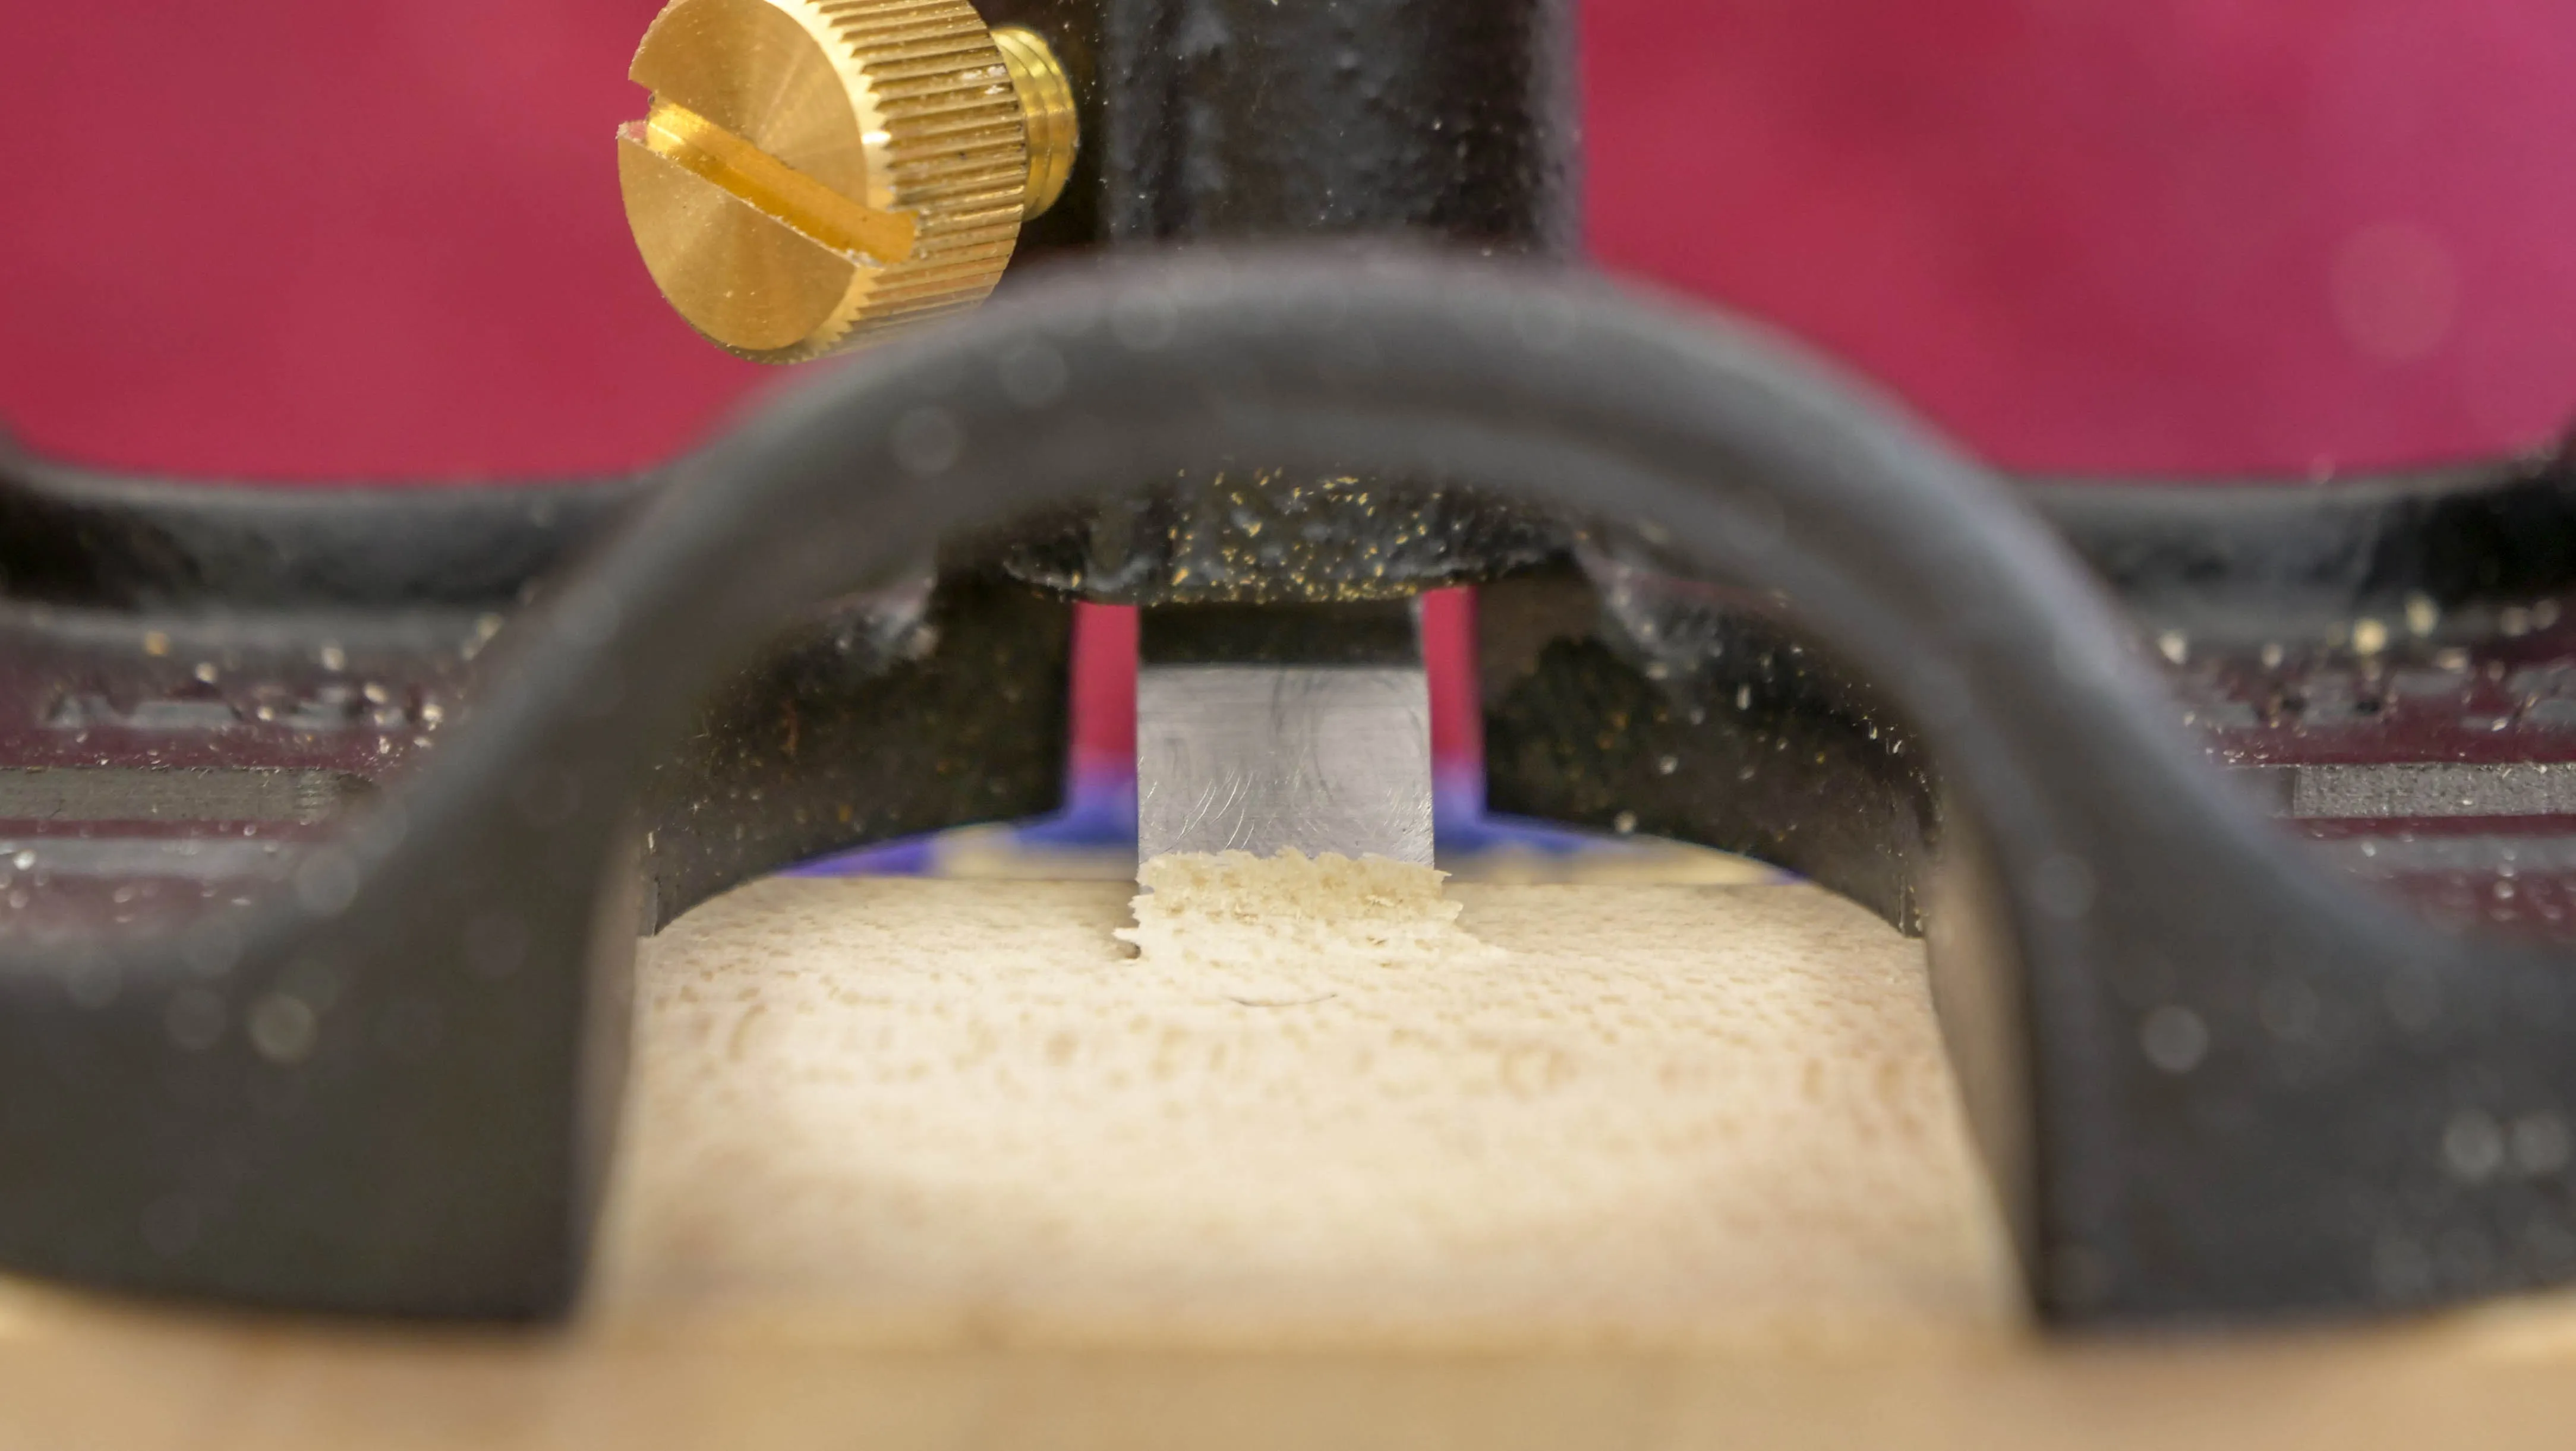
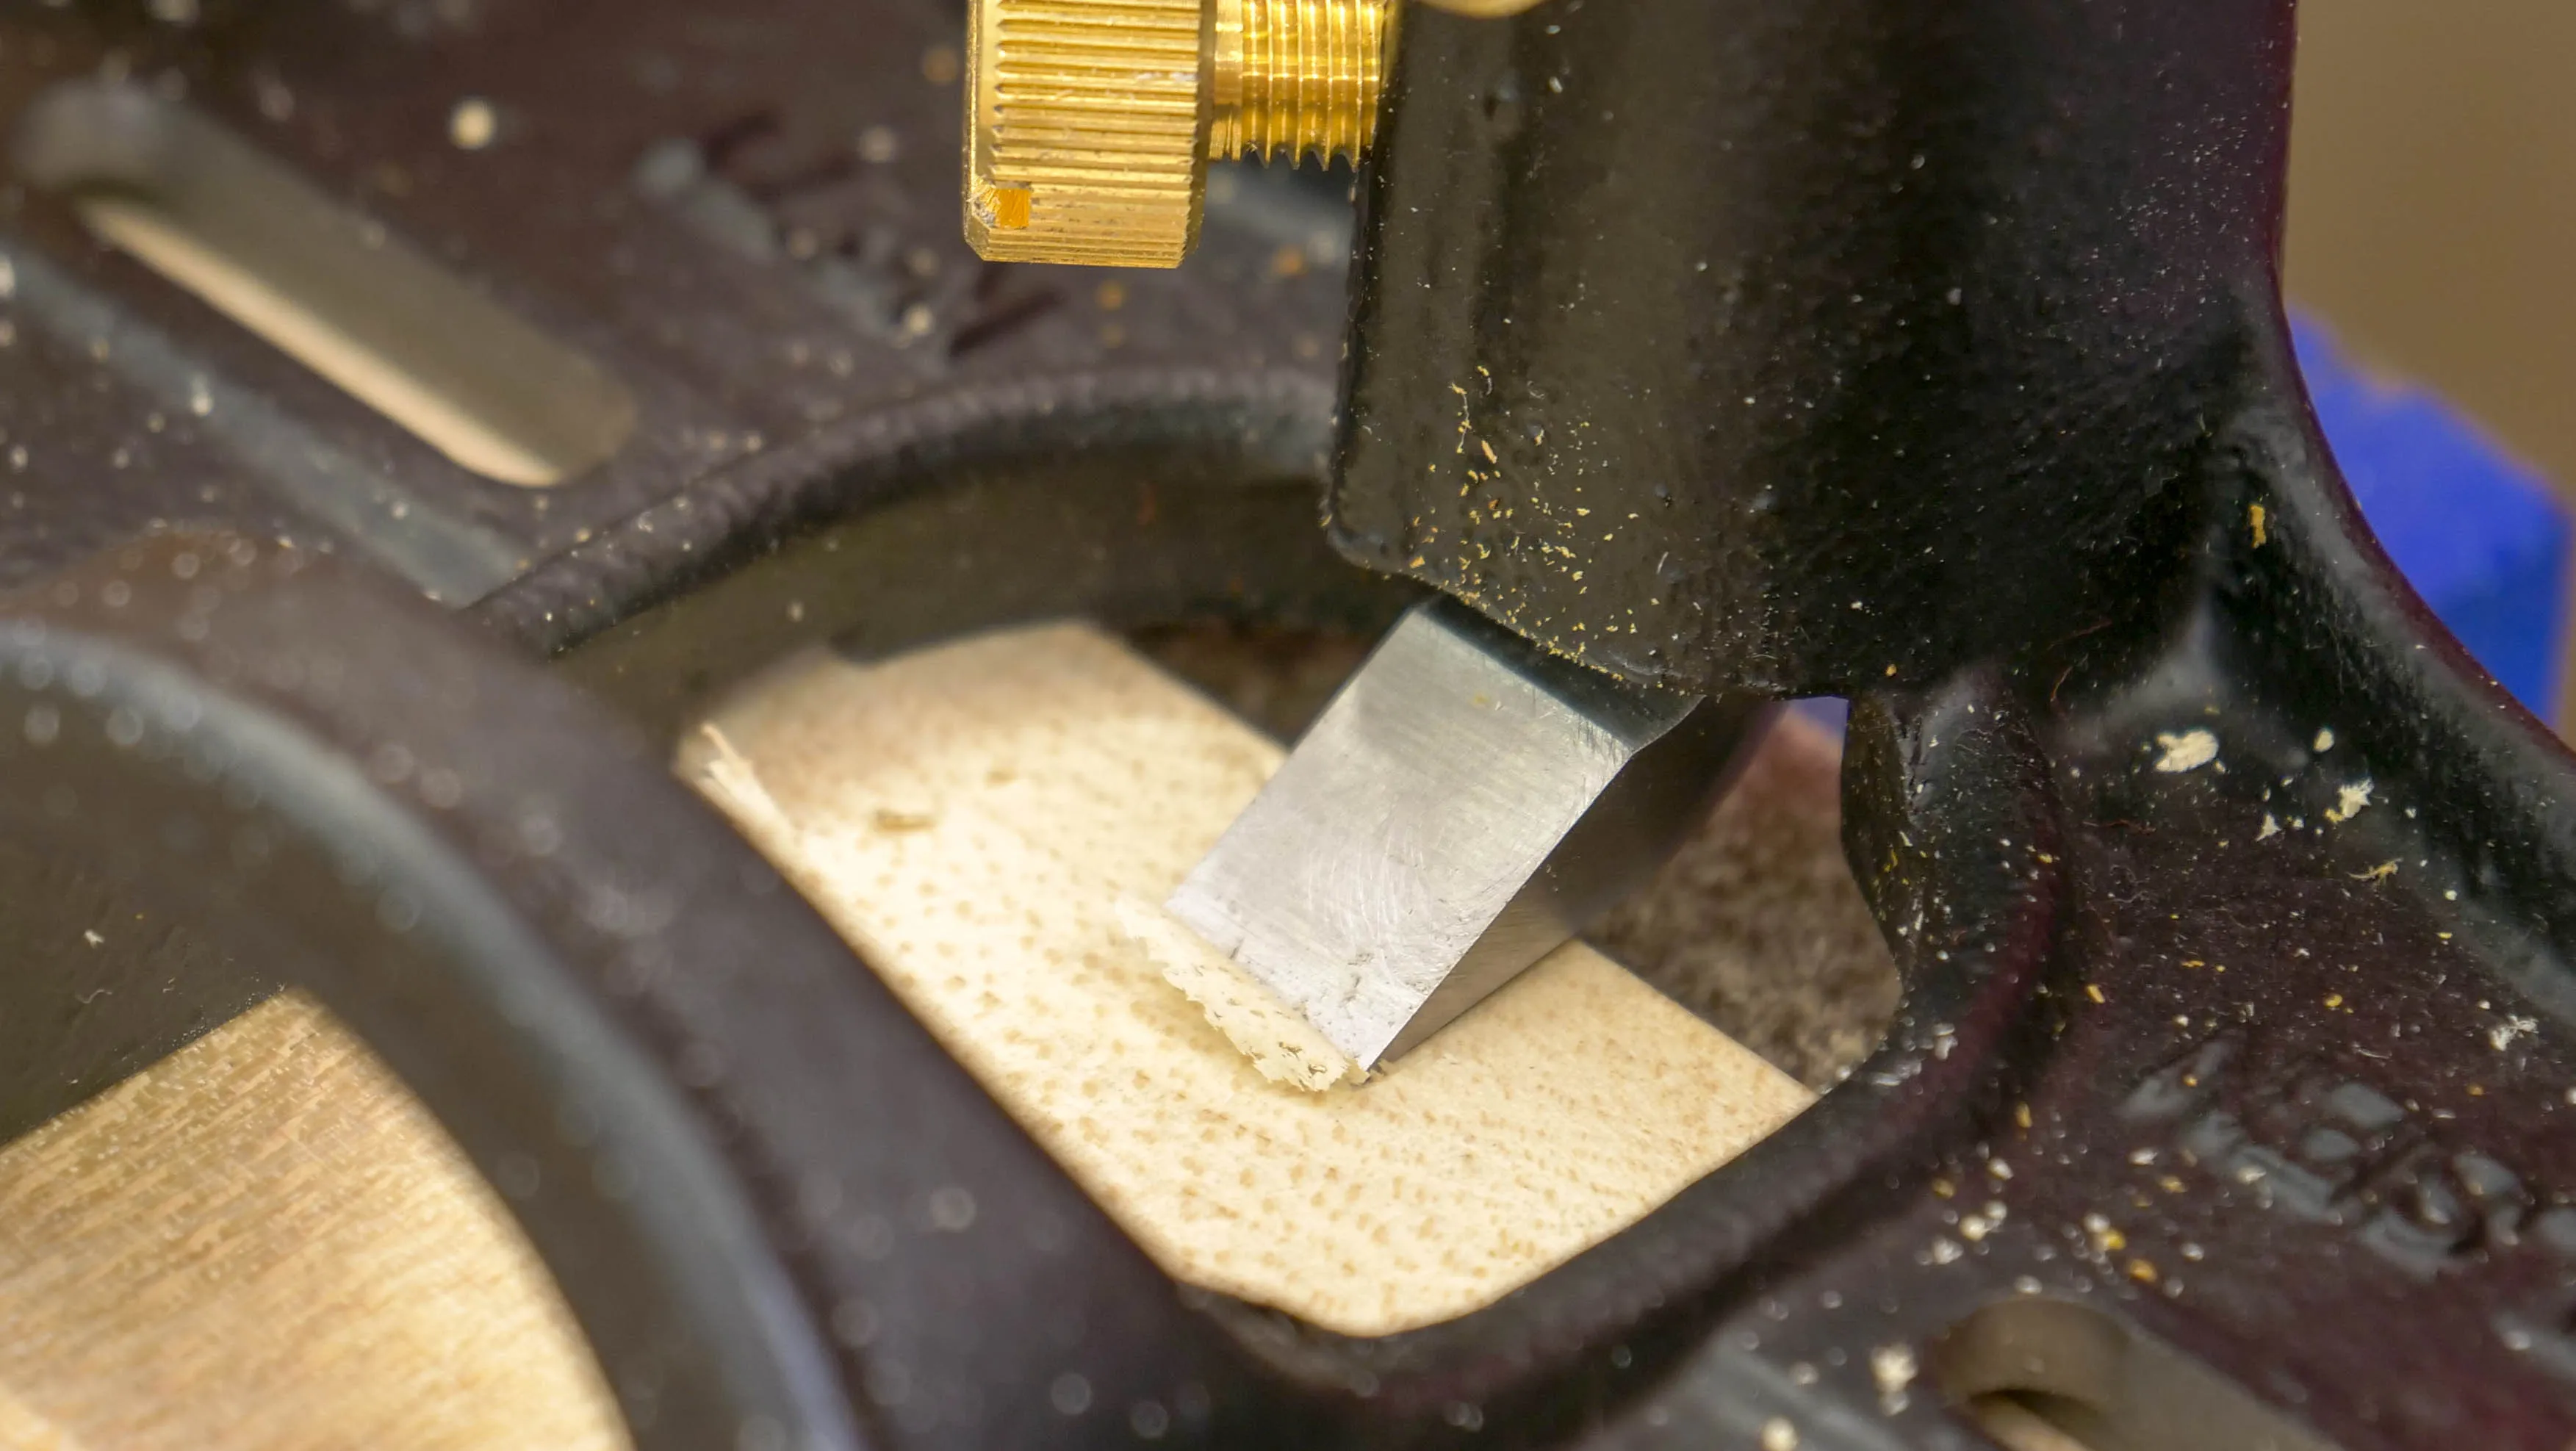
Put the cutting iron back into the body of the plane. Test the cutting iron on a scrap piece of wood by taking a fine shaving to see if the cutting iron is square. It is square when it takes an even shaving across the whole width of the cutting iron.
The design of the plane ensures that the cutting iron is presented to the wood at an angle to the underside of the iron. This angled presentation is critically important as it provides a relief on the underside of the cutting iron. Without this the plane will not cut, because if the cutting iron is flat against the wood it will glide over the surface of the wood without cutting. It is important to remember that the cutting edge may not appear square even when it is in line with the body of the router plane. This will be due to the angle of relief that the cutting iron is sat at combined with the angle on the cutting iron bevel. If you have initialised the cutting iron during the setting up process, and have sharpened the bevel so it takes an even shaving, you can be sure that it is presented squarely and parallel to the wood’s surface and this is what matters. Finish by polishing the bevel on the leather strop, charged with buffing compound.
Further Reading
To read more on router planes, we recommend the following from Paul’s blog:
Buying Good Tools Cheap- Router Plane
Tool Review- Veritas Router Plane
Tightening Tool for a Veritas Router Plane
Veritas Router Plane
Questions Answered- Router Bevels Reversed
More on Router Planes- Part II
Questions Answered- What Are pointed Blades for on Router Planes