Bench Plane Setup
Note: This exercise will get you familiar with the parts of the plane and where they go. To see the video on putting the plane together, click here.
You will need:
Start by dismantling the plane, take any removable pieces apart, including all the screws but not the tote threaded bolts, and lay them all out.
Test yourself to see if you can name each one and refer to the pictures below to see if you are correct.
The colour code is below the picture.
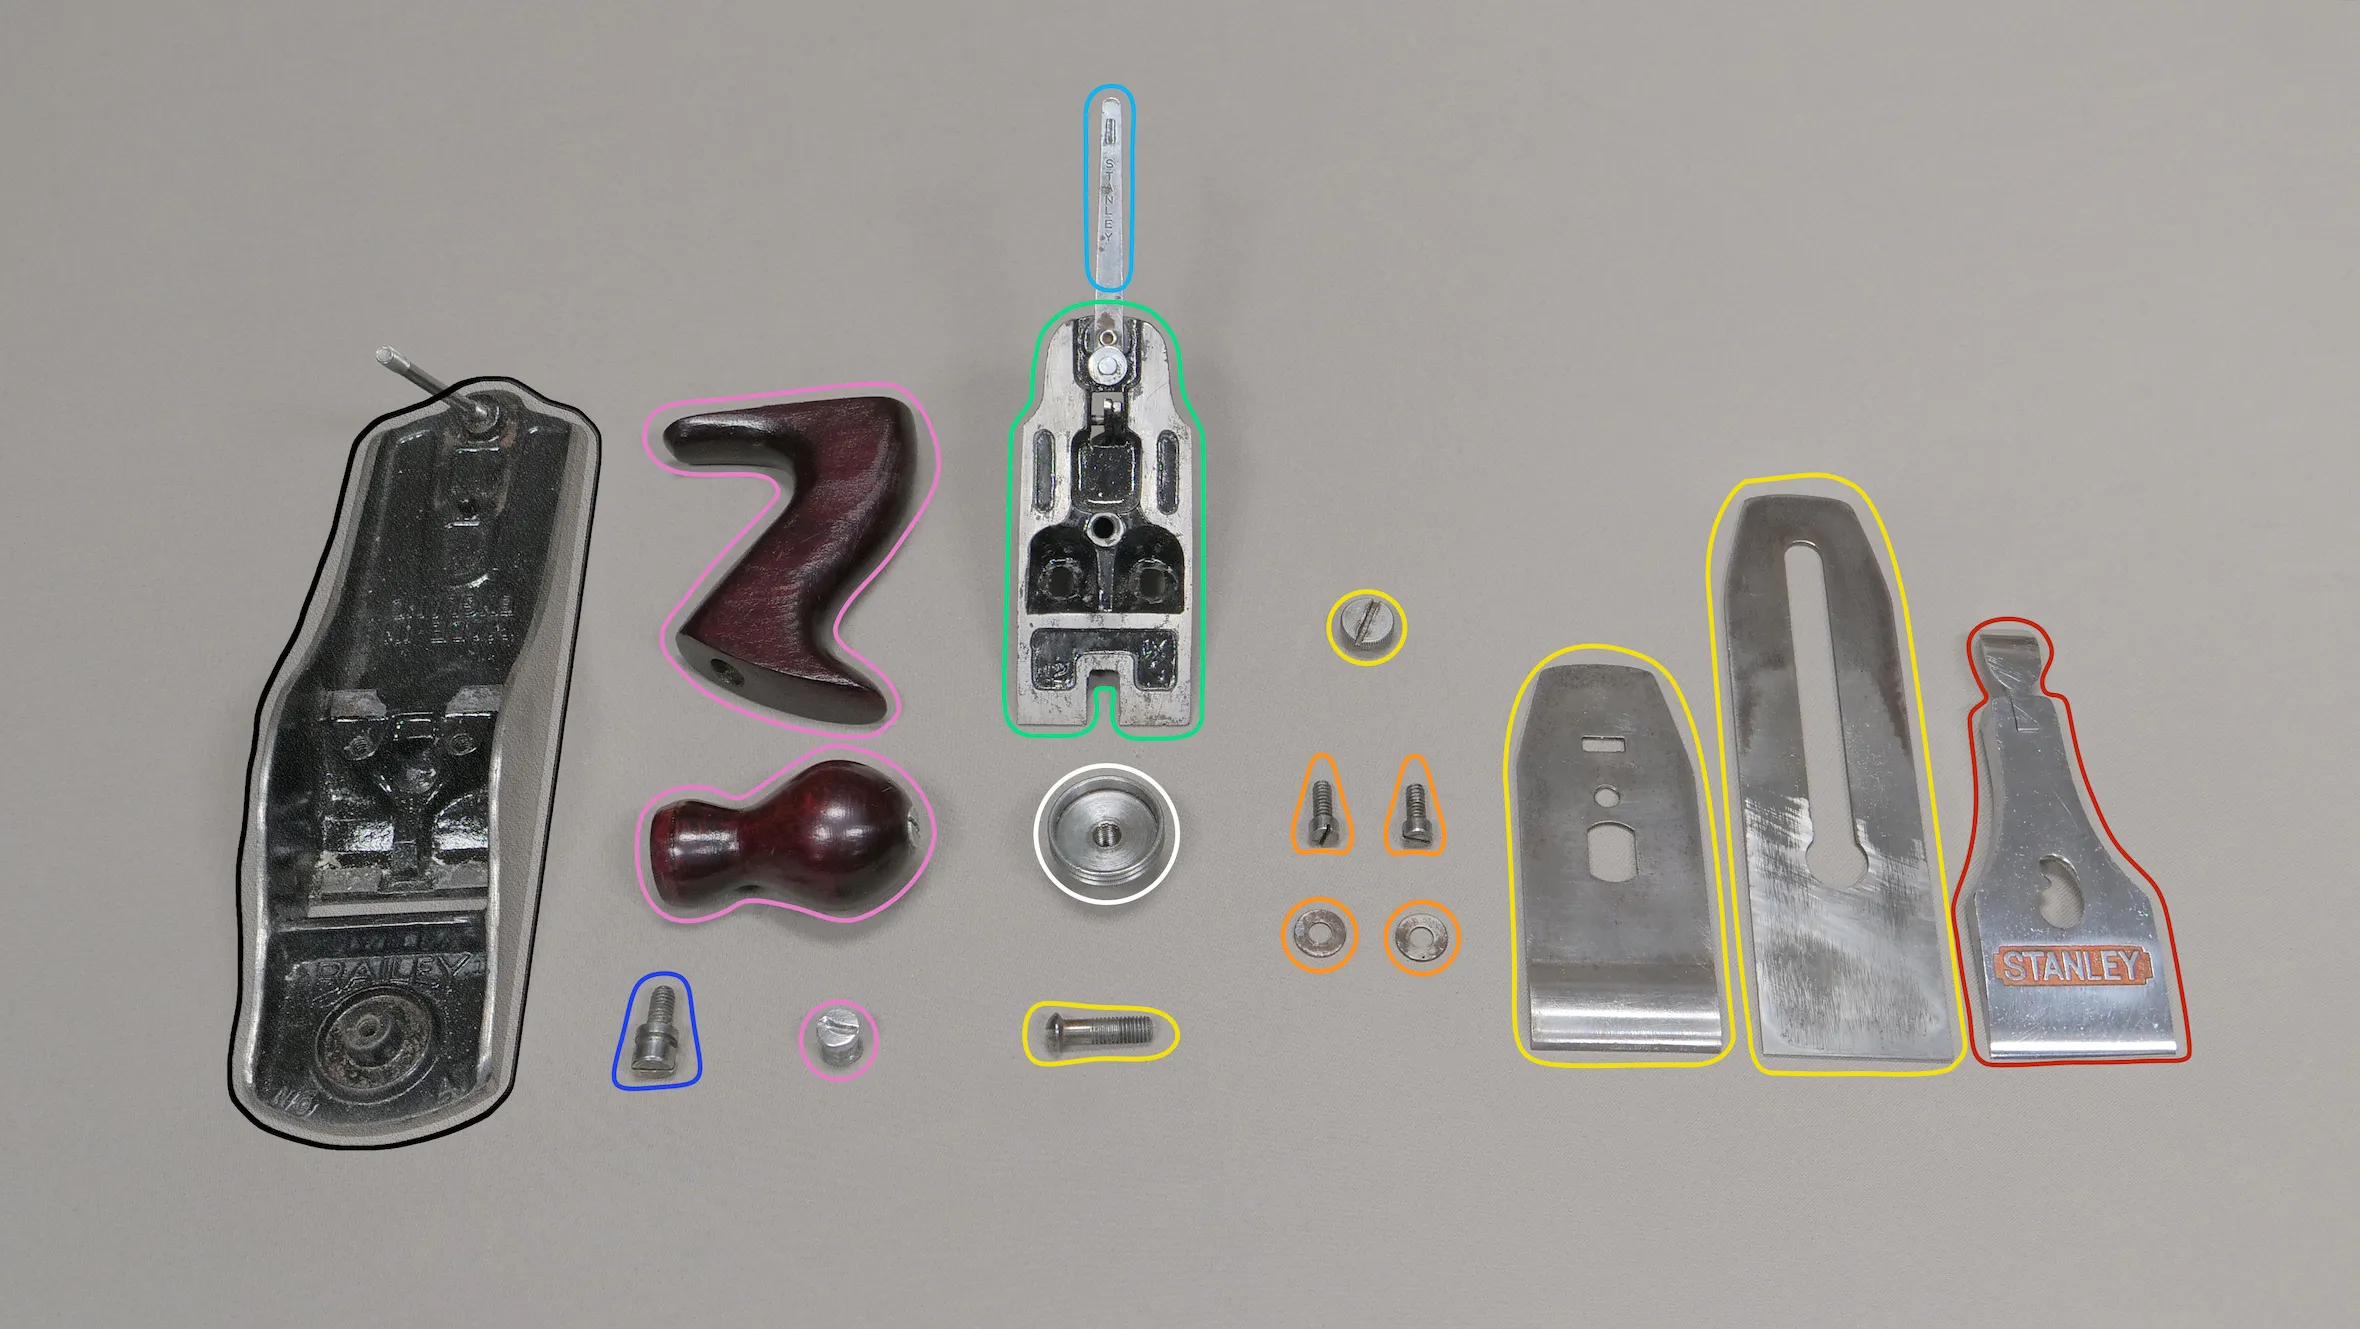
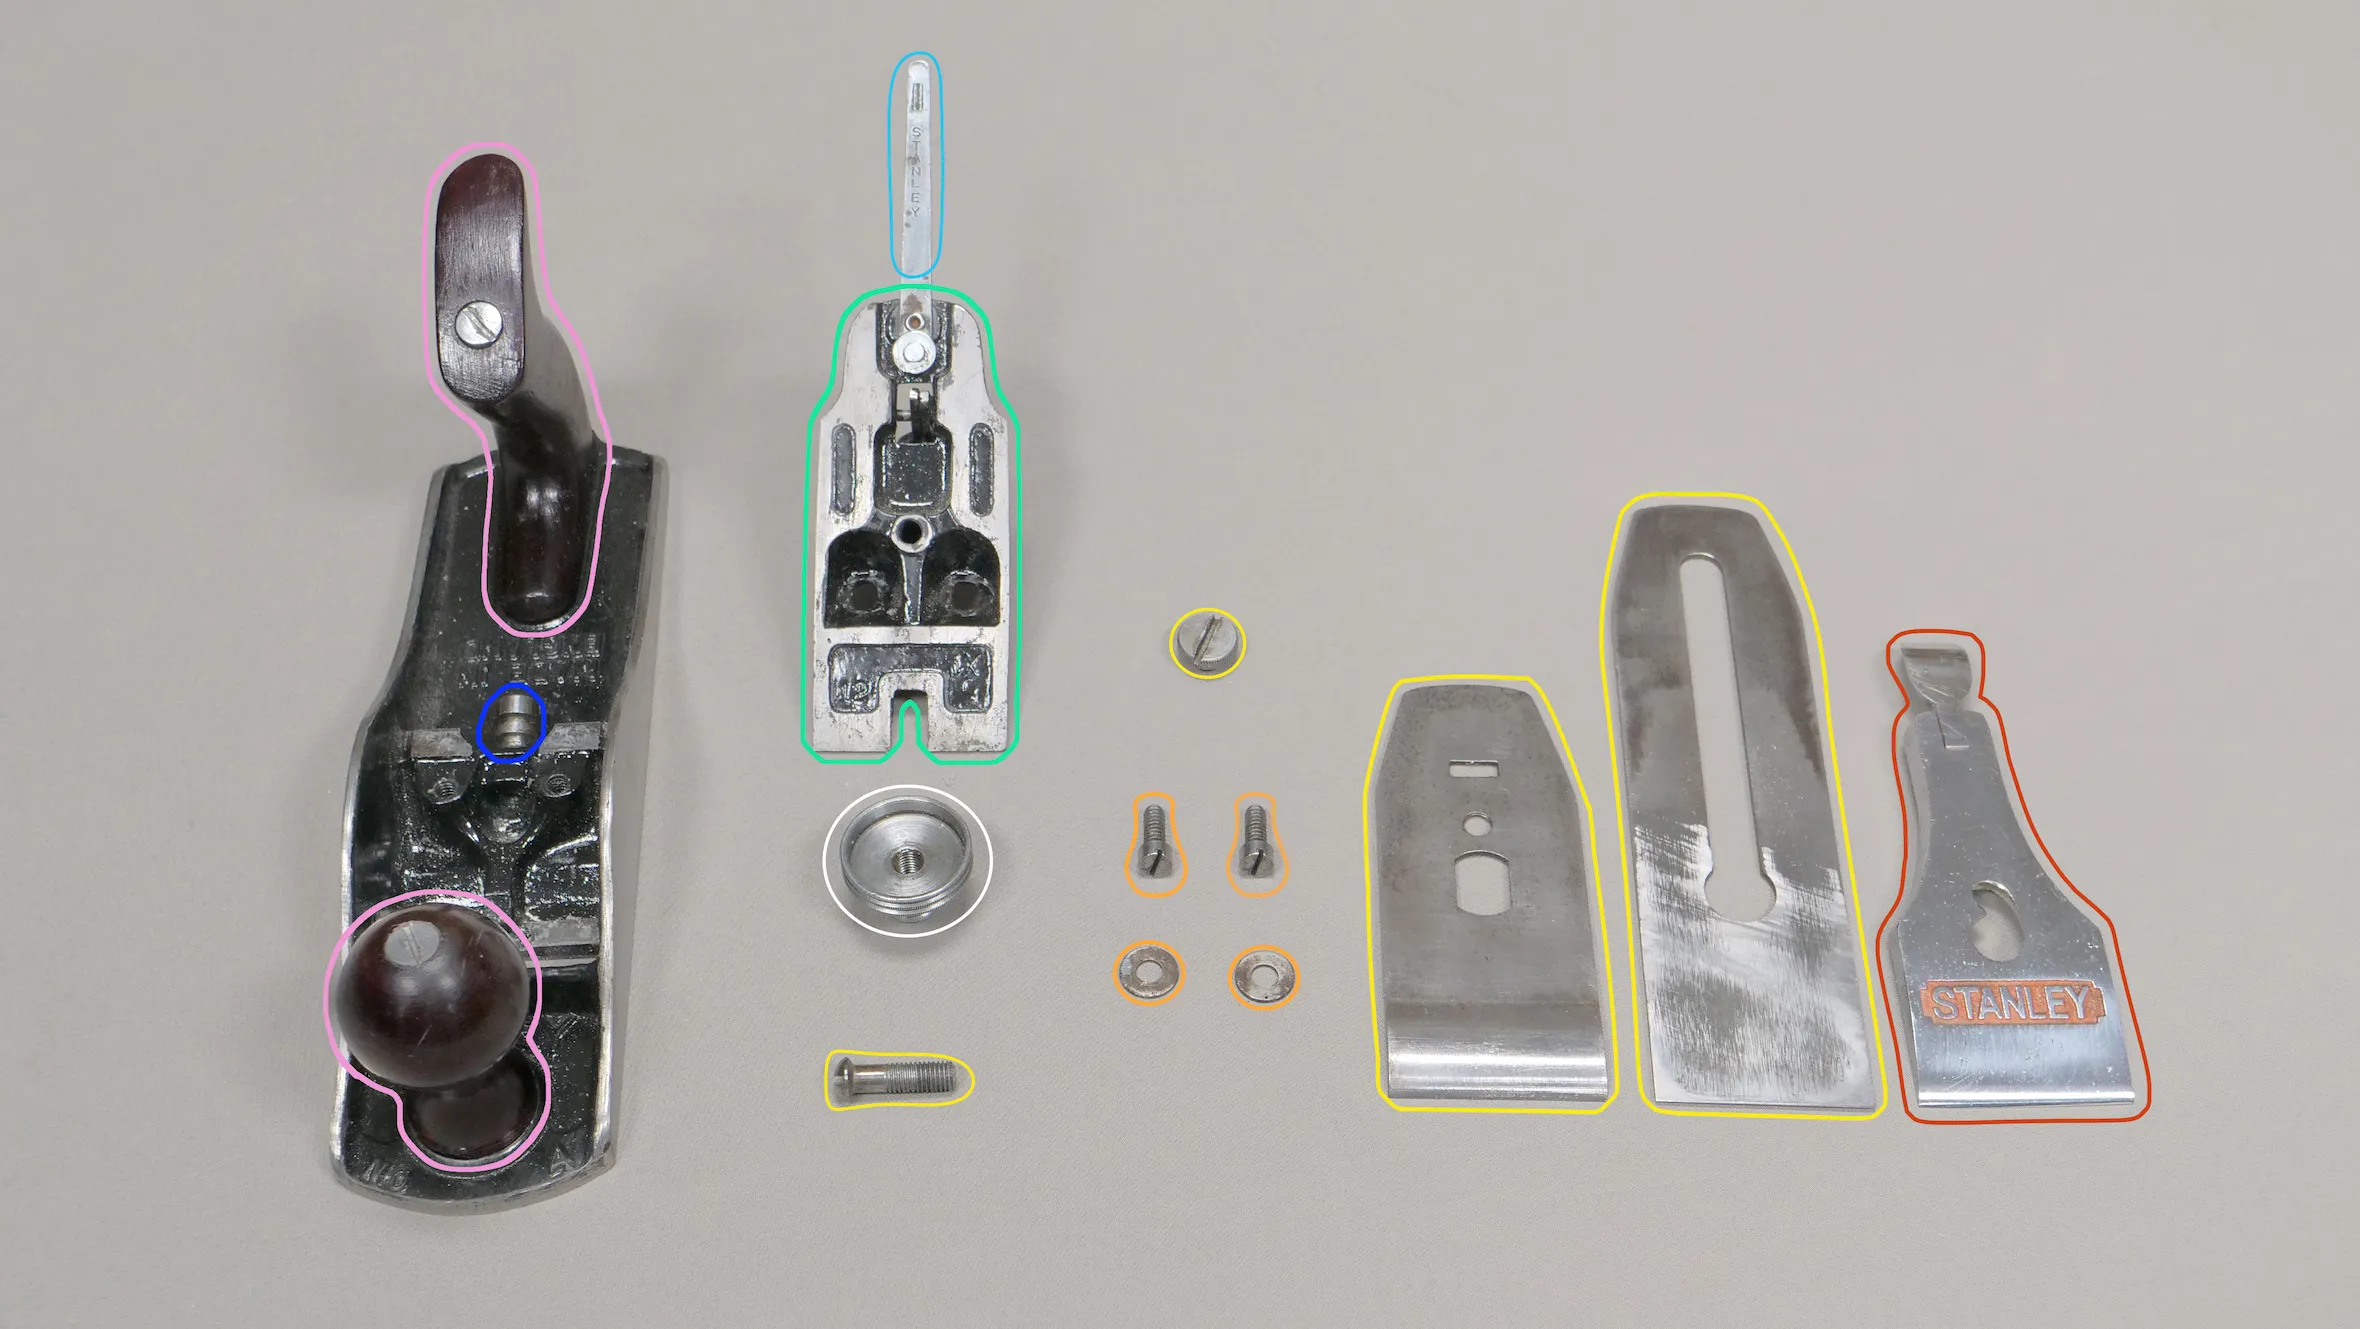
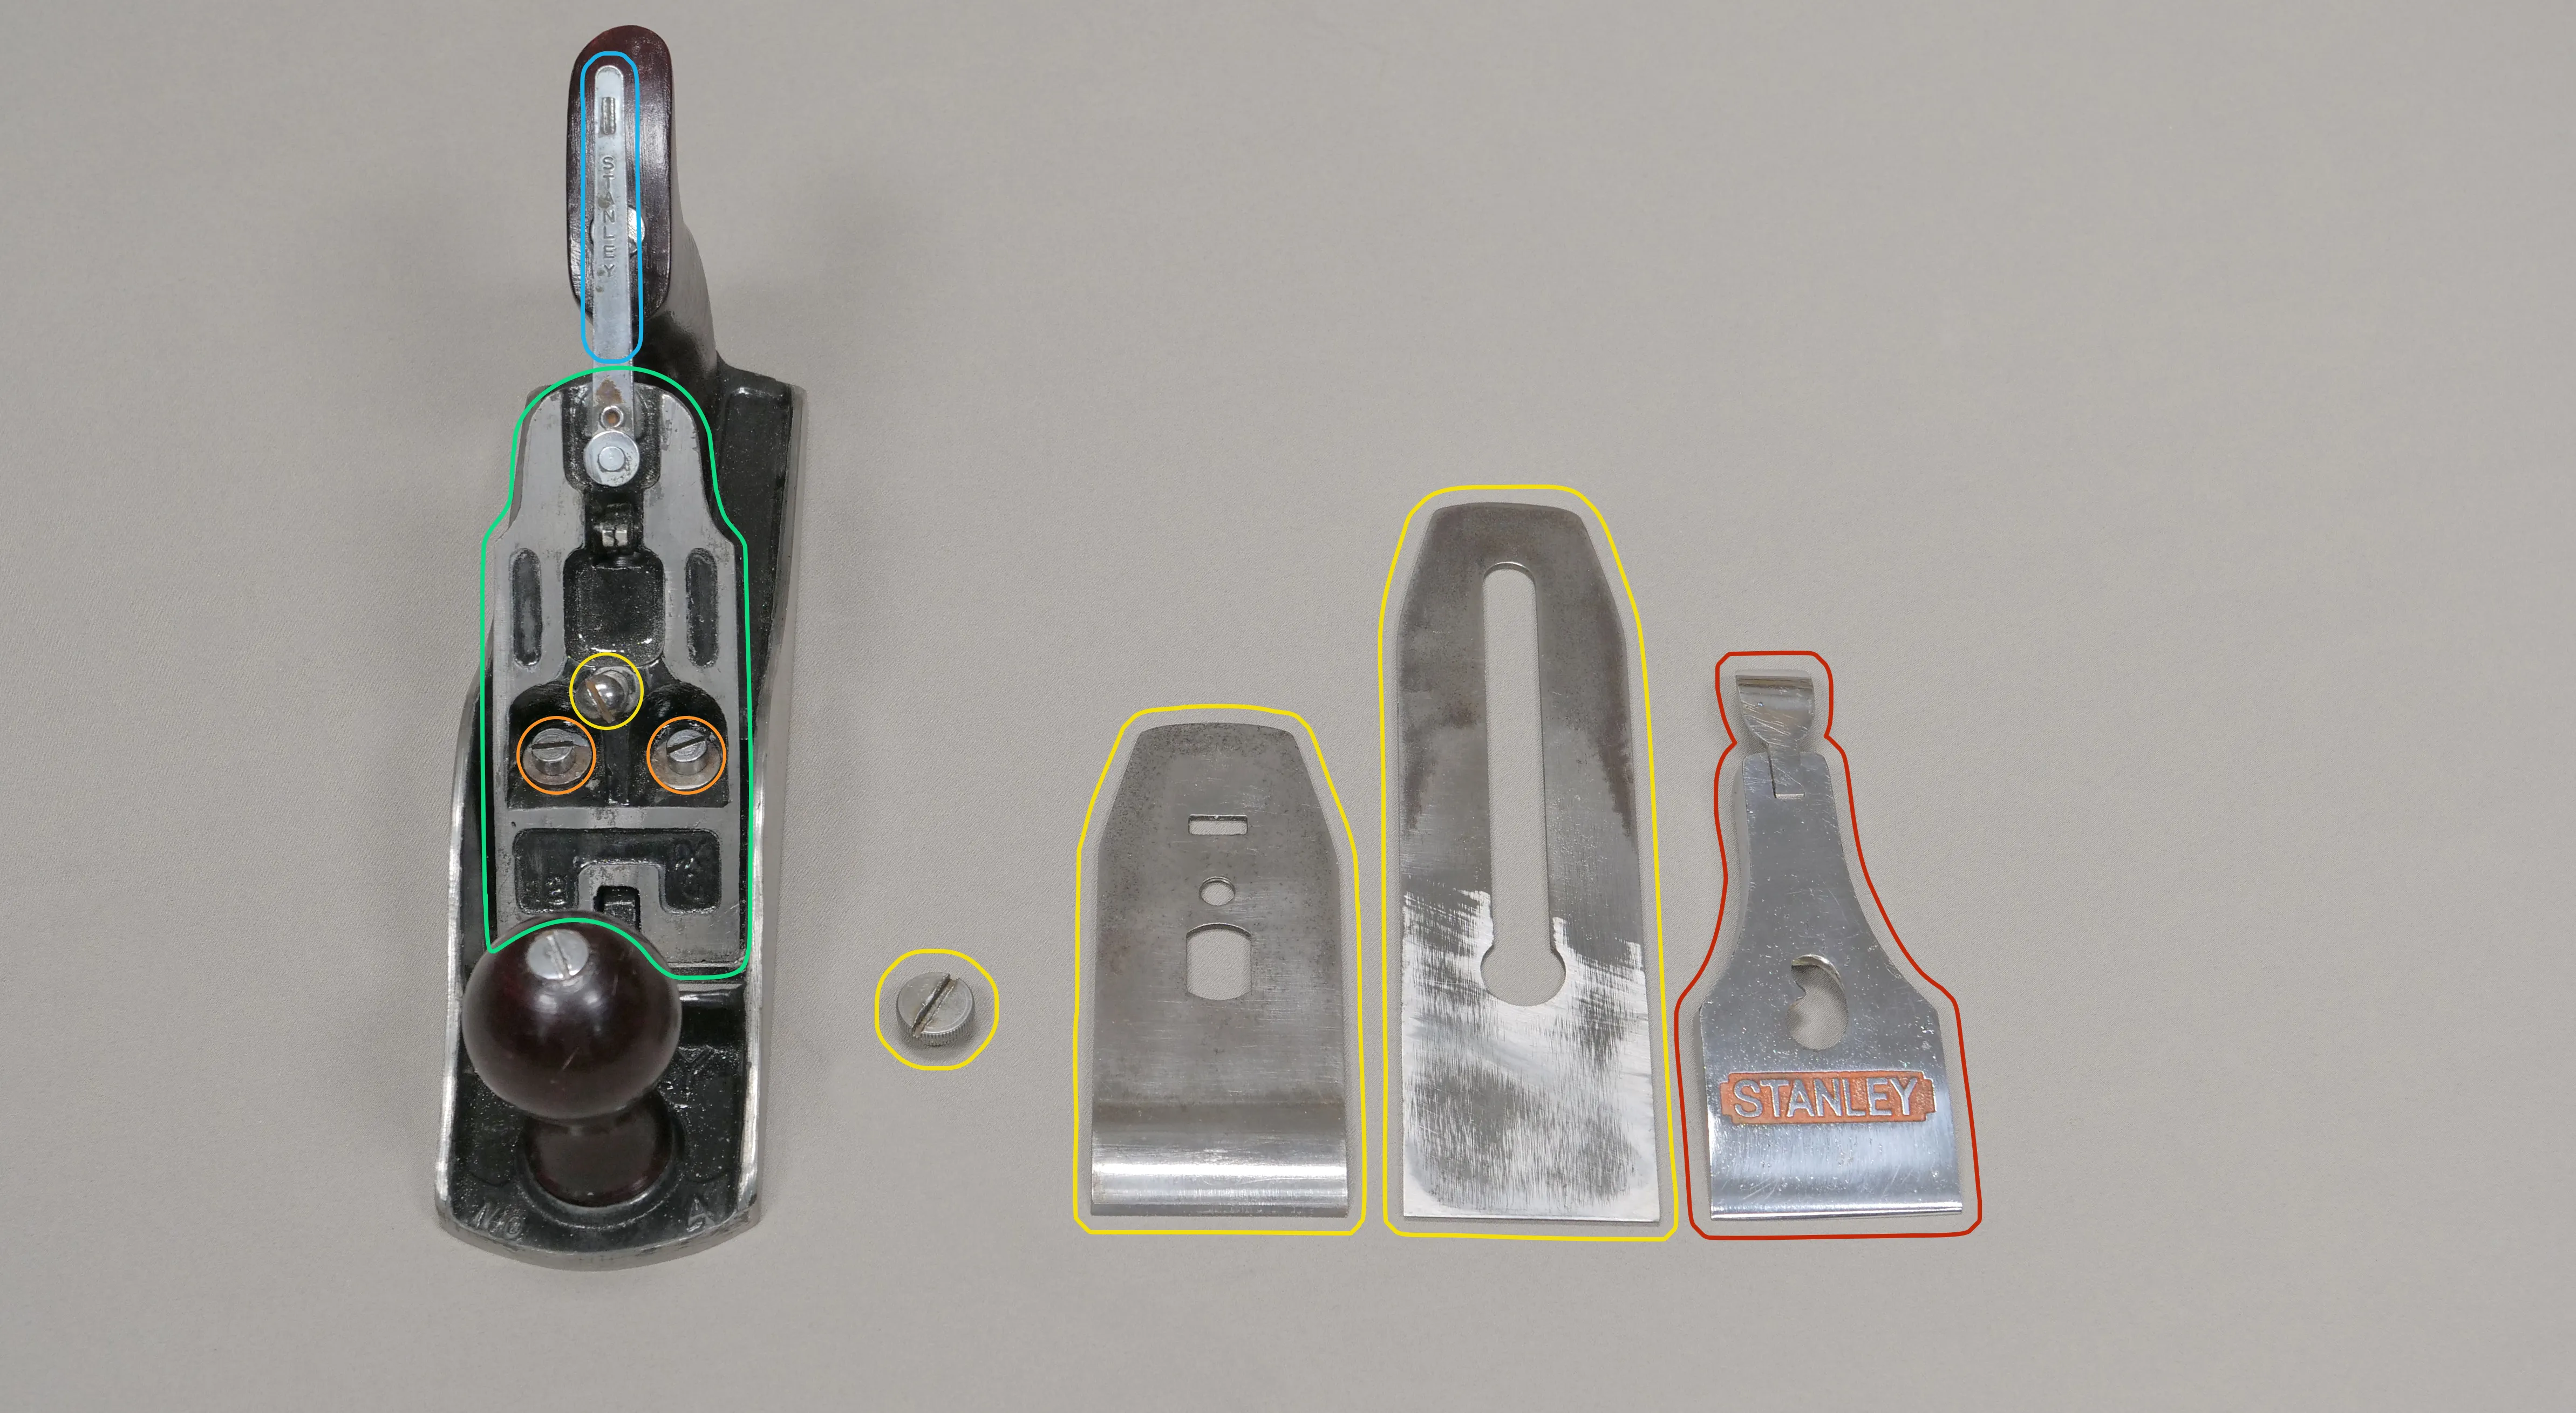
● Sole
● Handles (Front Knob and Back Tote)
● Cutting Iron Assembly (Cap Iron, Cutting Iron and Screw) and Setscrew
◎ Depth Adjustment Wheel
● Lever Cap
● Frog
● Lateral Adjustment Lever
● Frog Setscrews
● Frog Adjustment Screws
Put your plane back together in the order specified below:
- Put the front knob and the back tote onto the sole
- Put the frog adjustment screw back on the sole
- Place the frog into the inside of the sole and replace the two frog setscrews to secure it in place. Put the centre setscrew in place in the frog ready to hold the cutting iron assembly.
- Place the cap iron, cutting iron and setscrew together, this is known as the cutting iron assembly. Put the cap iron on top of the blade at 90 degrees then twist the cap iron back into place by swivelling them together; take care not to run the cap iron into the cutting edge as this could blunt or damage the cutting iron edge. This is also for safety as it means the actual cutting edge is never facing towards your opposing hand.
(To view pictures of how to assemble the cutting iron assembly, click here.)
- Screw on the depth adjustment wheel at the back of the frog, then place the cutting iron assembly onto the frog. Make sure it is lined up so that the protruding rectangle from the yoke slots into the cutting iron assembly and the circle on the lateral adjustment lever locates fully inside the long slit of the cutting iron.
- Make sure that the lever cap cam lever is in the open (upward, non-engage) position, place this on top of the cutting iron assembly and locate on the setscrew before pushing the lever on the lever cap down to secure it in place. You will need to adjust the setscrew incrementally to ensure the cap iron slots in and locks down without too much pressure. You want it to be secure but not too difficult to lock down or release.
By turning the setscrew, we affect the amount of pressure needed to set the lever.