Arches- Stop Cut Method
Note: This exercise will help you to remove large amounts of material using the stop cut method. It requires accurate reading of the grain and a sharp chisel.
For this exercise, you will need:
- Wood
- Pencil
- Arch Template
- Tenon Saw
- Chisel
- Spokeshave
- Card Scraper (optional)
- 240 Grit Sandpaper
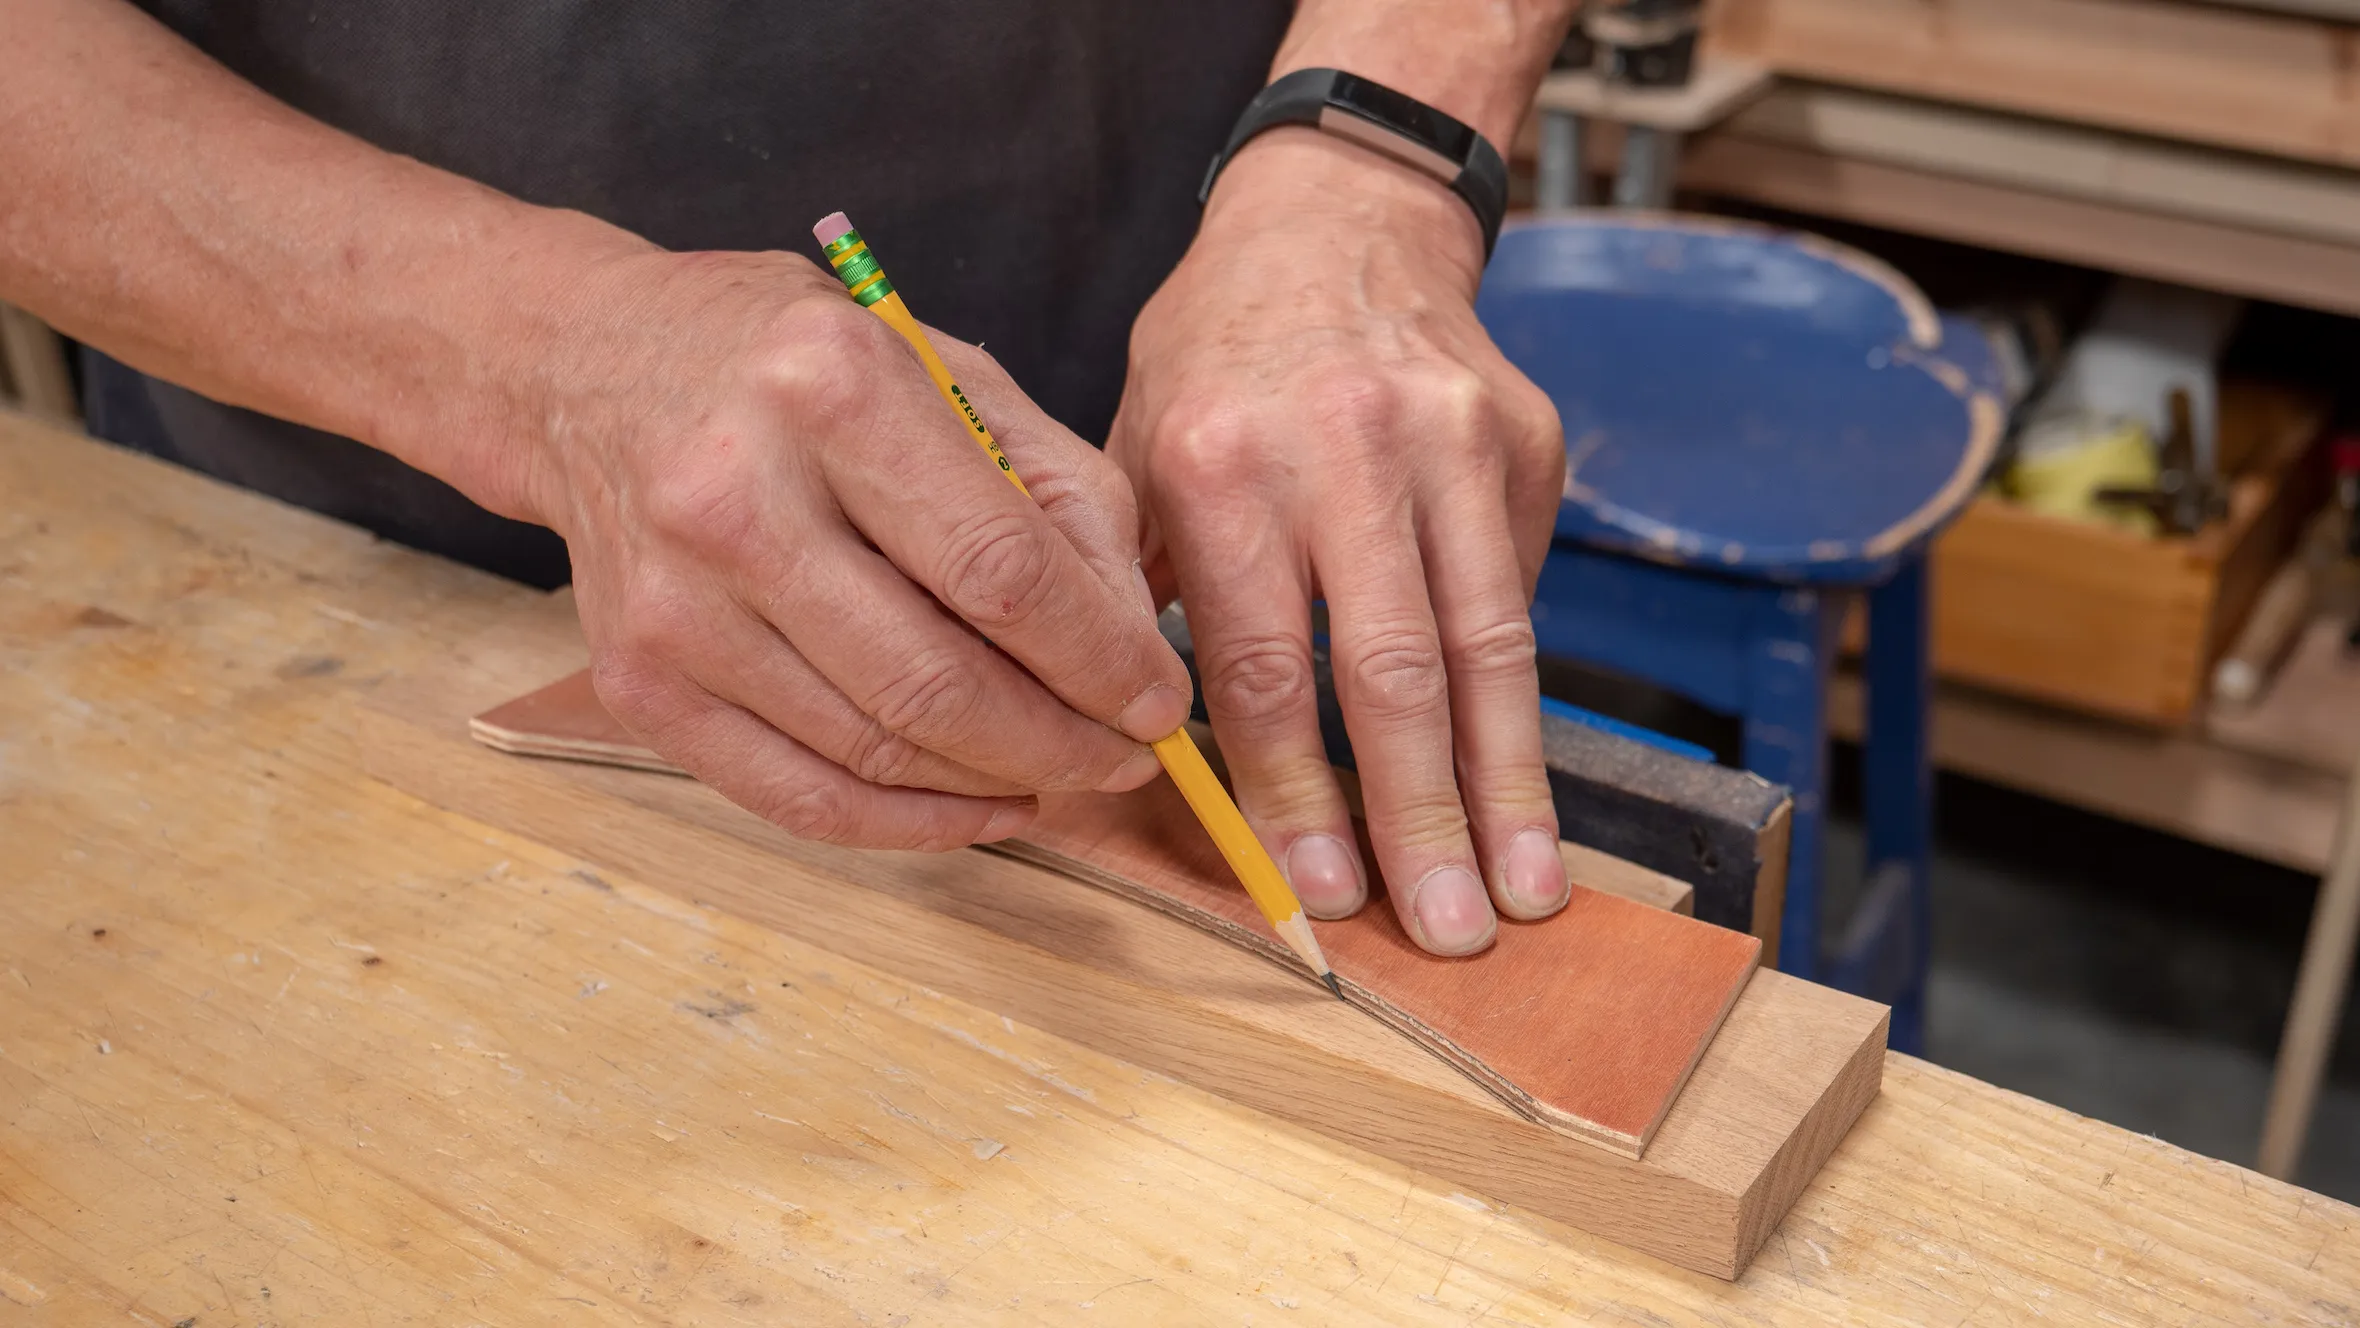
- Cut a template from a piece of paper and transfer the shape onto your wood (Paul uses a more permanent wooden template here).
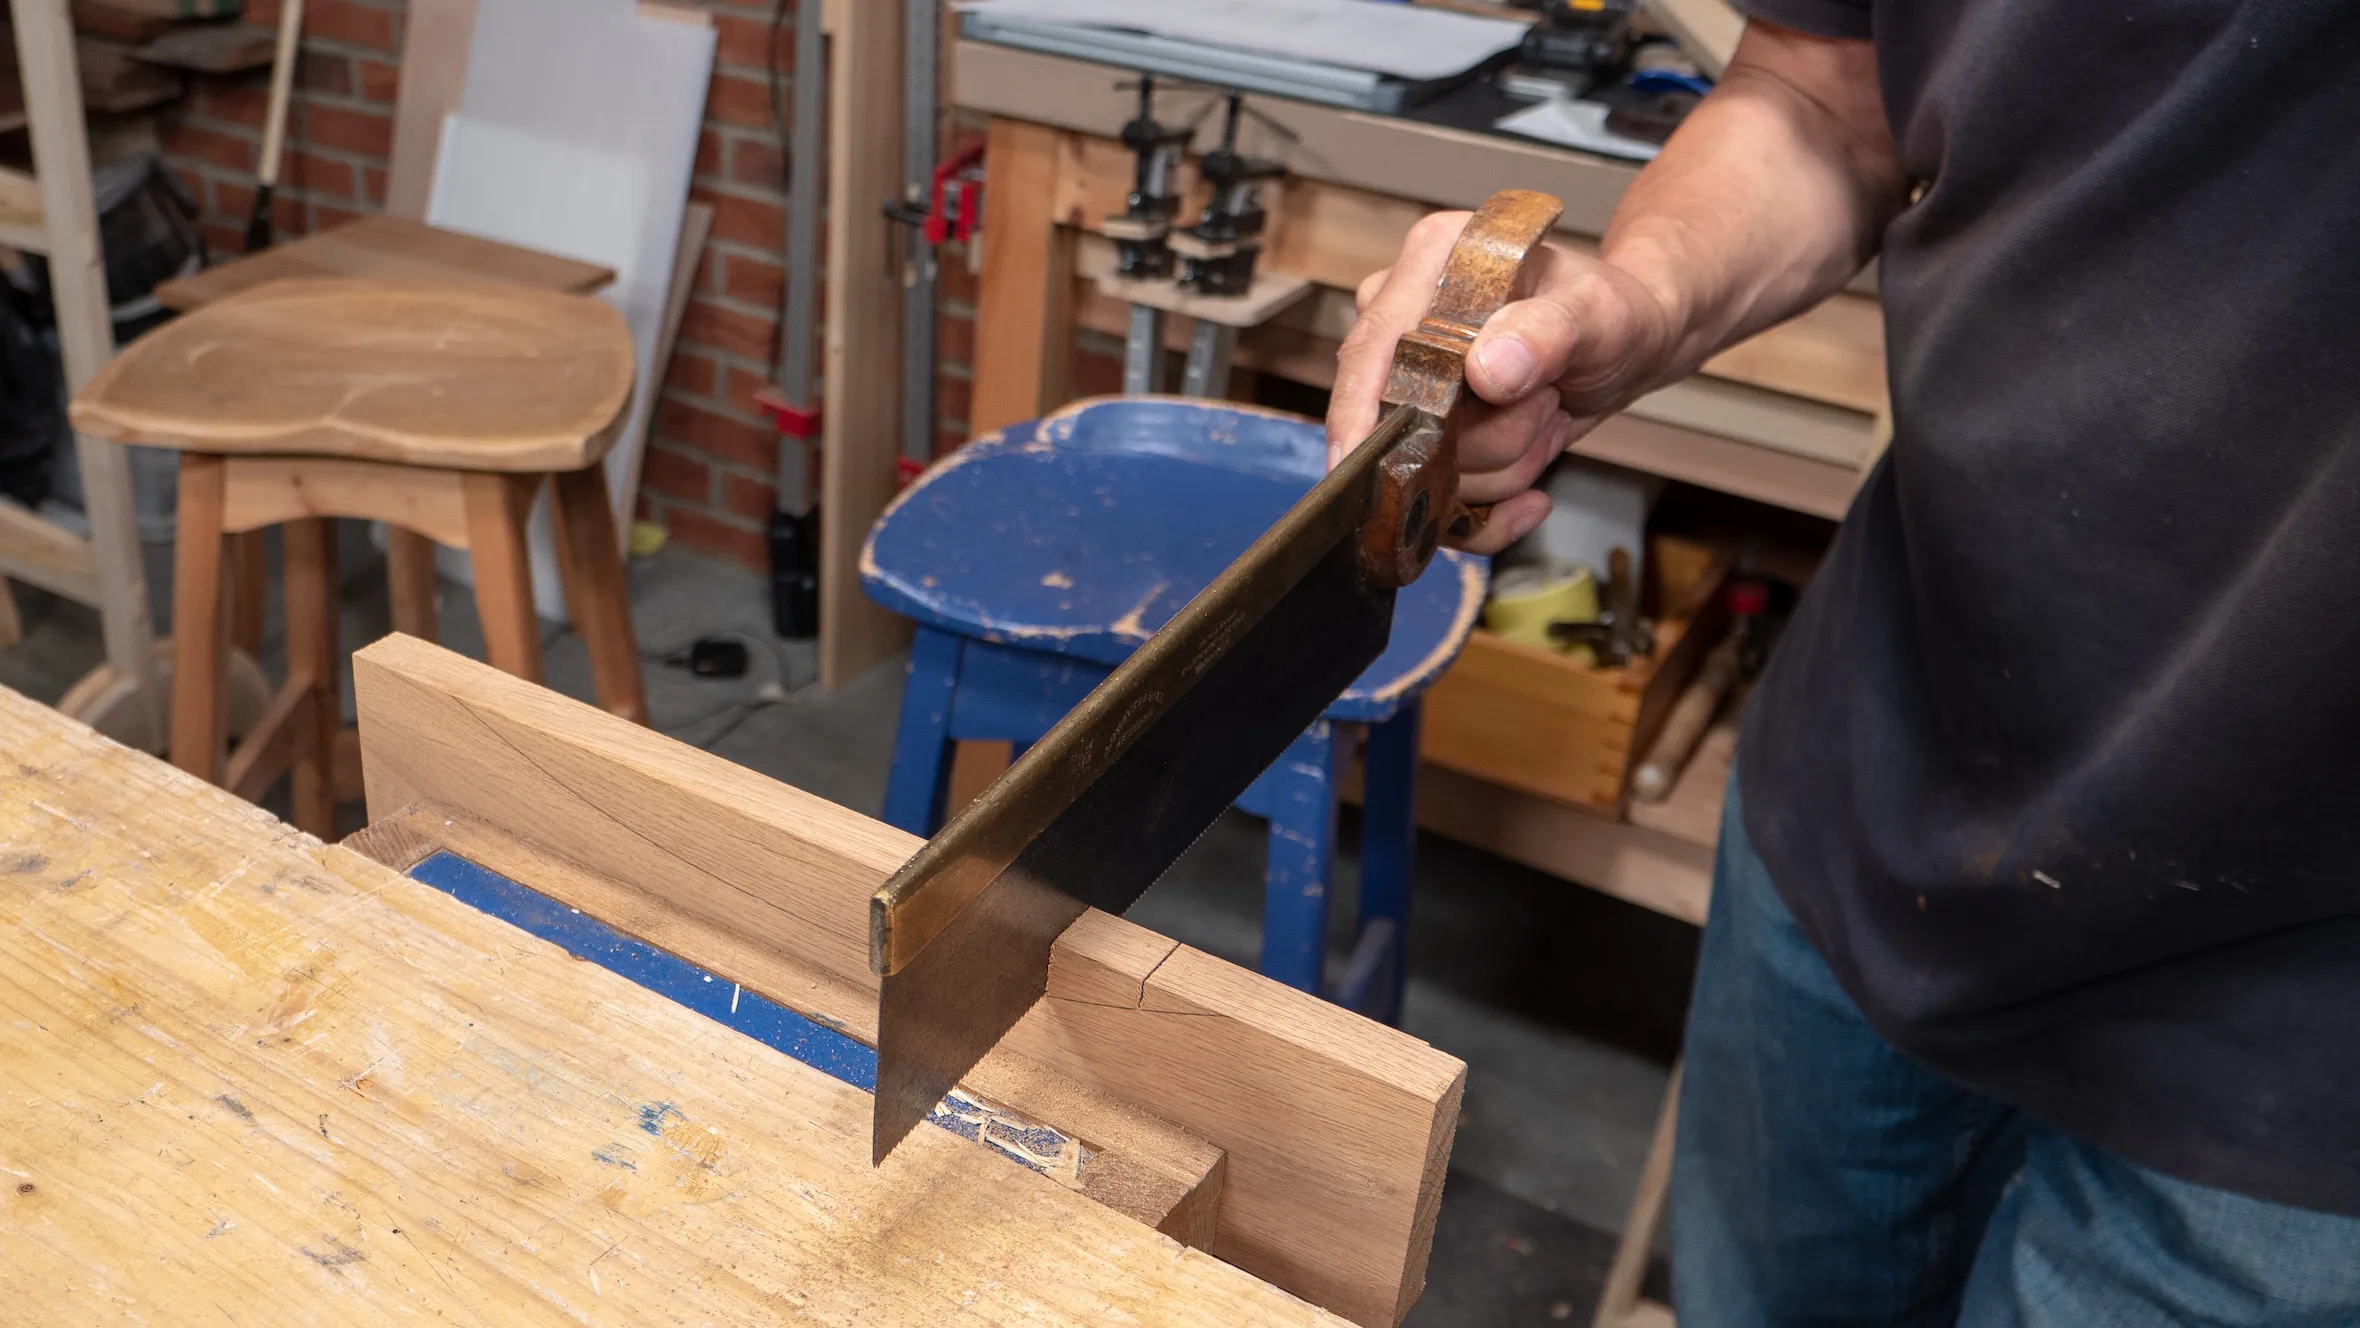
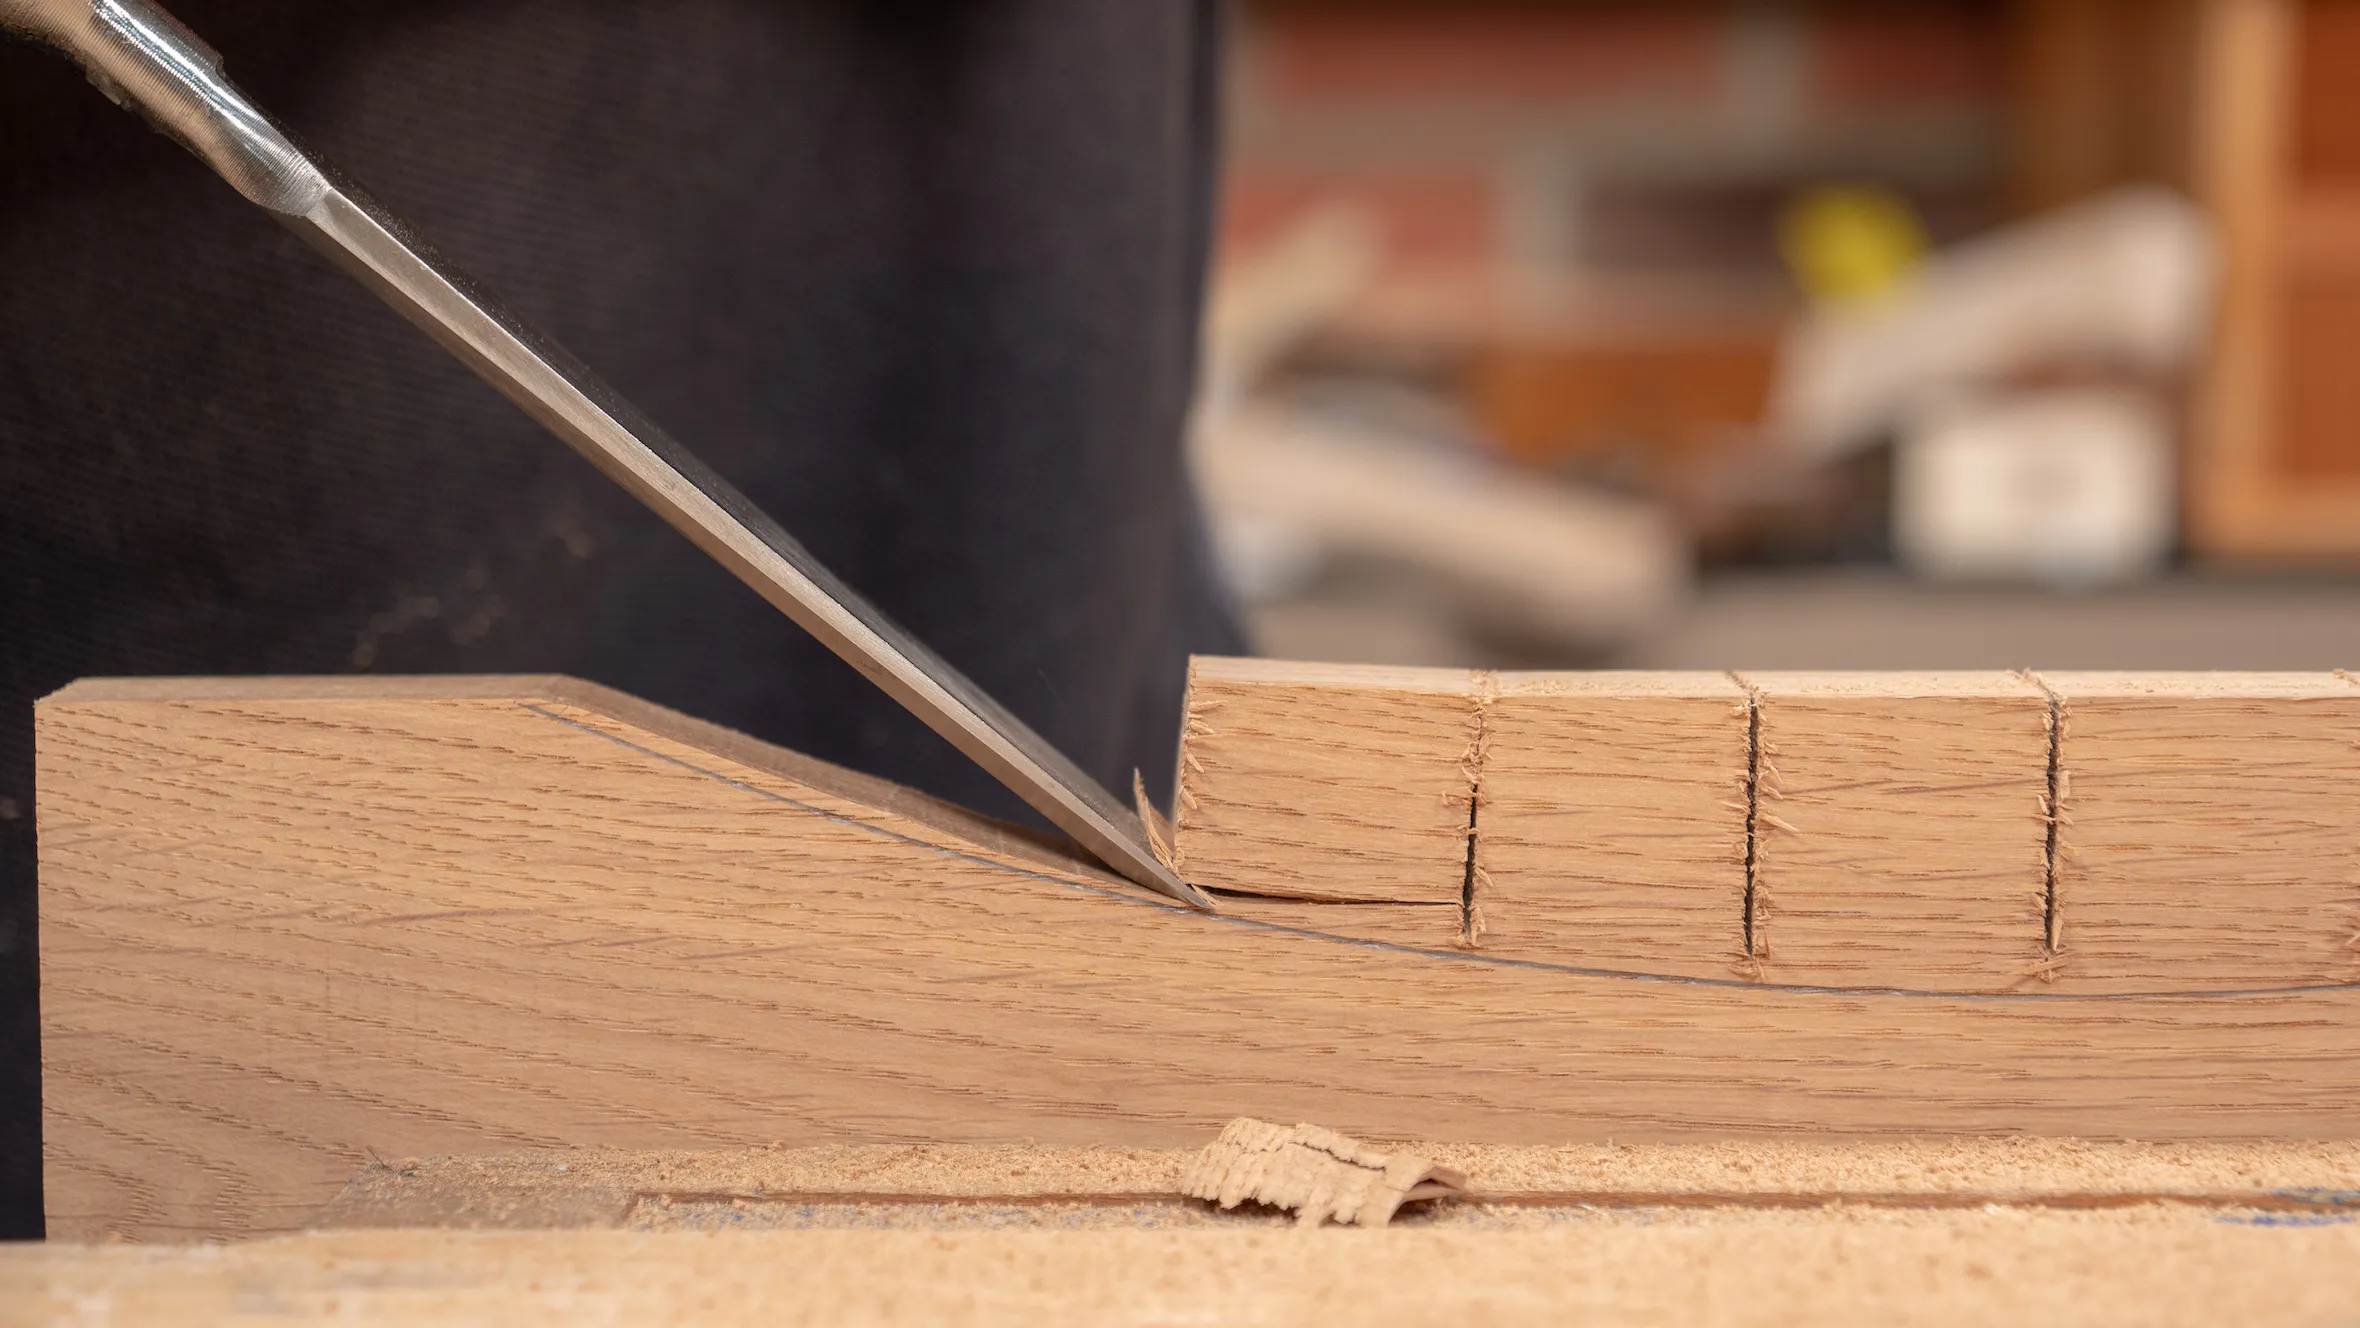
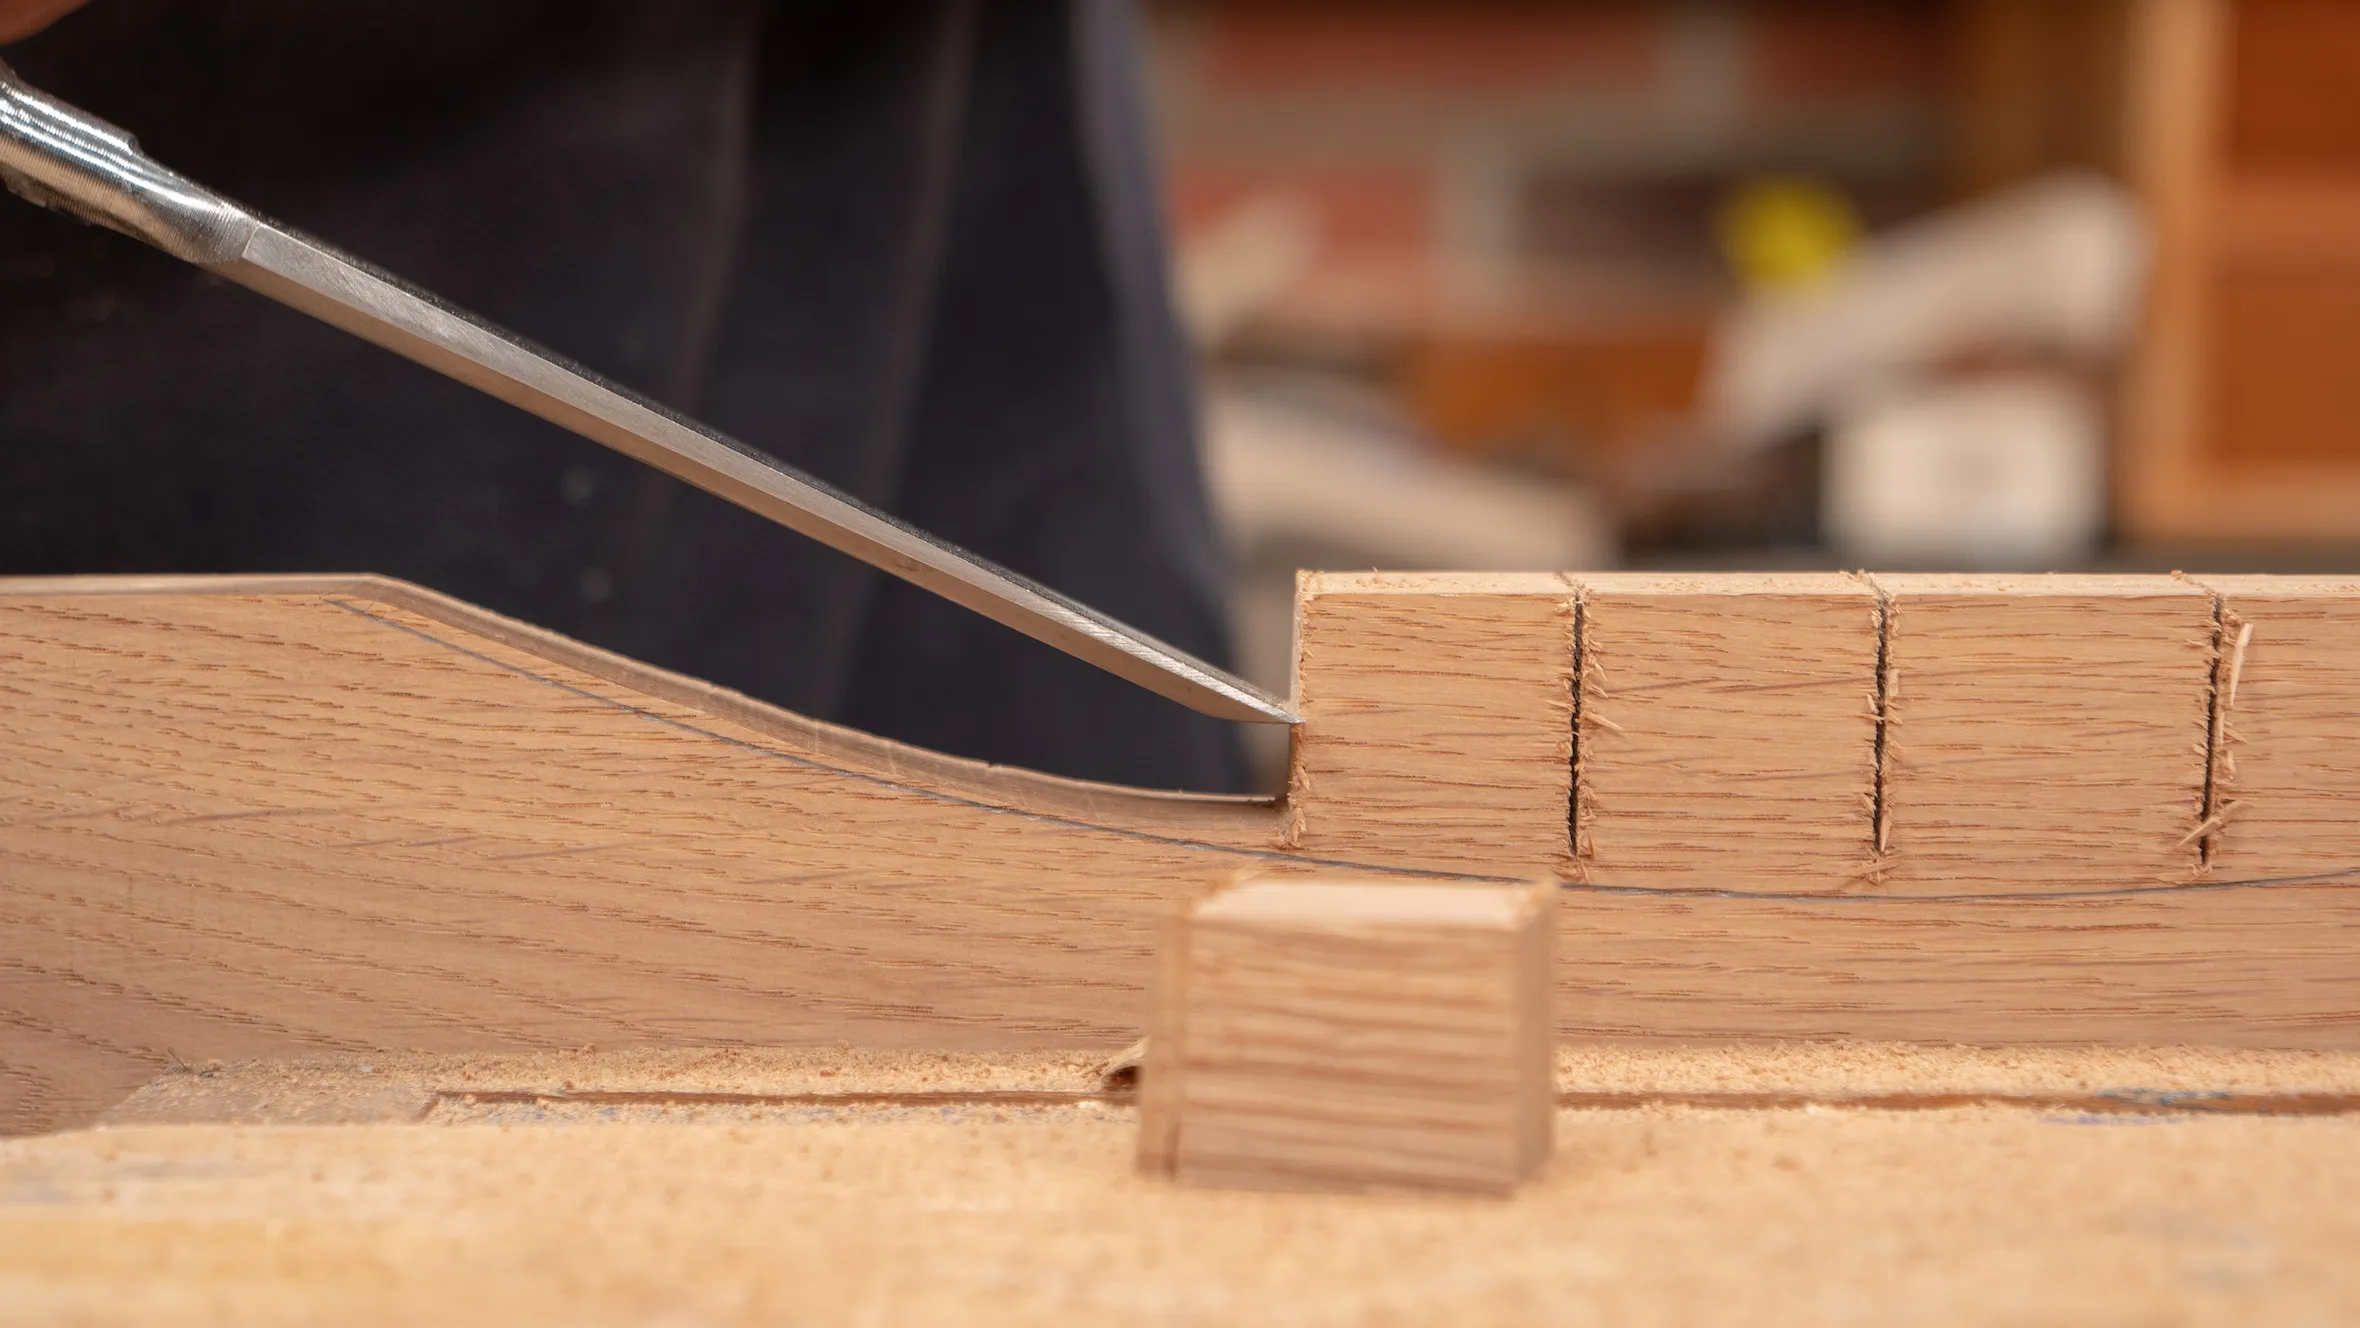
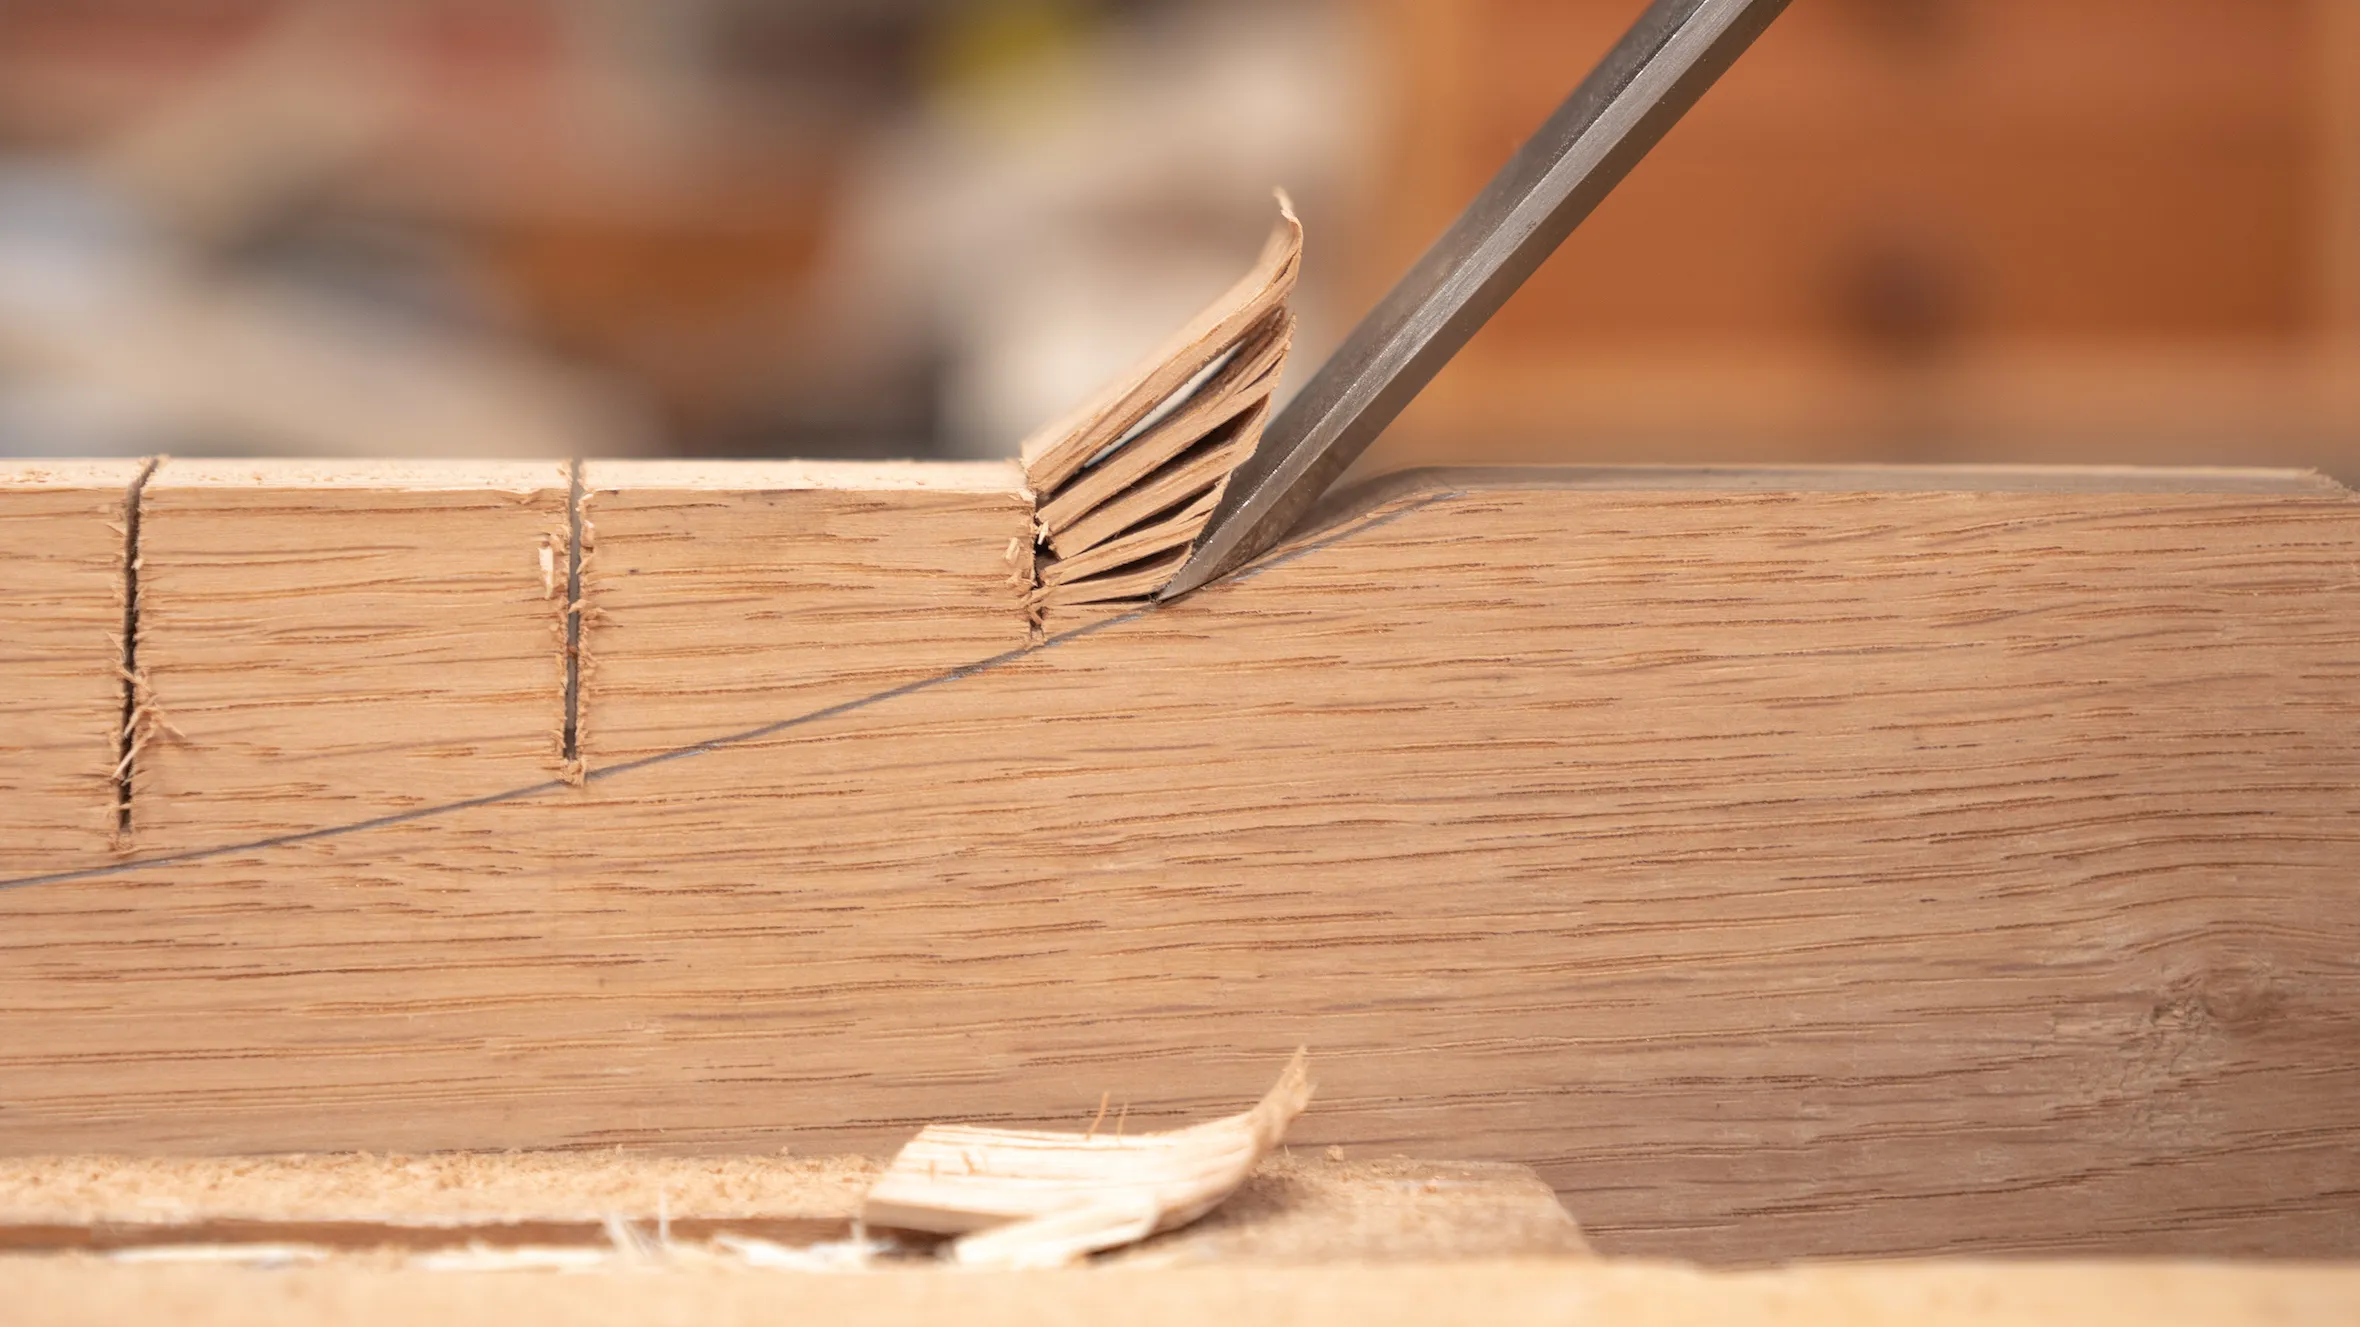
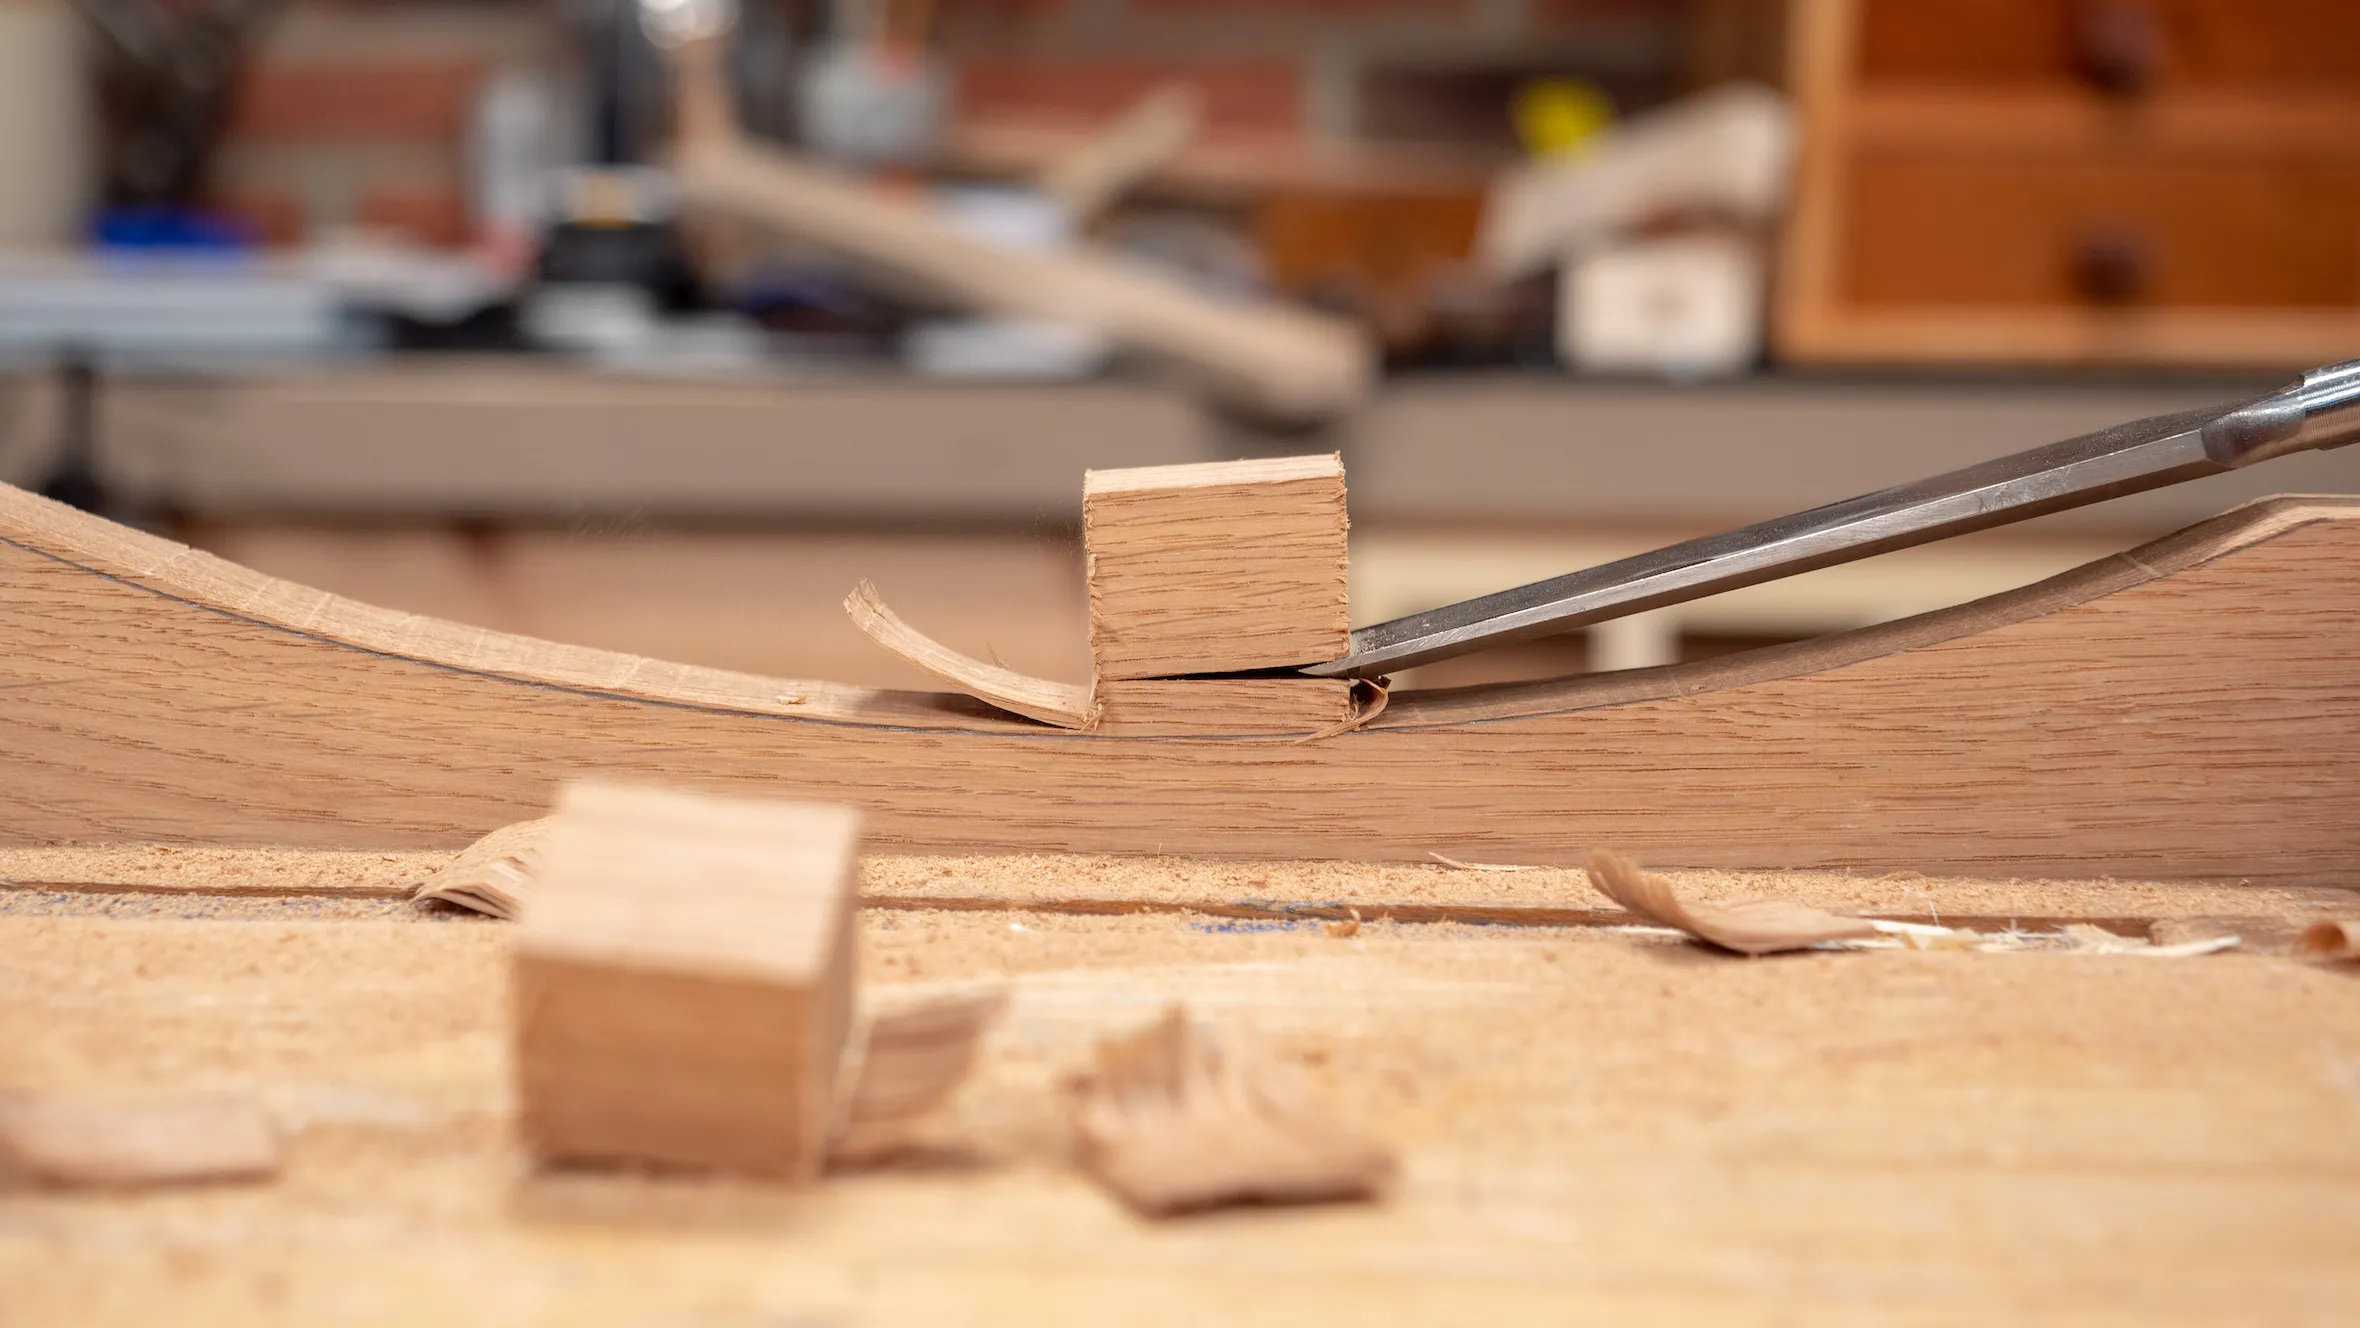
- Use your saw to create stop cuts about 1” (25mm) apart, stopping just before you get to the line. These stop cuts will avoid you splitting the grain too far.
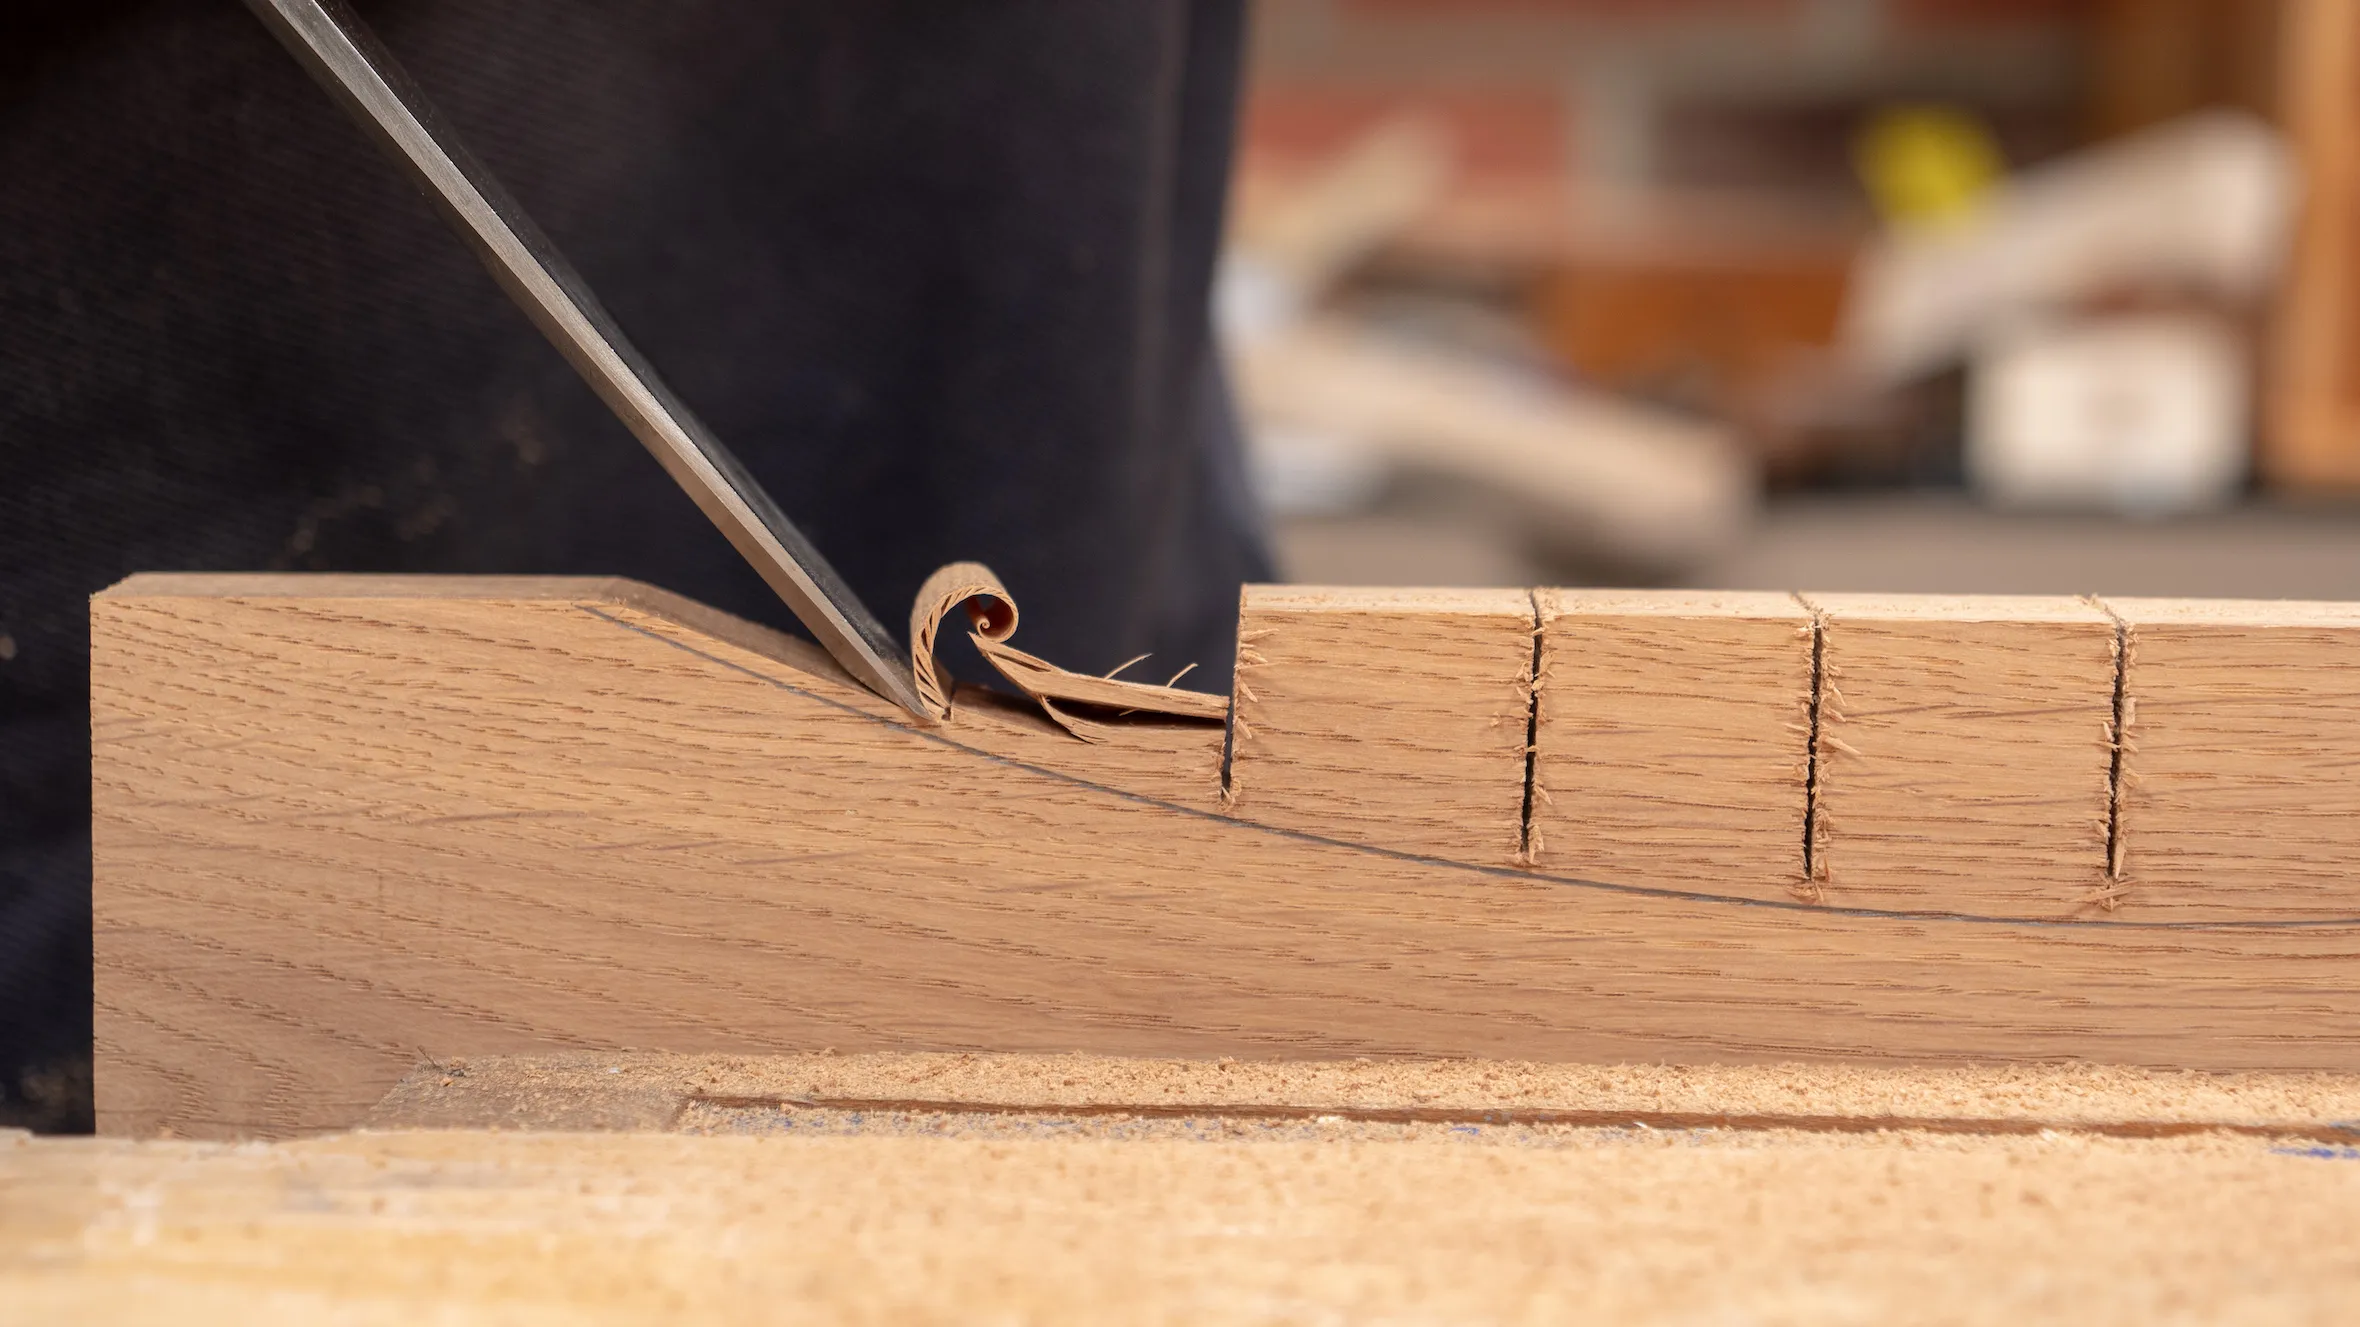
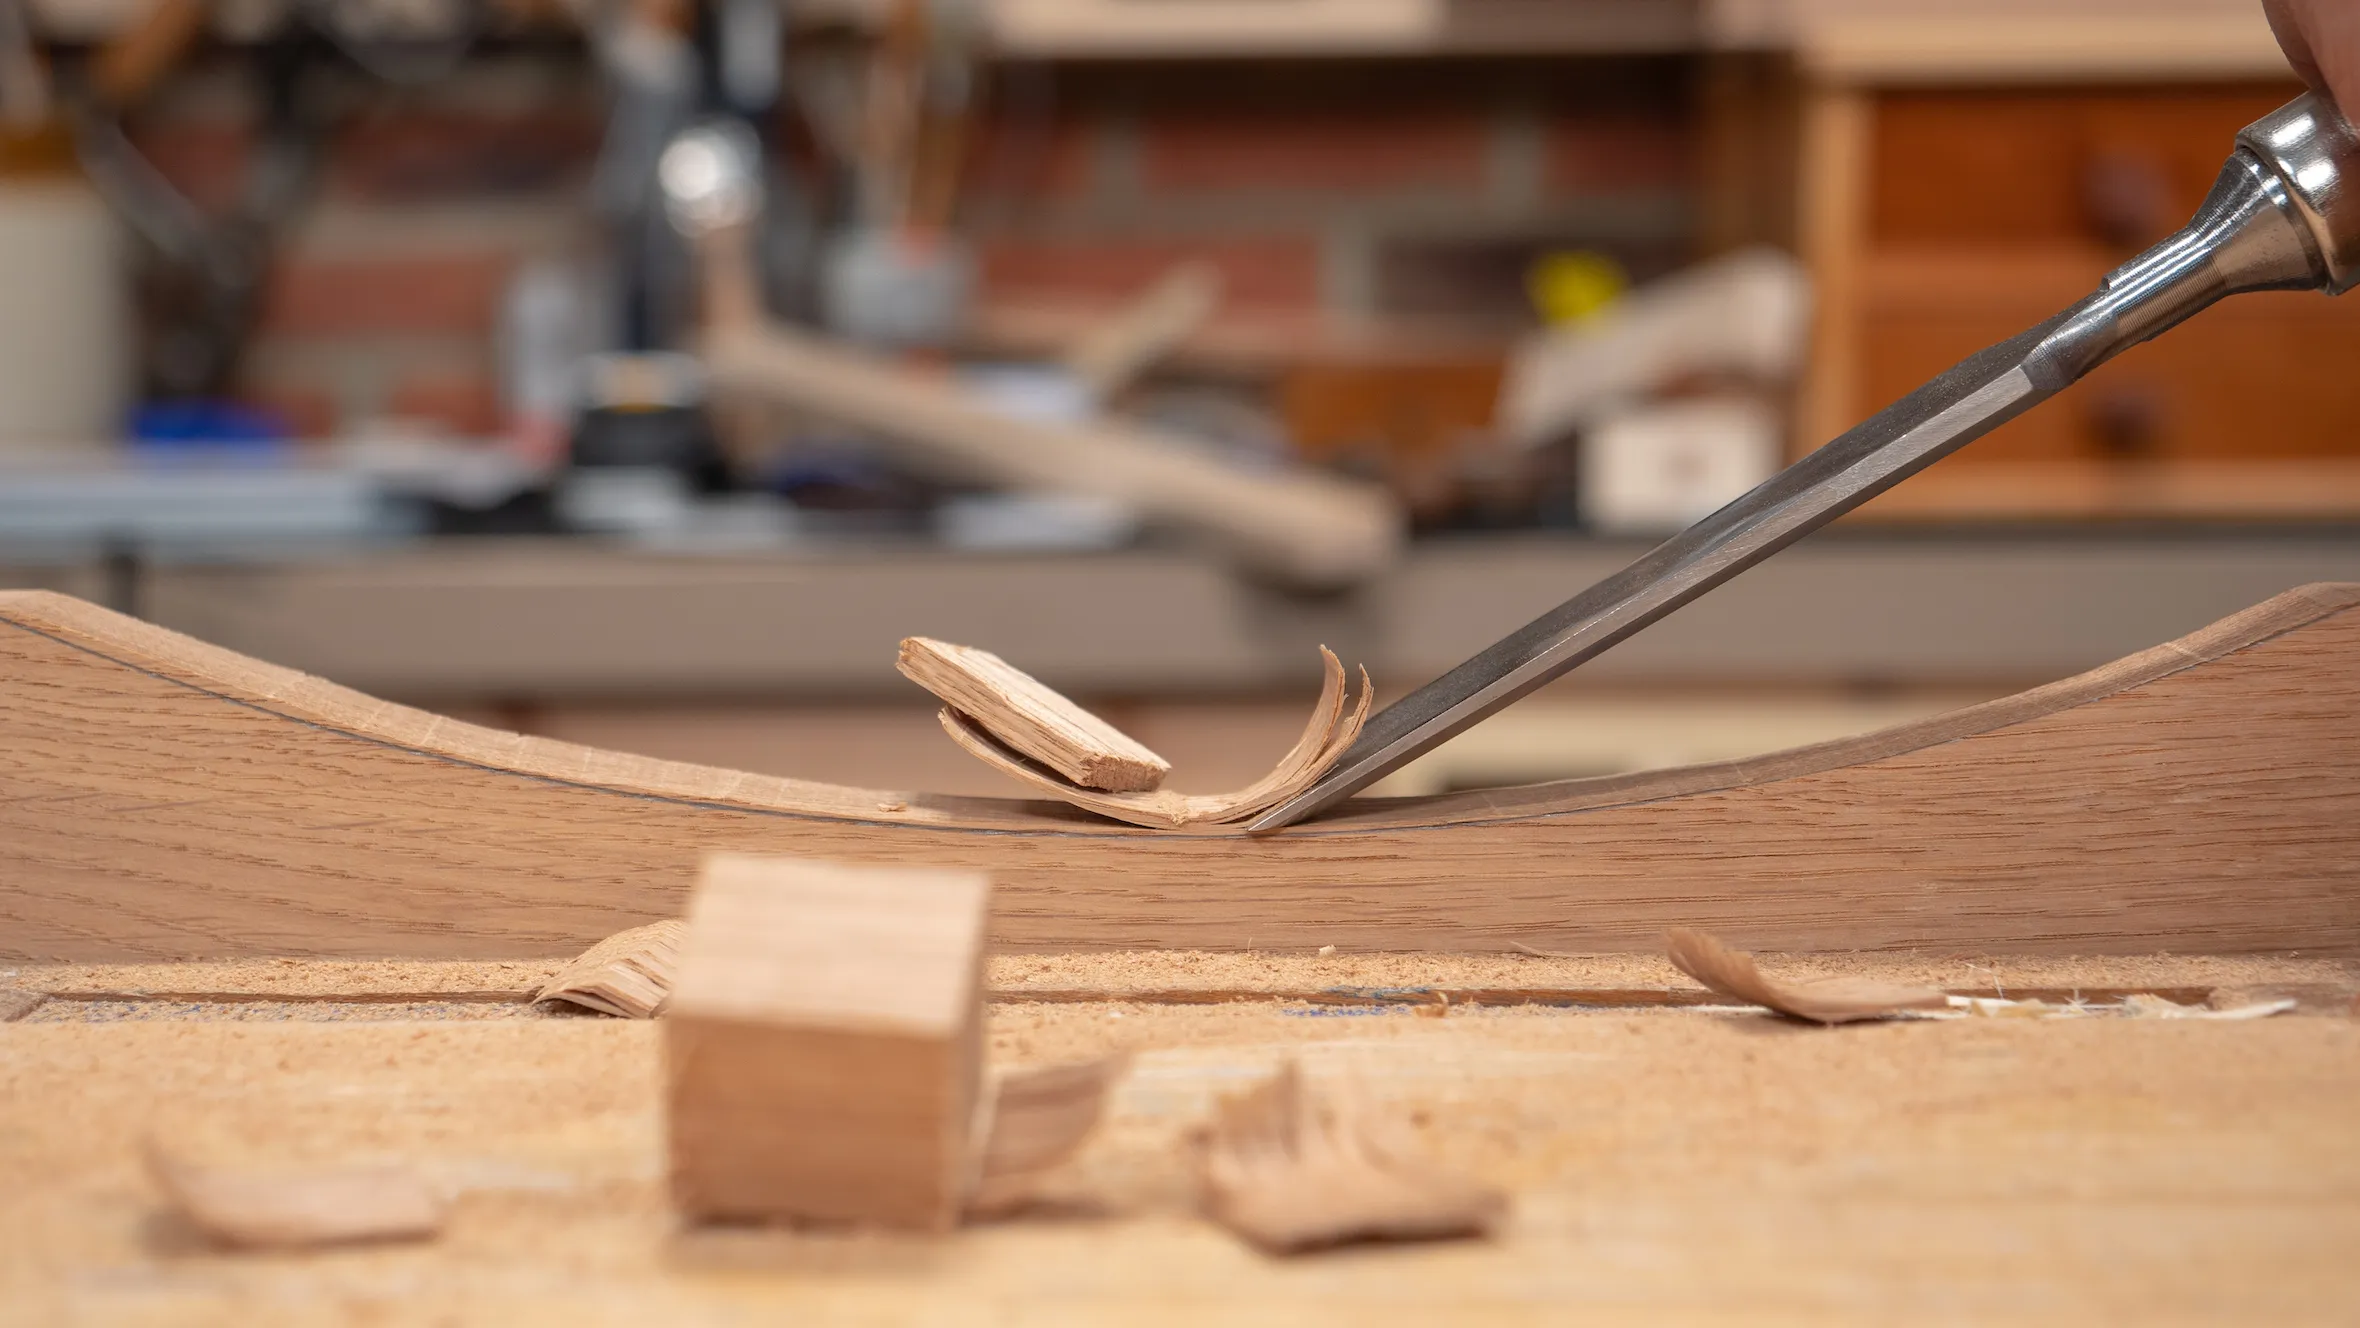
- Using a sharp chisel bevel down, split cut each section by taking off a small amount of material first to allow you to read the grain. If the grain is fairly straight, you can split nearer to the line. Start on the outside high points either side and work down towards the mid section, when you get to the middle from one side, start the opposite side from the other end.
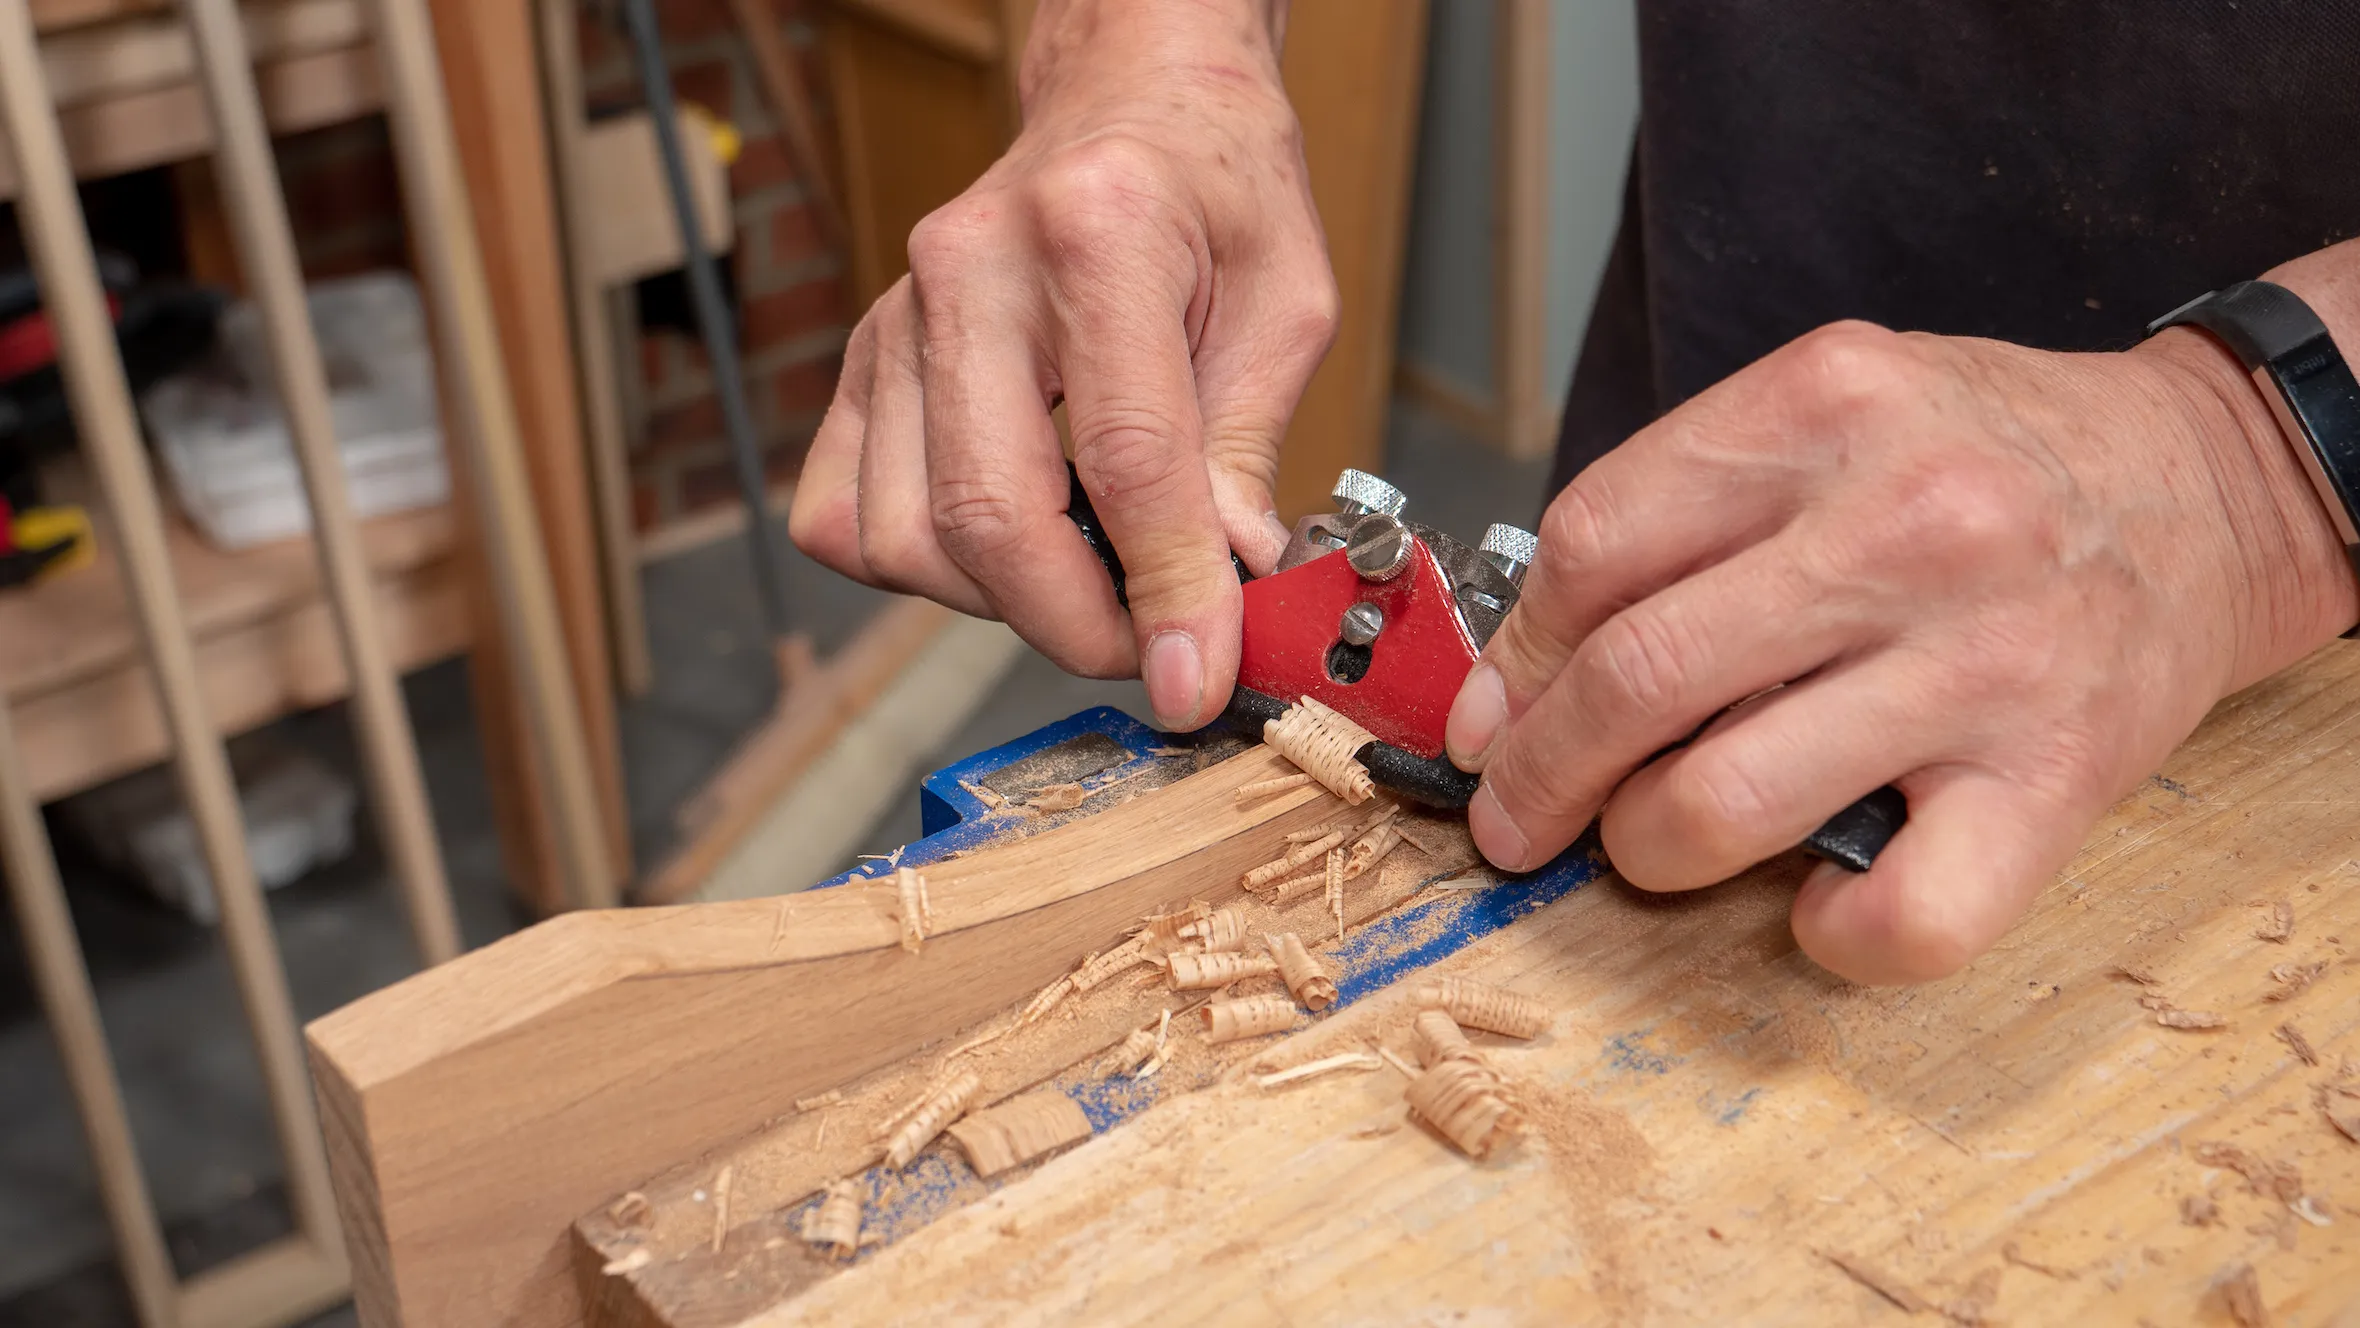
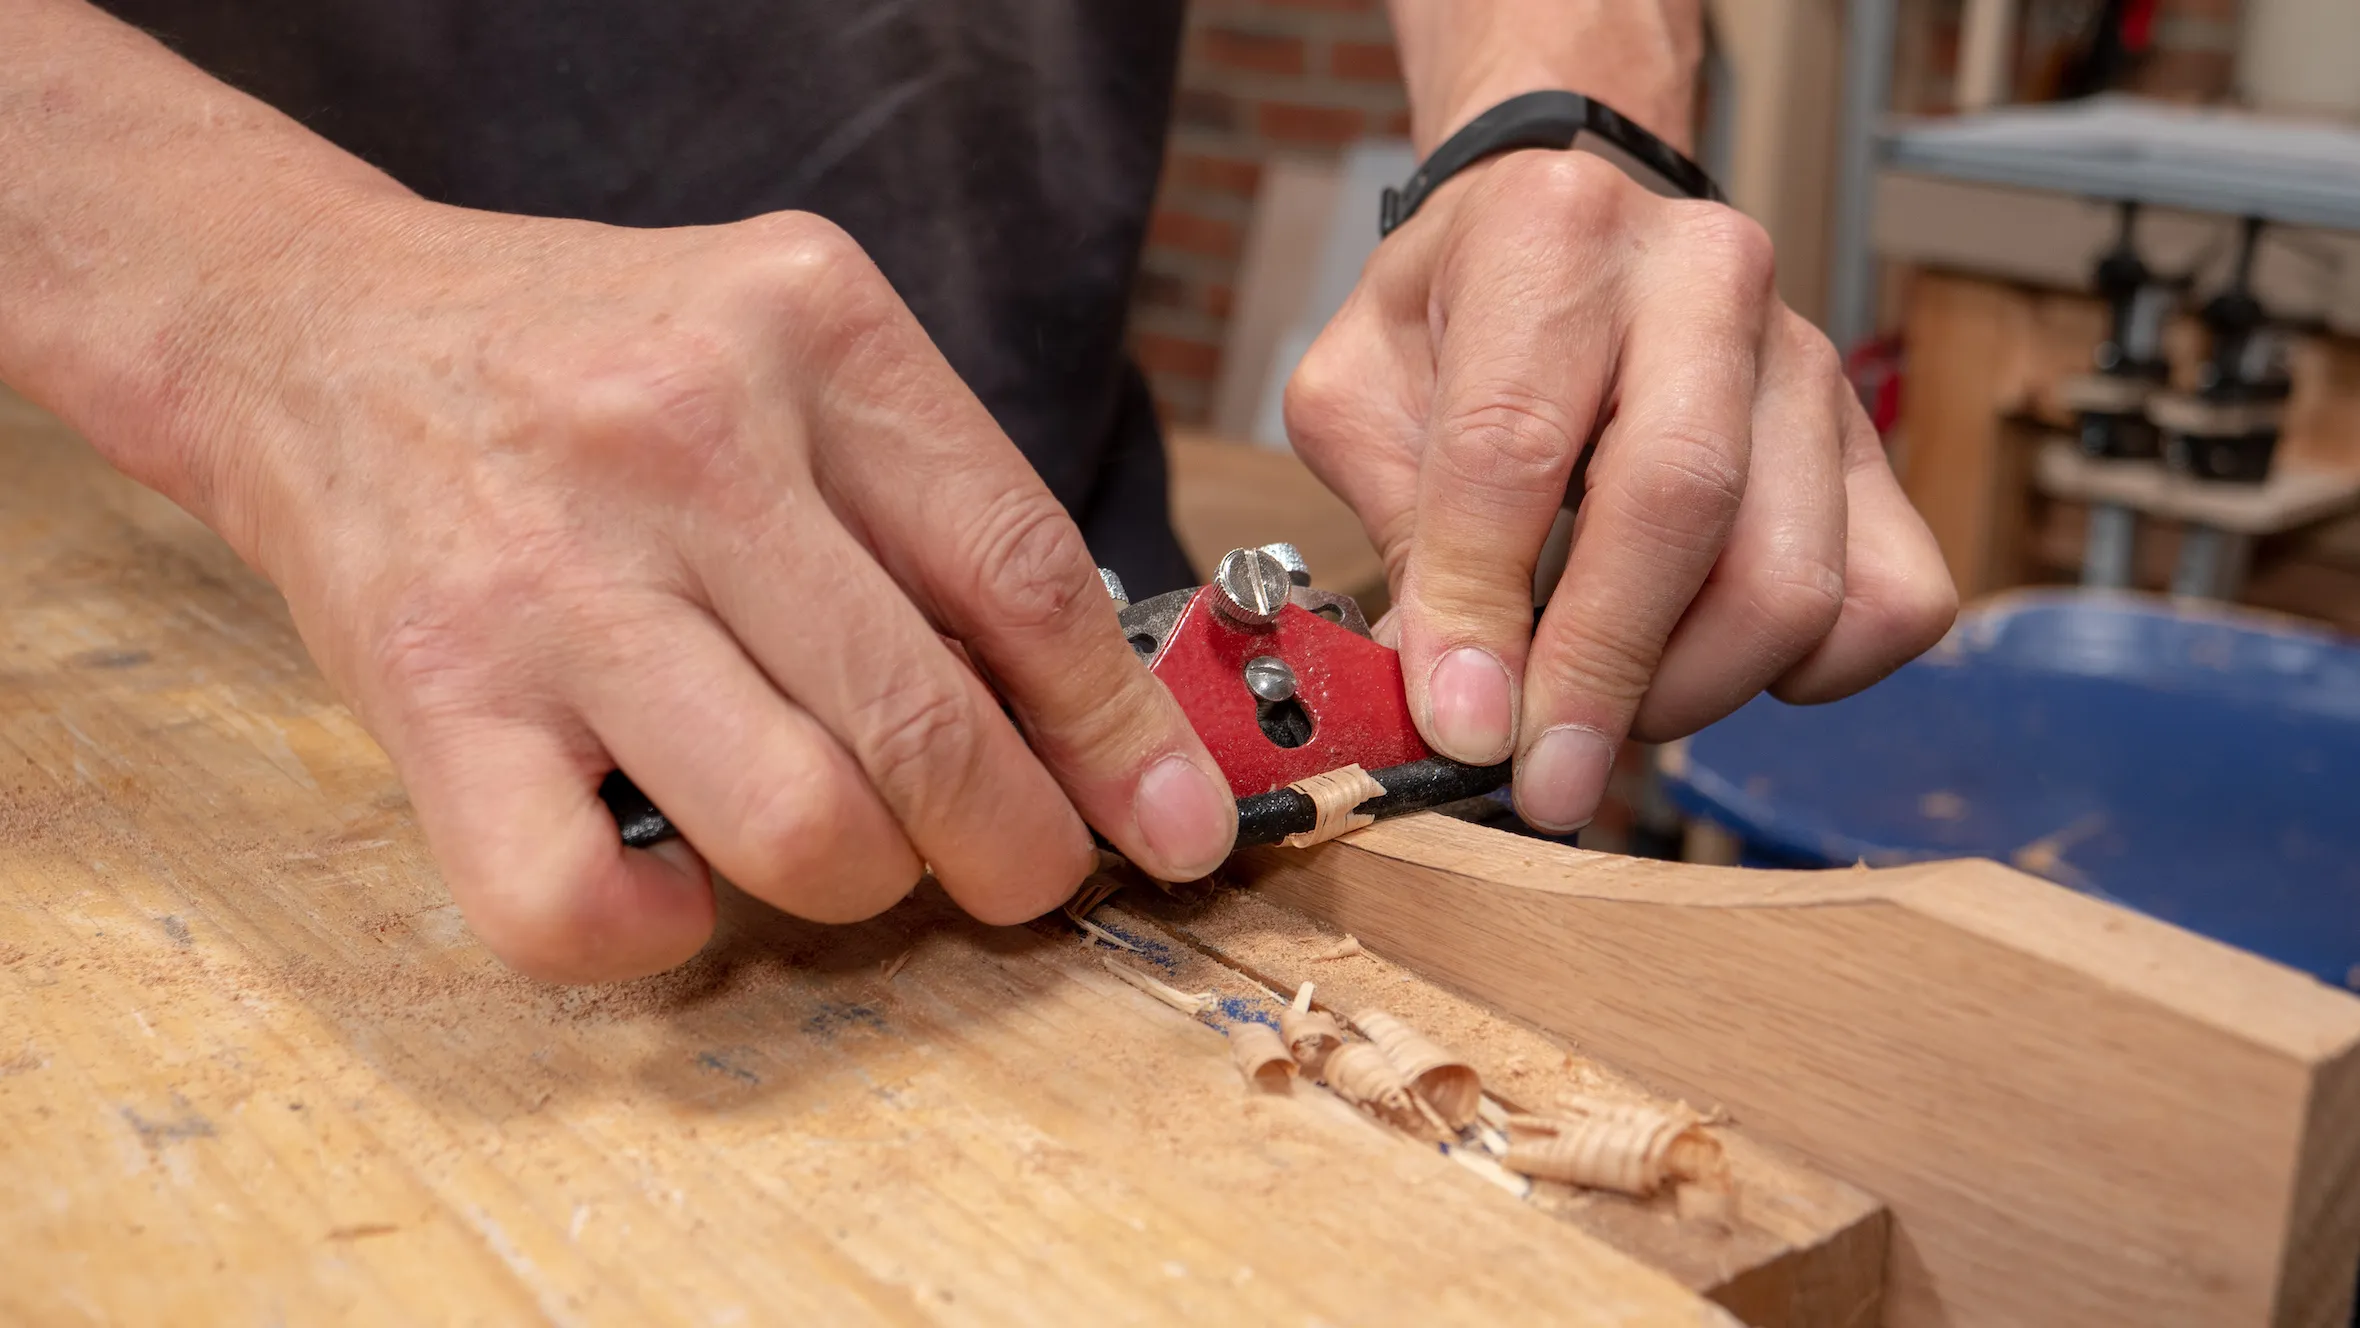
- Use a flat bottomed spokeshave to help refine your curve, go from the outside to the middle, then switch over and do it from the opposite end, this generally ensures you are always using the spokeshave ‘downhill’ or with the grain rather than against it. Sometimes you will find the cut is against the grain, in this case turn the spokeshave around and work the opposite way. To reach the bottom of the curved section, you may need to extend your spokeshave blade out a little more to cut the wood in this section. If you are finding it difficult, oil your spokeshave as this reduces the friction and should make it easier to use (for a picture on how to do this, see our ‘Using a Spokeshave’ guide).

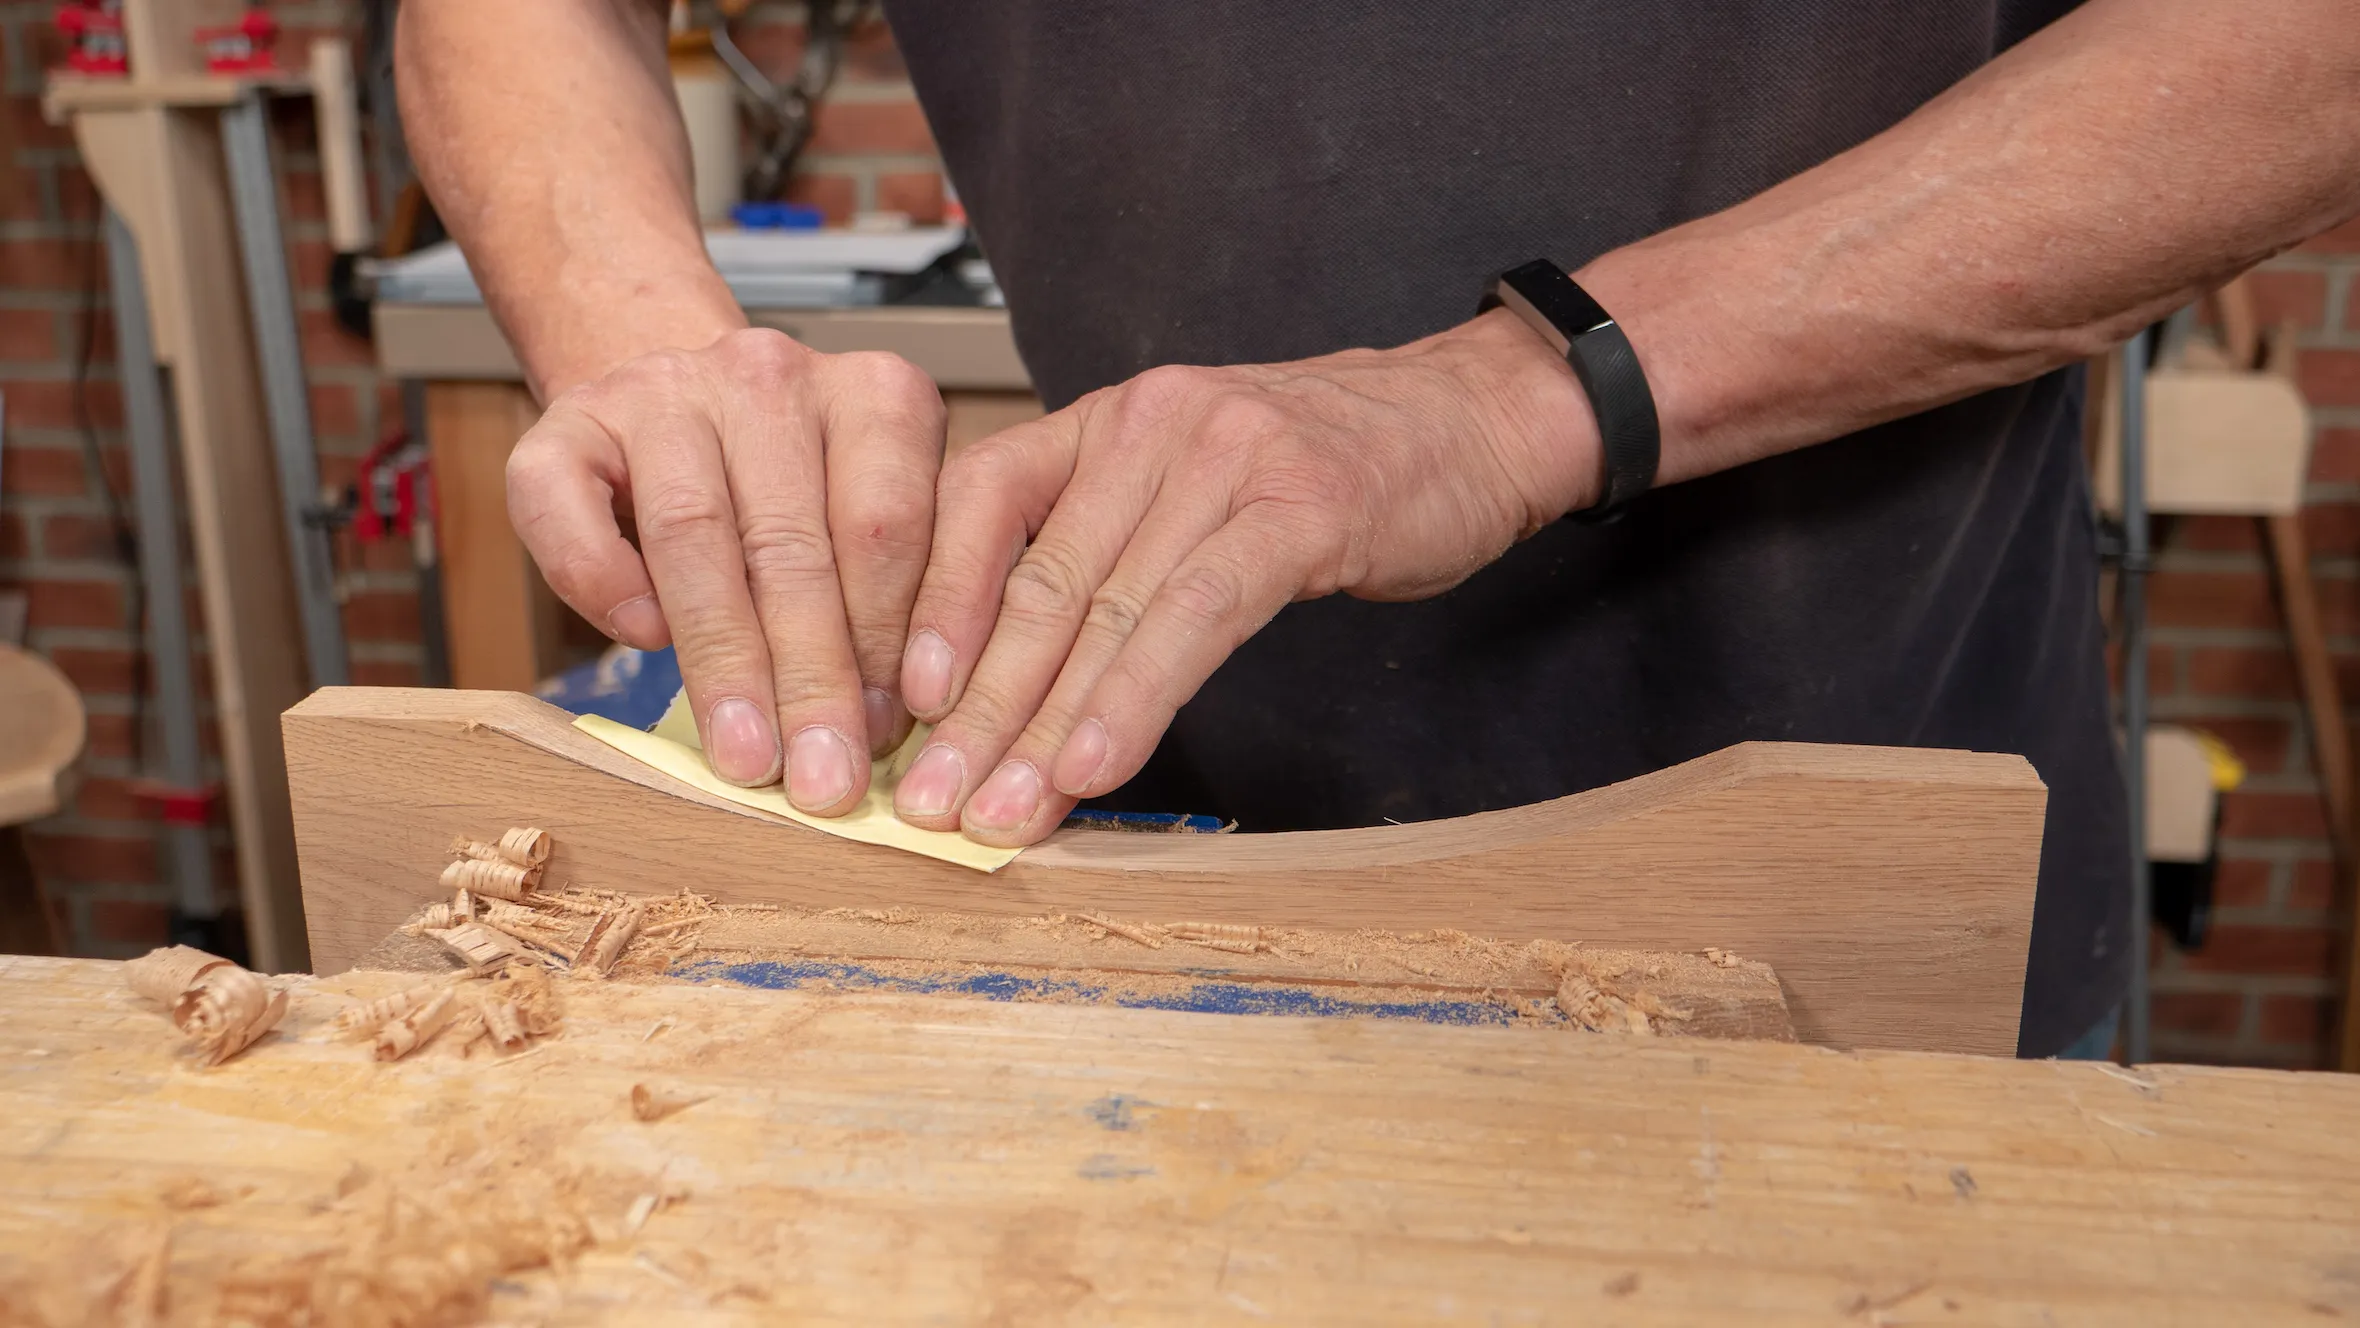
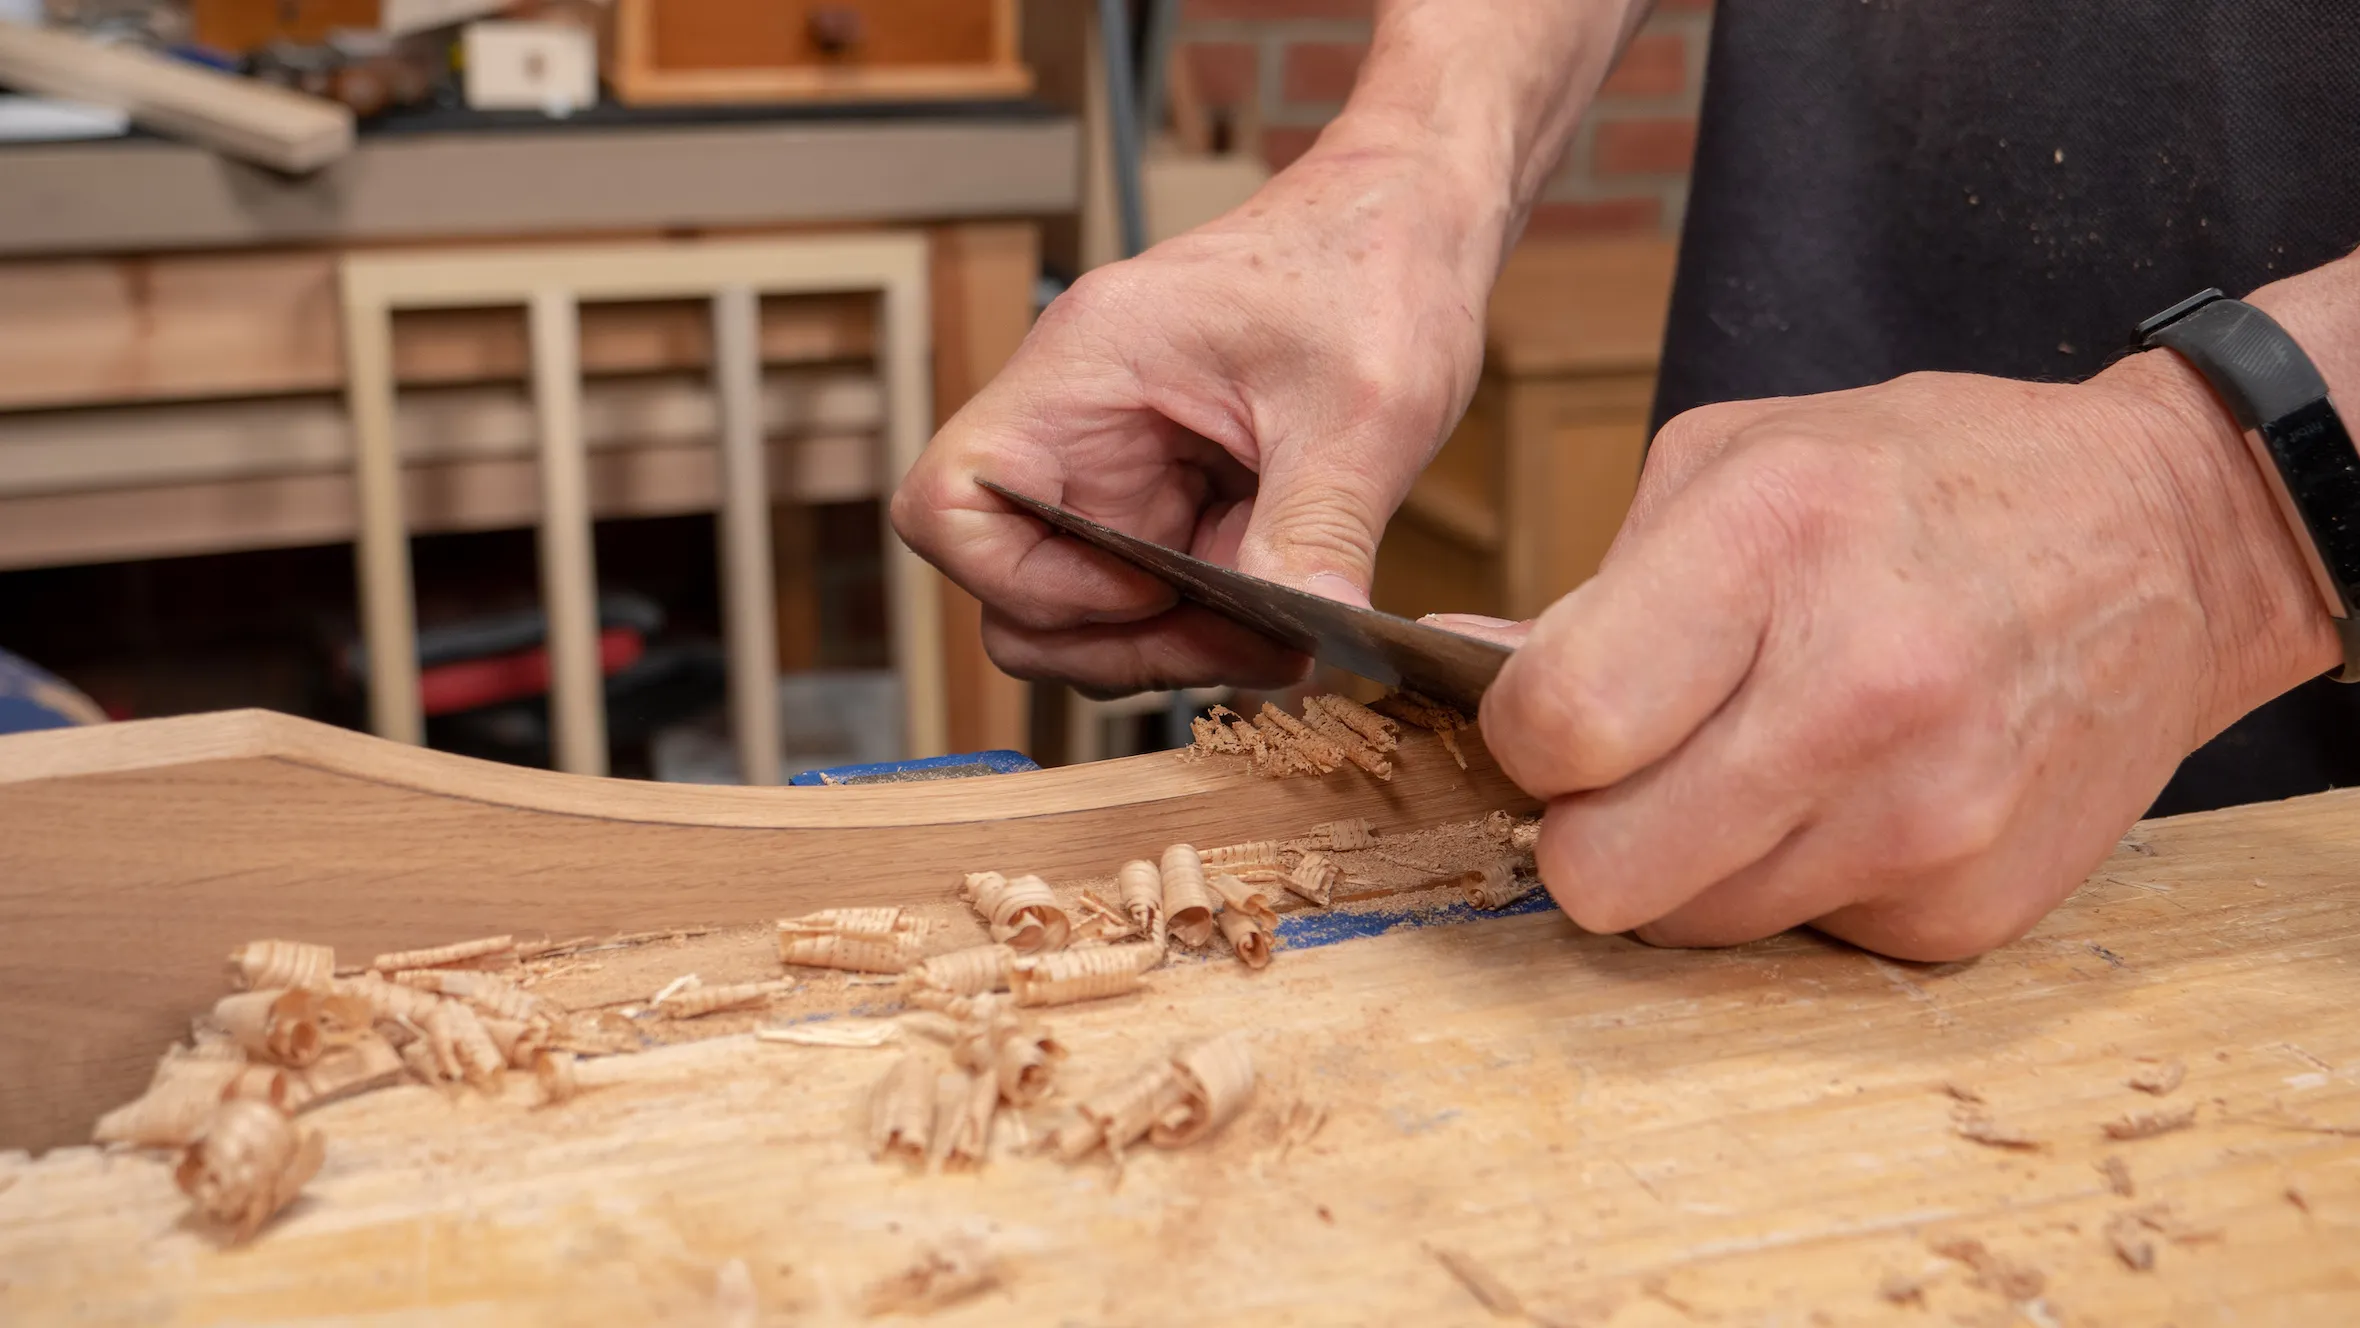
- You can use a scraper to refine the curve and remove any minor irregularities and high spots.
- Finish off by using 240 grit sandpaper