Layout
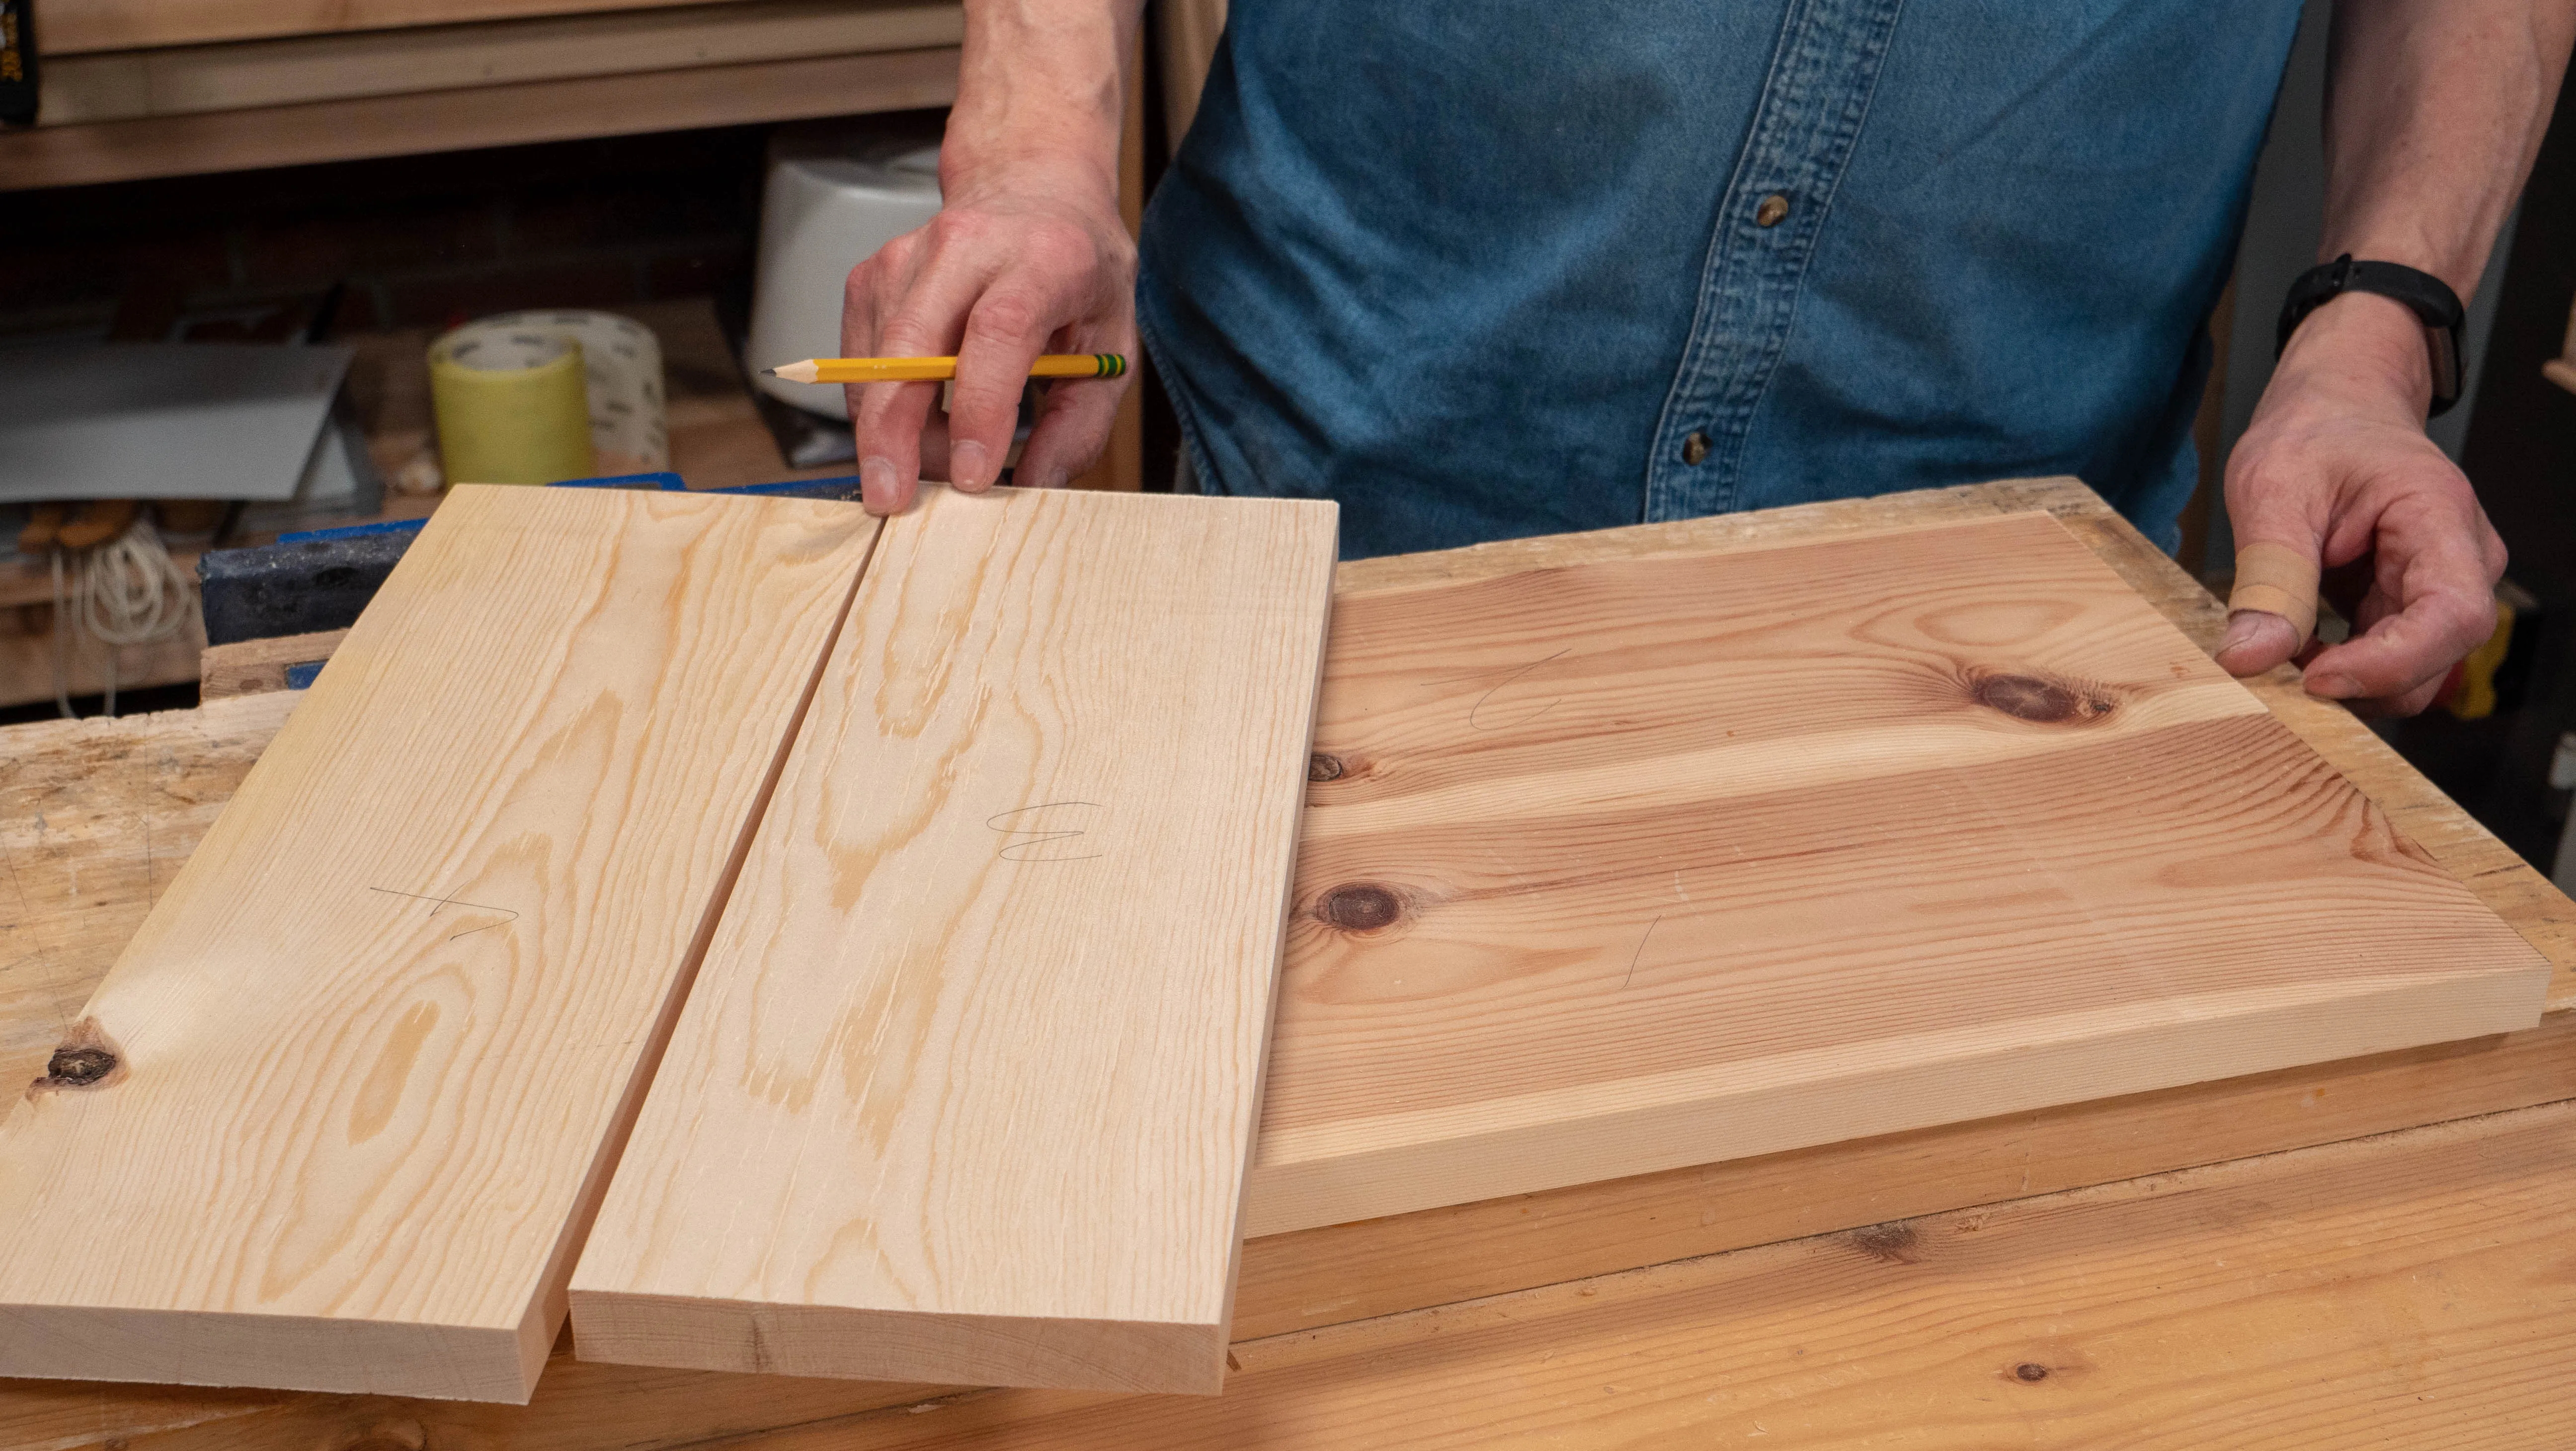
As with any project, begin by choosing the position of each part so as to result in a balanced piece. Pay attention to colour, grain configuration and knots that may cause problems, especially if they fall right in the middle of a joint.
When you’re happy with your choice of faces, number the parts clearly to avoid any confusion. Paul labels the parts for his tool tote as follows:
1 and 2 = Side pieces
3 and 4 = End pieces
Laying out the Joints
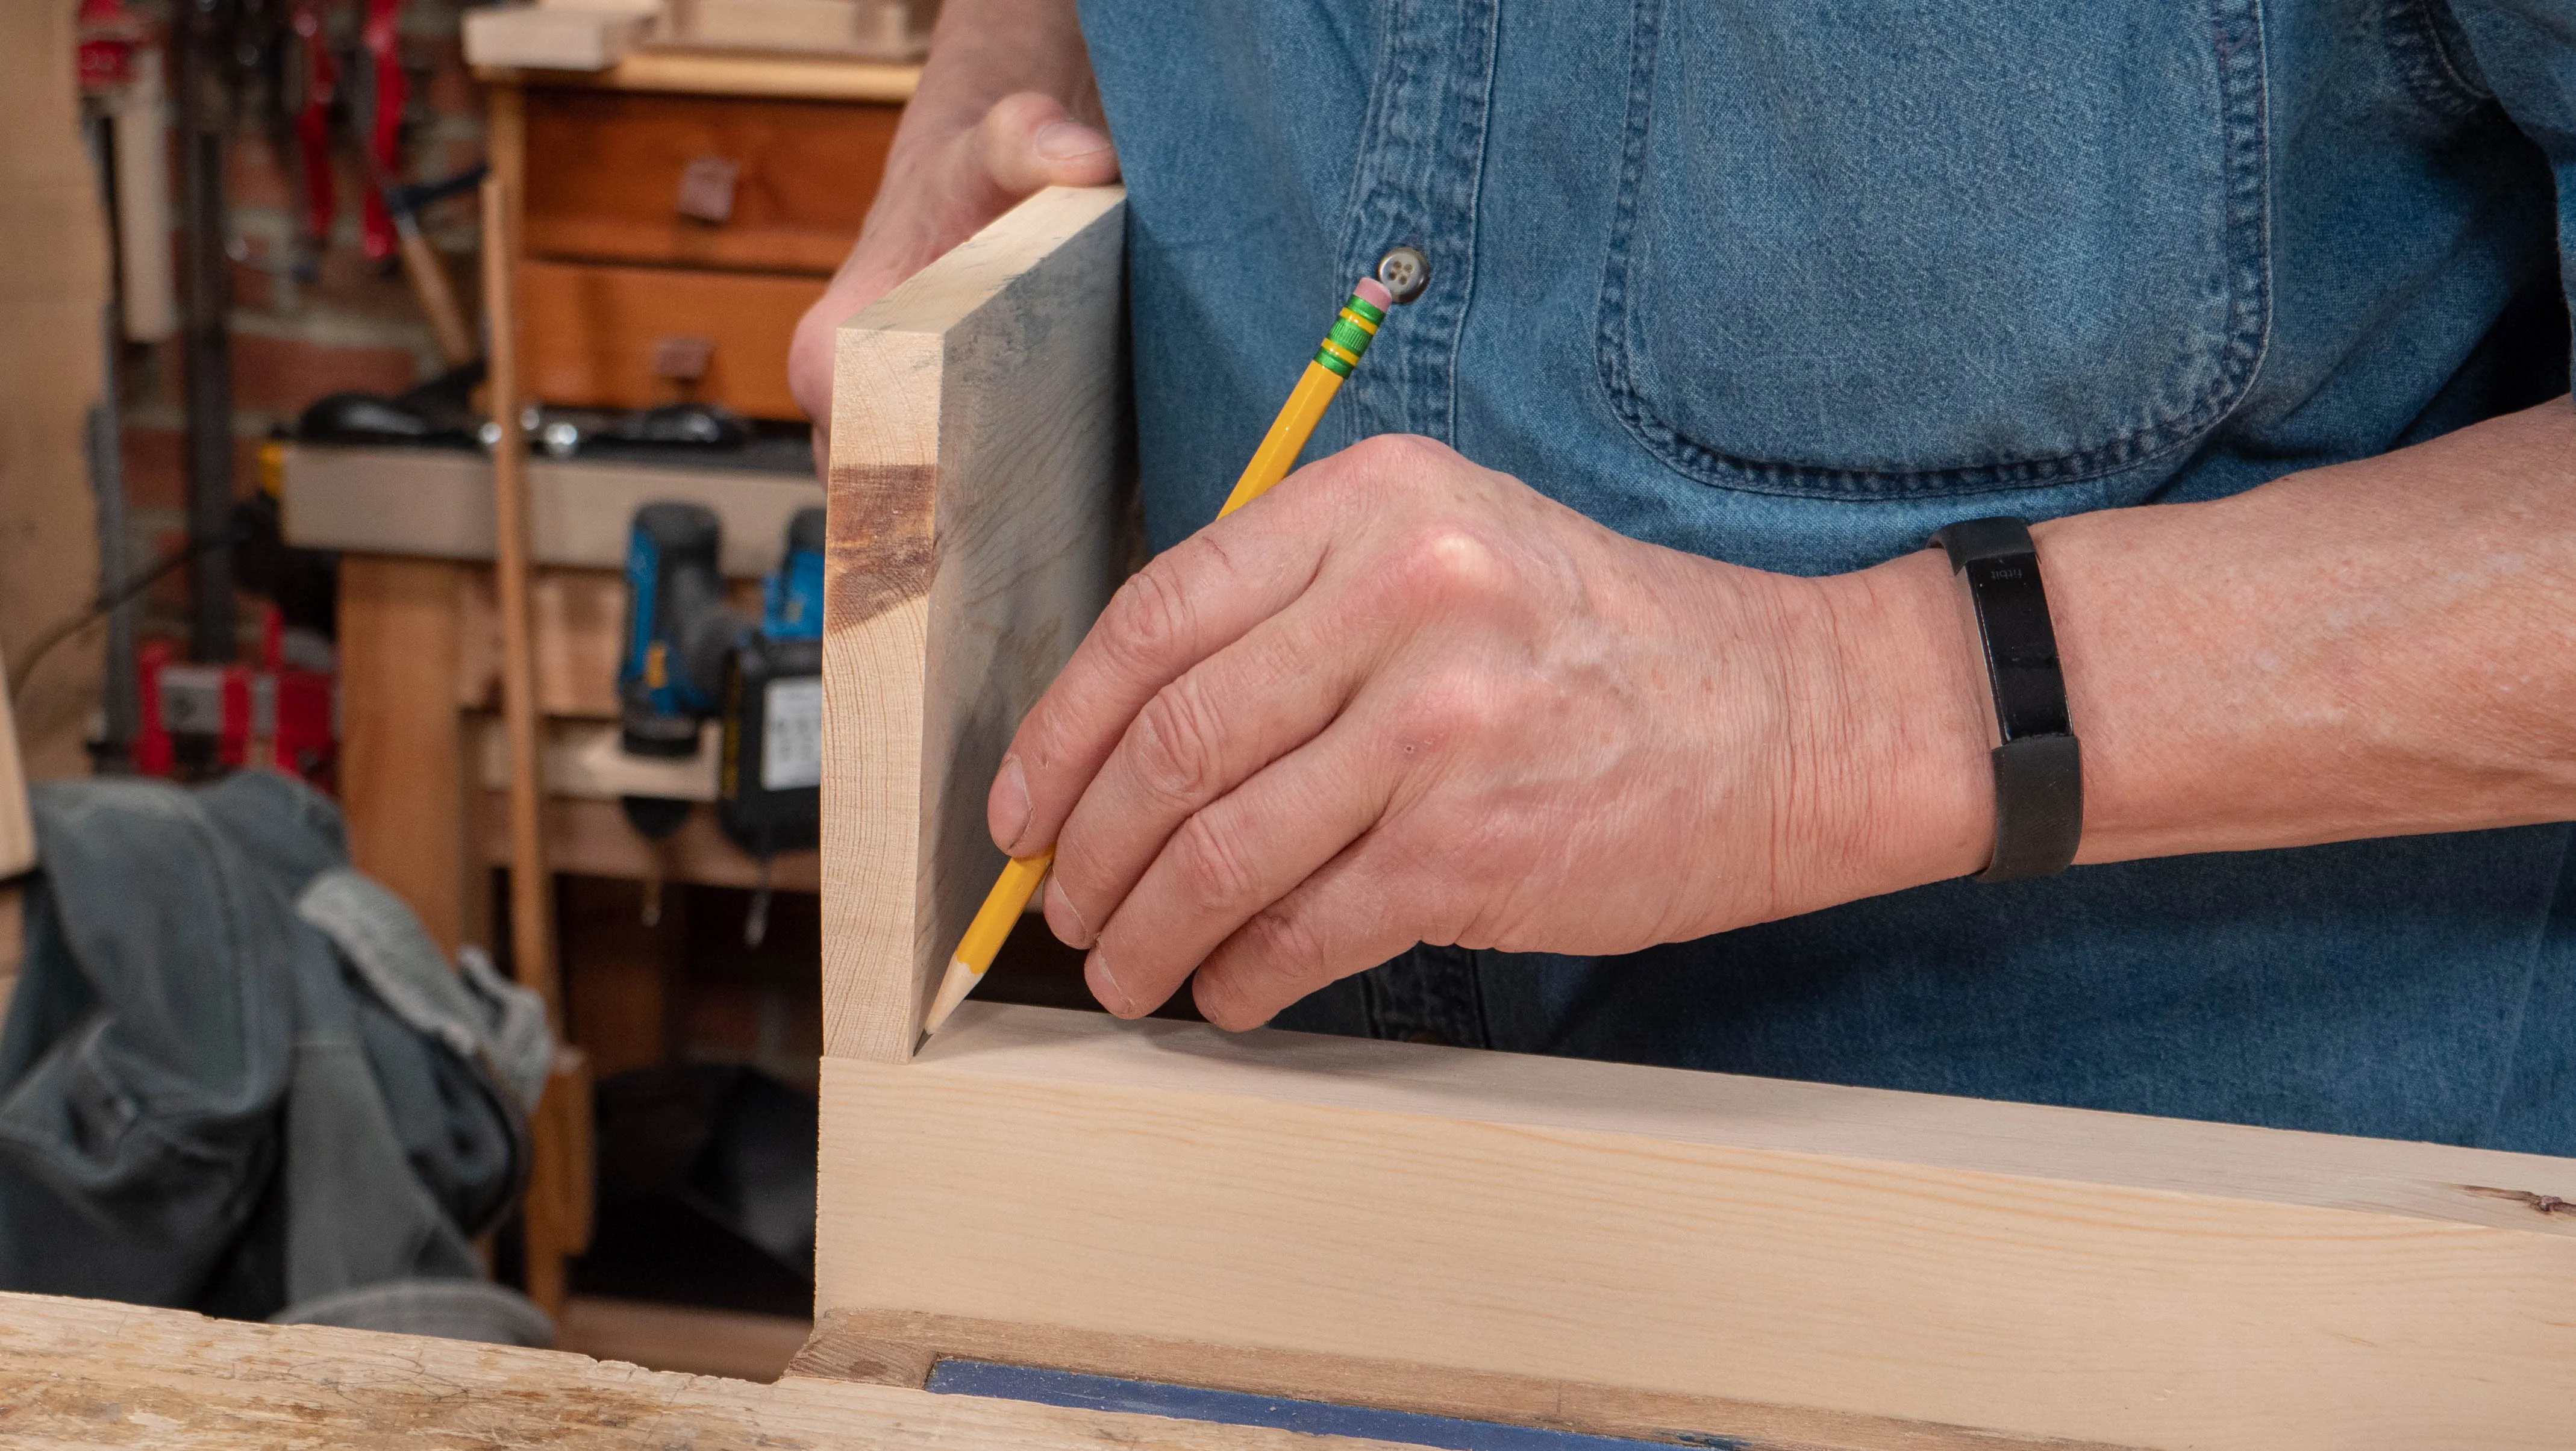
Start with the two housing dados on the end pieces to house the base along its length. These are the least visible of the joints so you can chop these first to get some practice.
Clamp the two end pieces horizontally in the vise – inside faces against each other, and use the thickness of the base piece (this is only done out of convenience), flush with the bottom end, as a spacer for first wall of your recess. Mark this with a short pencil line, and then move the base piece up to the other side of the newly made mark and make another pencil line for the second wall.
You can now take the end pieces out of the vise and square these reference marks all the way across the inside faces and about half way towards the outside face on both edges. (Remember that the pencil lines are only temporary guidelines, and the depth of the recess will only be 1/4” or 6mm.)
Note: You could decide on a certain distance and measure the same amount in from the ends since it’s completely arbitrary, but many times, the thickness of stock is just about right as it’s enough material to compromise the joint yet not too great to look cumbersome in the finished piece.
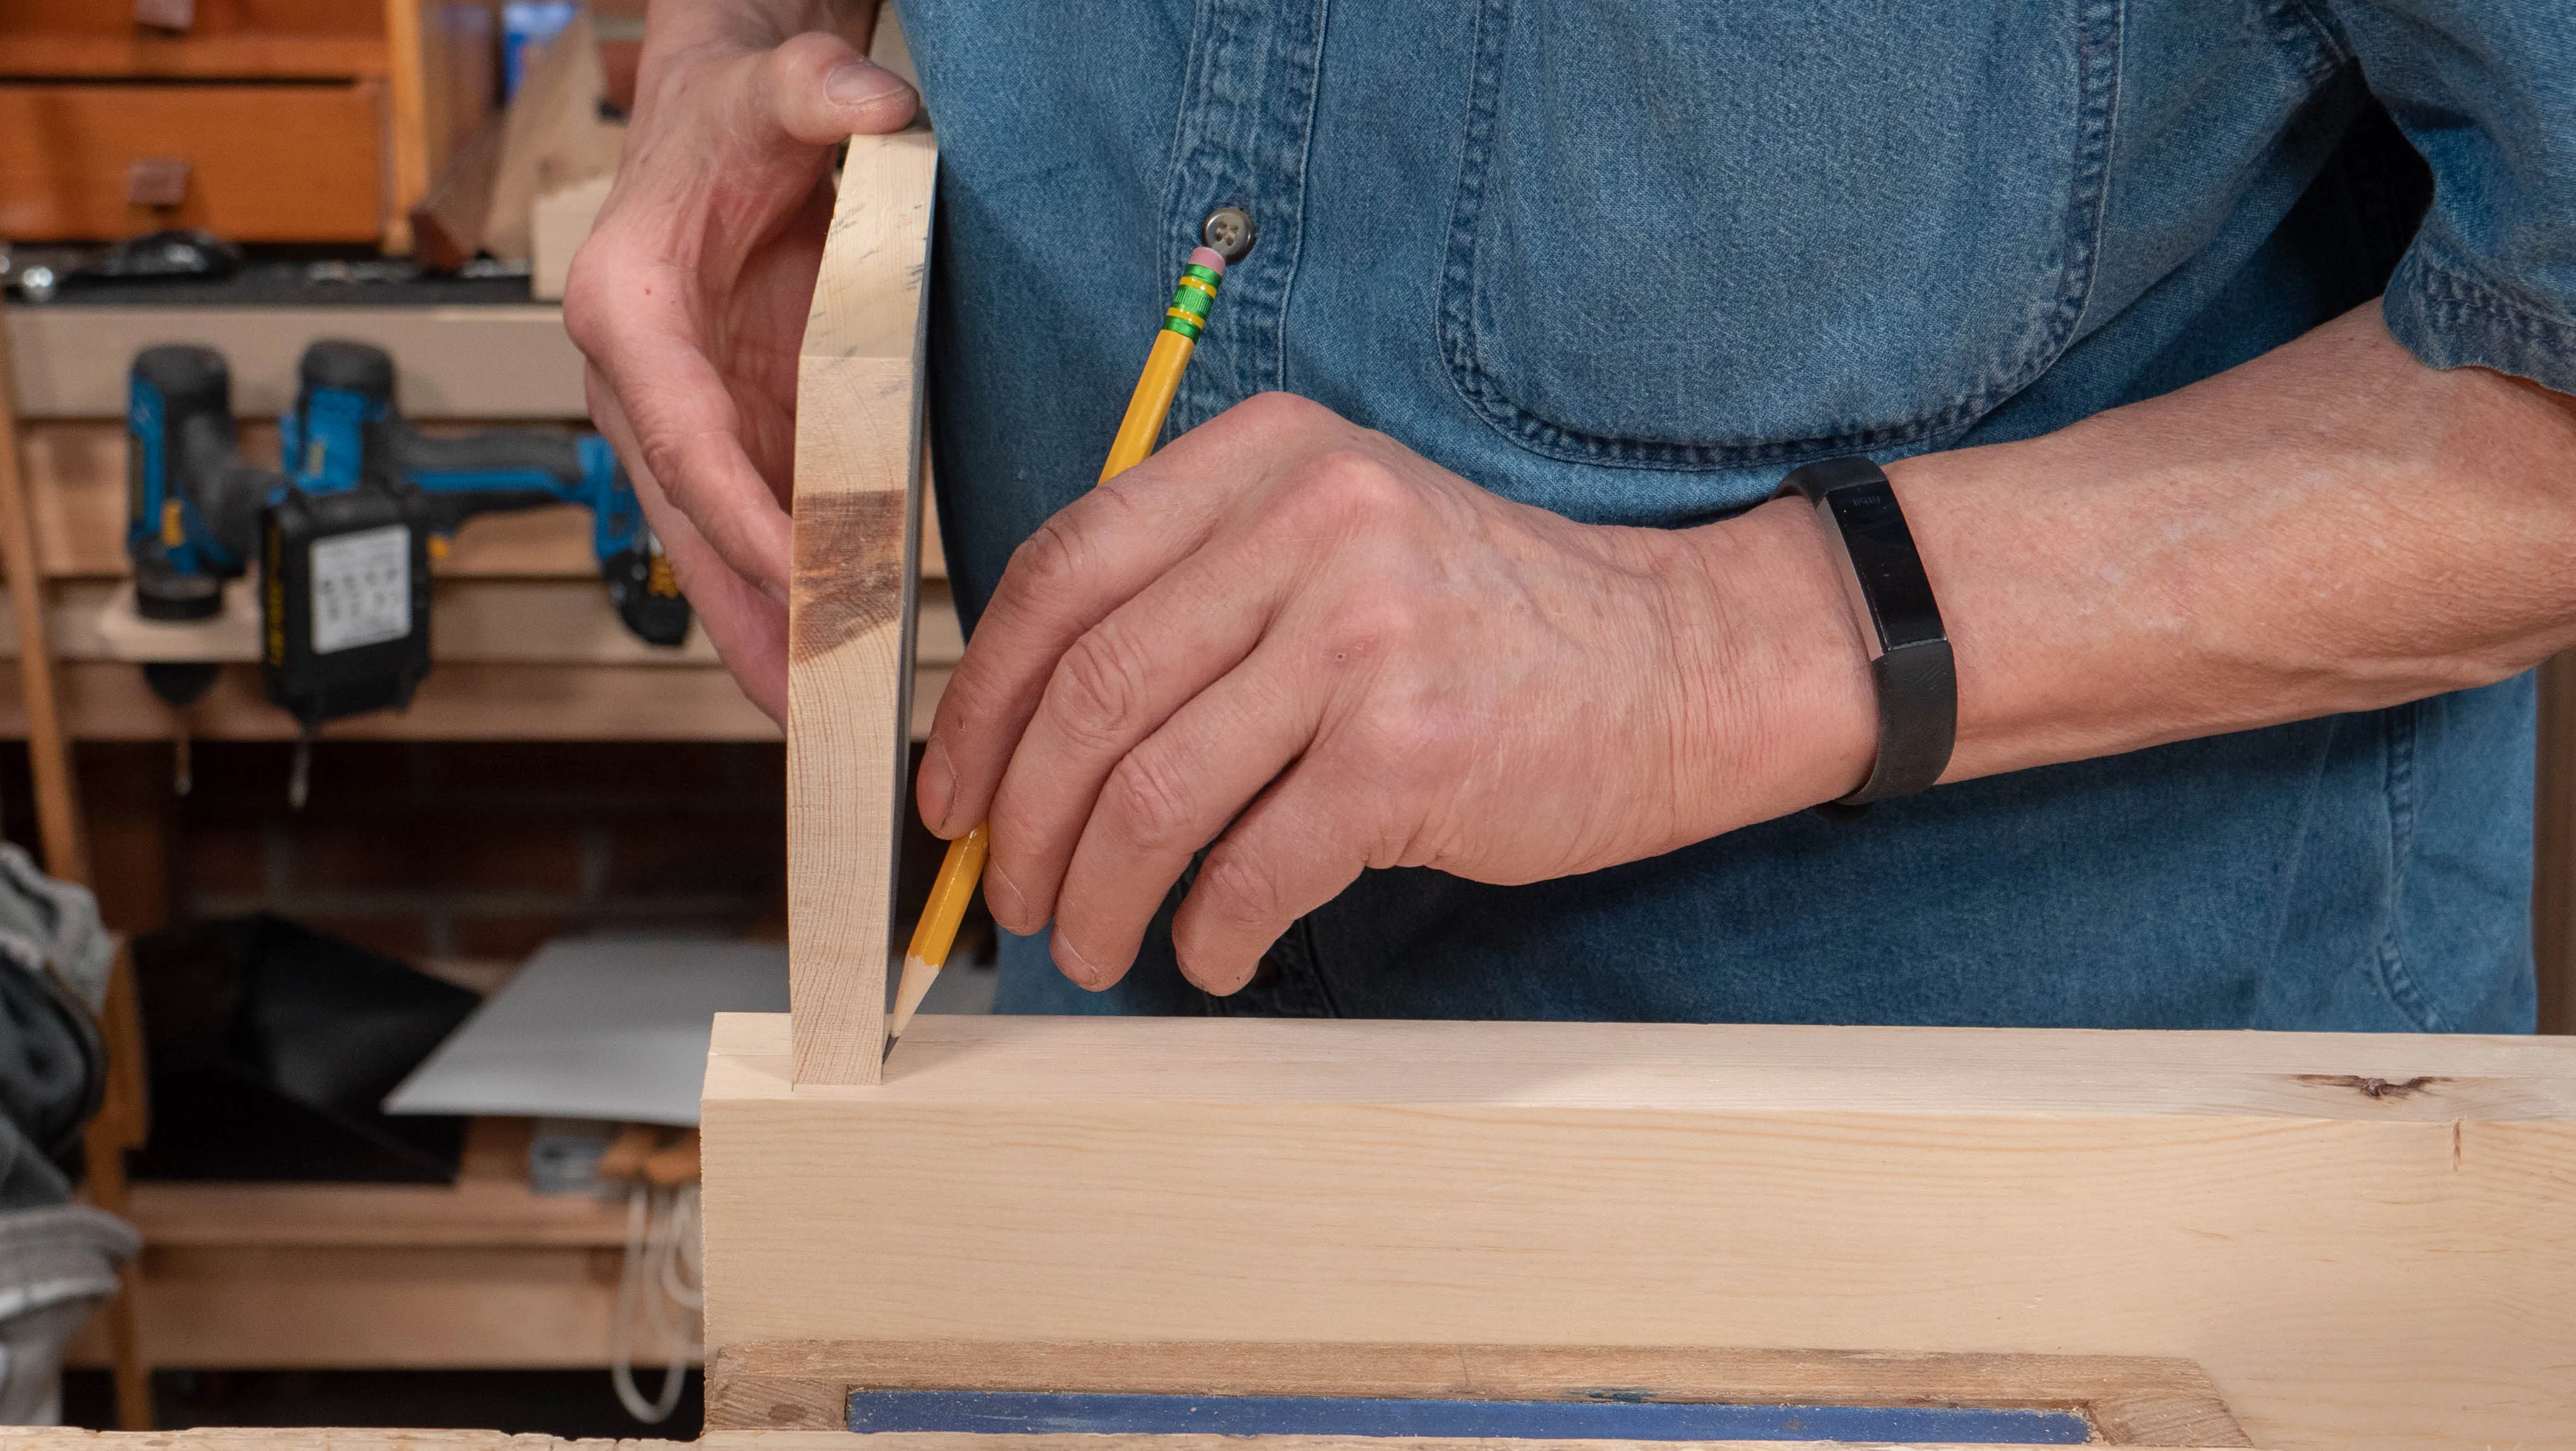


Repeat for both ends of the two side pieces. These recesses will house the sides of the end pieces, which is not the most common of applications of the joint.
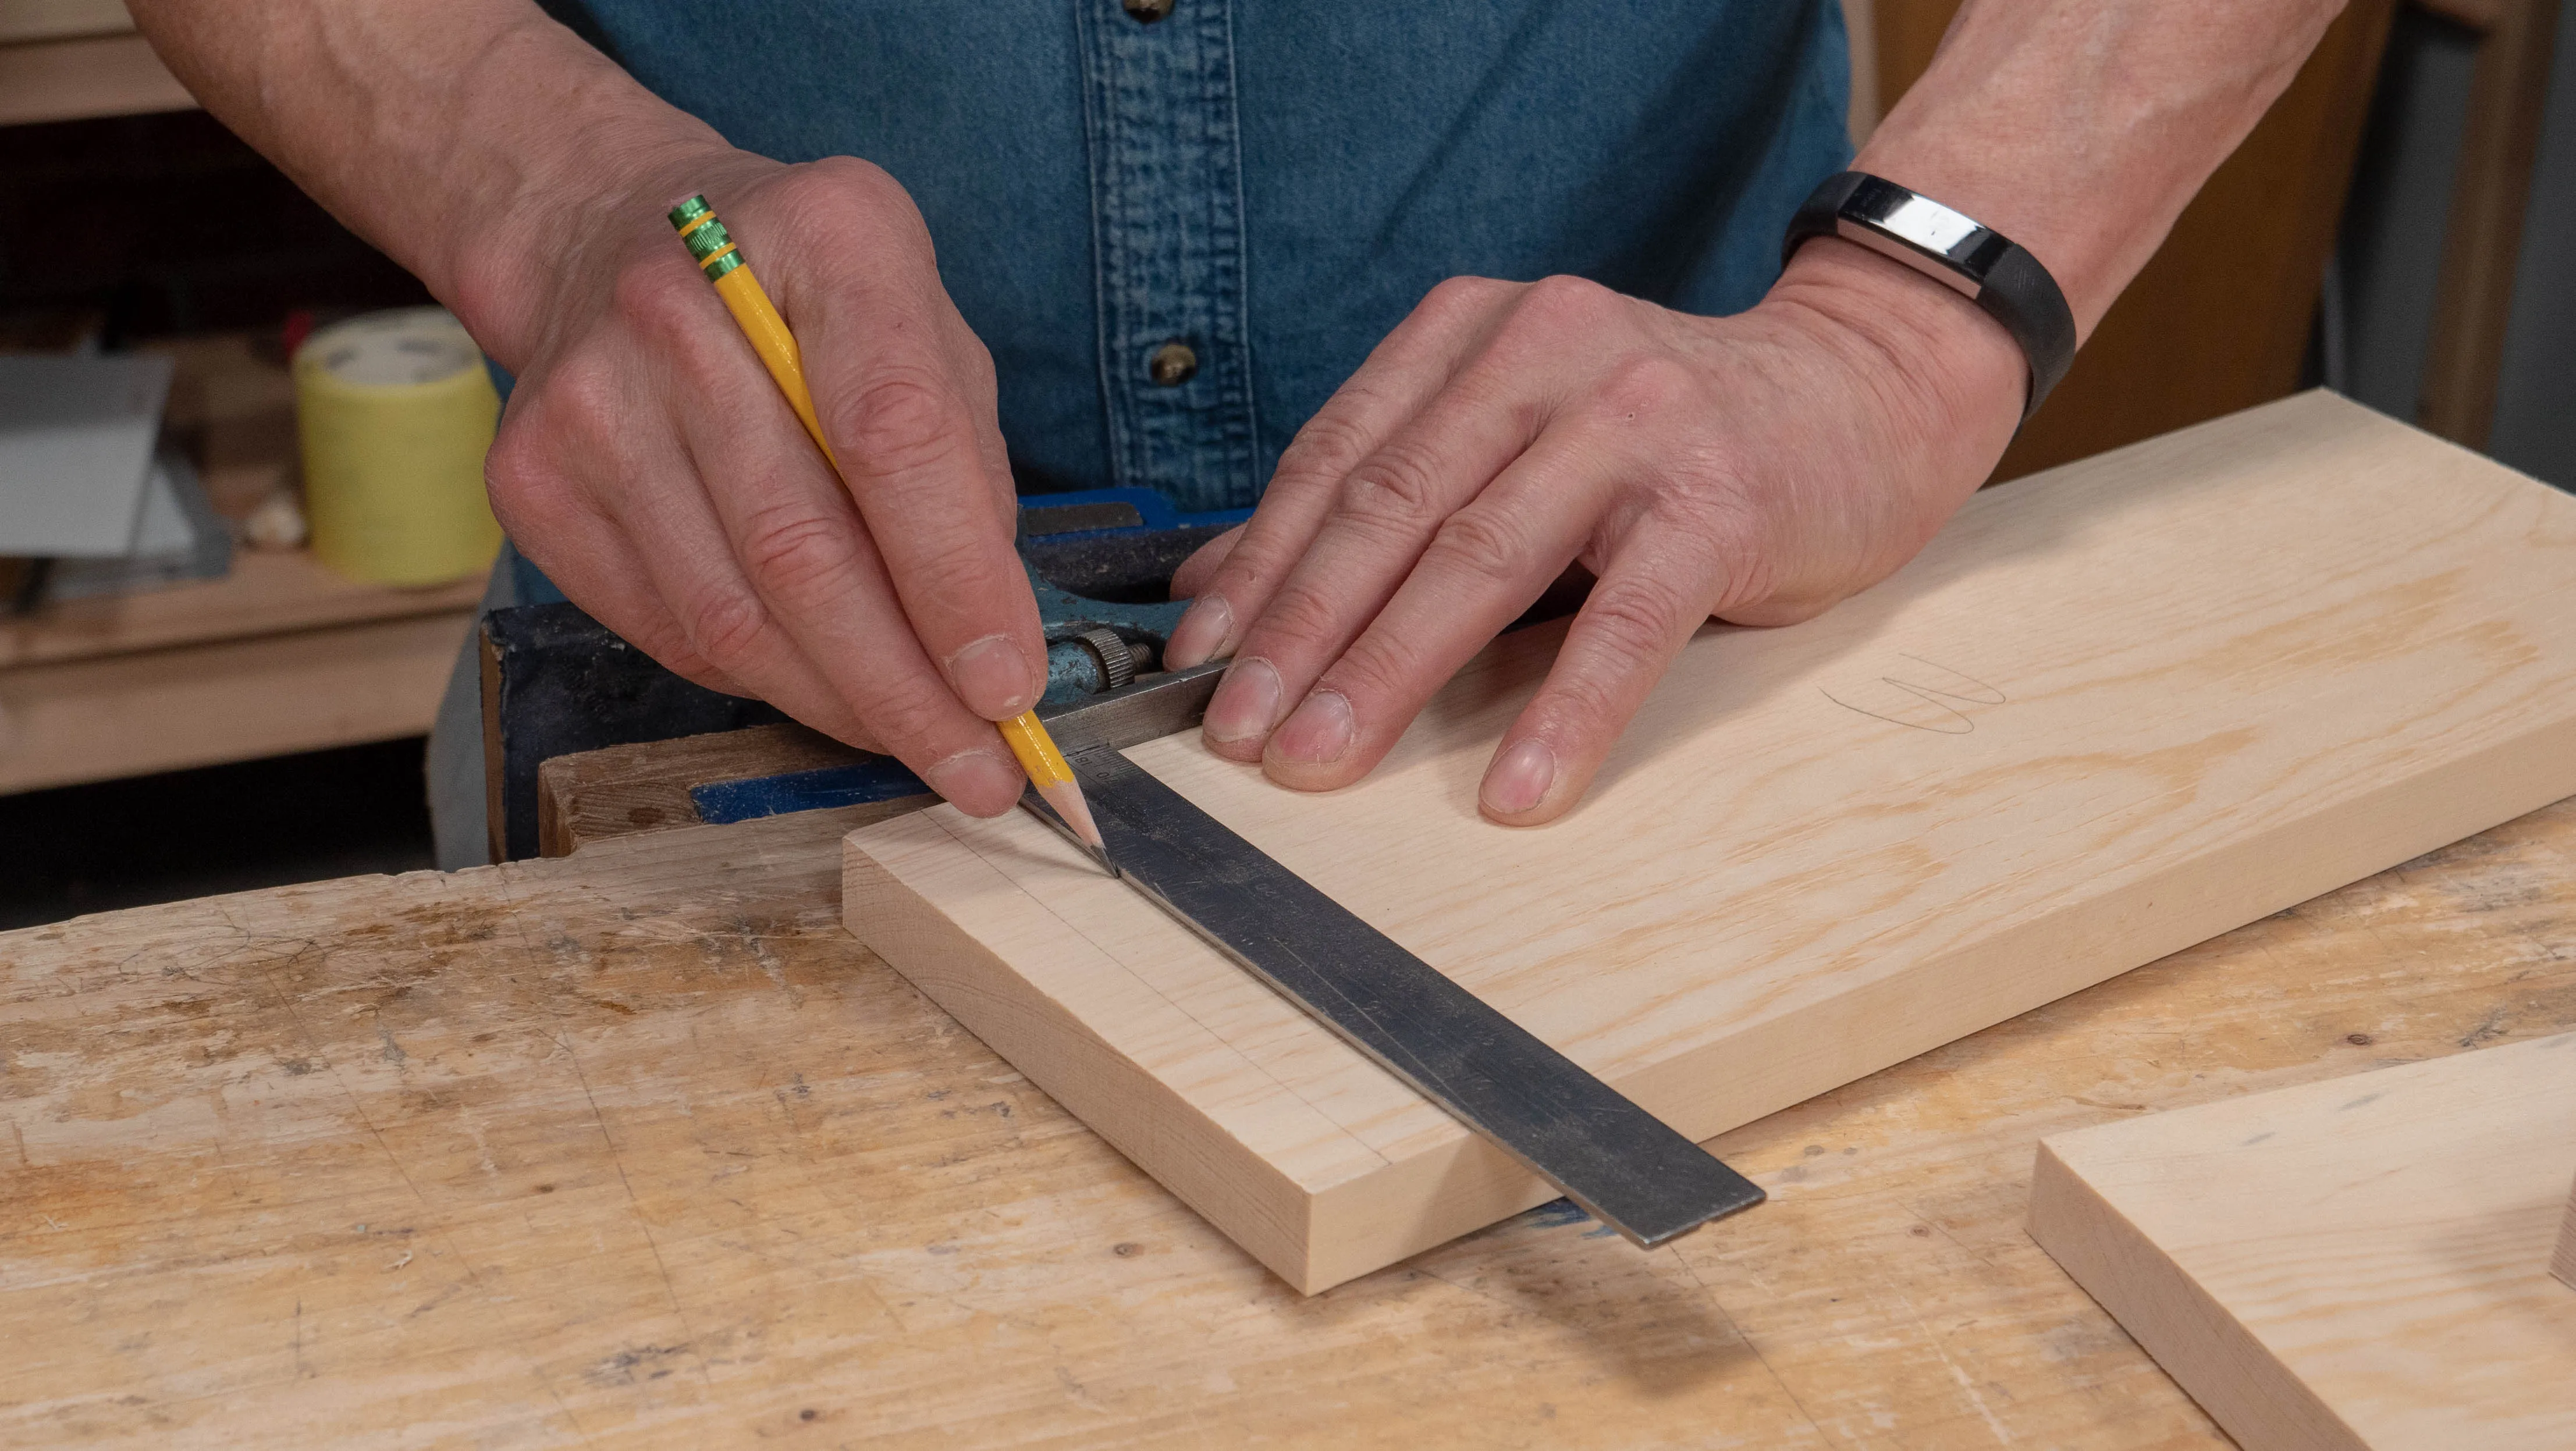
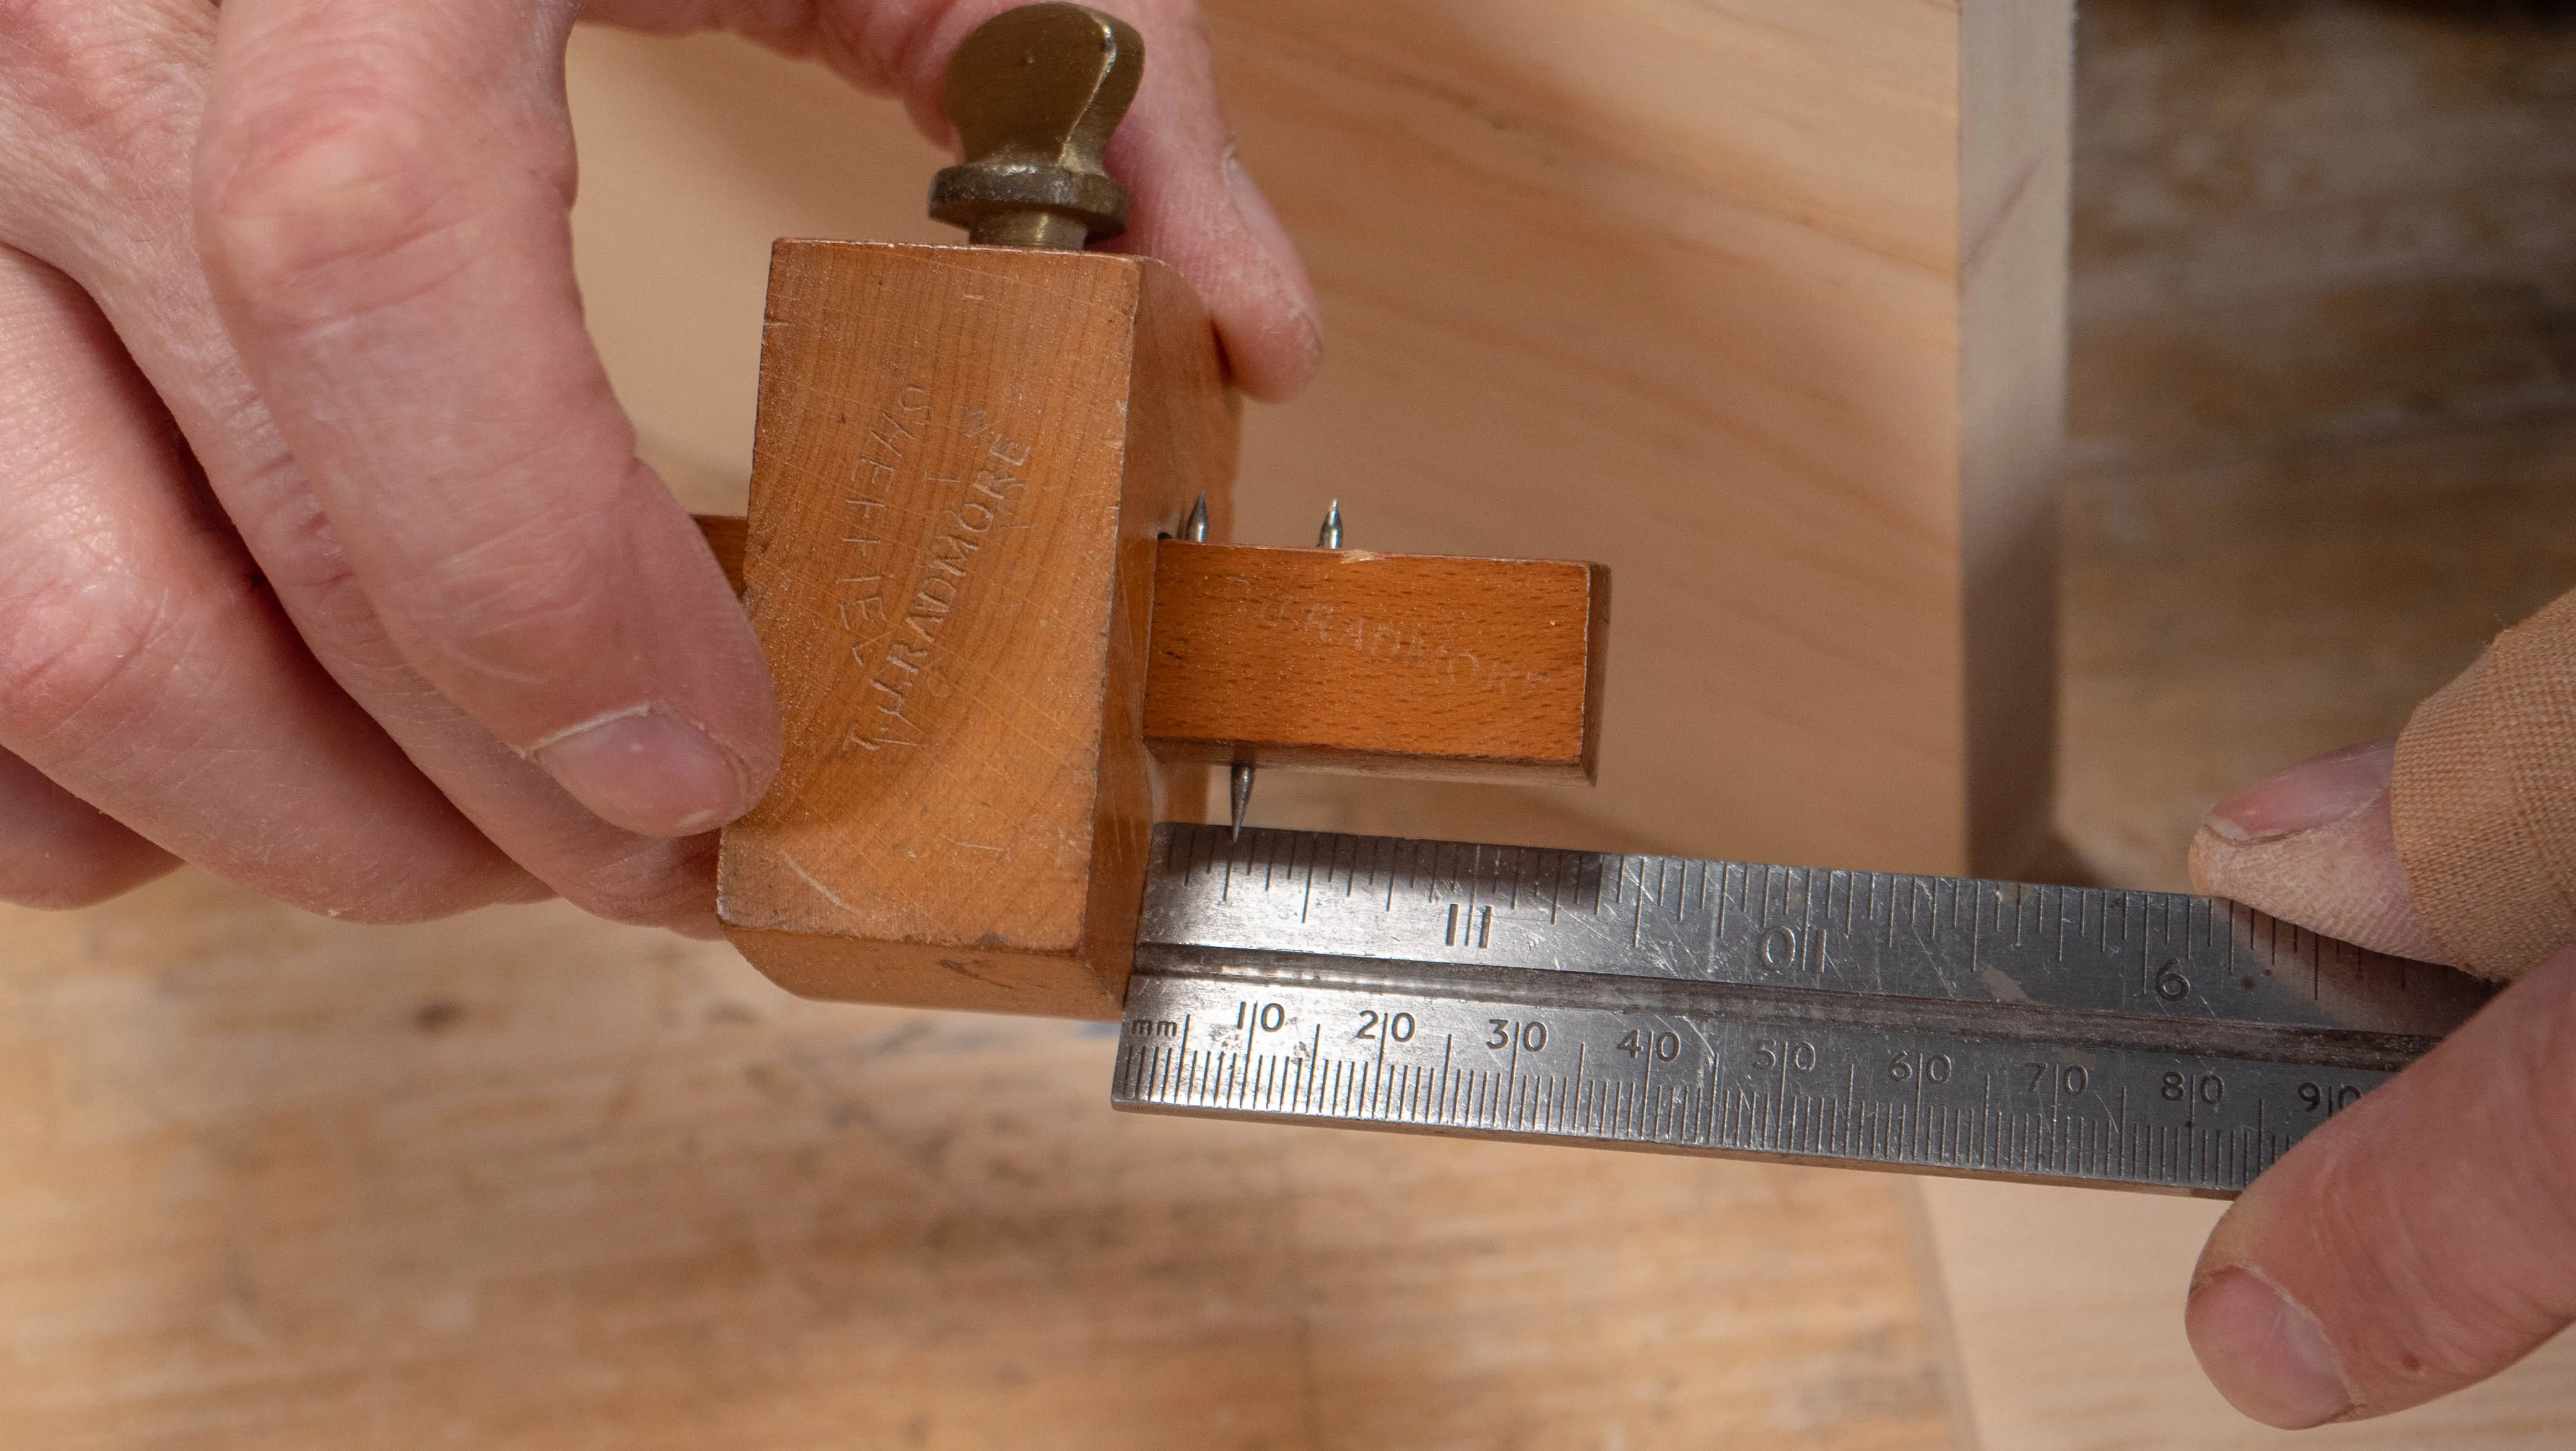
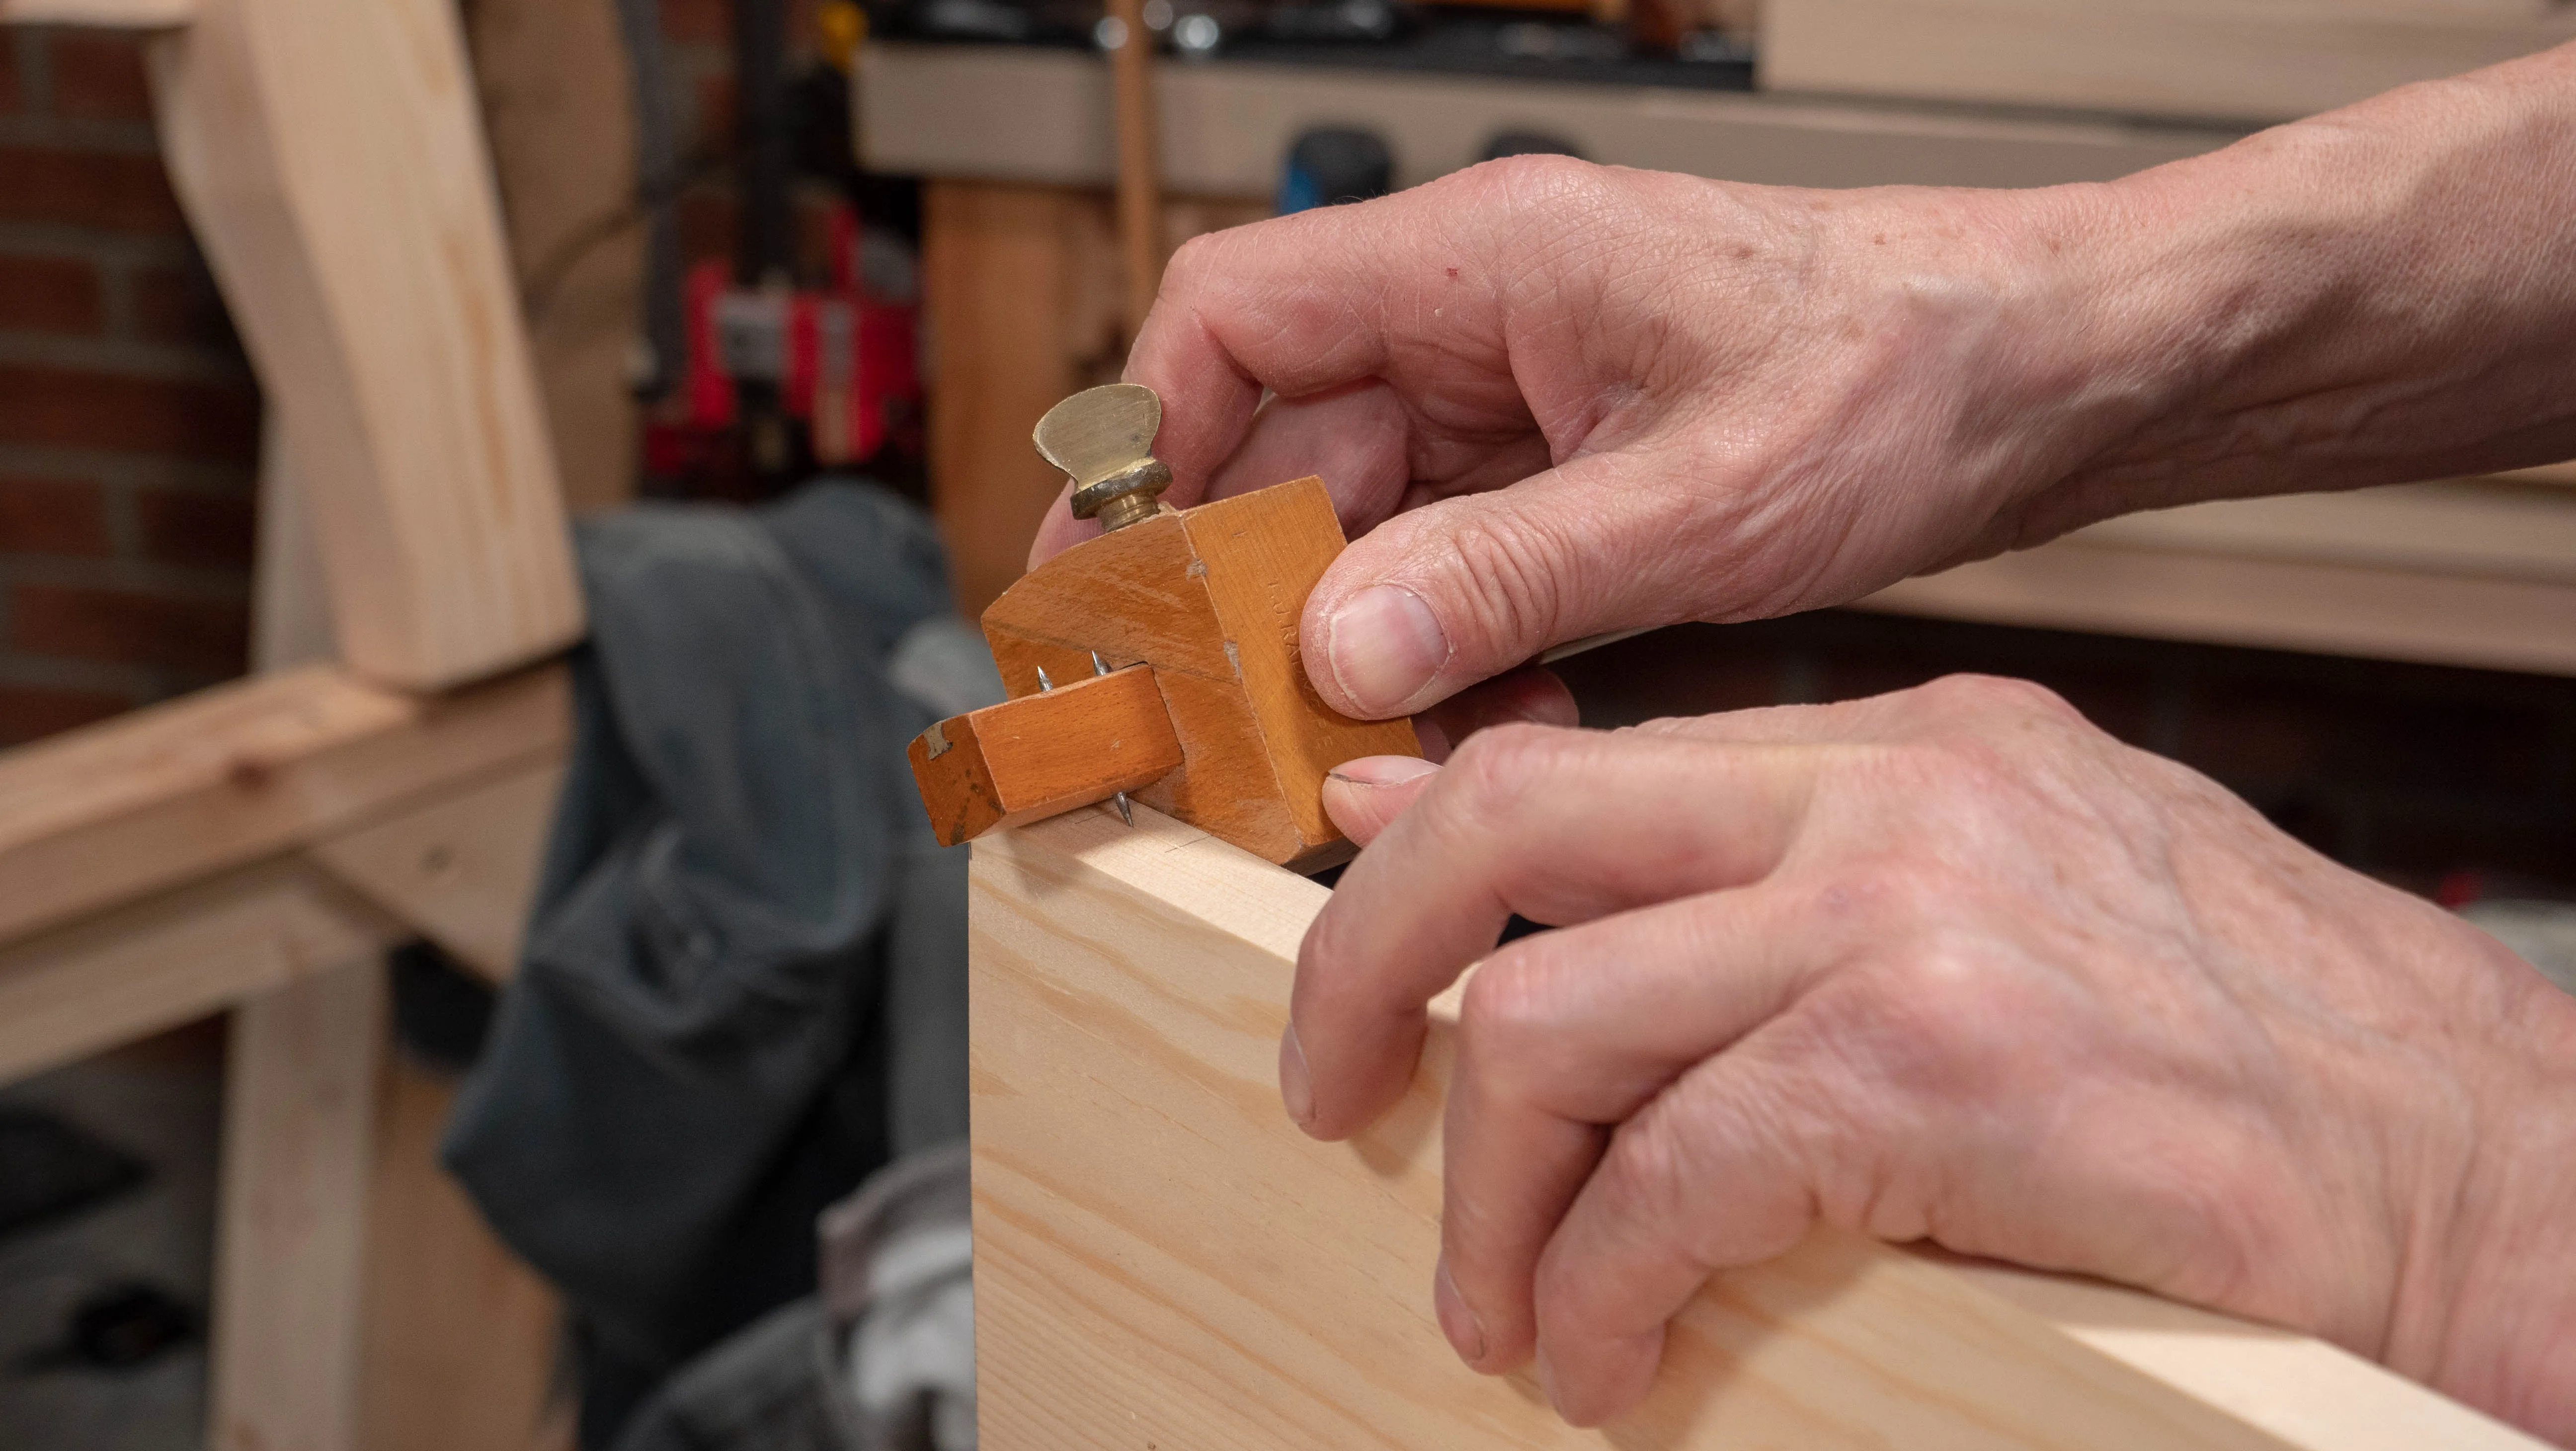
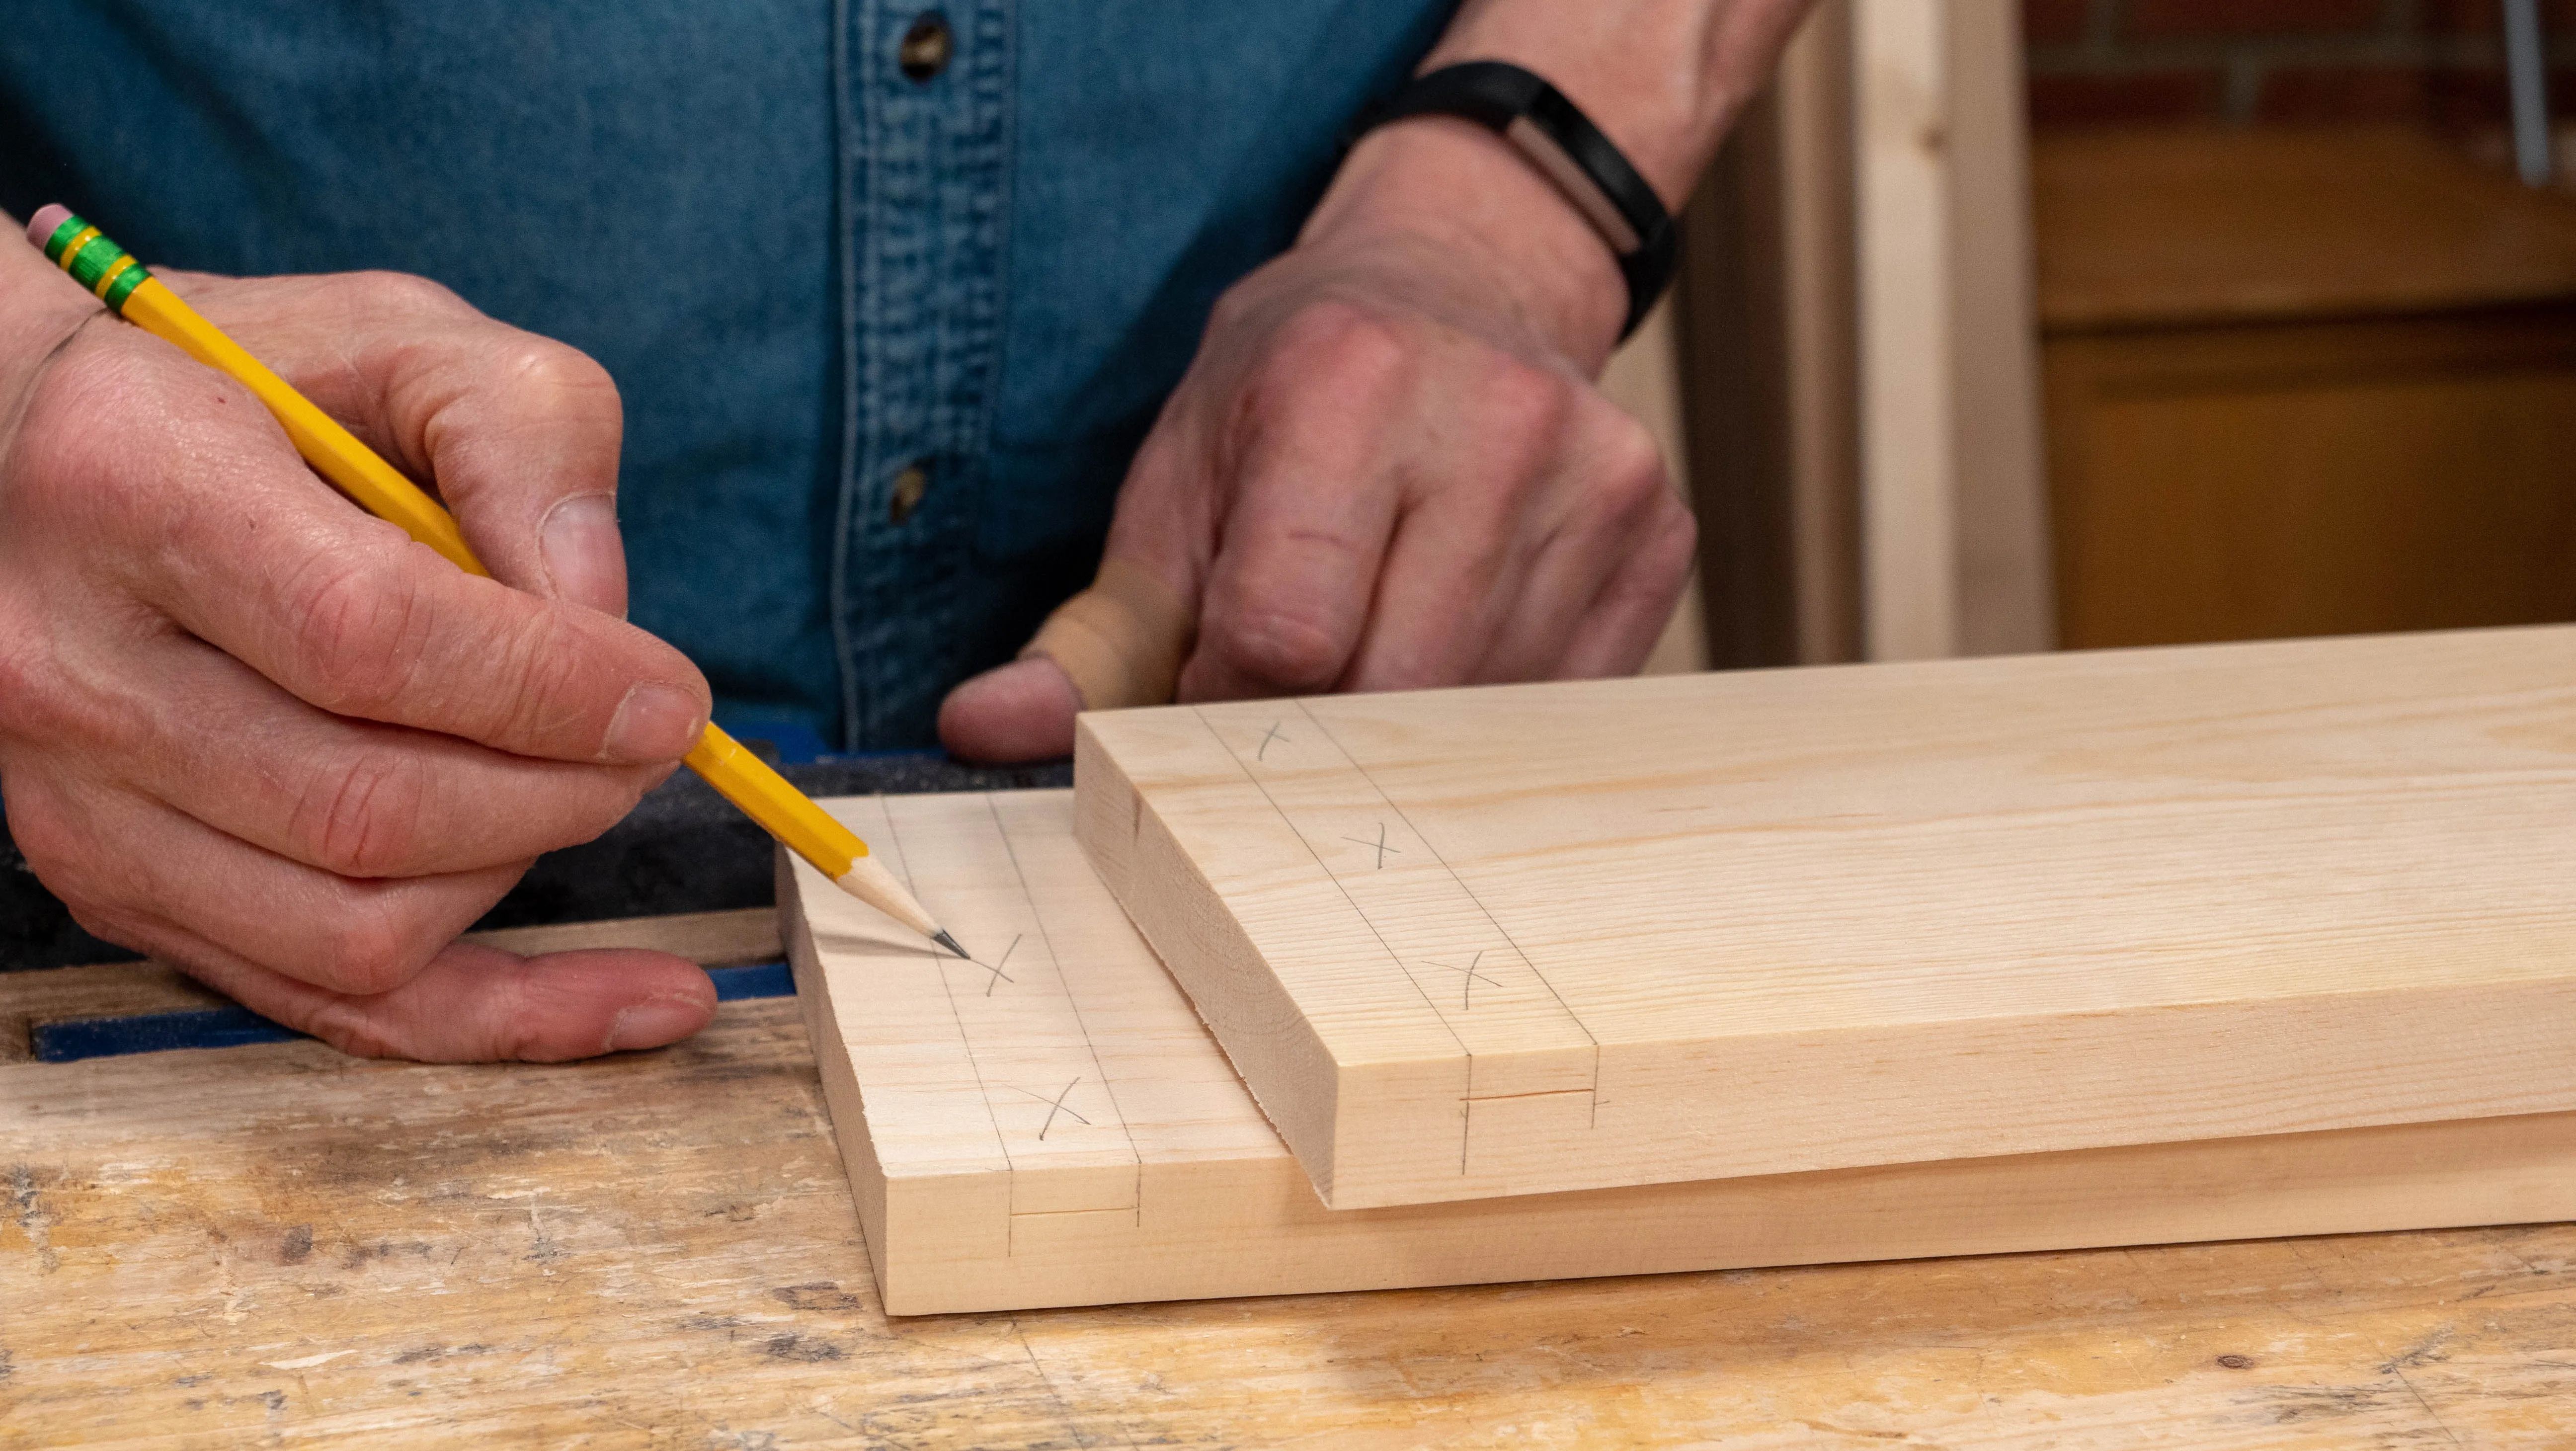
With all six housing dados laid out, set a marking gauge to the recess depth, in this case ¼” (6mm), and run the gauge between the pencil lines on both edges of the recess. Remember to register your stock against the inside face and make sure you are applying lateral pressure to keep the stock of the marking gauge well registered at all times. Mark the waste wood with an X.
Sign in to track your progress