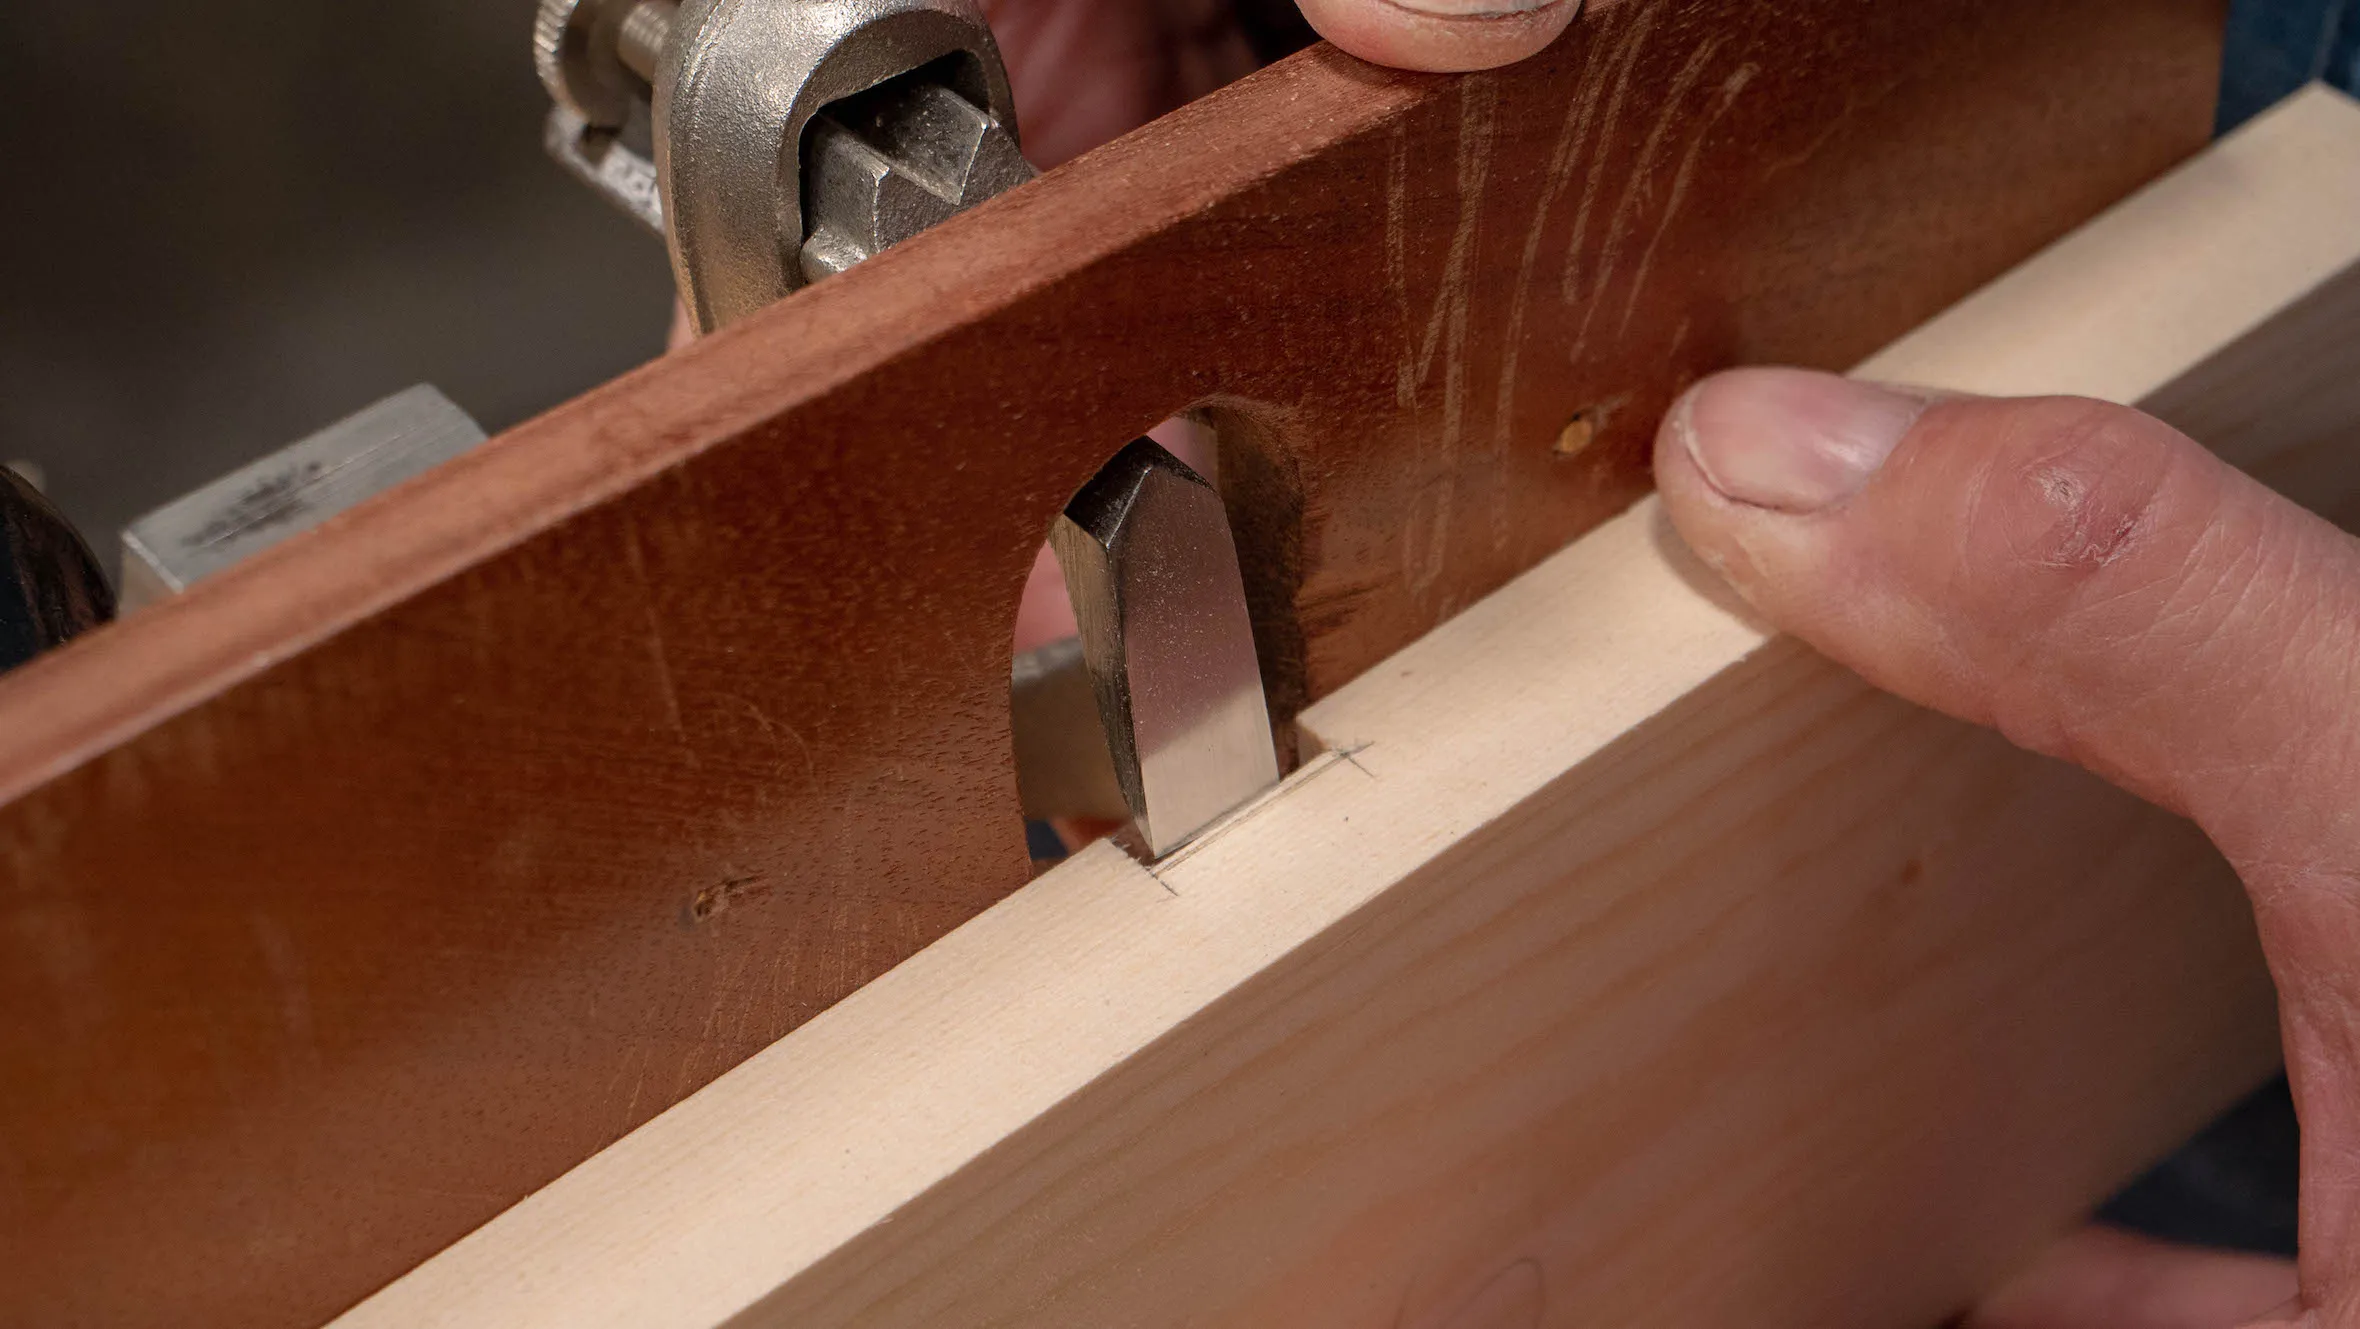
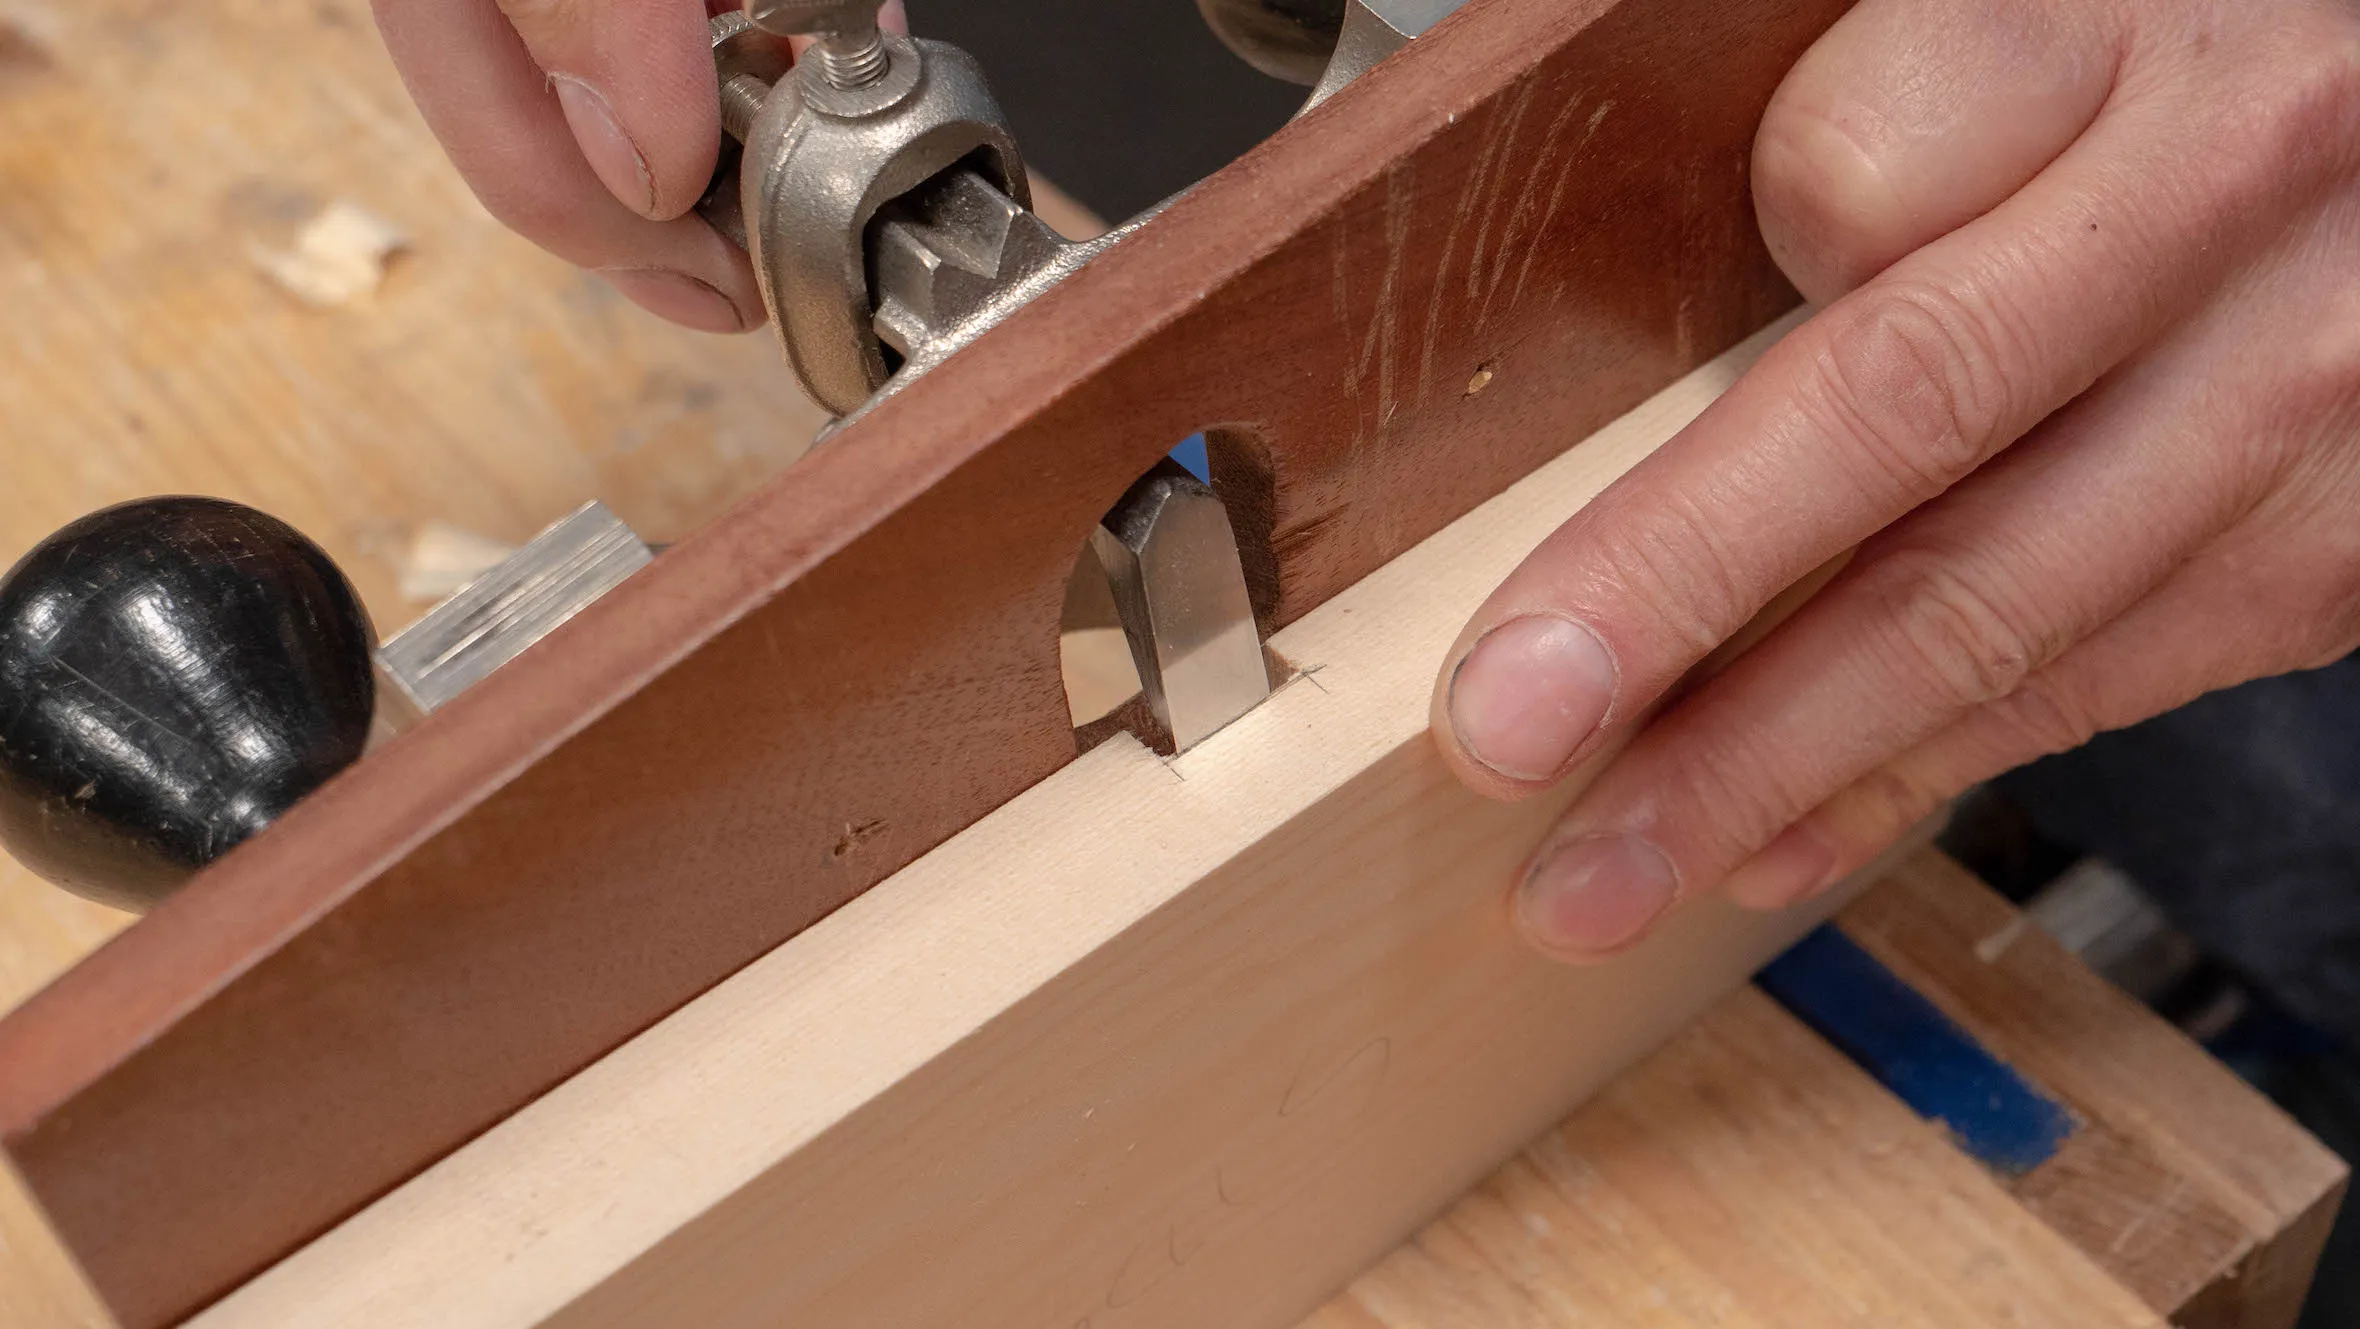
Leveling the Recess
The final step is to level the bottom of the housing dado. Creating a perfectly flat surface isn’t too critical to the joint, as the structural value really lies in the width. Even so, working with care and sensitivity is an important aspect of our craft, so strive for accuracy at every stage.
To level the housing dado, you can simply carry on using the same chisel you used to take out the waste. Work from both ends and be a little more attentive to staying level along the recess. Take special care in the mid section where it’s easier to dive. If the recess is longer, you may need to turn your chisel around and use it bevel down. This would force you to rely on visual cues, as the length of the bevel on the chisel is far too short to keep you level.
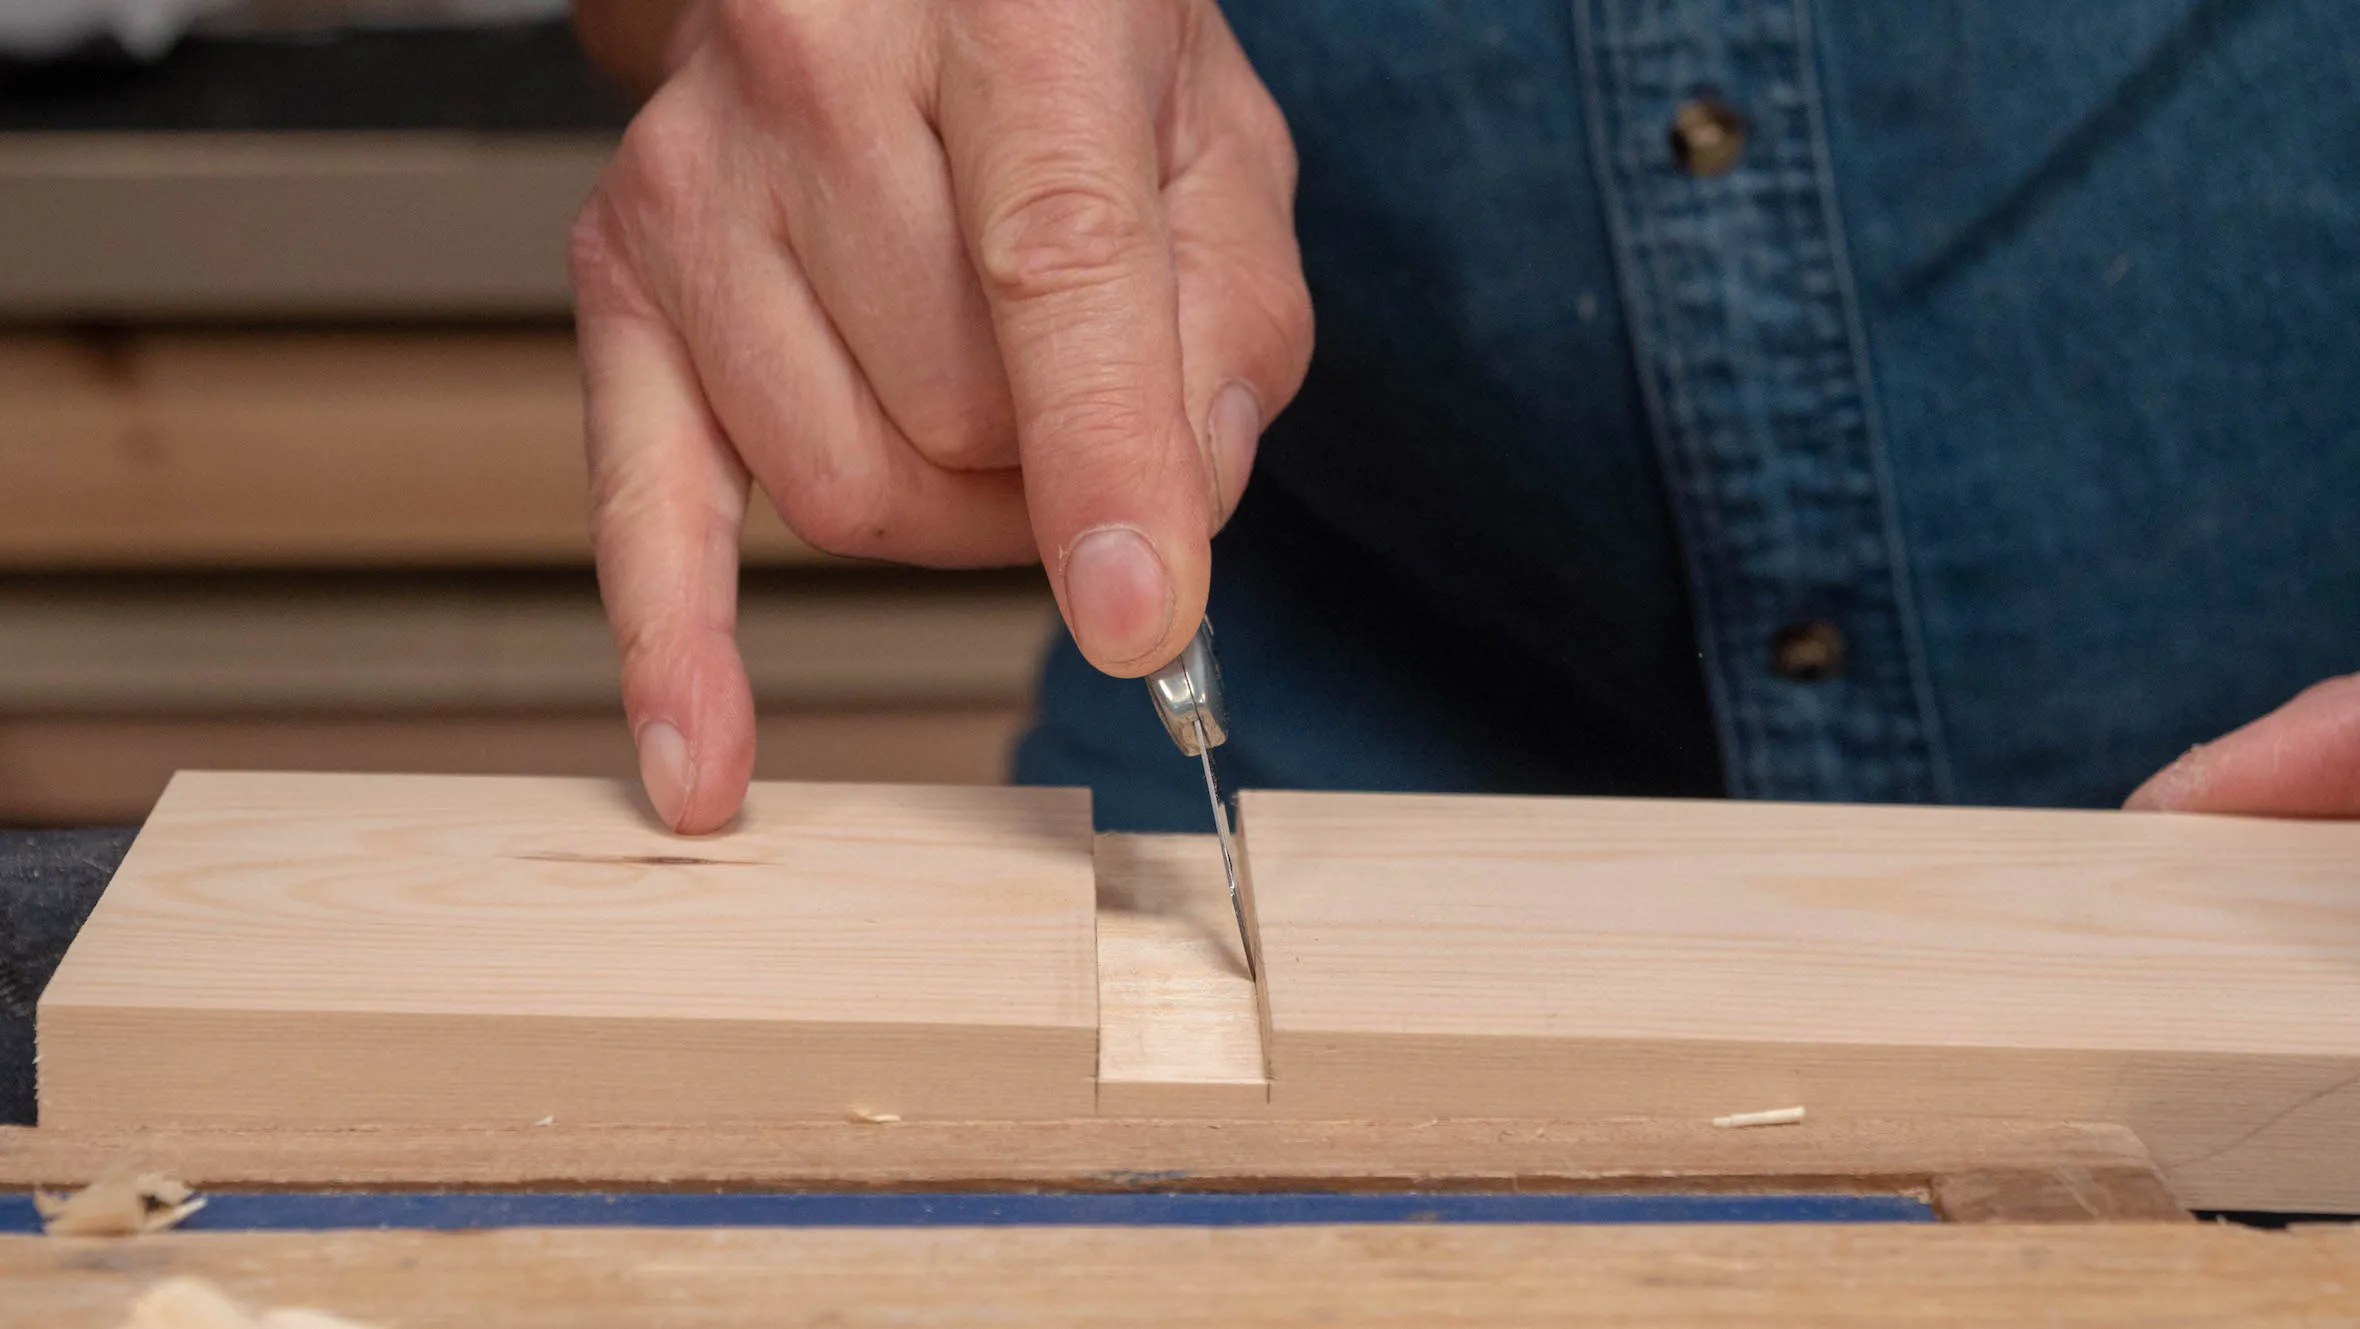
When you’re down to depth, go over the long inside corners with a knife to sever any fibres that may be still attached. You are now ready to assemble the parts.
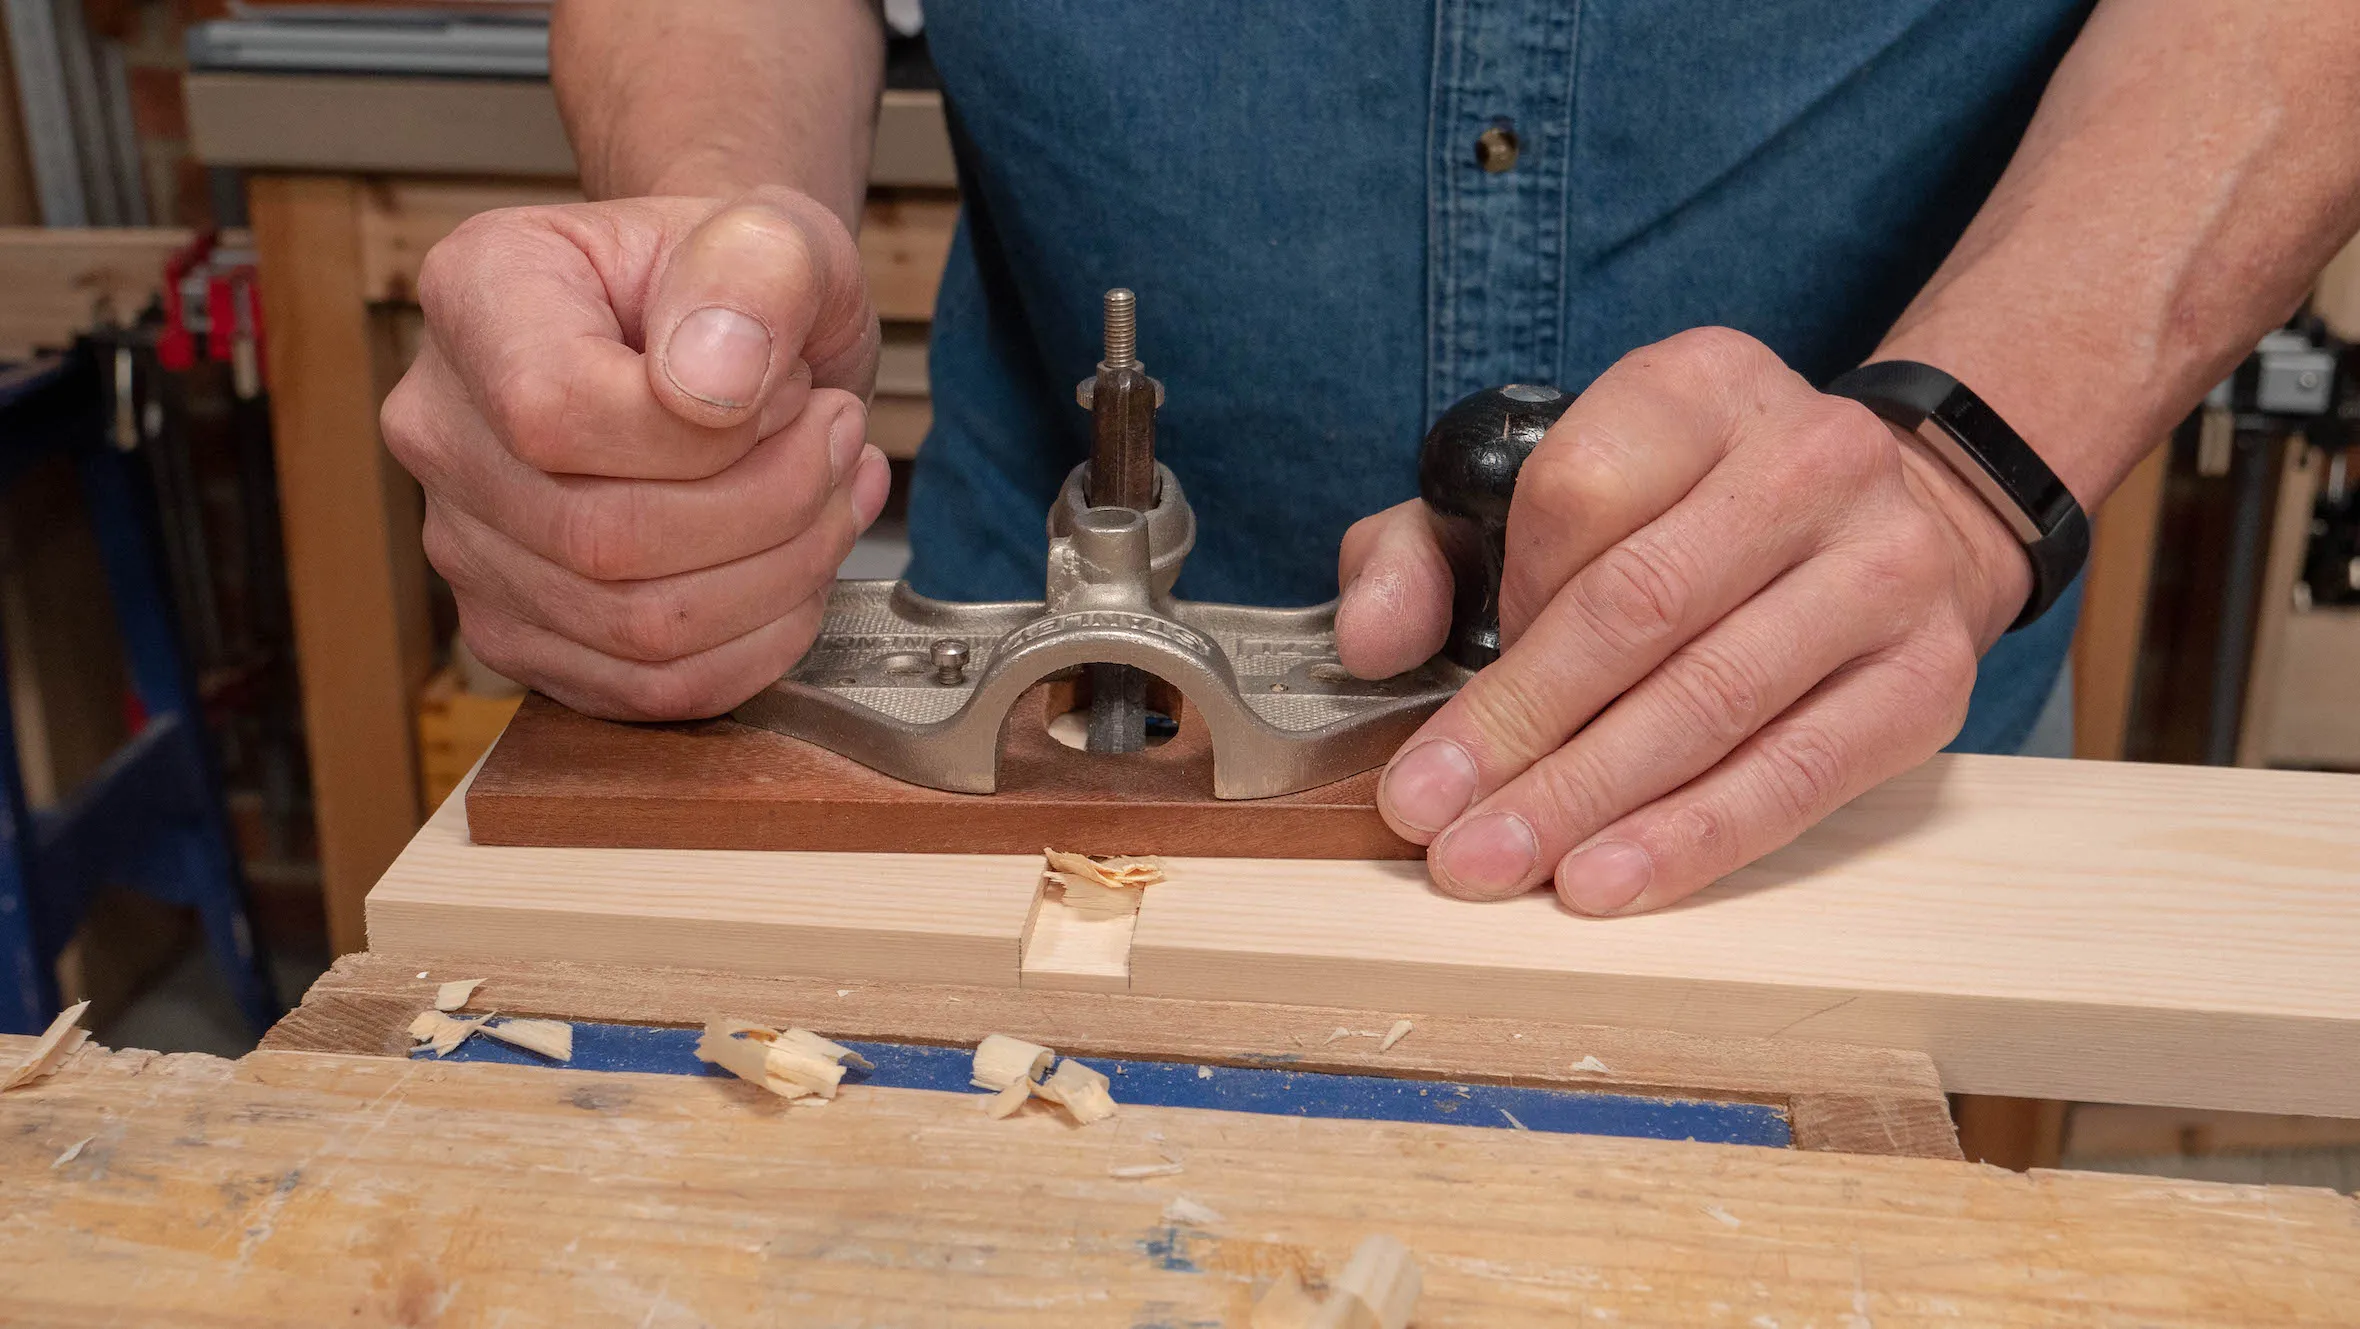
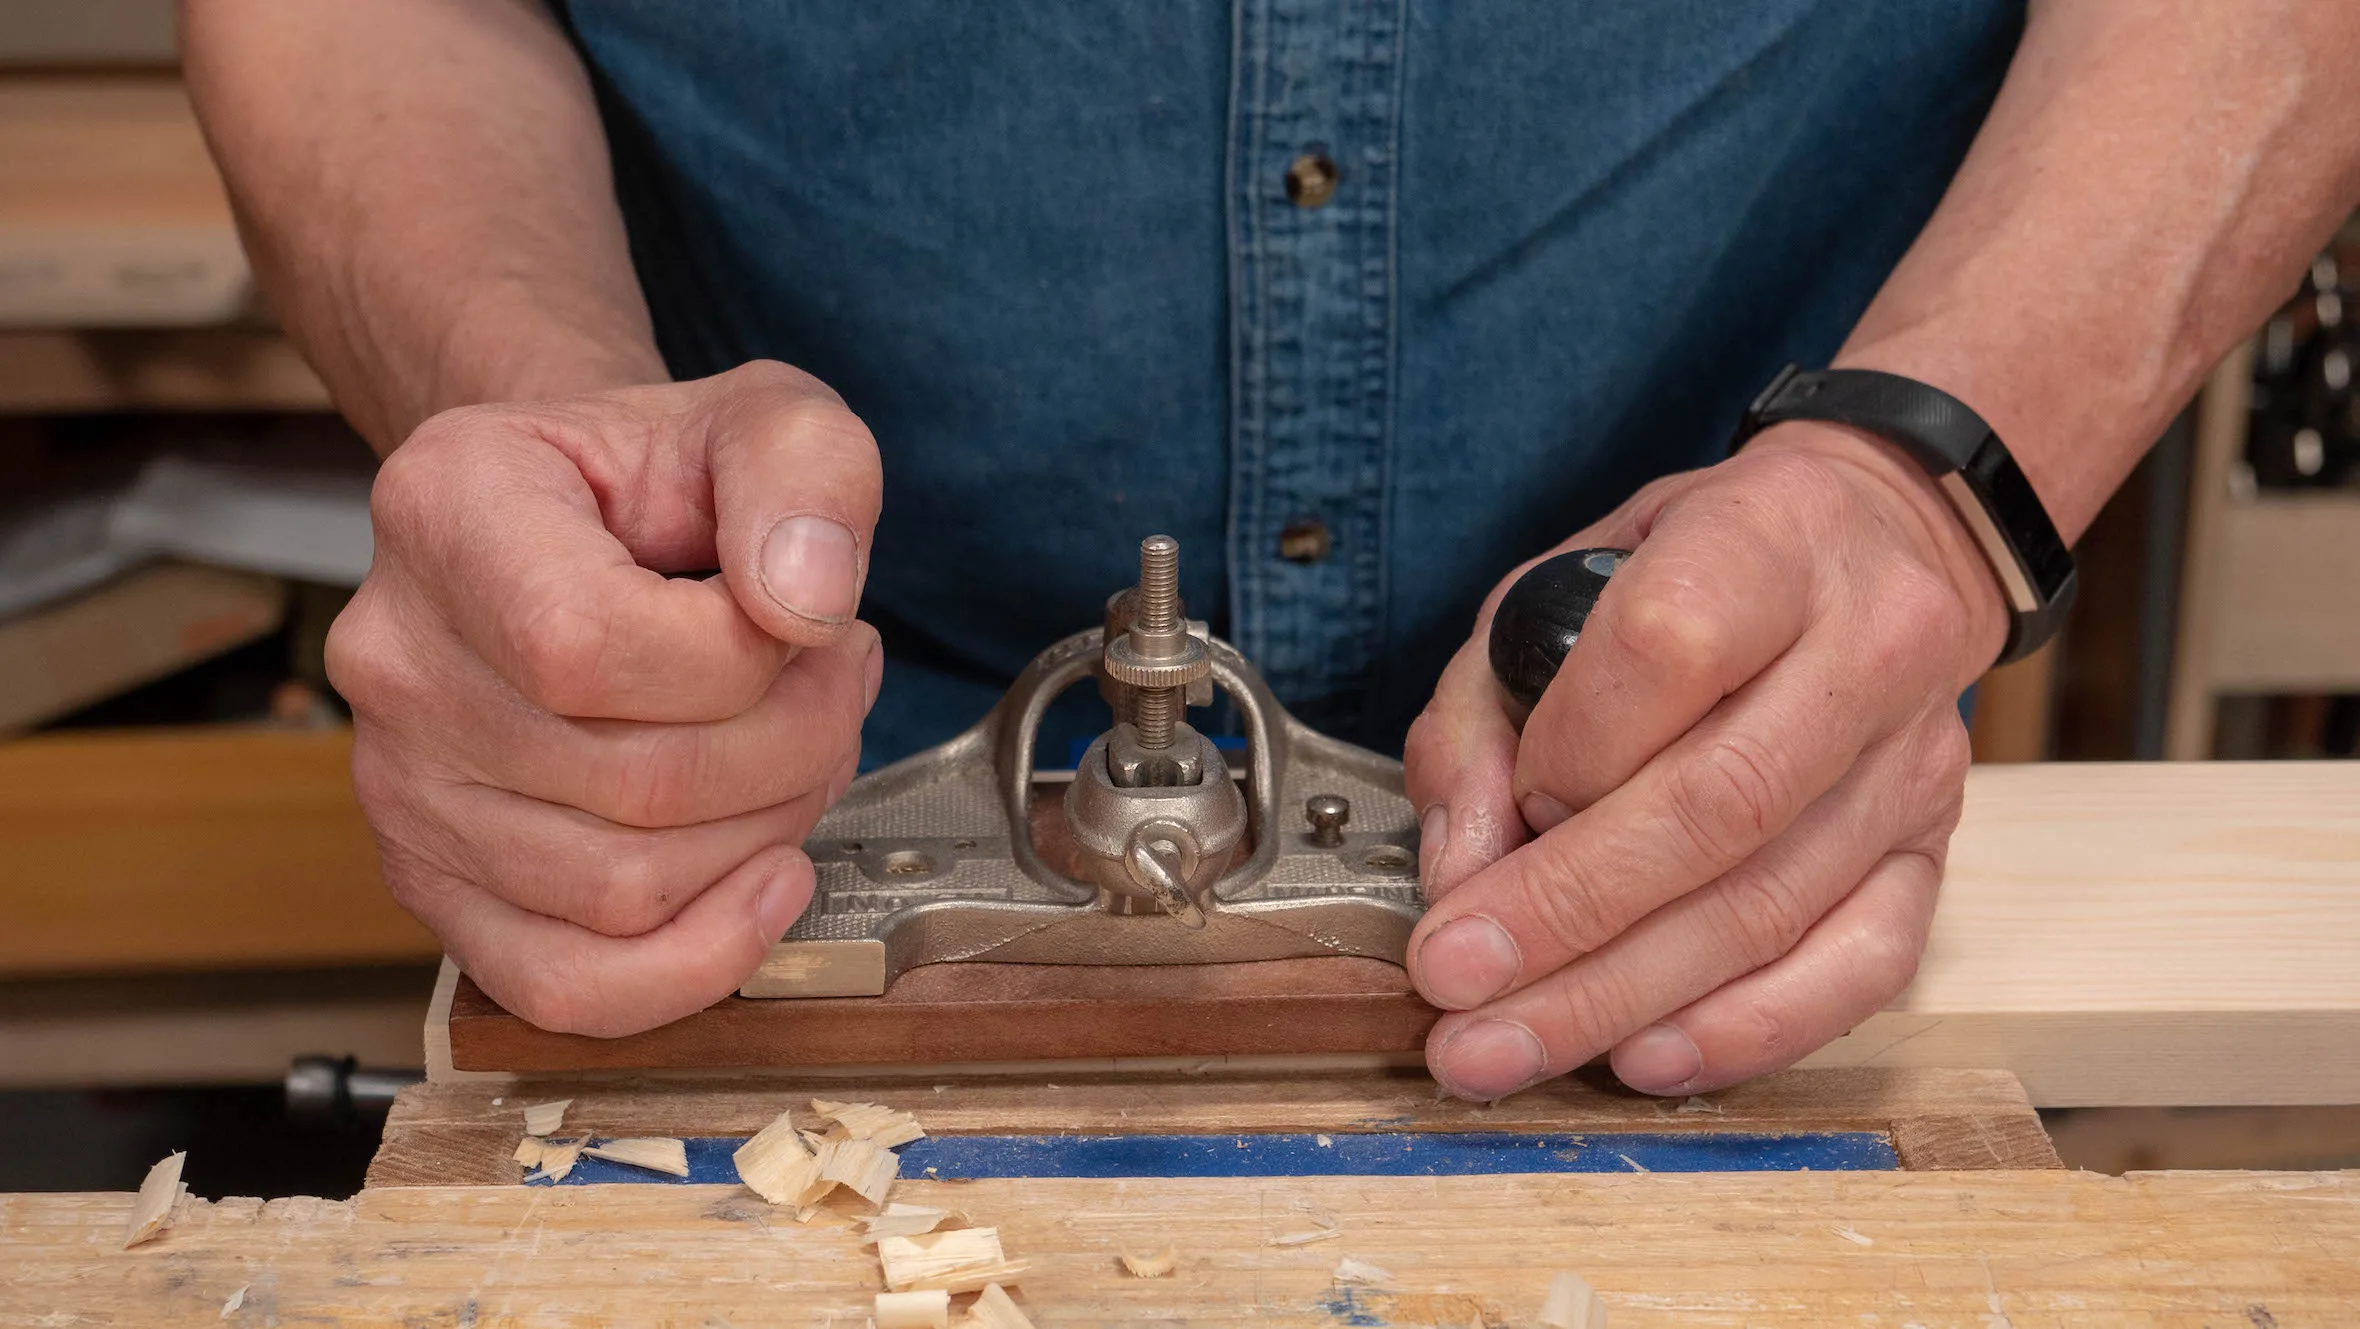
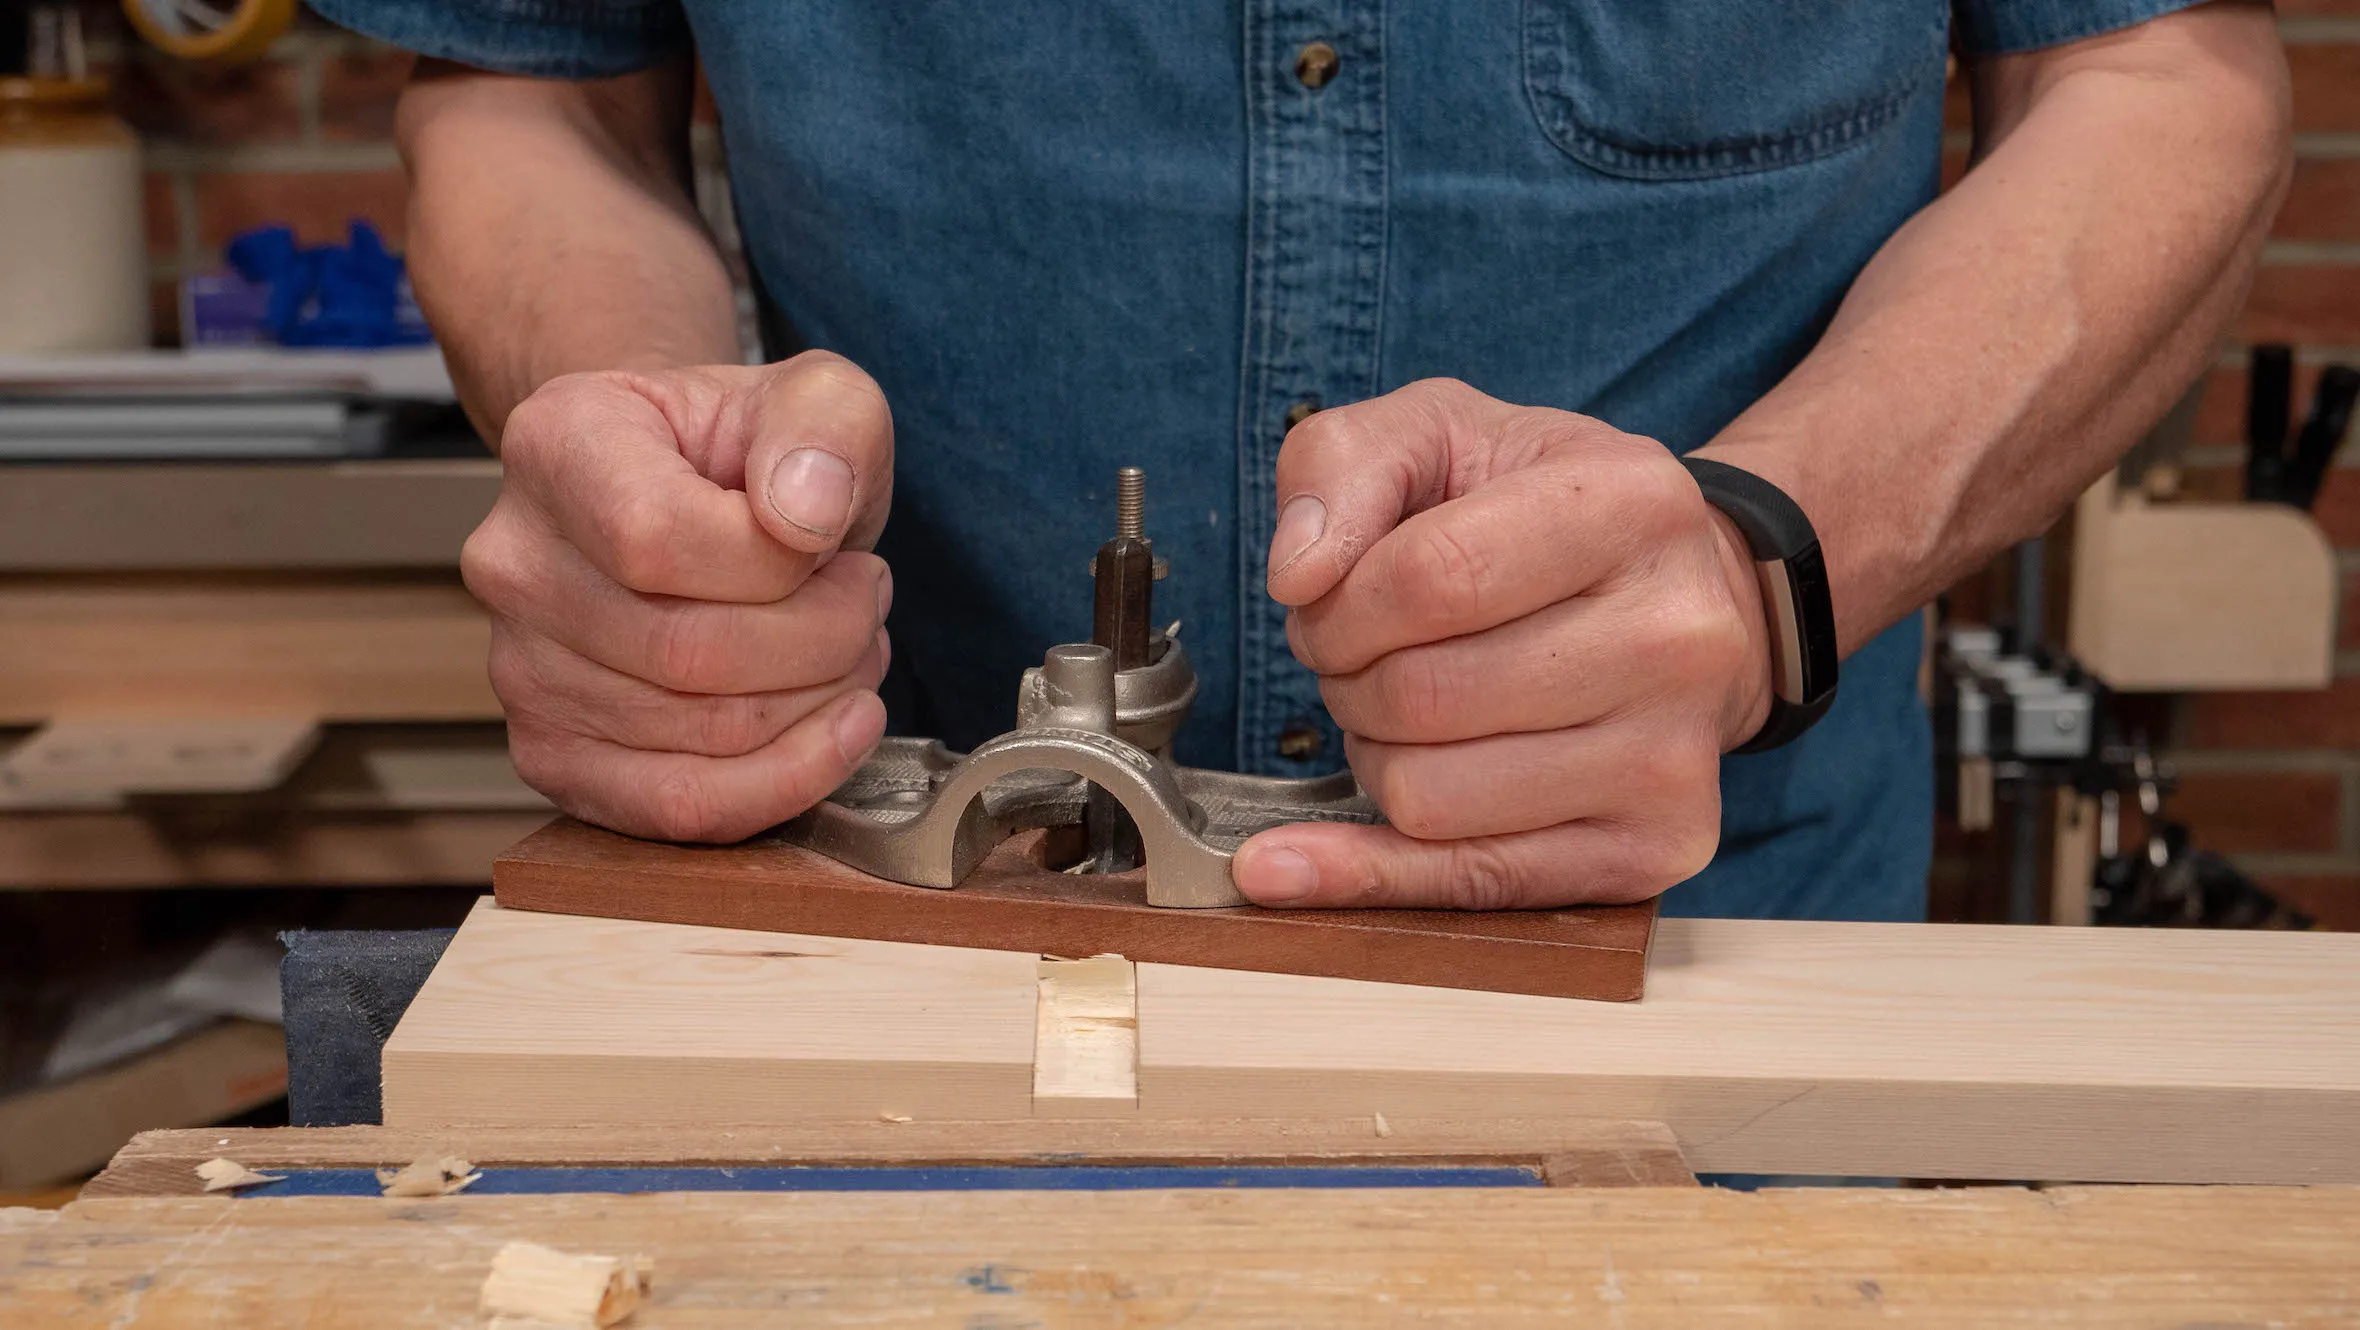
Alternative Method: Router Plane
A router plane is ideal for levelling the bottom of recesses, amongst other things. You can take off the bulk with a chisel and then use the router to work gradually down to depth. This does not substitute for skill as it’s still a hand tool and requires your continuous attention and constant tweaking. You’ll find the router most useful the longer the recess, as your only other option would be to use a chisel bevel down.
If you have a router, first set it so that it’s only catching the very high spots after you’ve removed the bulk of the waste. Then come in from one side and then from the other to avoid splitting on the outcut. Make sure there are no loose wood fibres on the face of your board as they will mar the surface under the pressure of the router. Next, adjust the cutter for a deeper cut and go over the surface again to take off a little more. Continue in this way until you reach the gauge line, always checking along the walls to see if you need to go with a knife to deepen a little. Whatever the case, go with a final pass of the knife when you’re done to make sure there are no fibres still attached that could hold up the joint from closing.
Sign in to track your progress