Laying Out Top & Bottom Housings
The recesses on the top and bottom pieces that house the side pieces, begin one board’s thickness from the ends (in this case, 3/4”, or 19mm). You could measure for a more precise measurement, but it really isn’t necessary, and again, using the thickness of your stock can save time and effort.
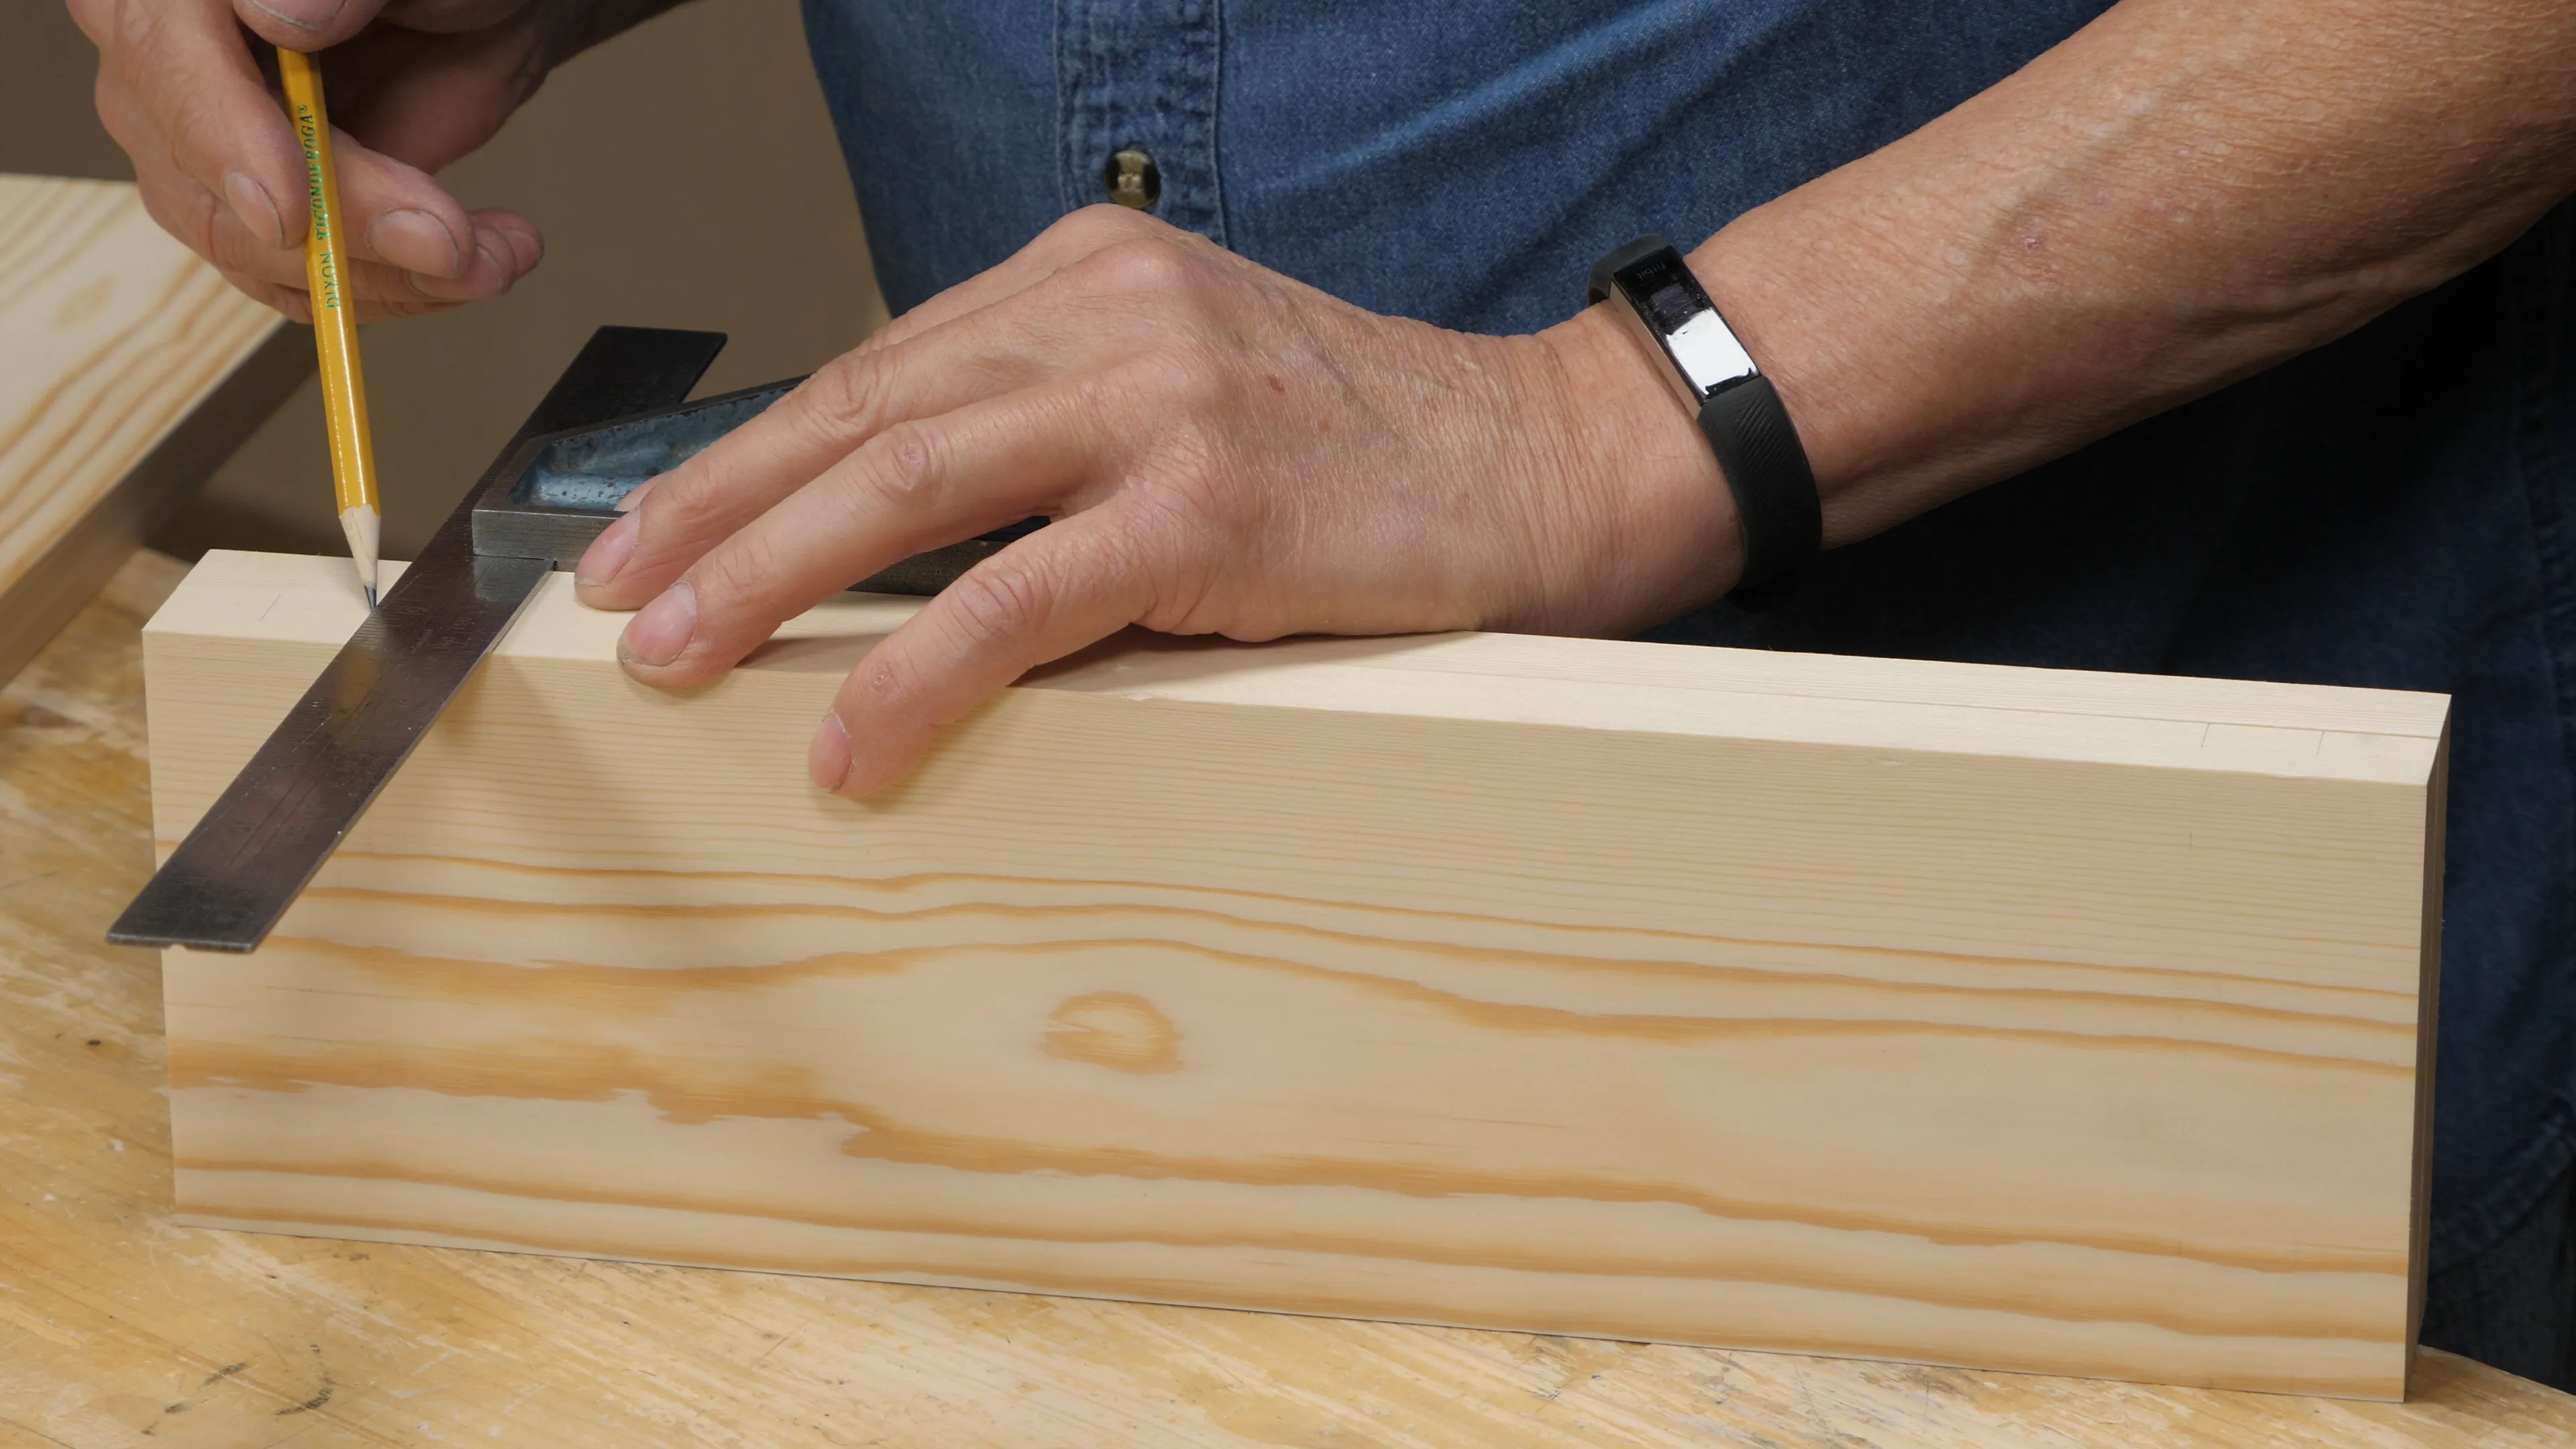
Take a side piece and flush it with the end of the top piece; use the square and slide it until the outside faces of both parts are aligned perfectly. Keeping your square in place, remove the side piece and use a sharp pencil to square a line across the face, but not all the way to the front (since the recess will only be the width of the side pieces).
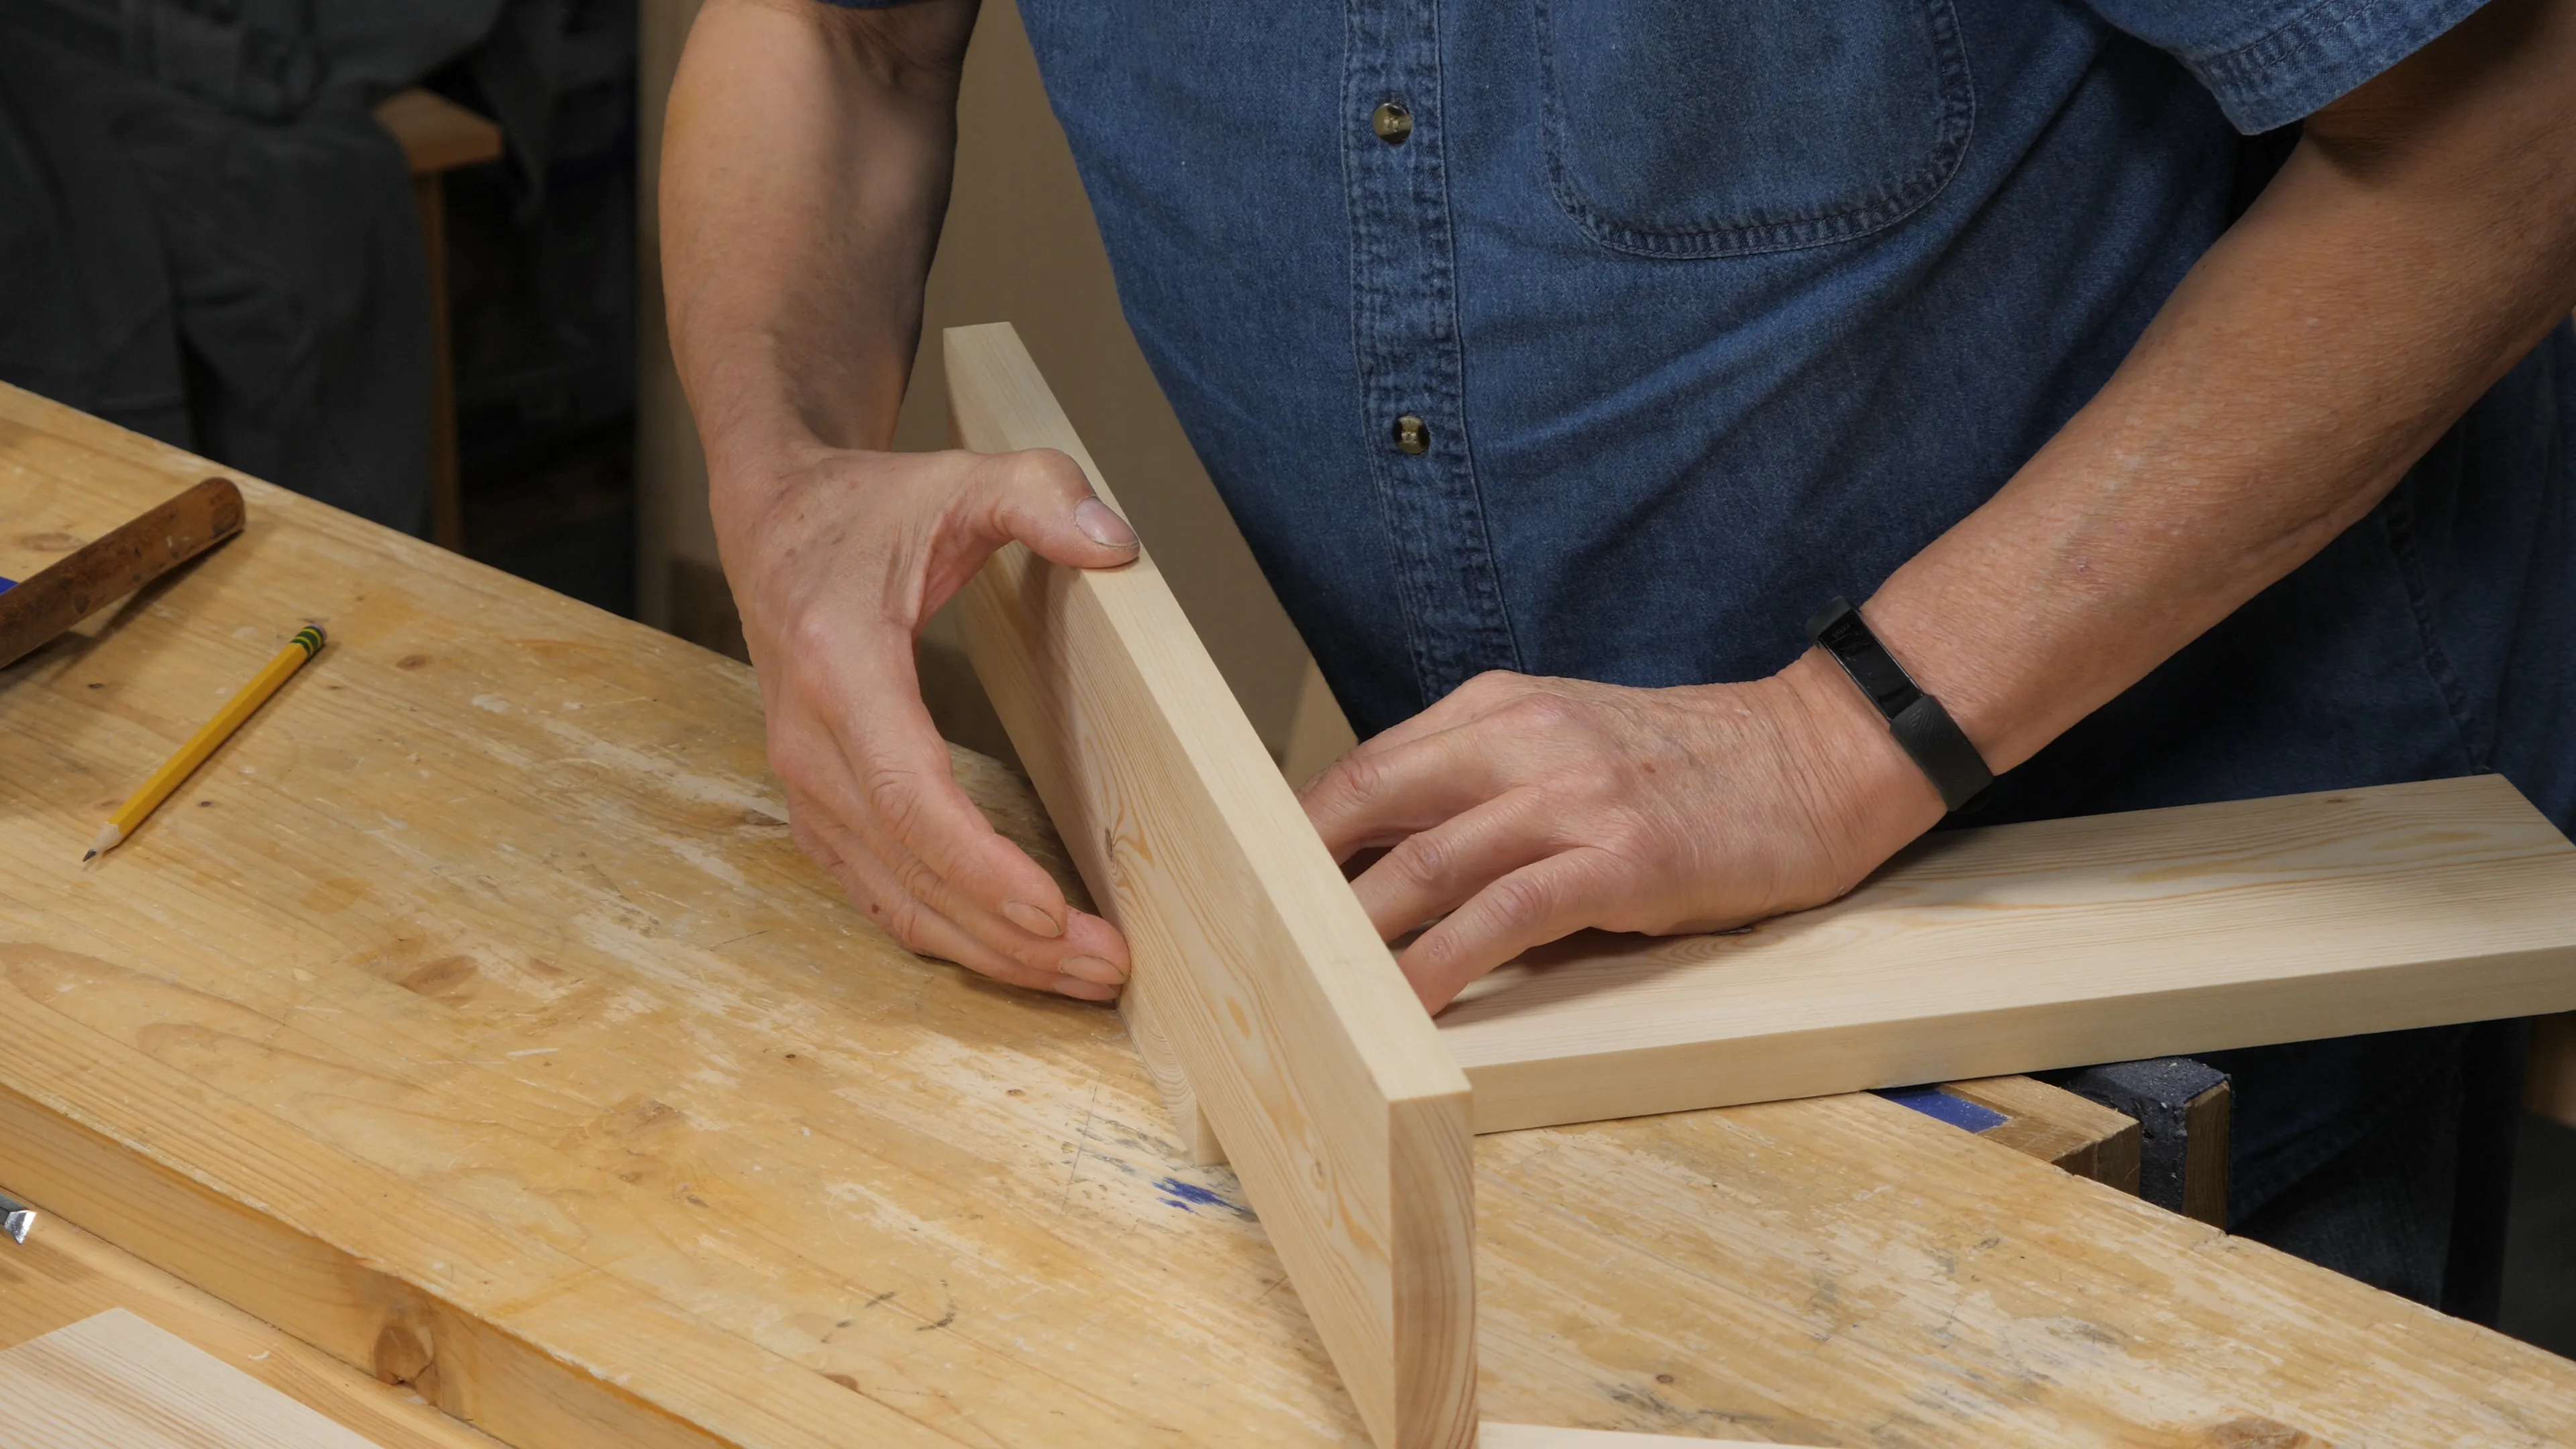
Next, move the square over and use the thickness of the side piece again to mark the second wall with a sharp pencil. Square this line across the face as well. Mark the inside of the housing dado with crosses to identify your waste wood. Repeat on the opposite end.
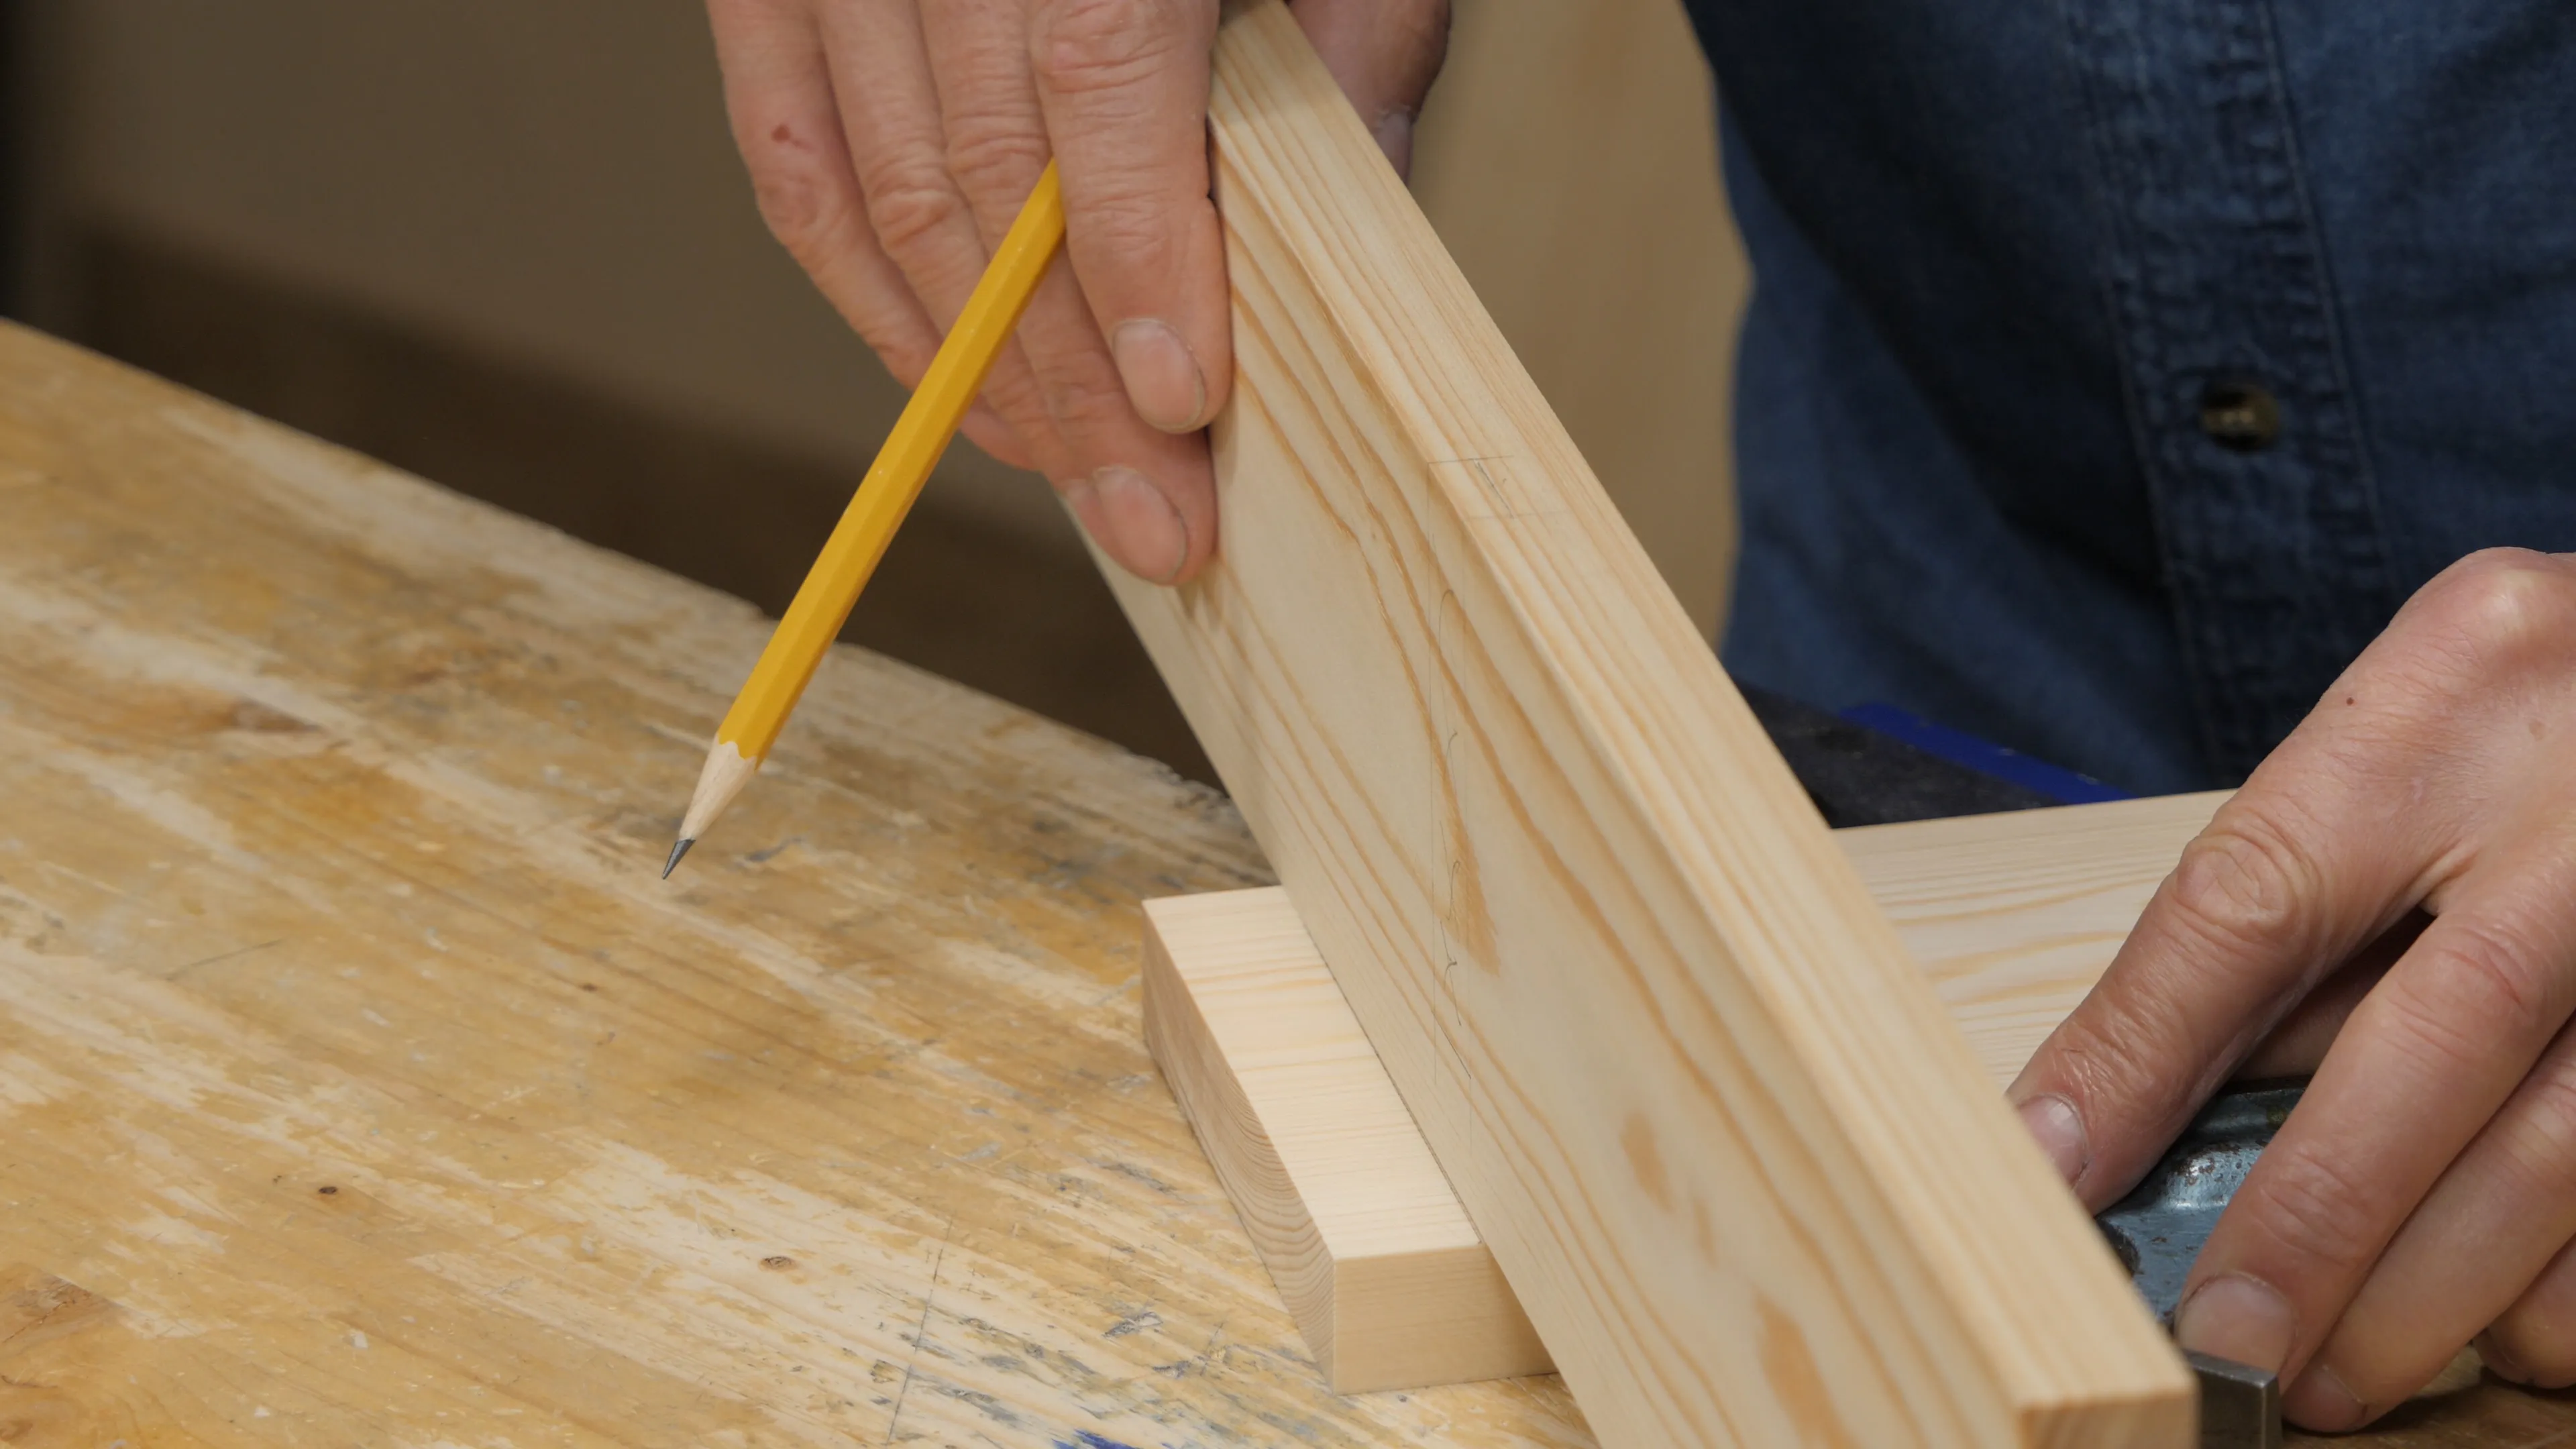

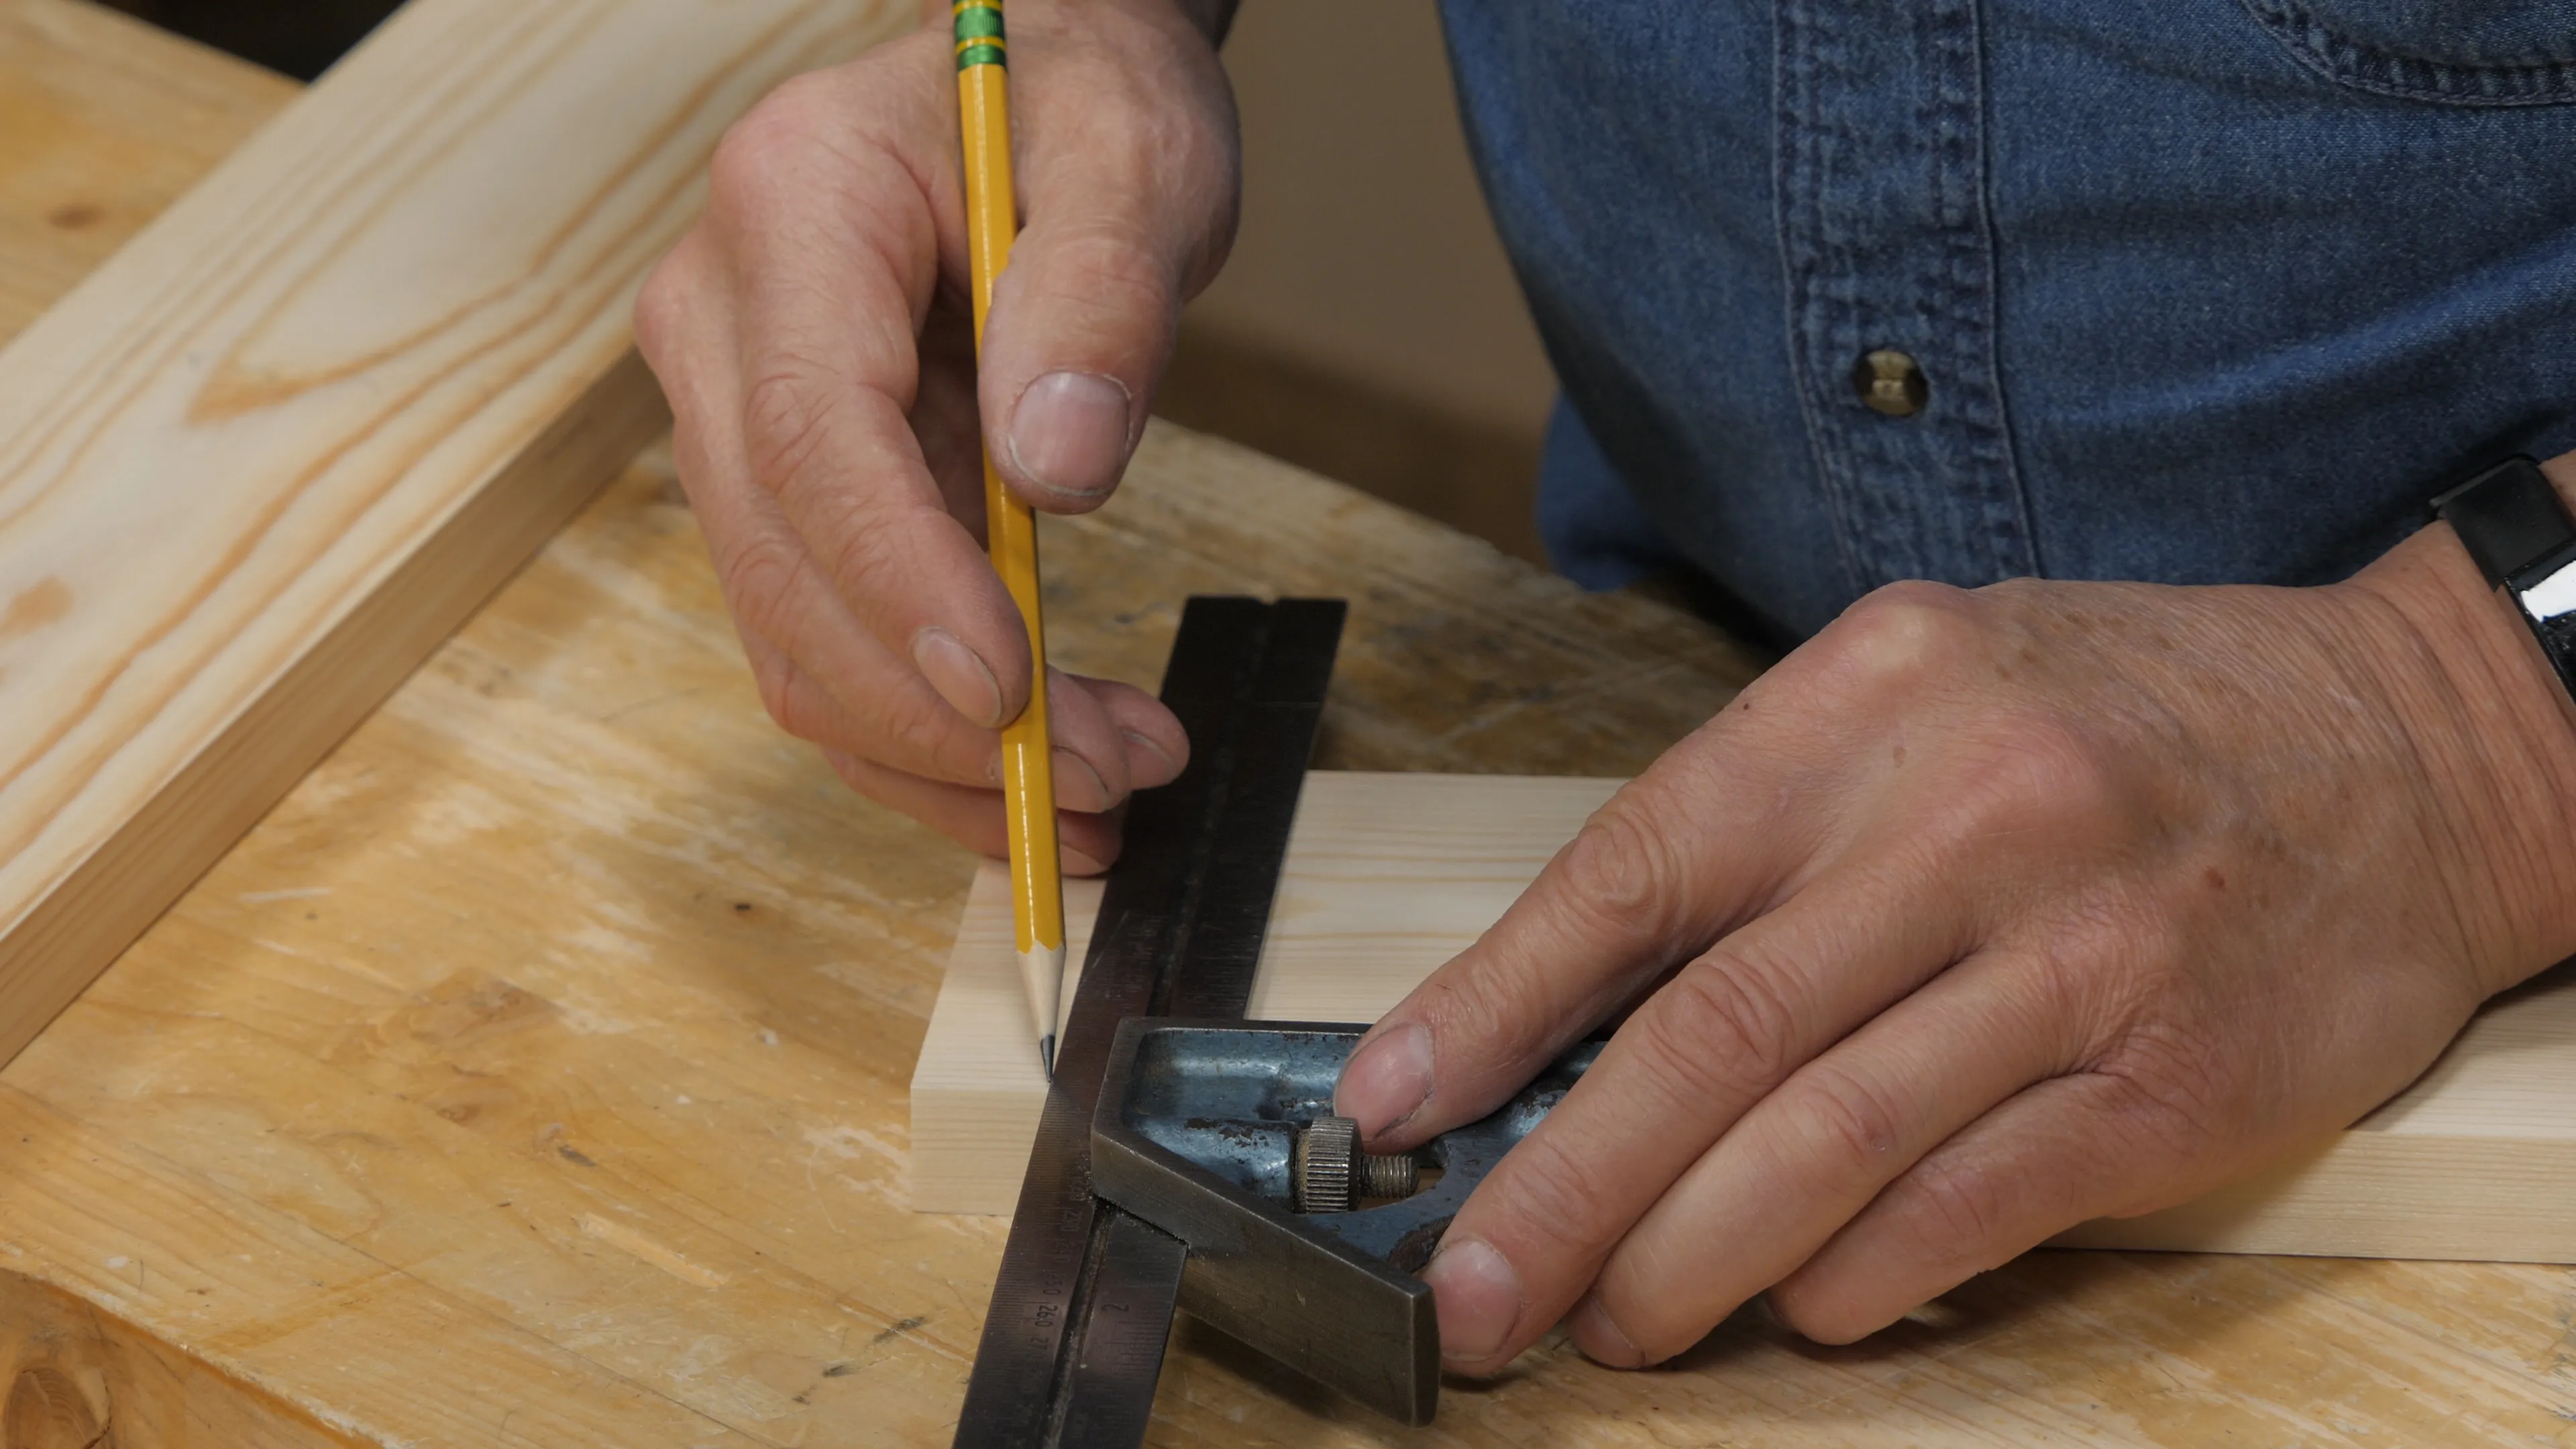
You must now transfer the layout markings to the bottom piece to ensure the recesses will be the same distance apart and with an equal overhang on either side. Bring both pieces together and, after making sure they are aligned, transfer the four pencil lines onto your second piece with a square. With all layout lines transferred, square them across the face of your second piece as before.
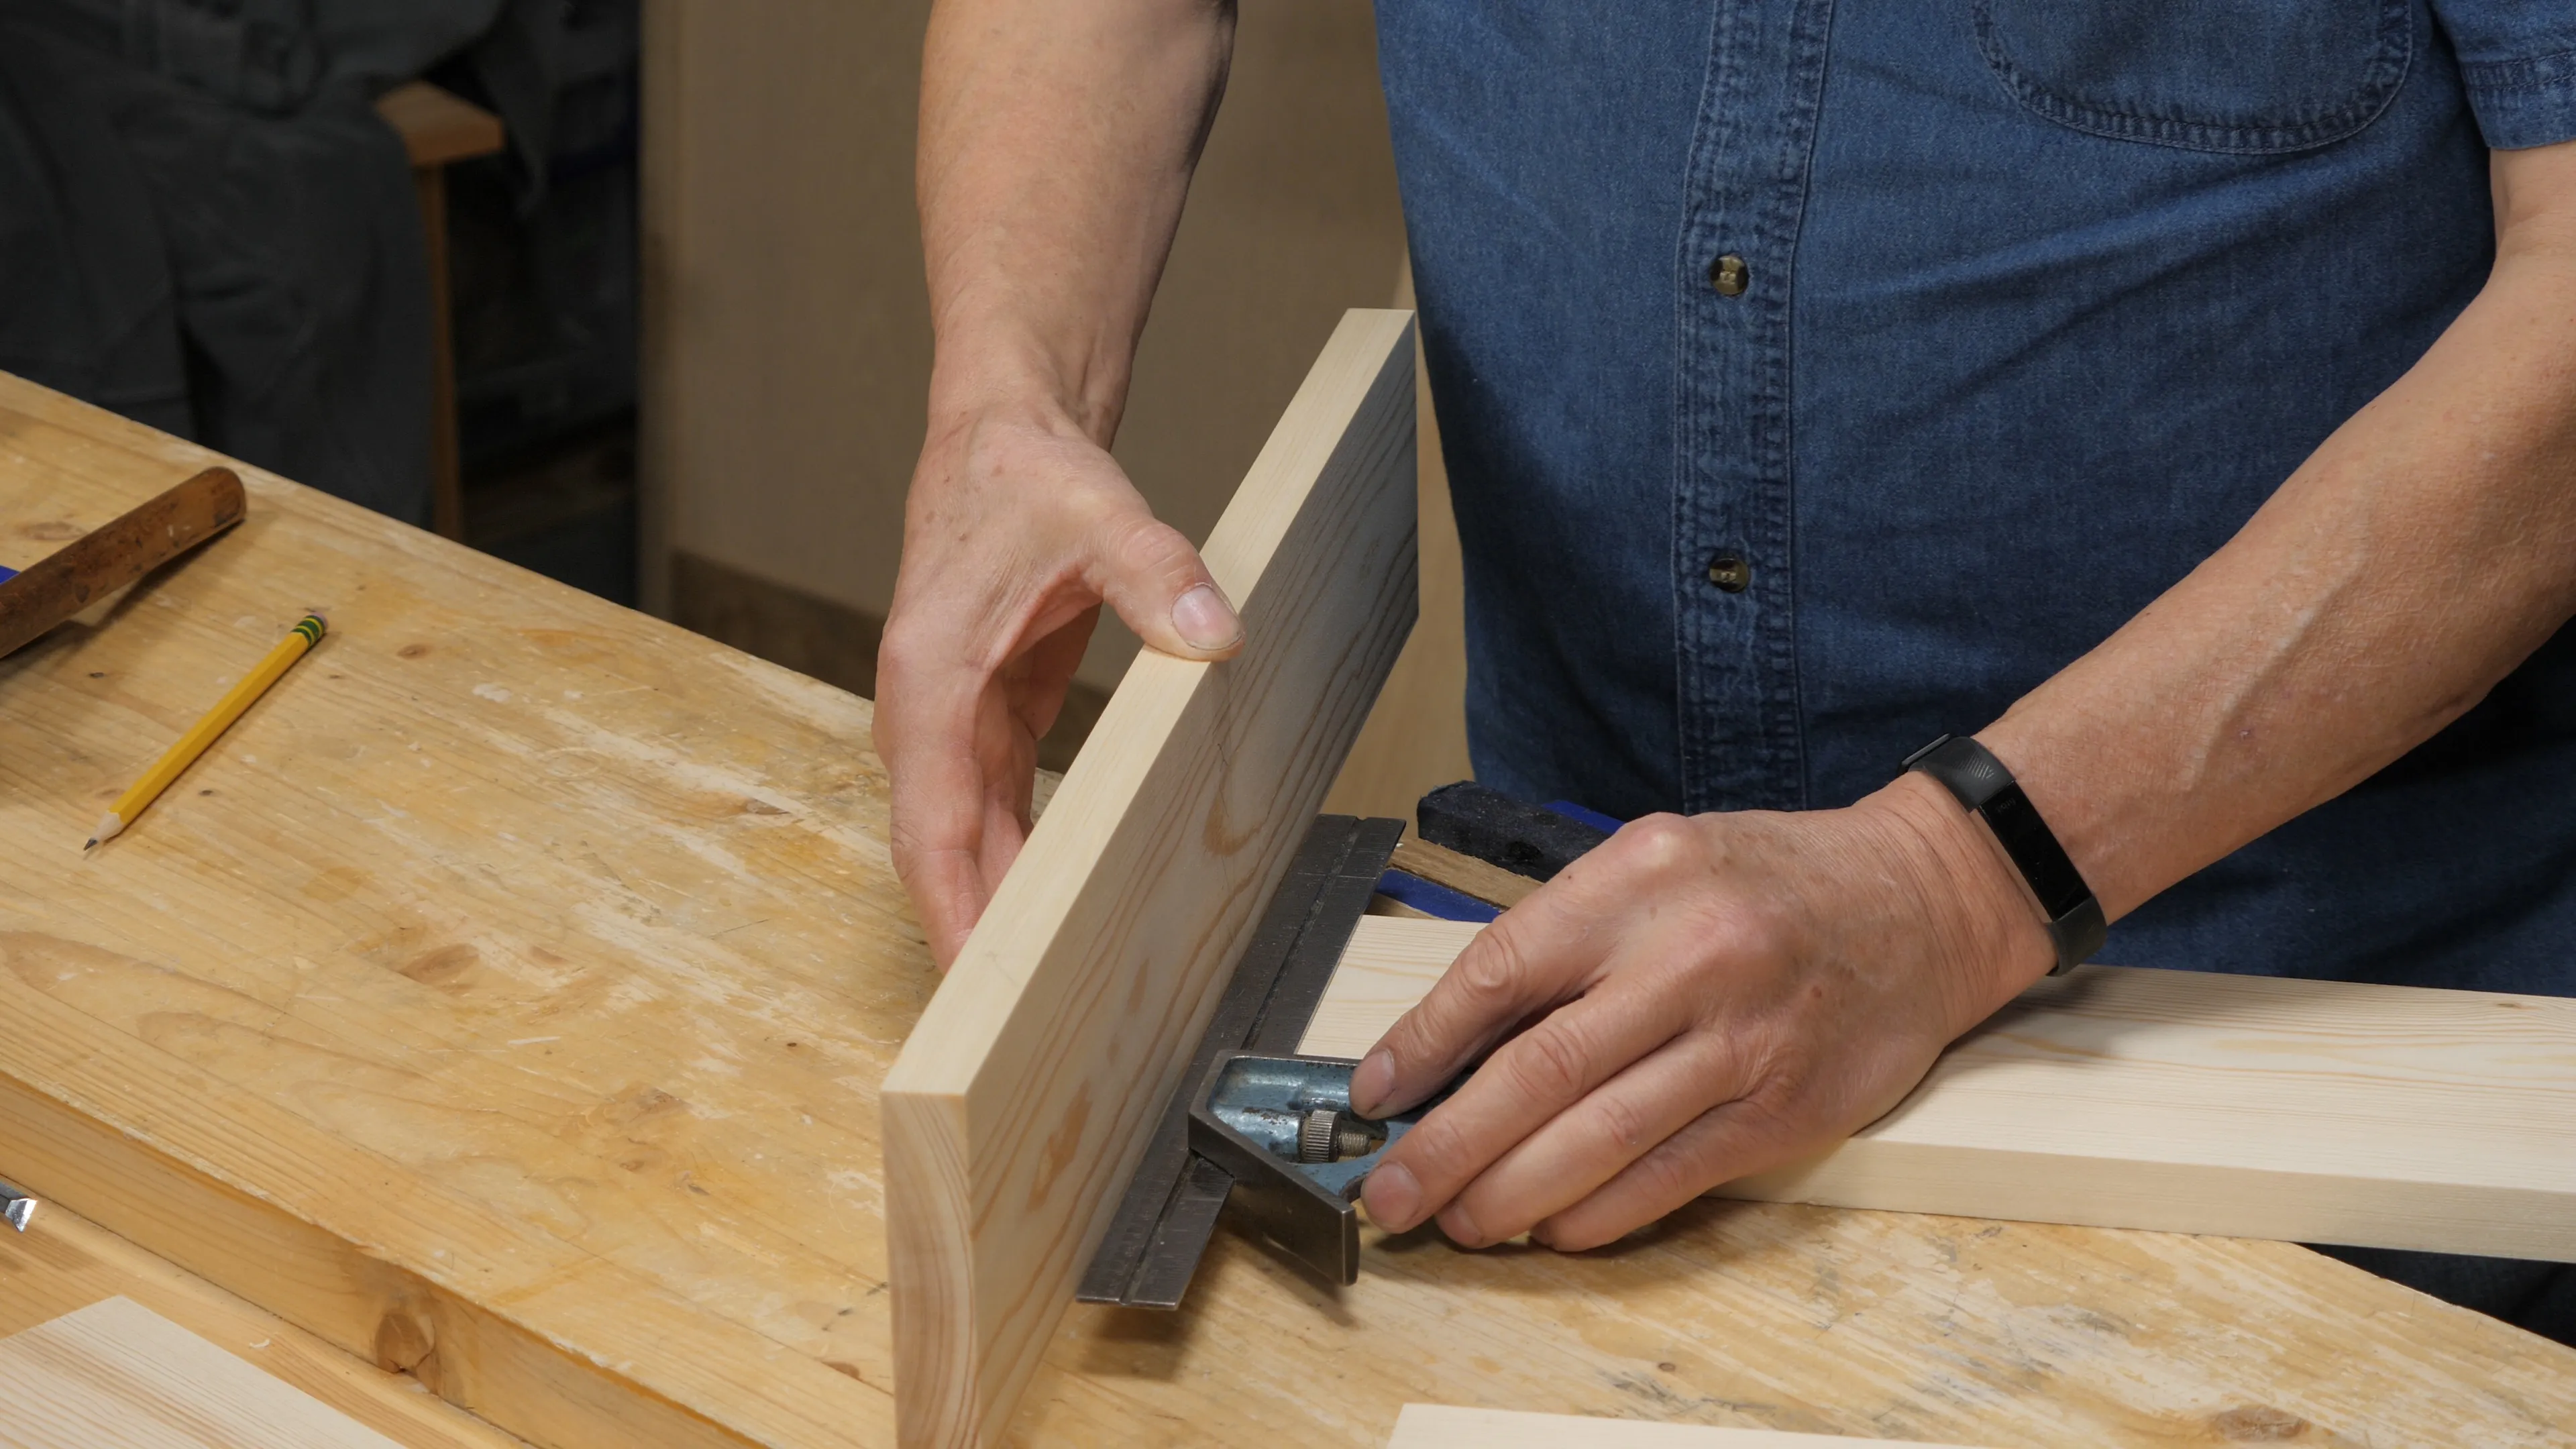
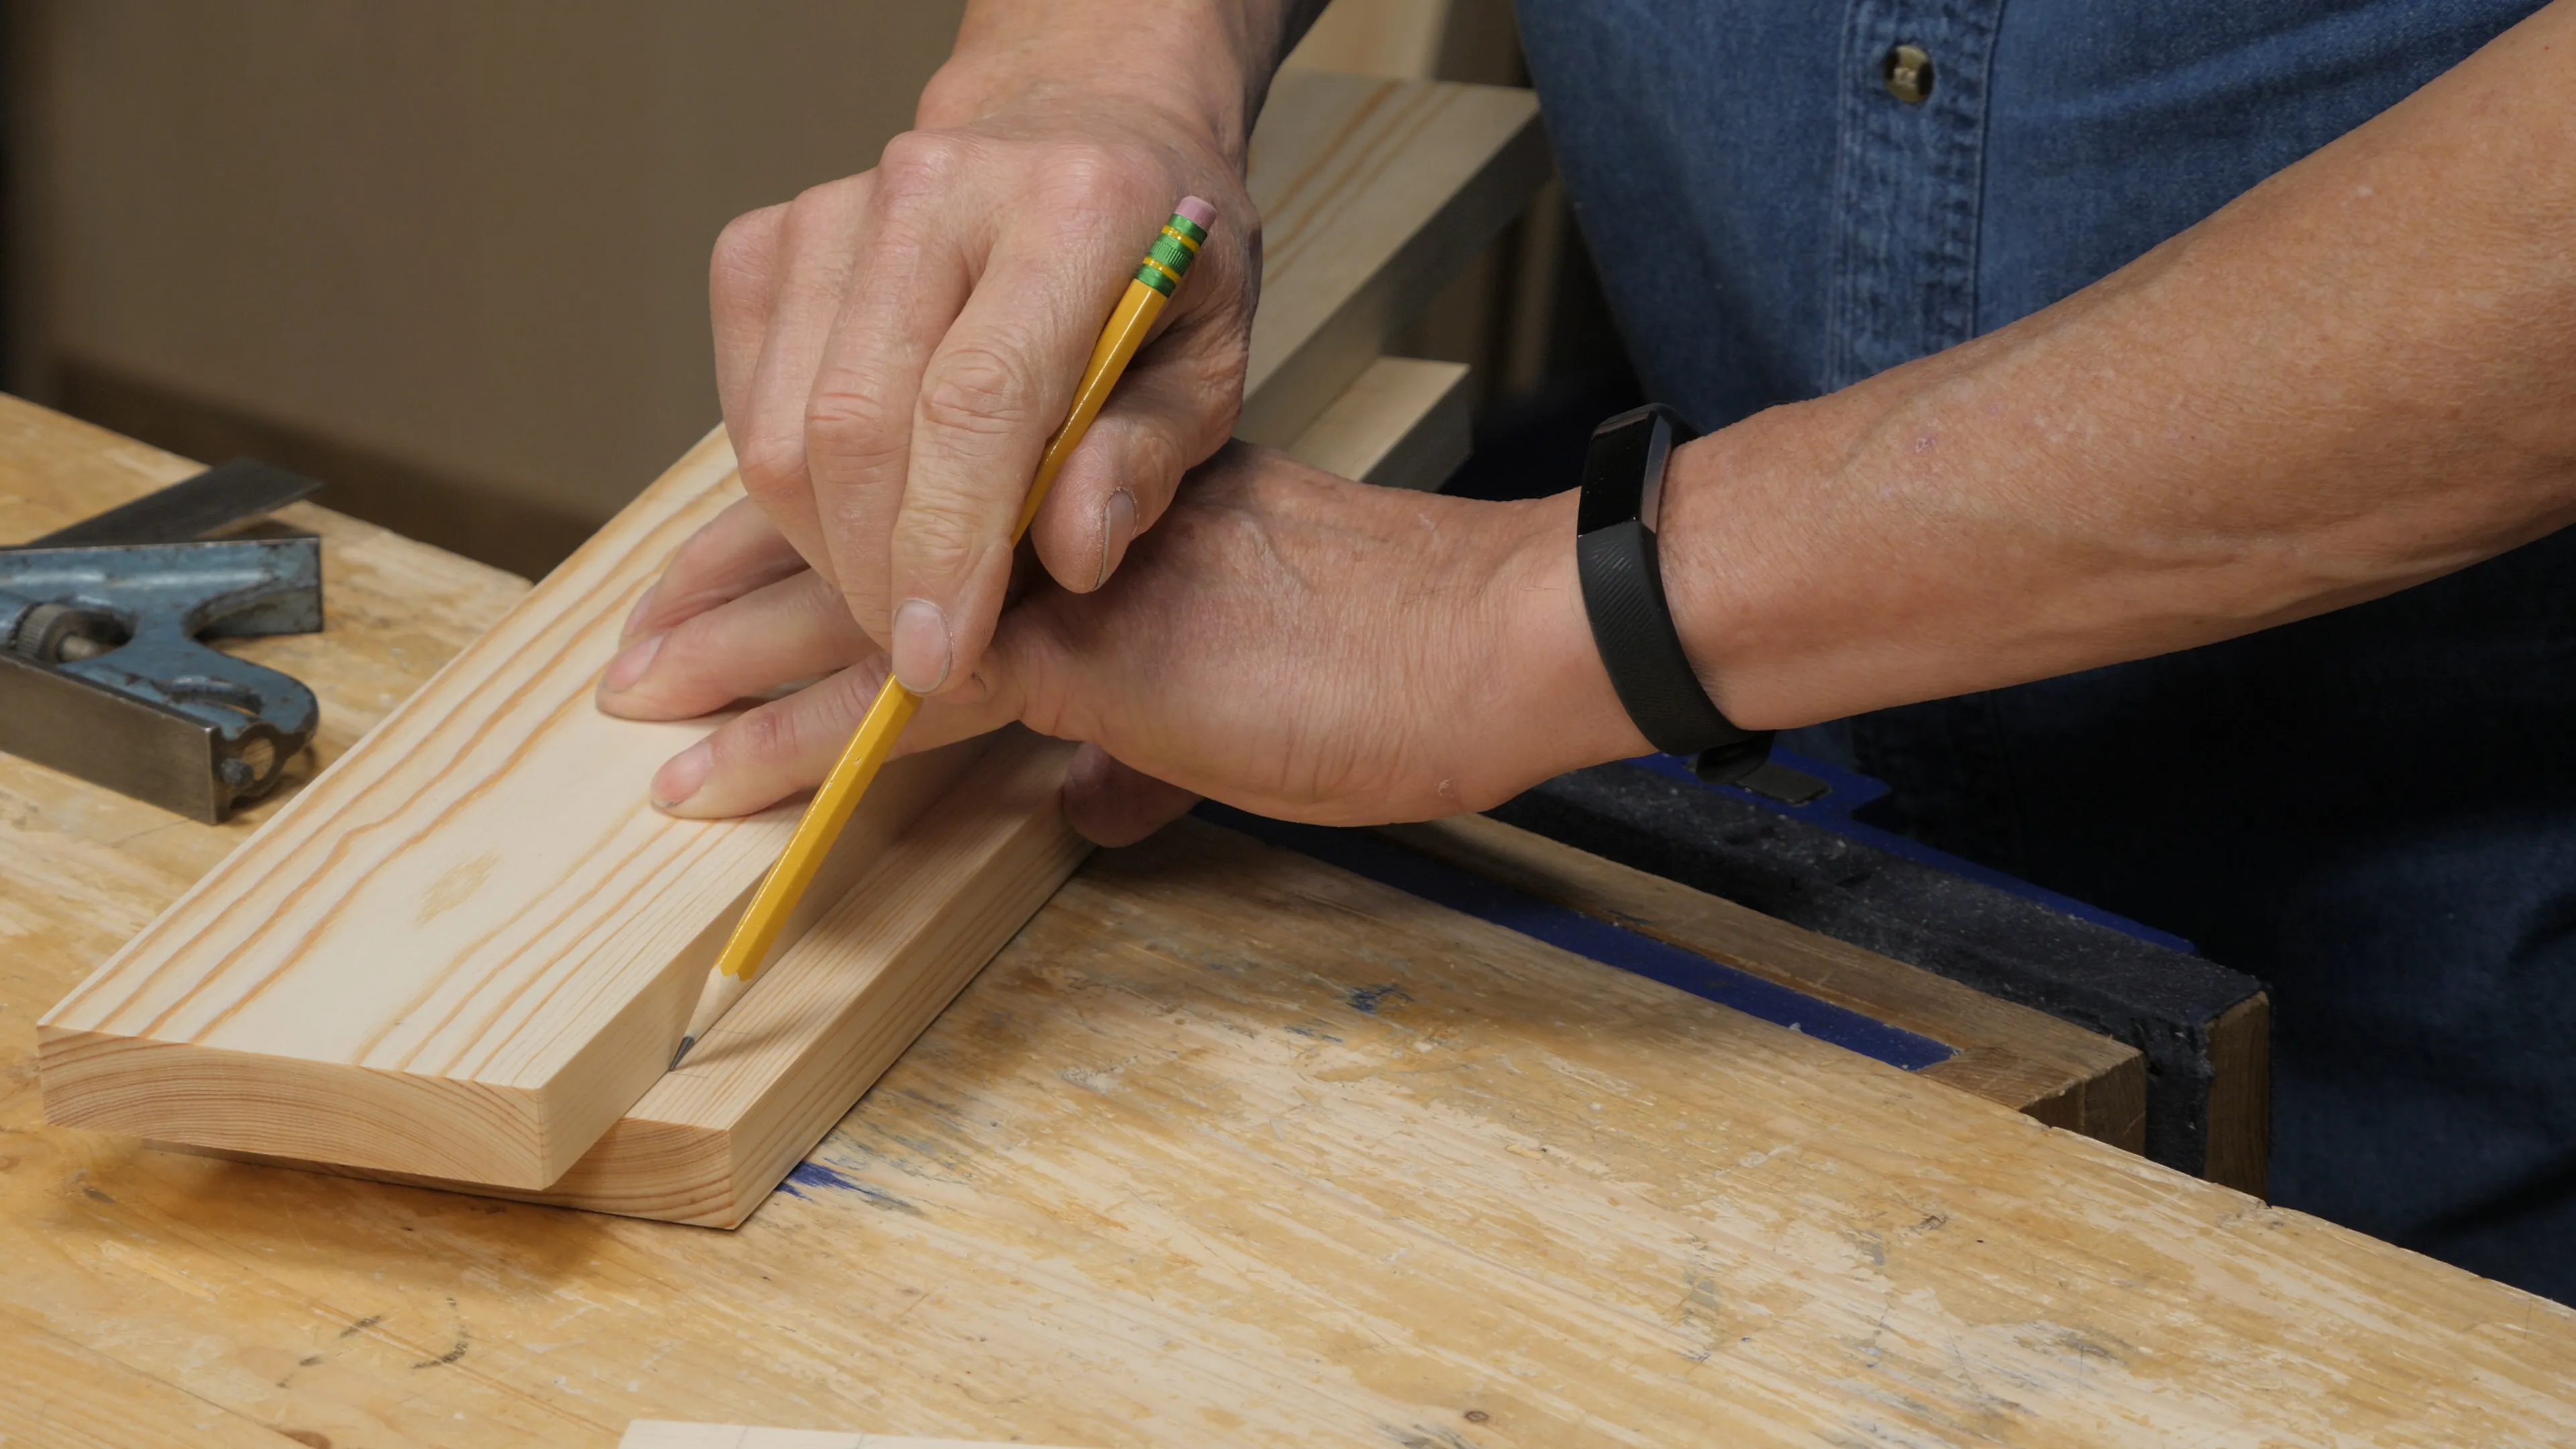
To mark the front of the recesses, place the side piece over the top/bottom piece and flush both along the back edge. Then use the front of the side piece to mark the ends of the recesses with a pencil.
Note: You could mark the ends of the recesses with a marking gauge if you wish. However, a fine pencil line works well if you use it as a reference and avoid cutting into it later when trimming the recess.
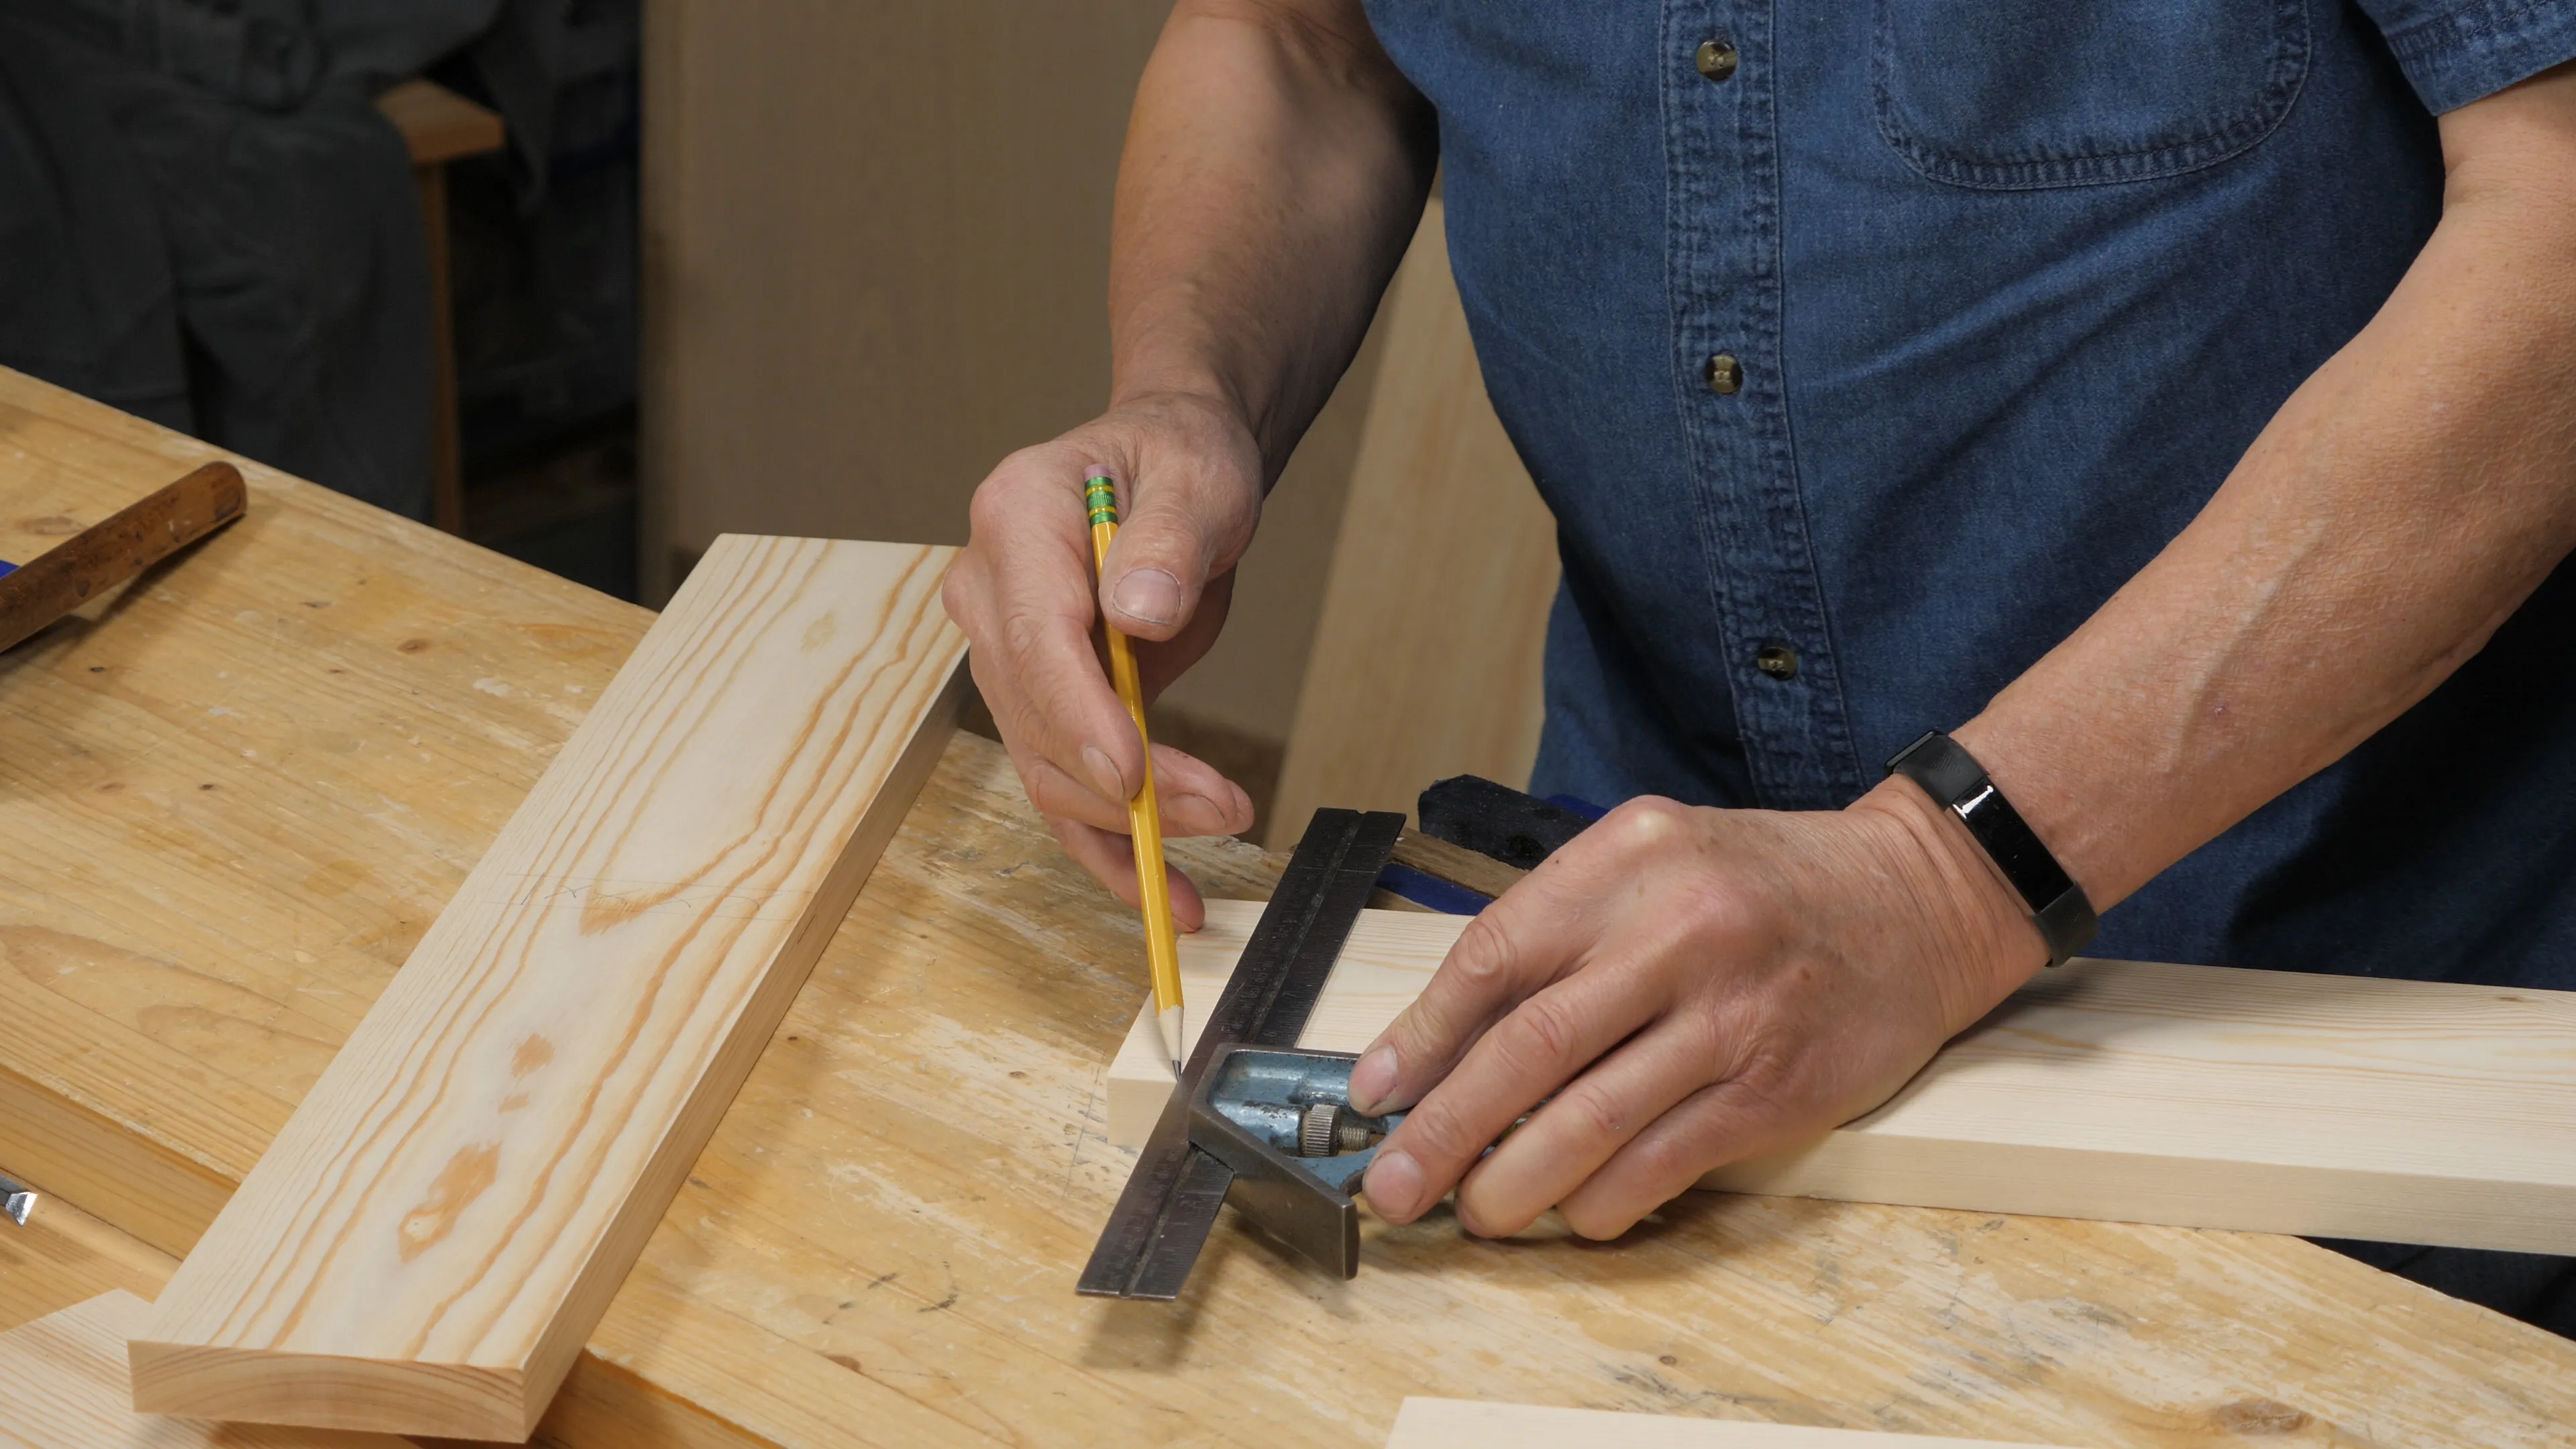
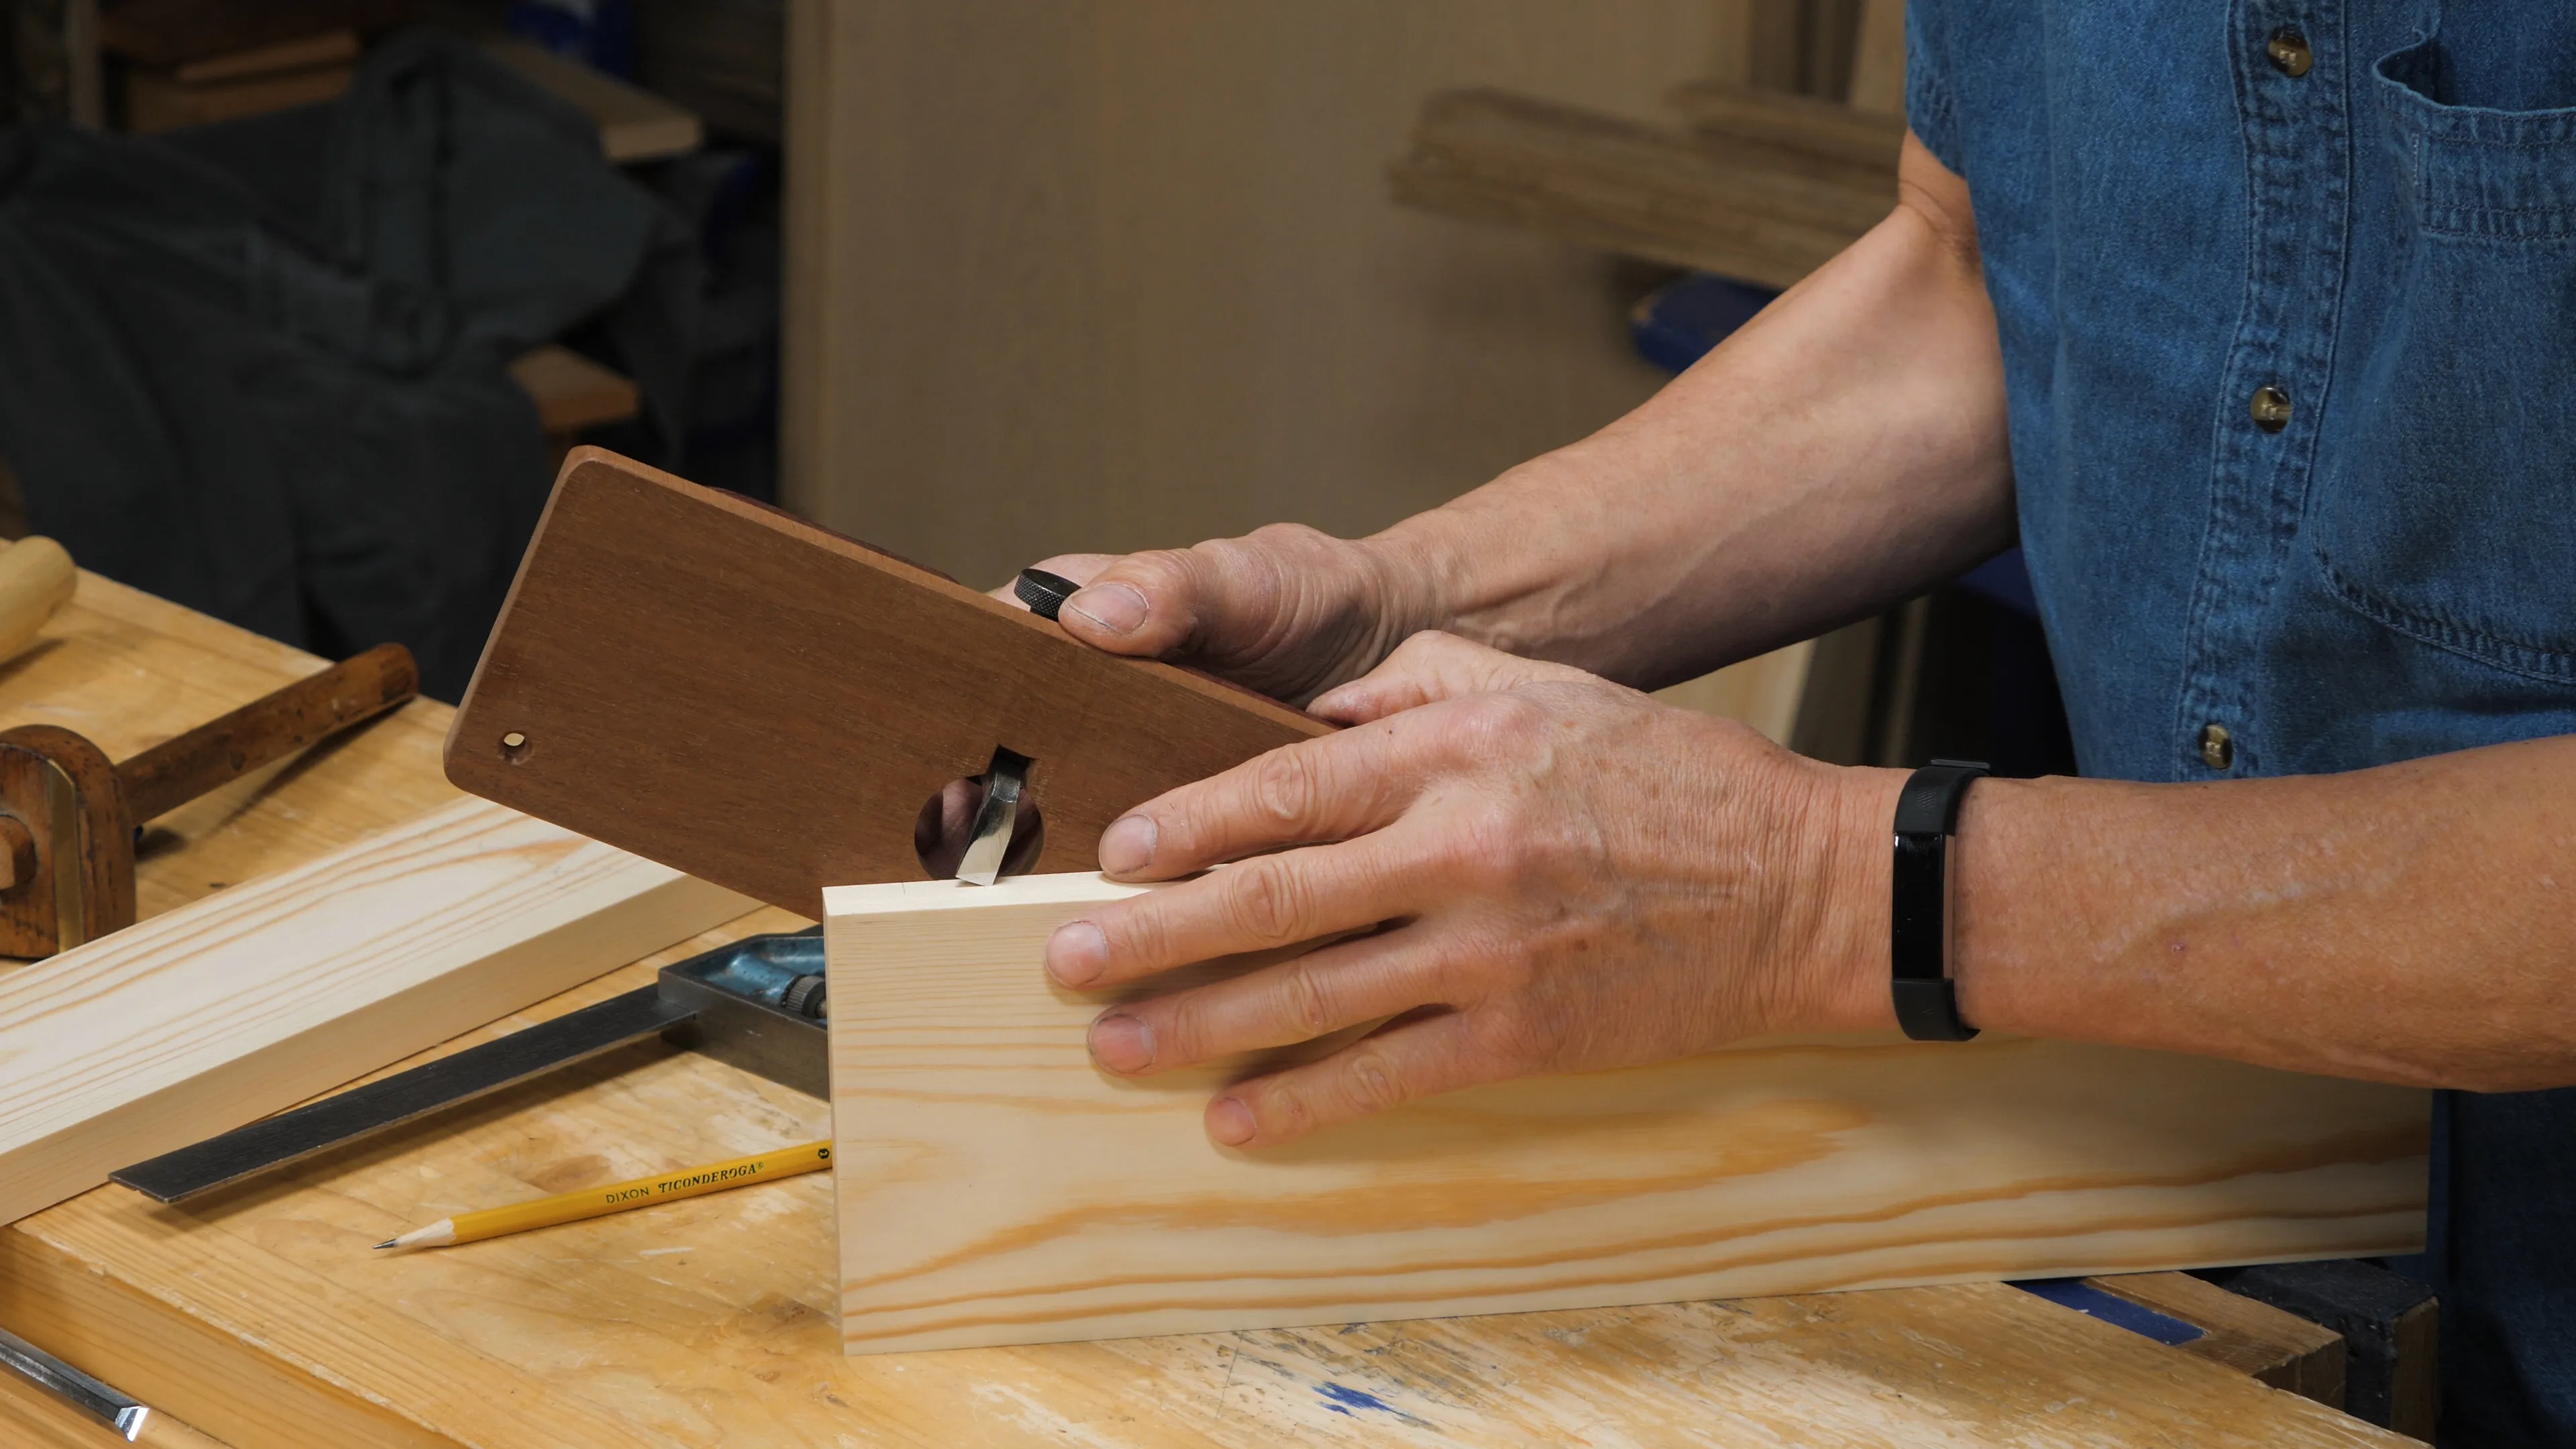
Use the gauge still set to ¼” (6mm) to mark the depth of the recesses. Alternatively, you can use a router plane blade as shown.

Sign in to track your progress