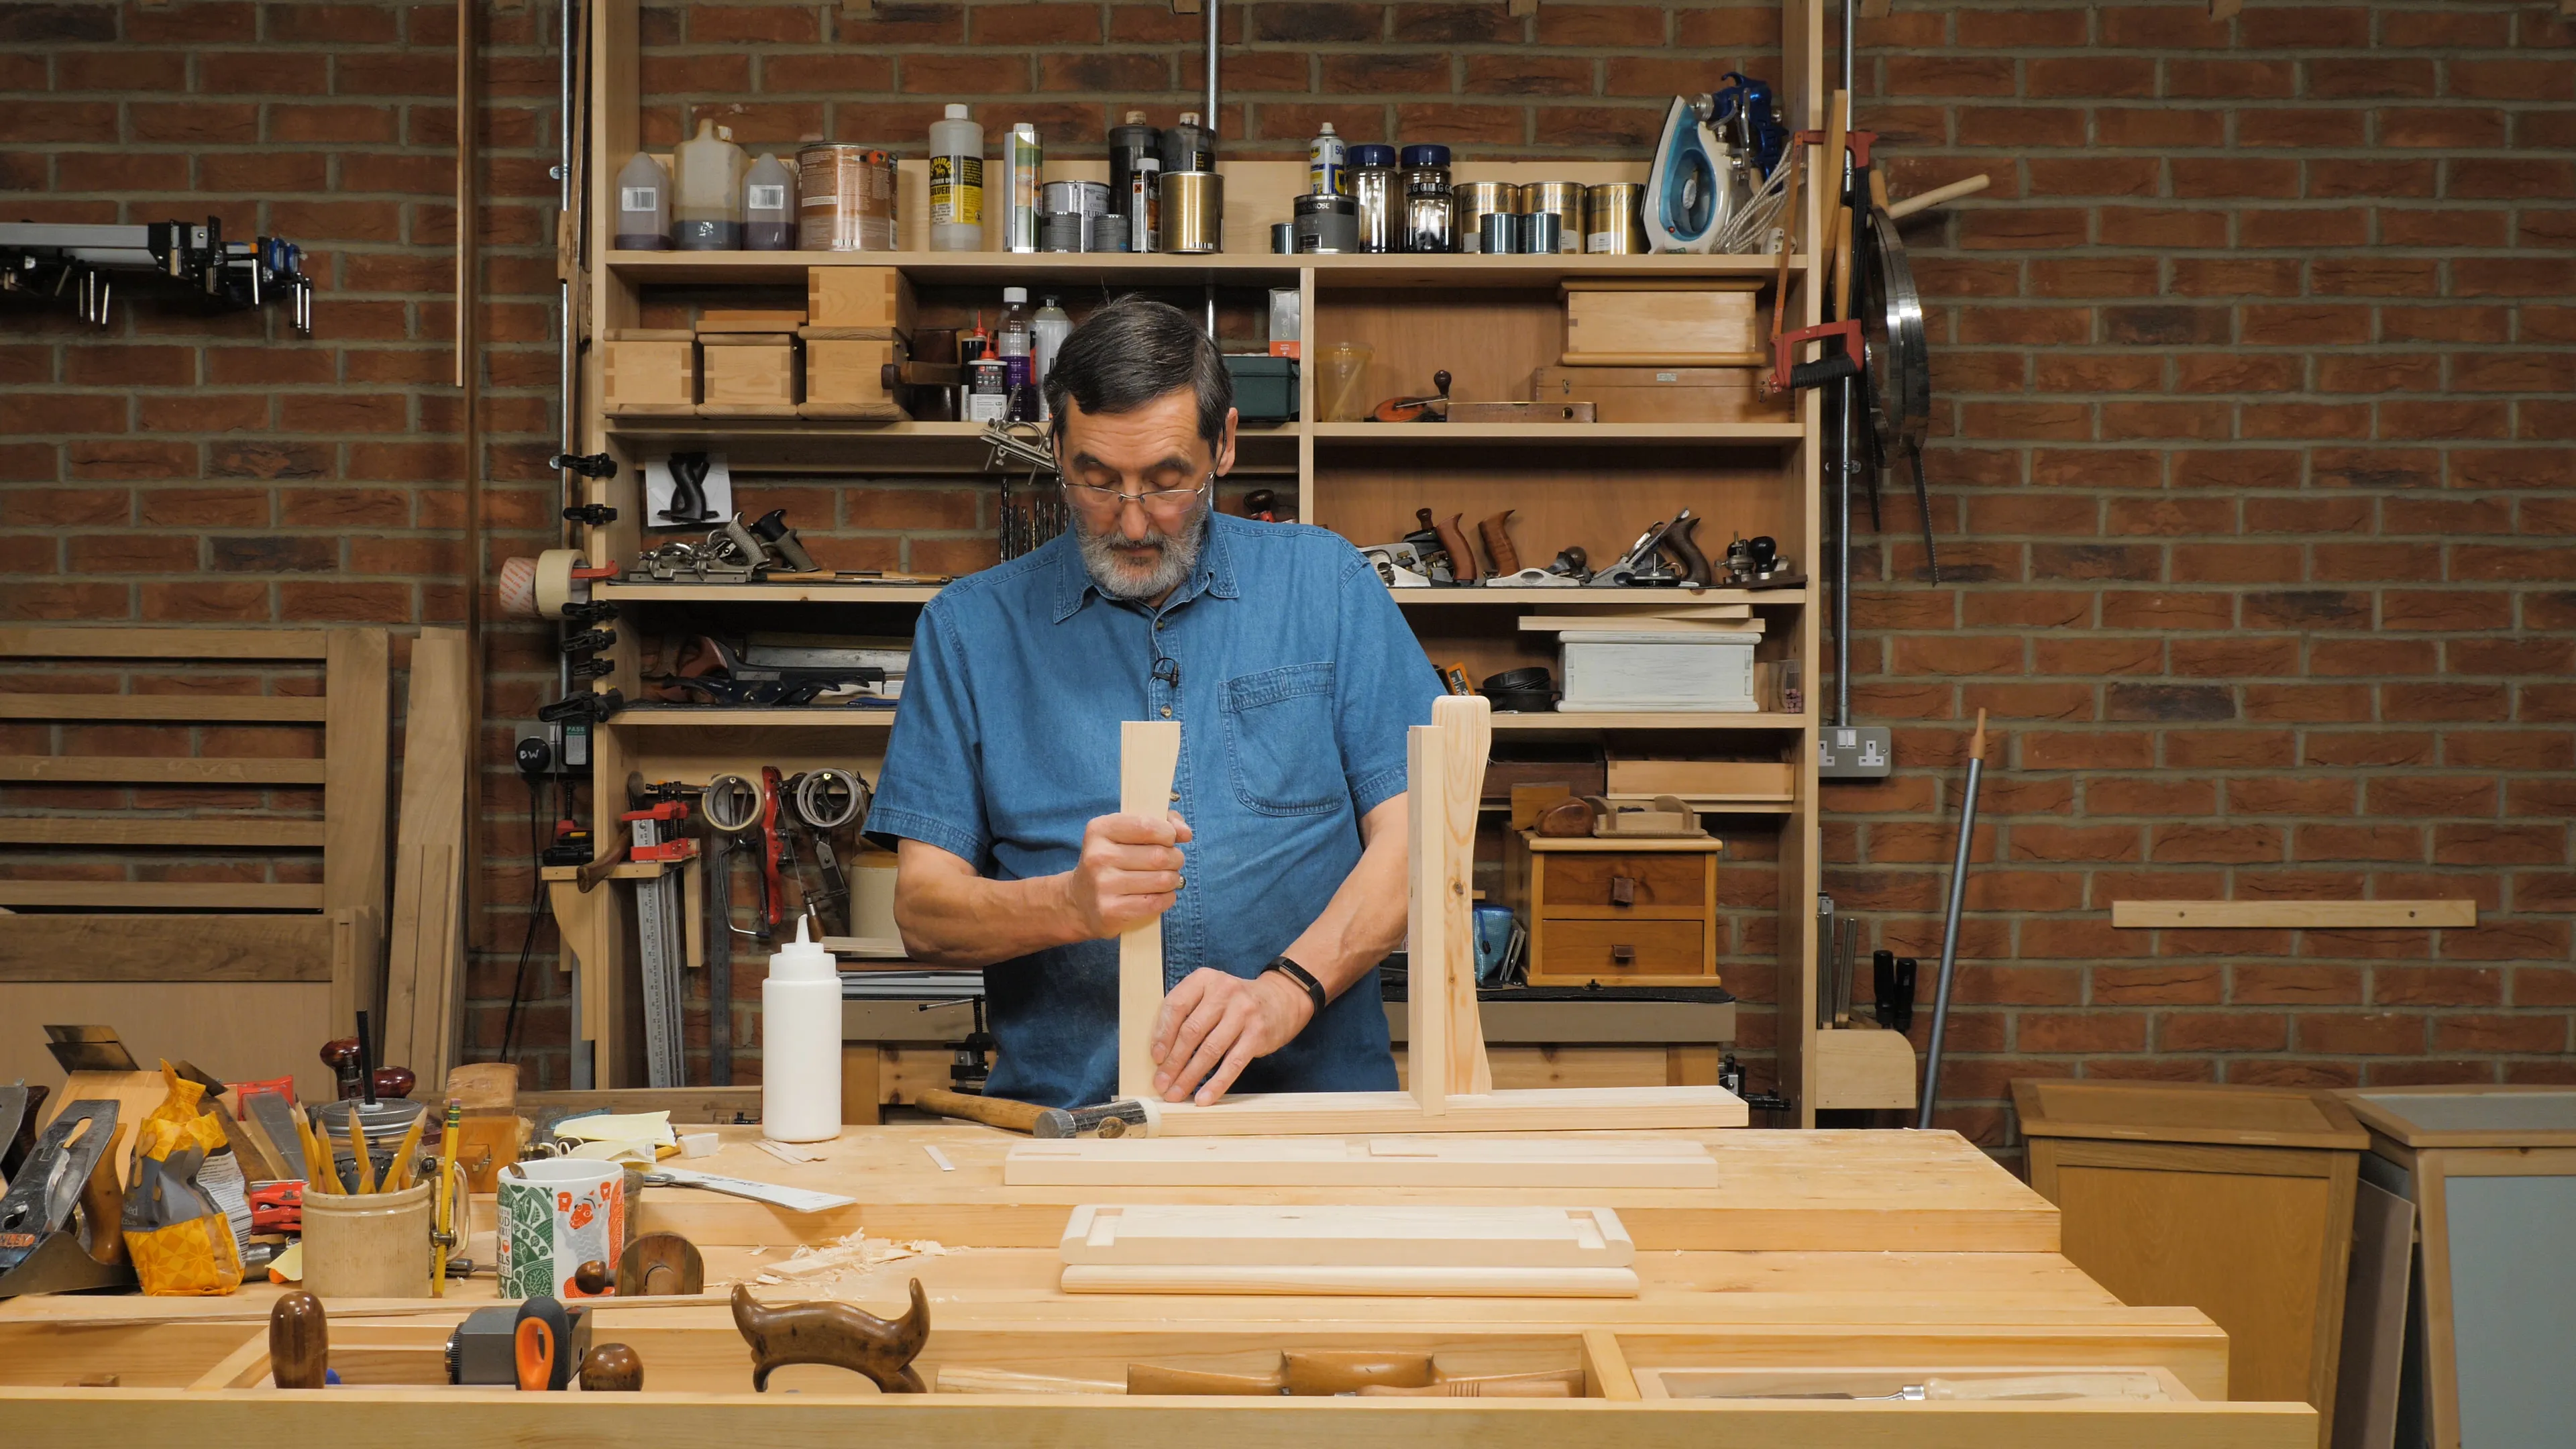
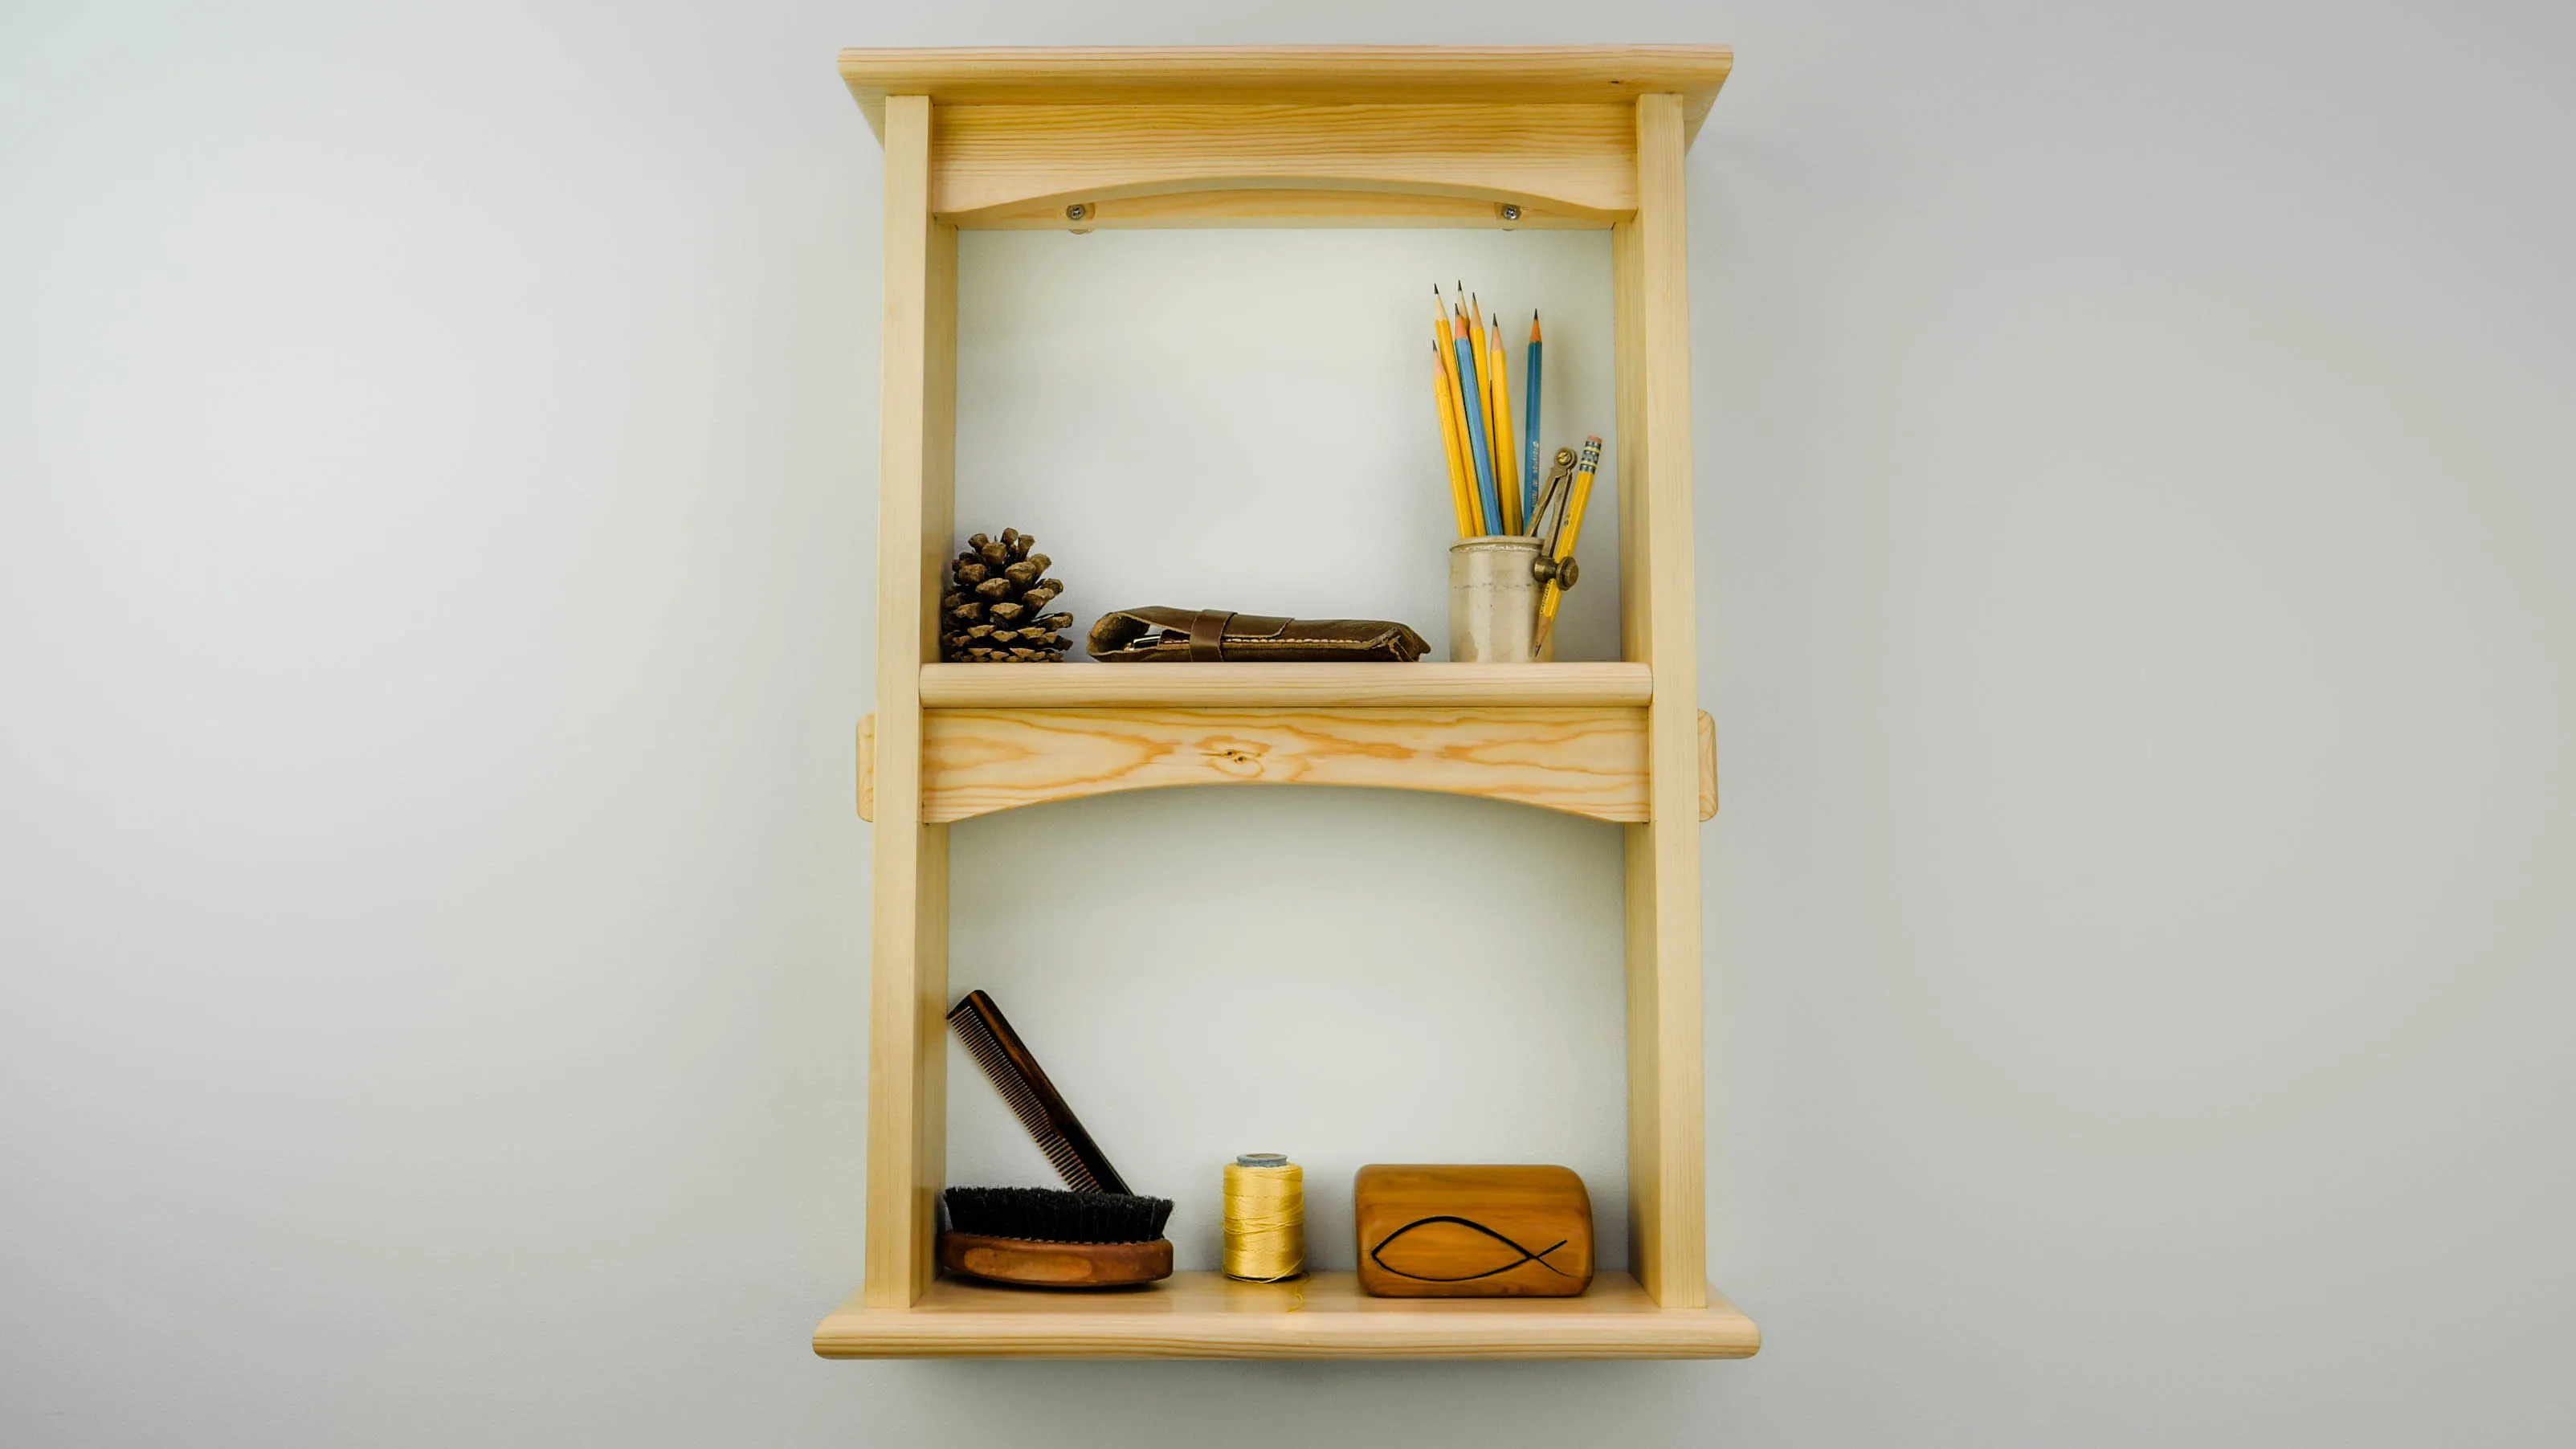
Gluing Up
Once you have surface planed and sanded any necessary components, you are ready to glue-up.
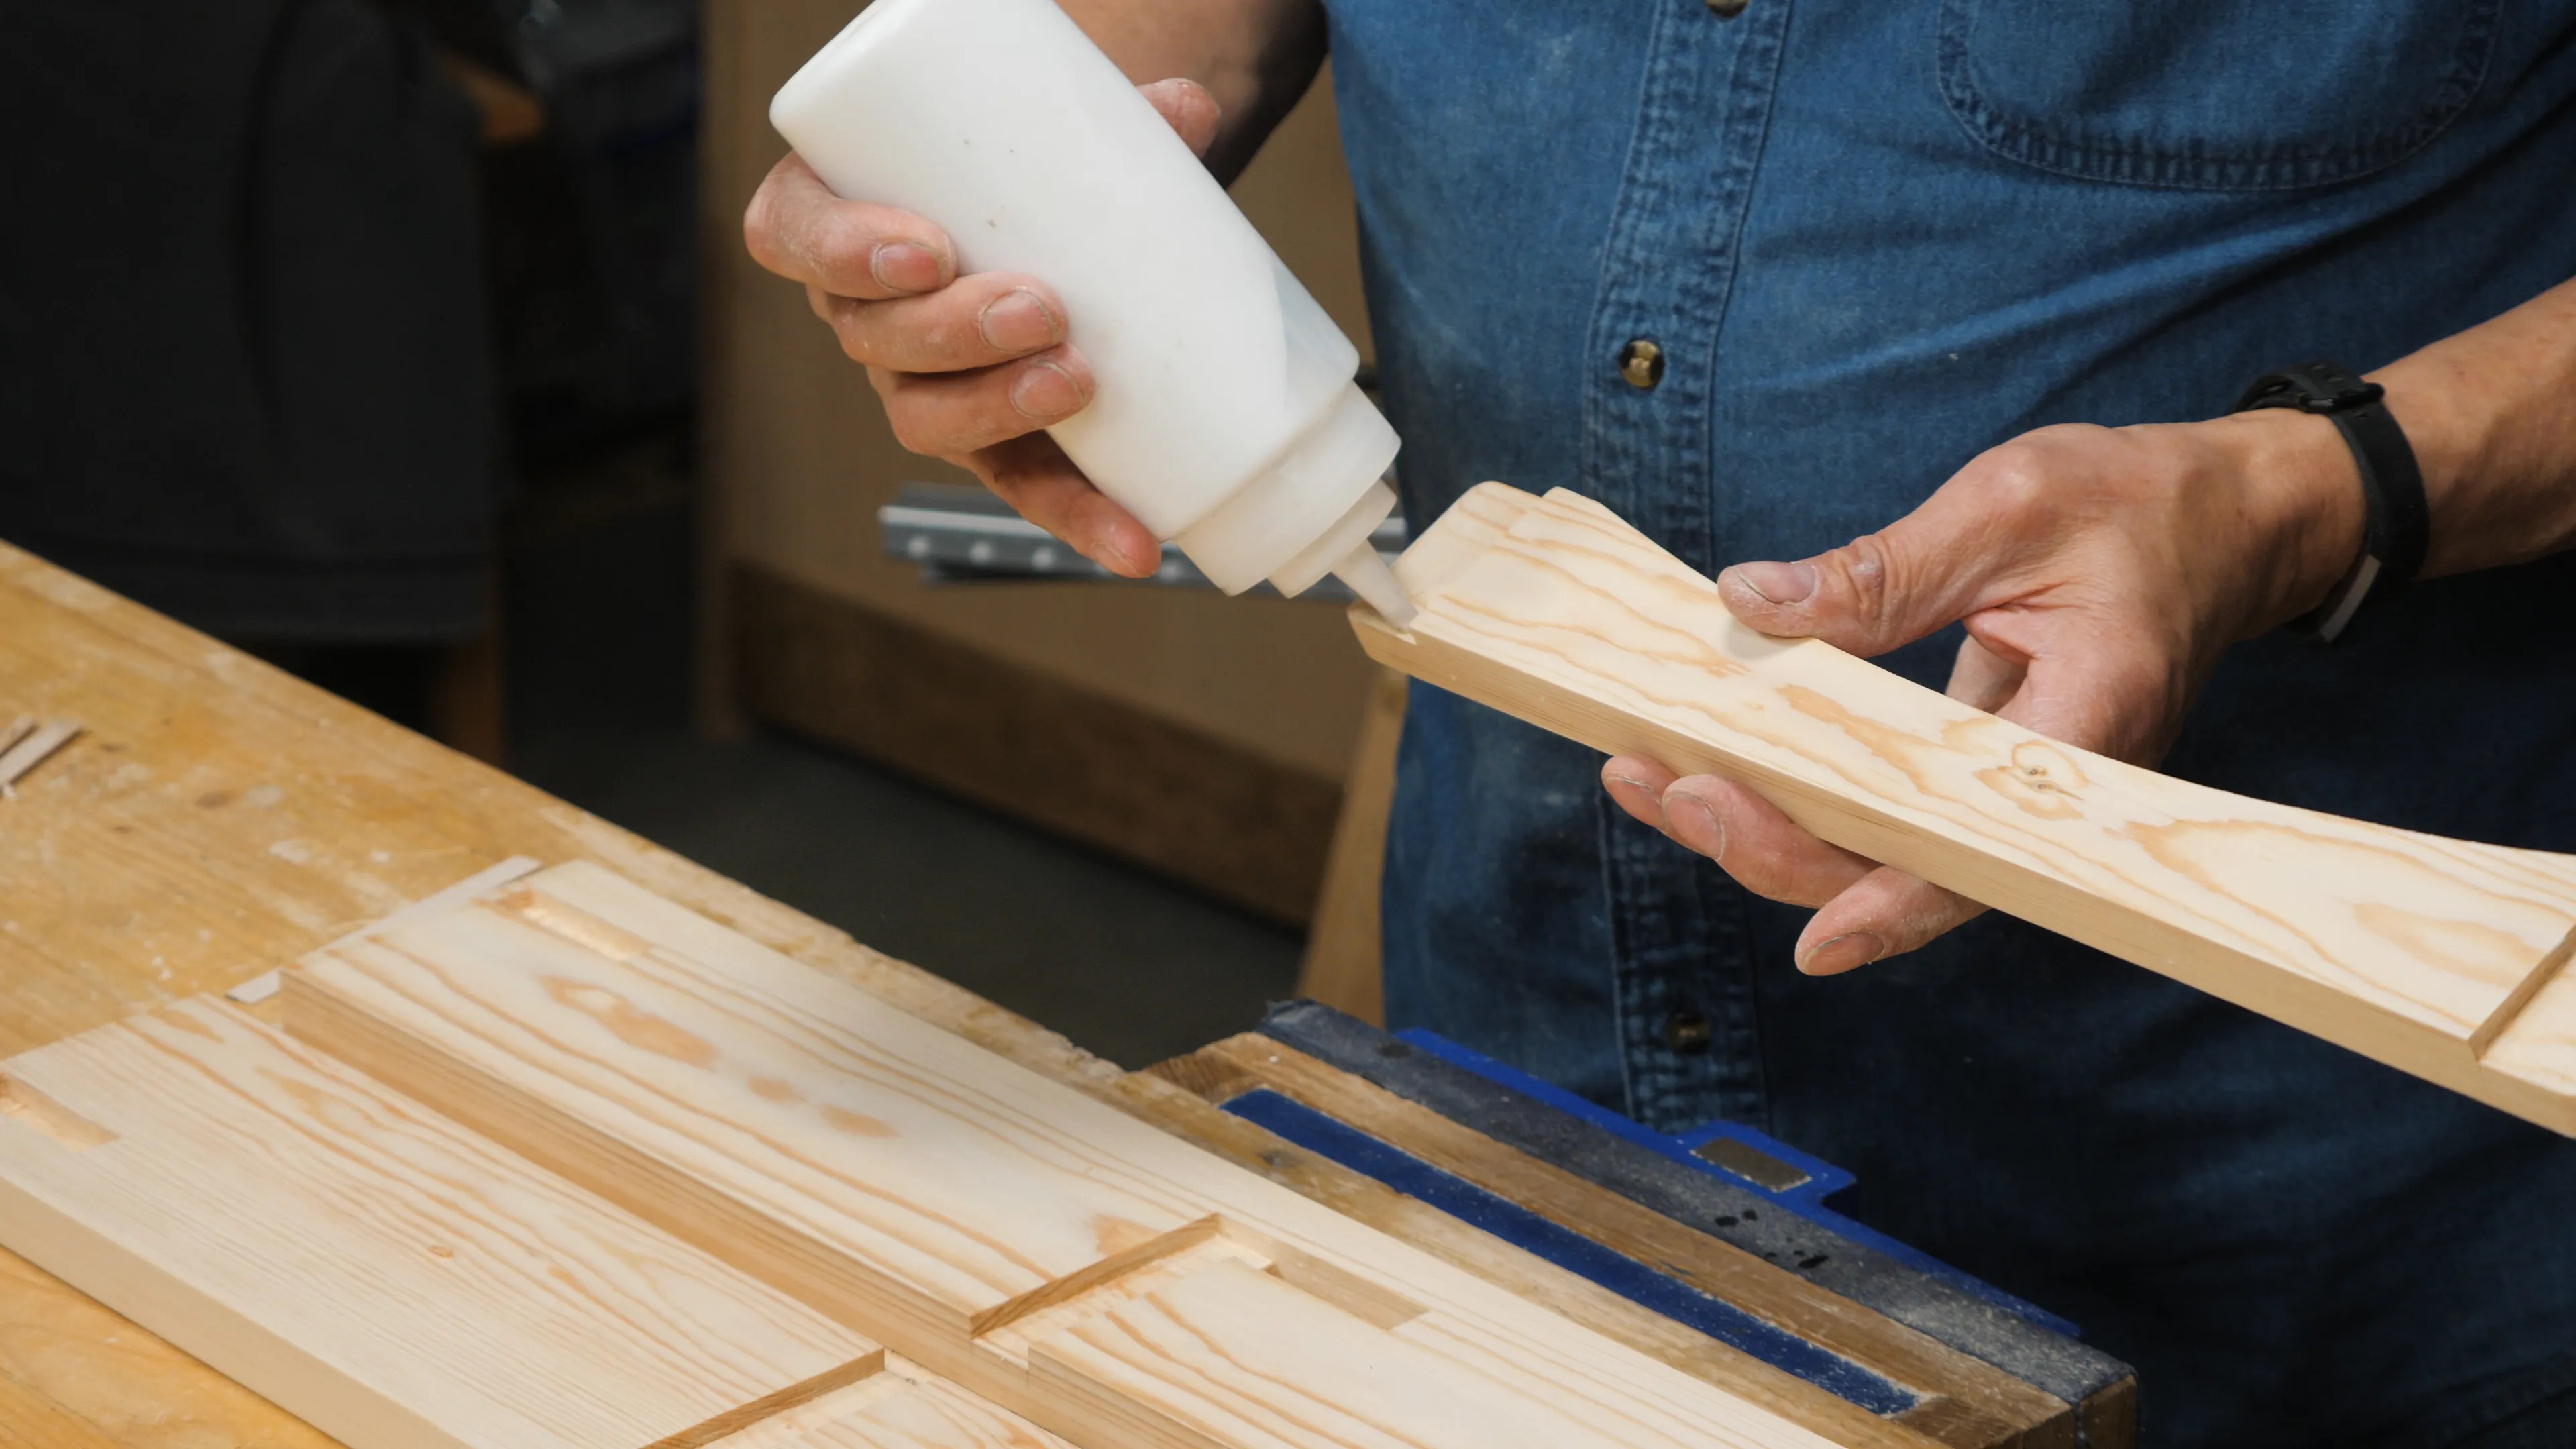
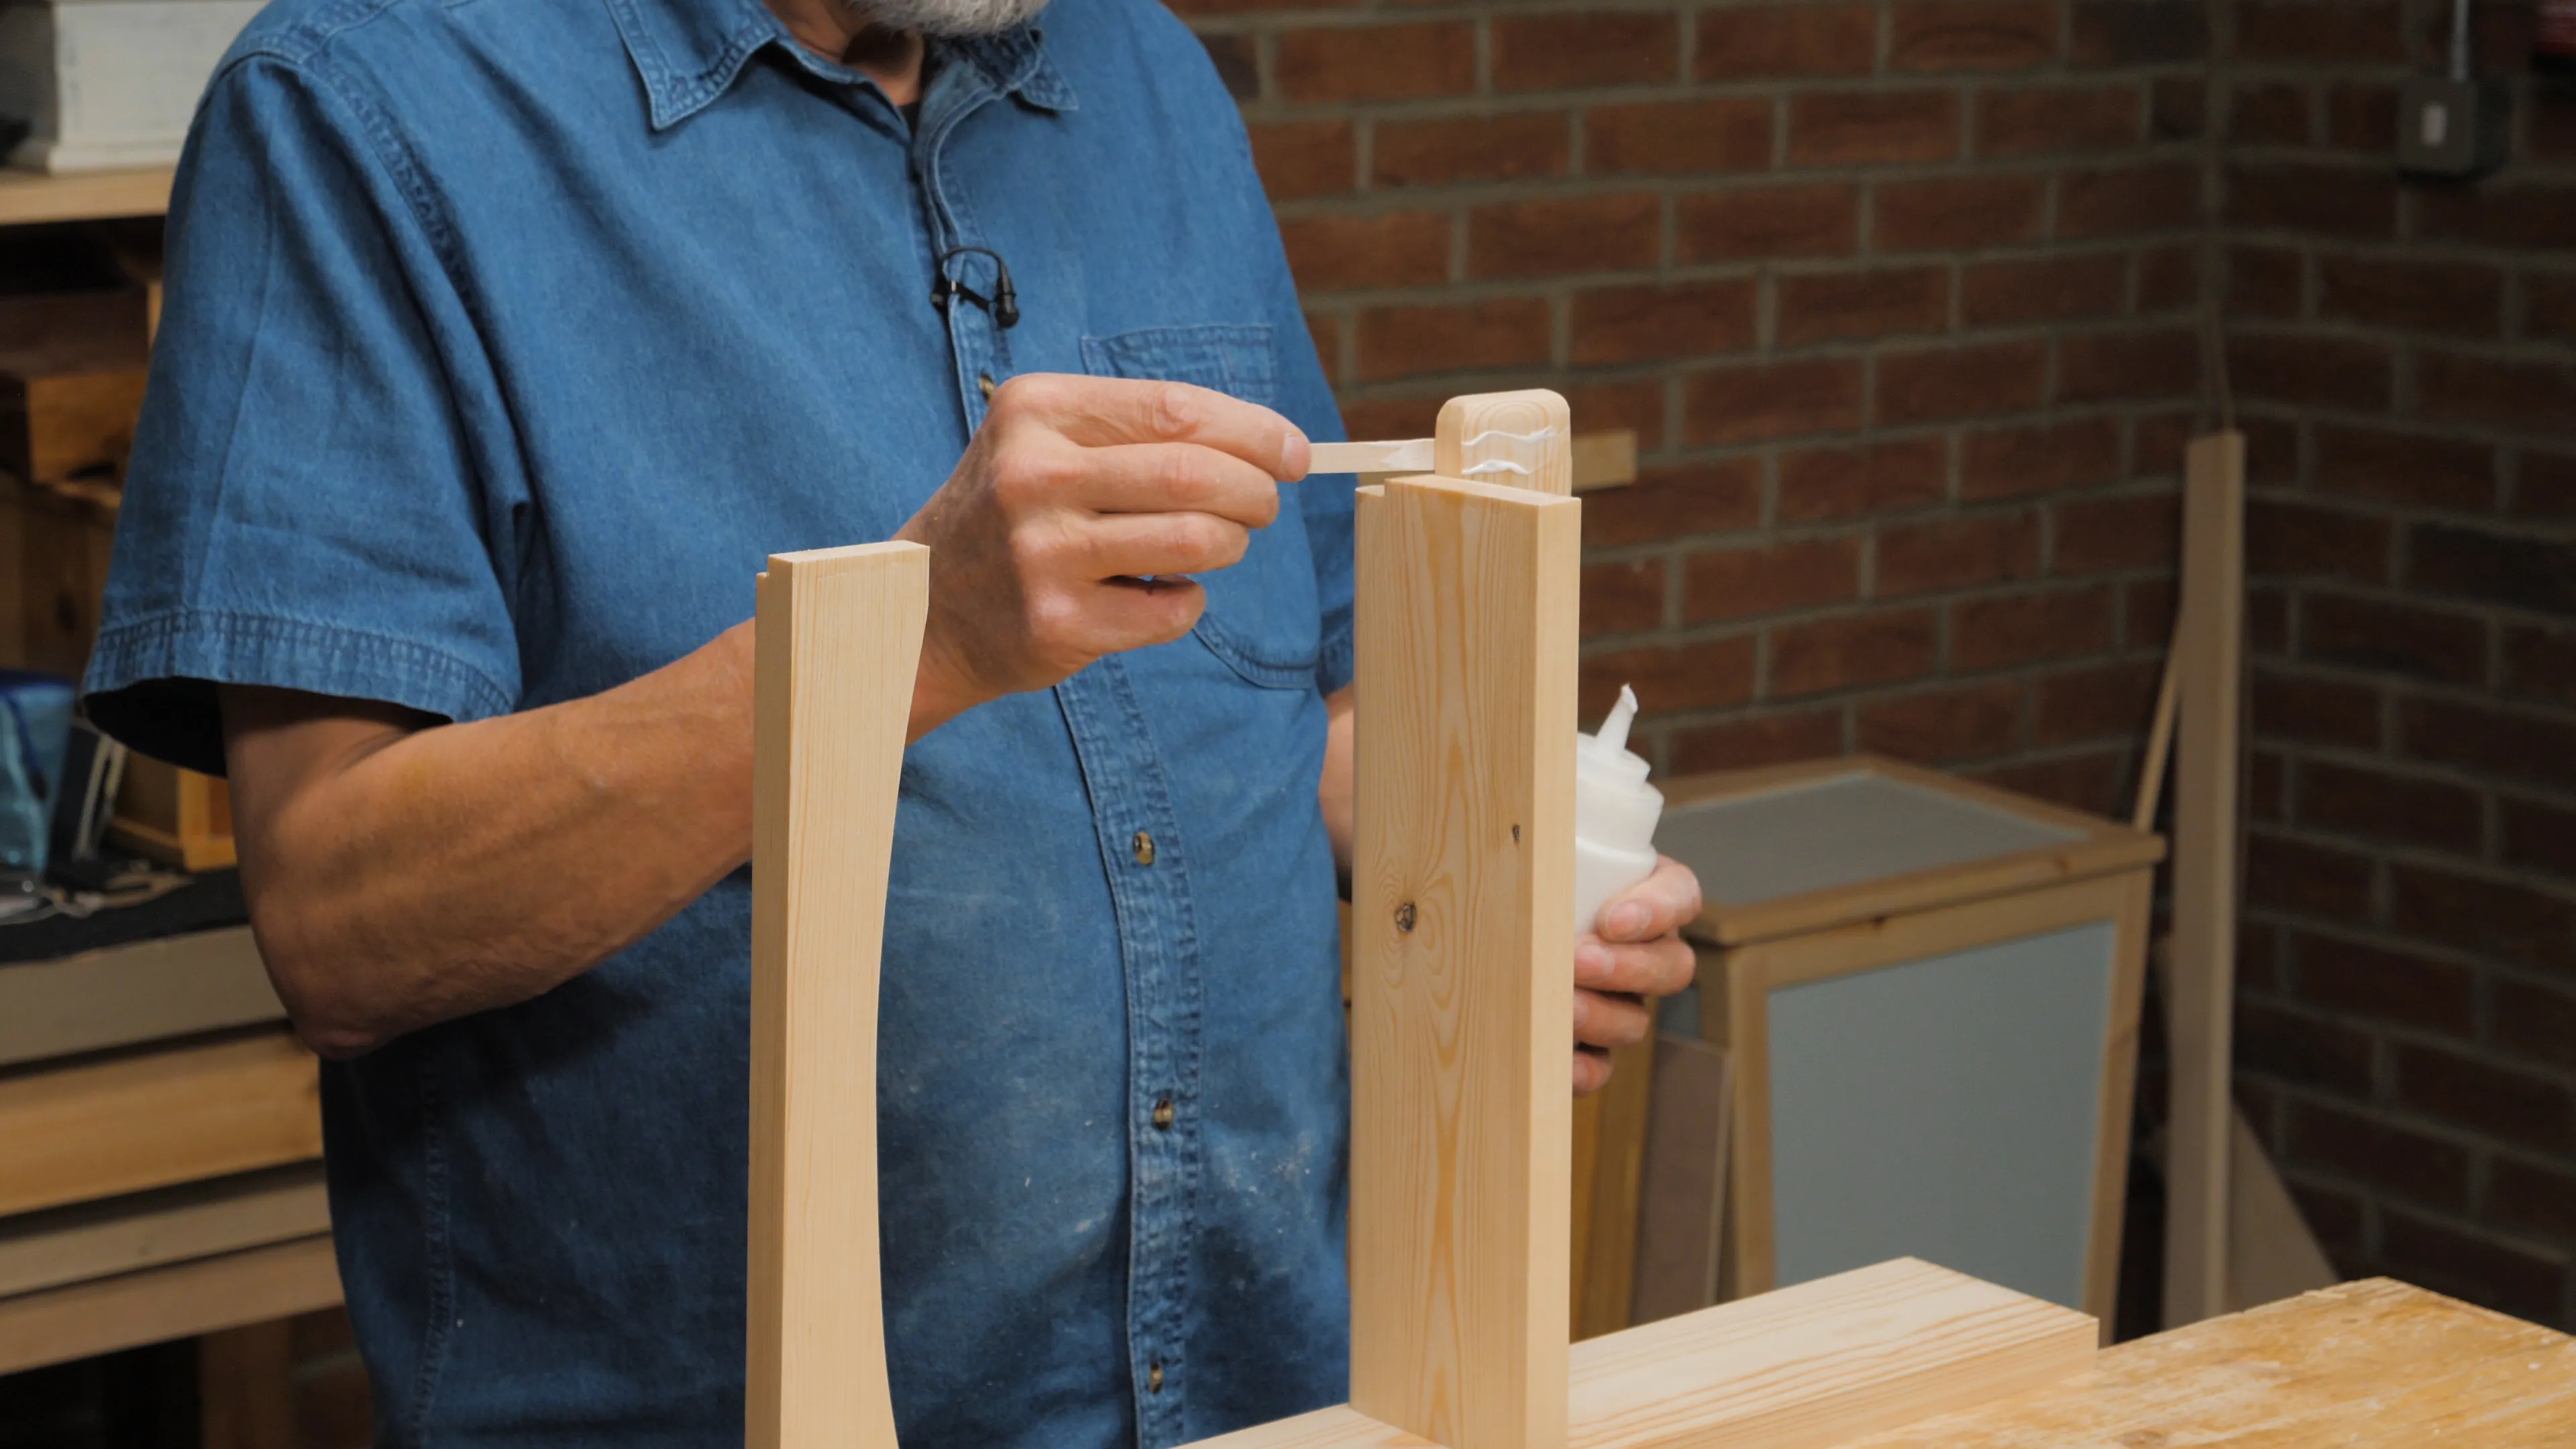
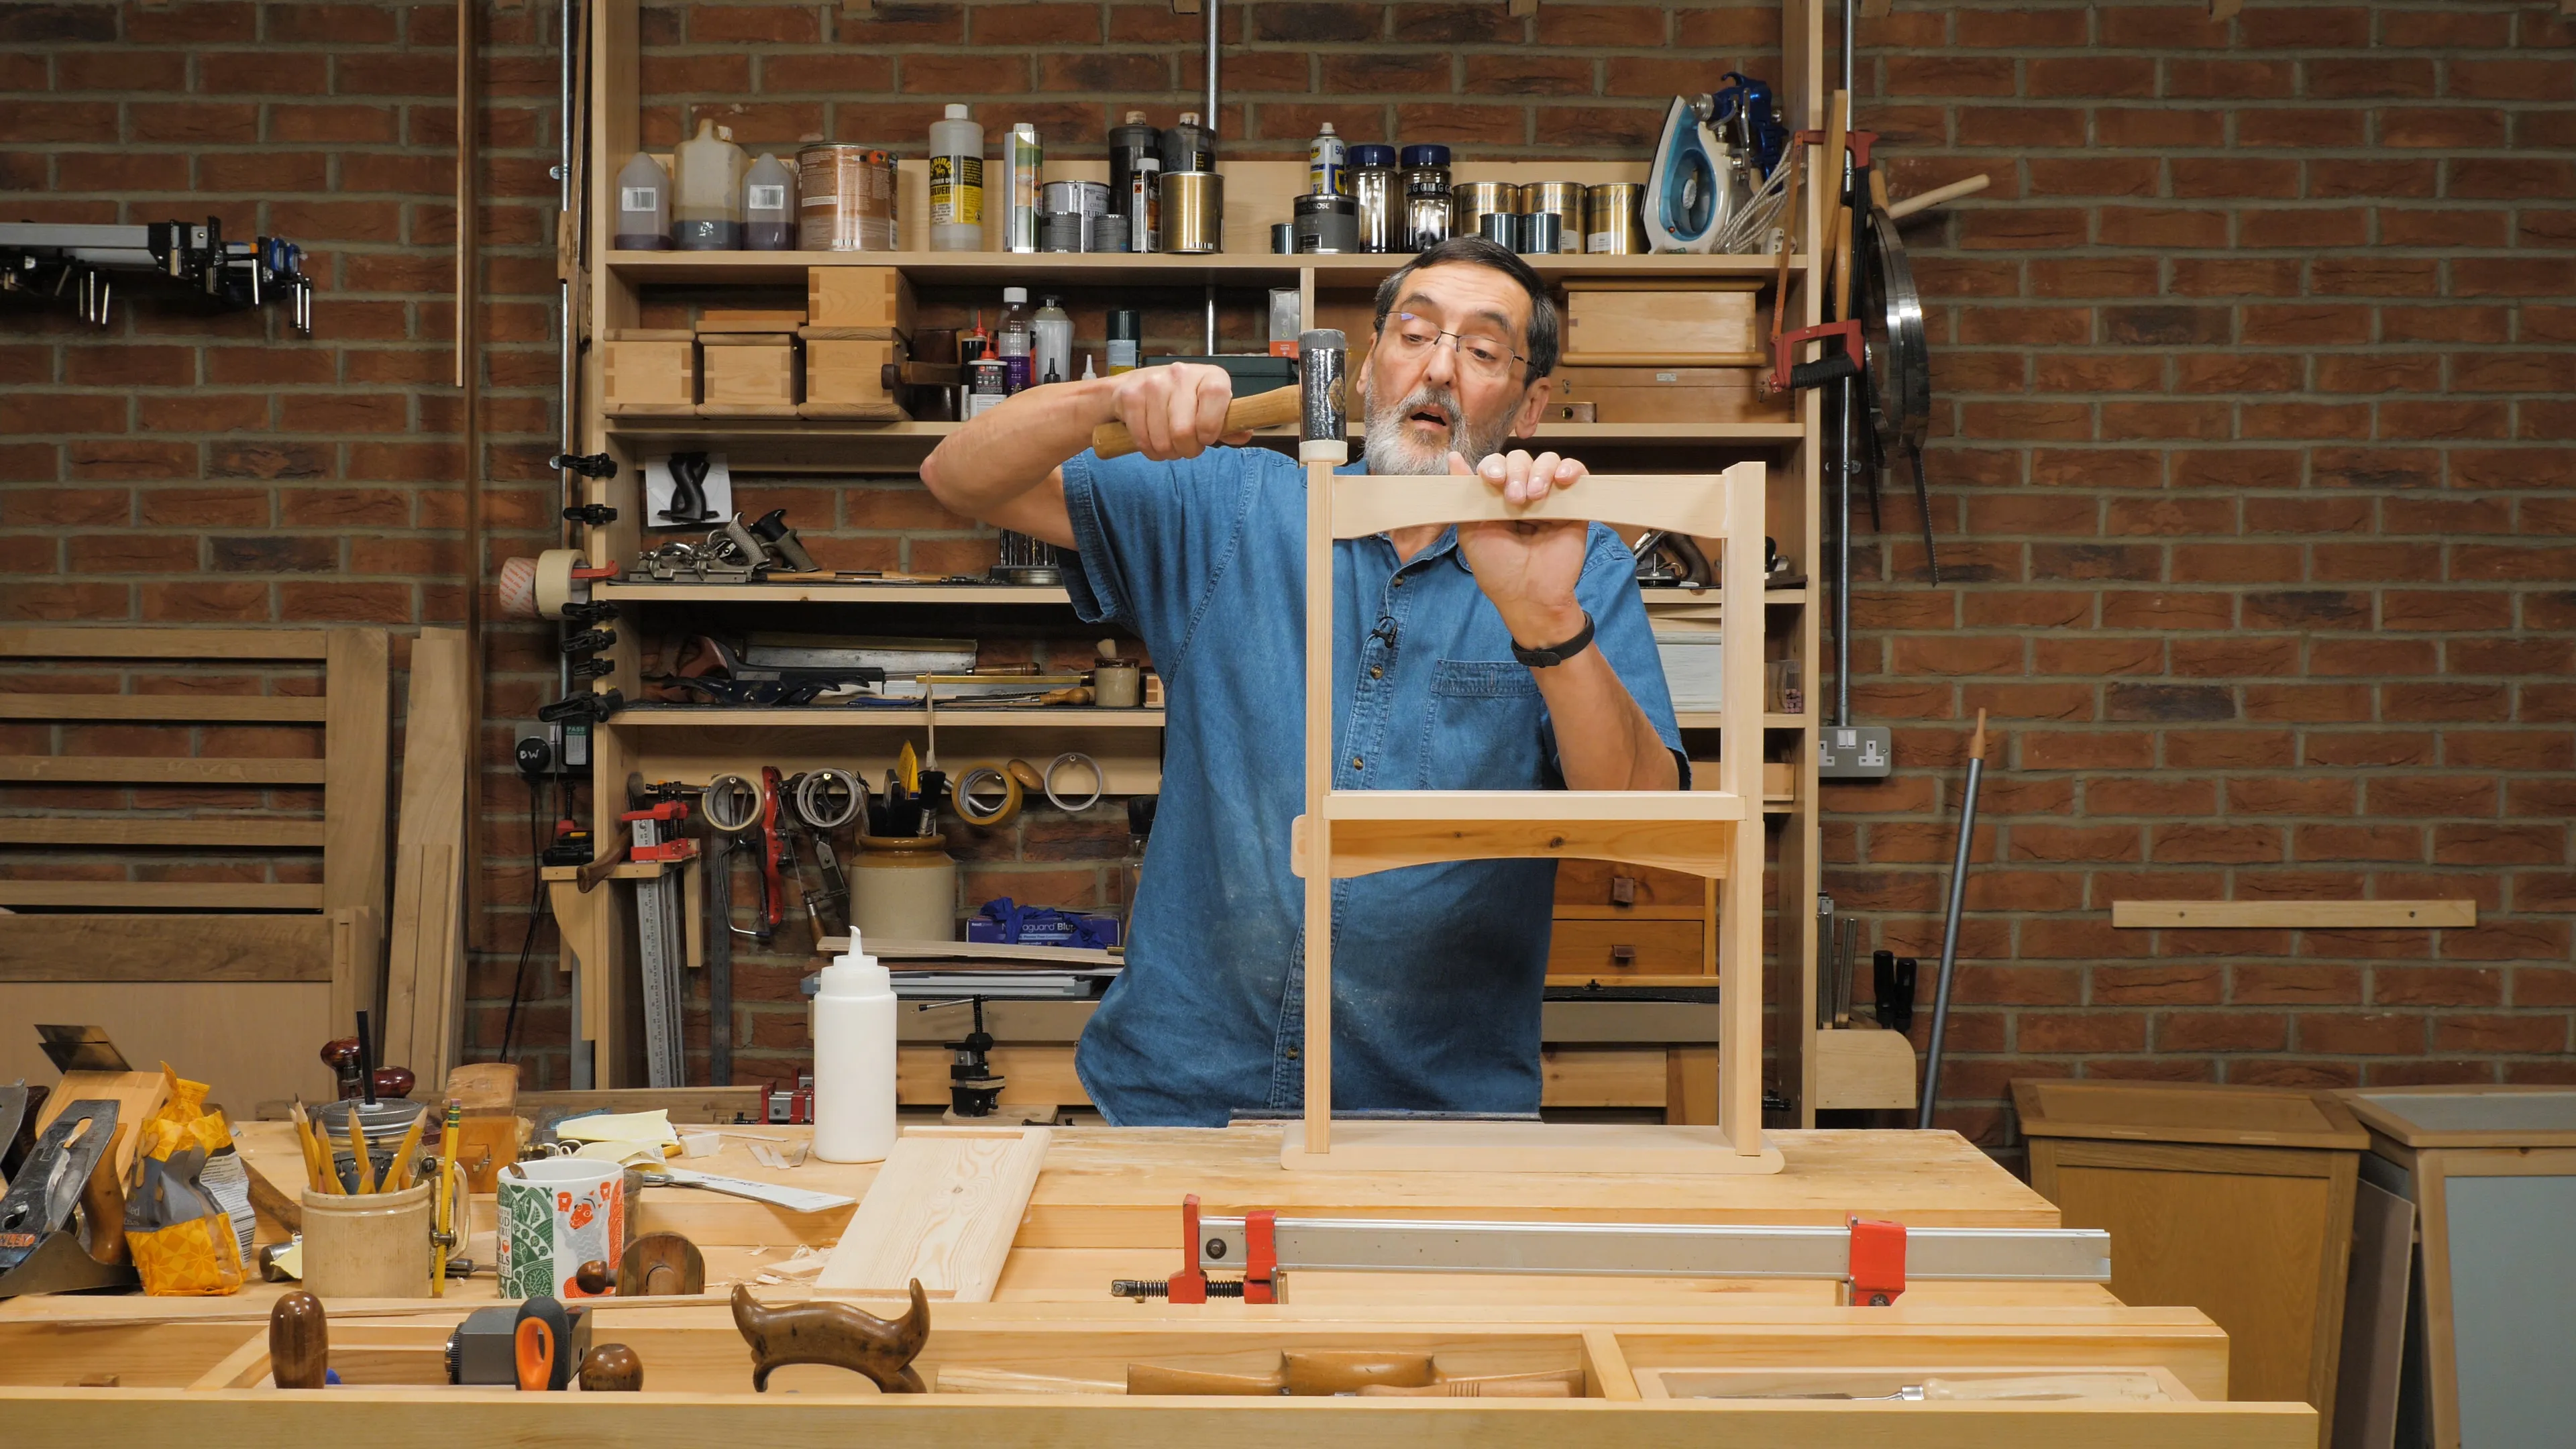
Begin by gluing one end of the rails and the shelf to one of the side pieces. With the through tenon, you don’t want to put any glue into the mortise hole as that would push through onto the rounded feature, which would be very difficult to clean up afterwards. Therefore, only apply a small amount of glue to the cheeks of the tenon near the shoulder.
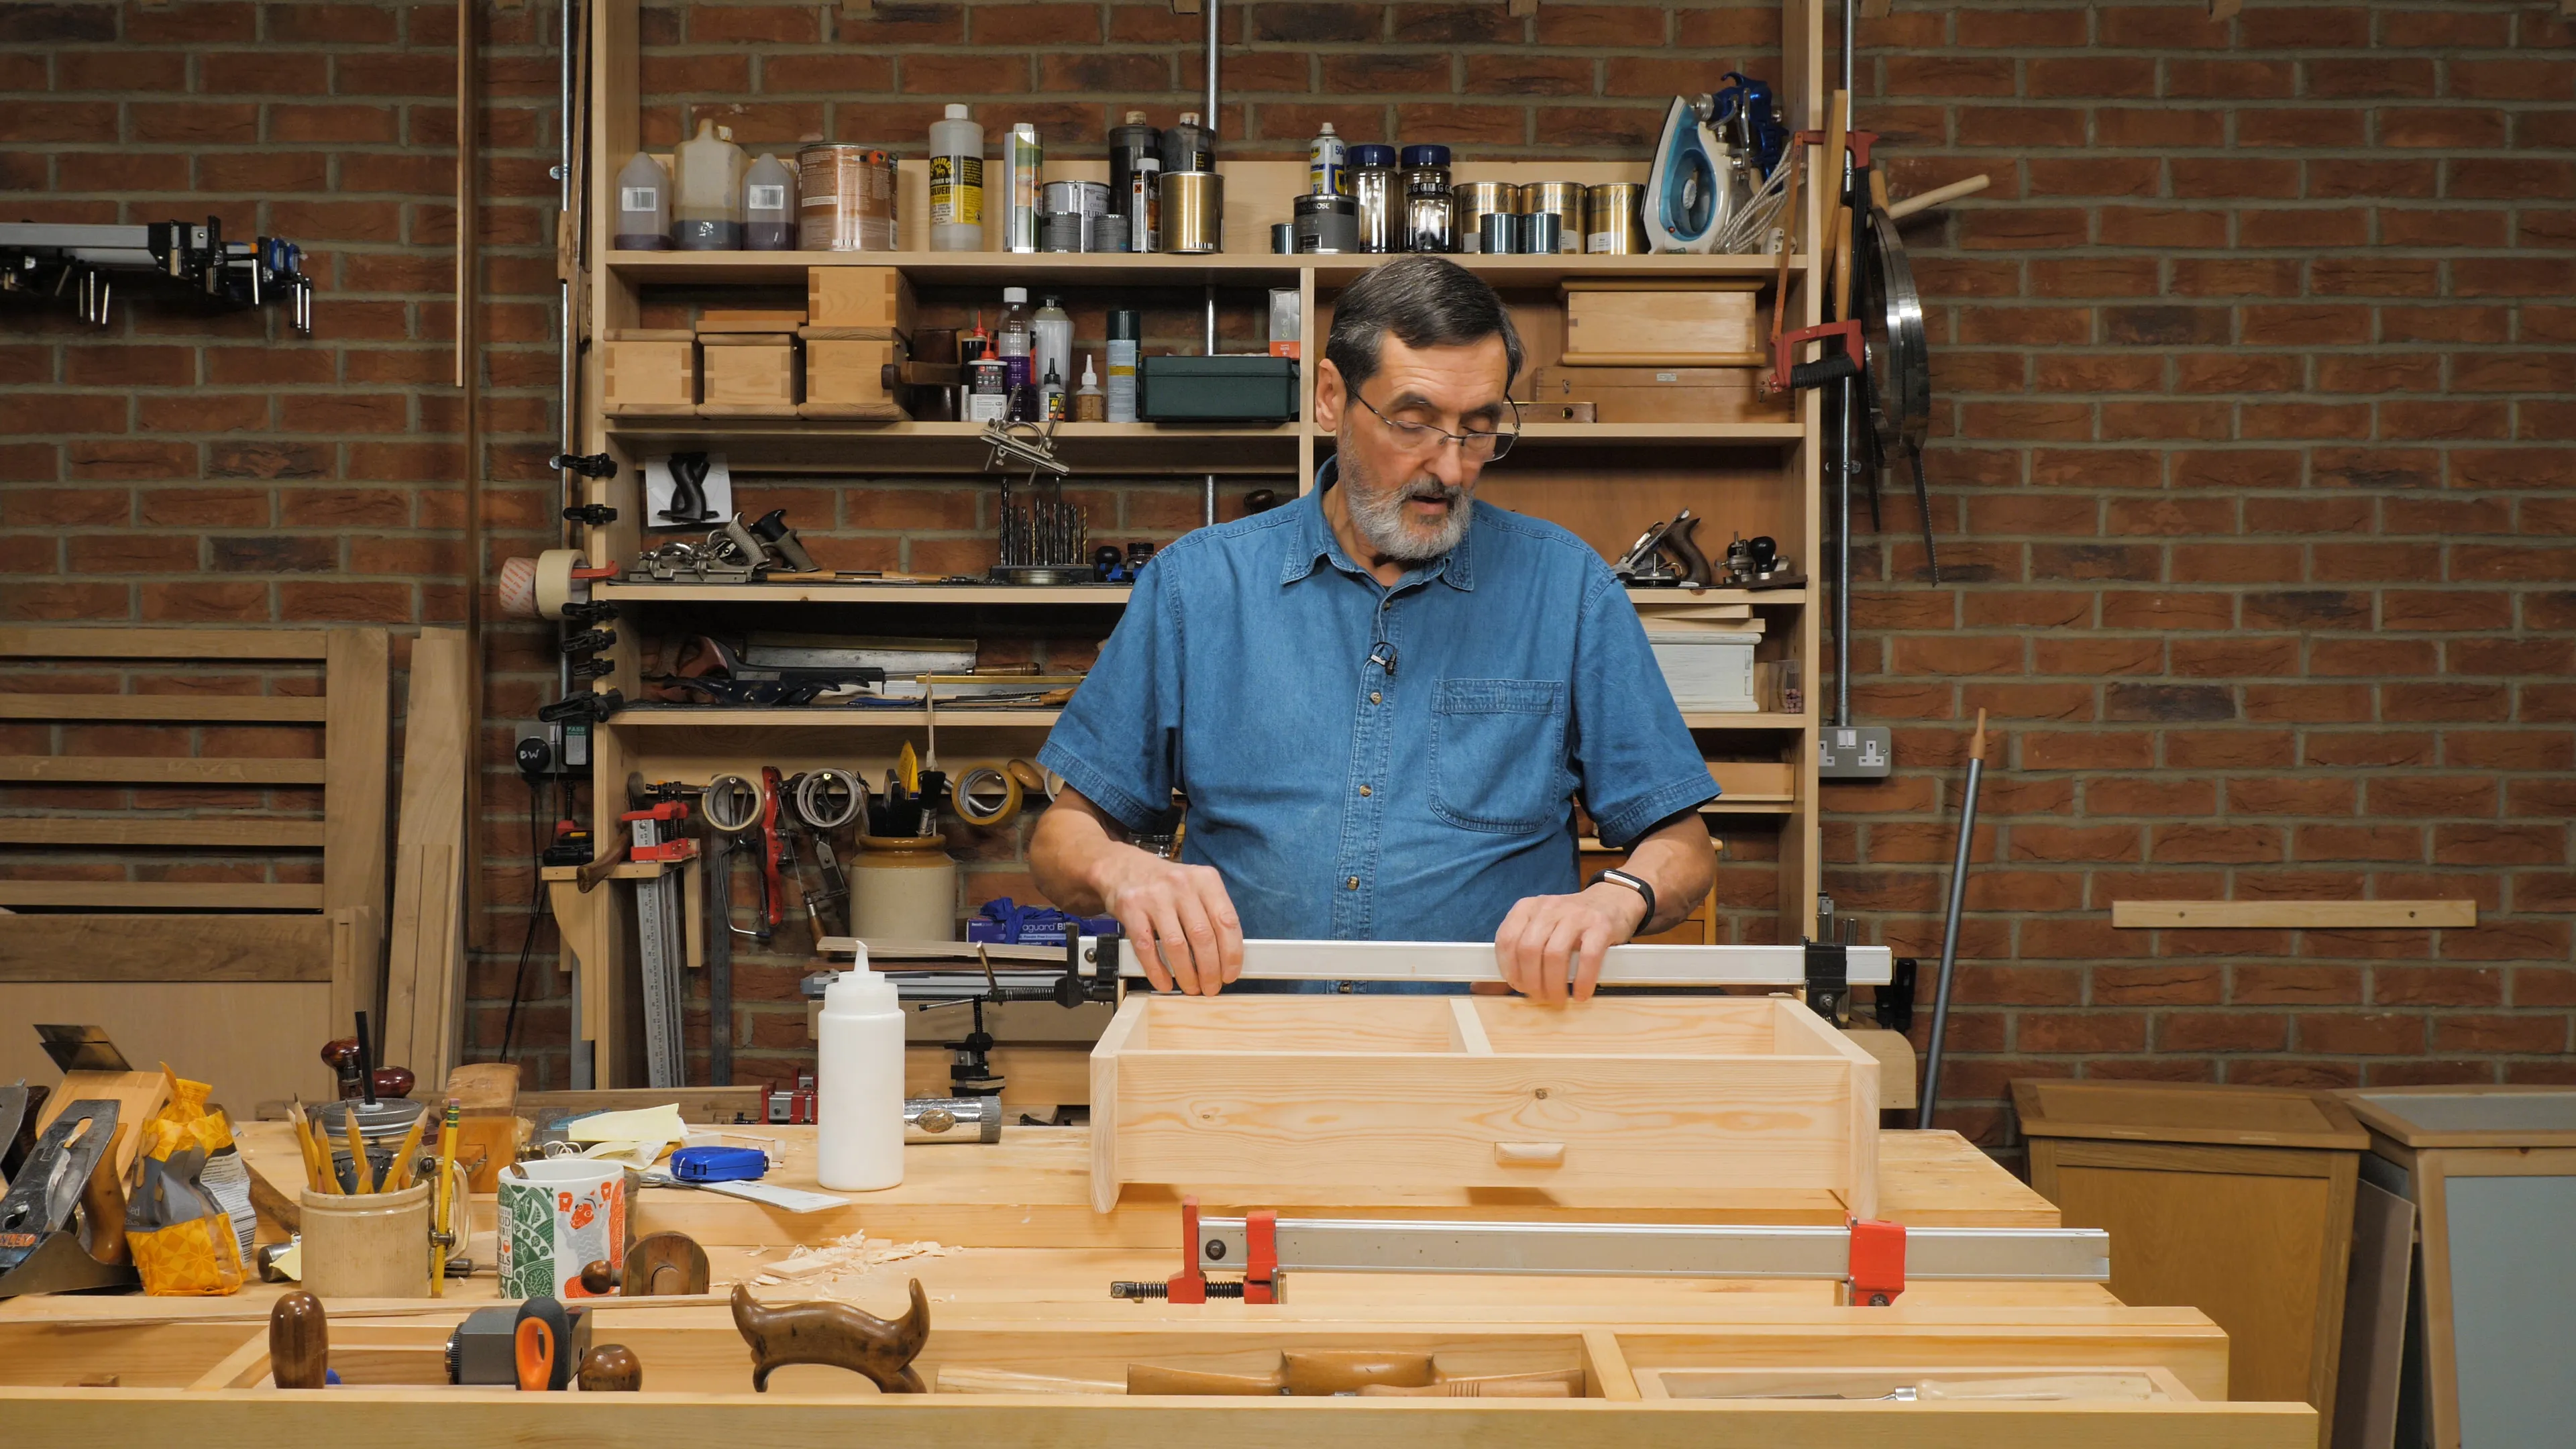
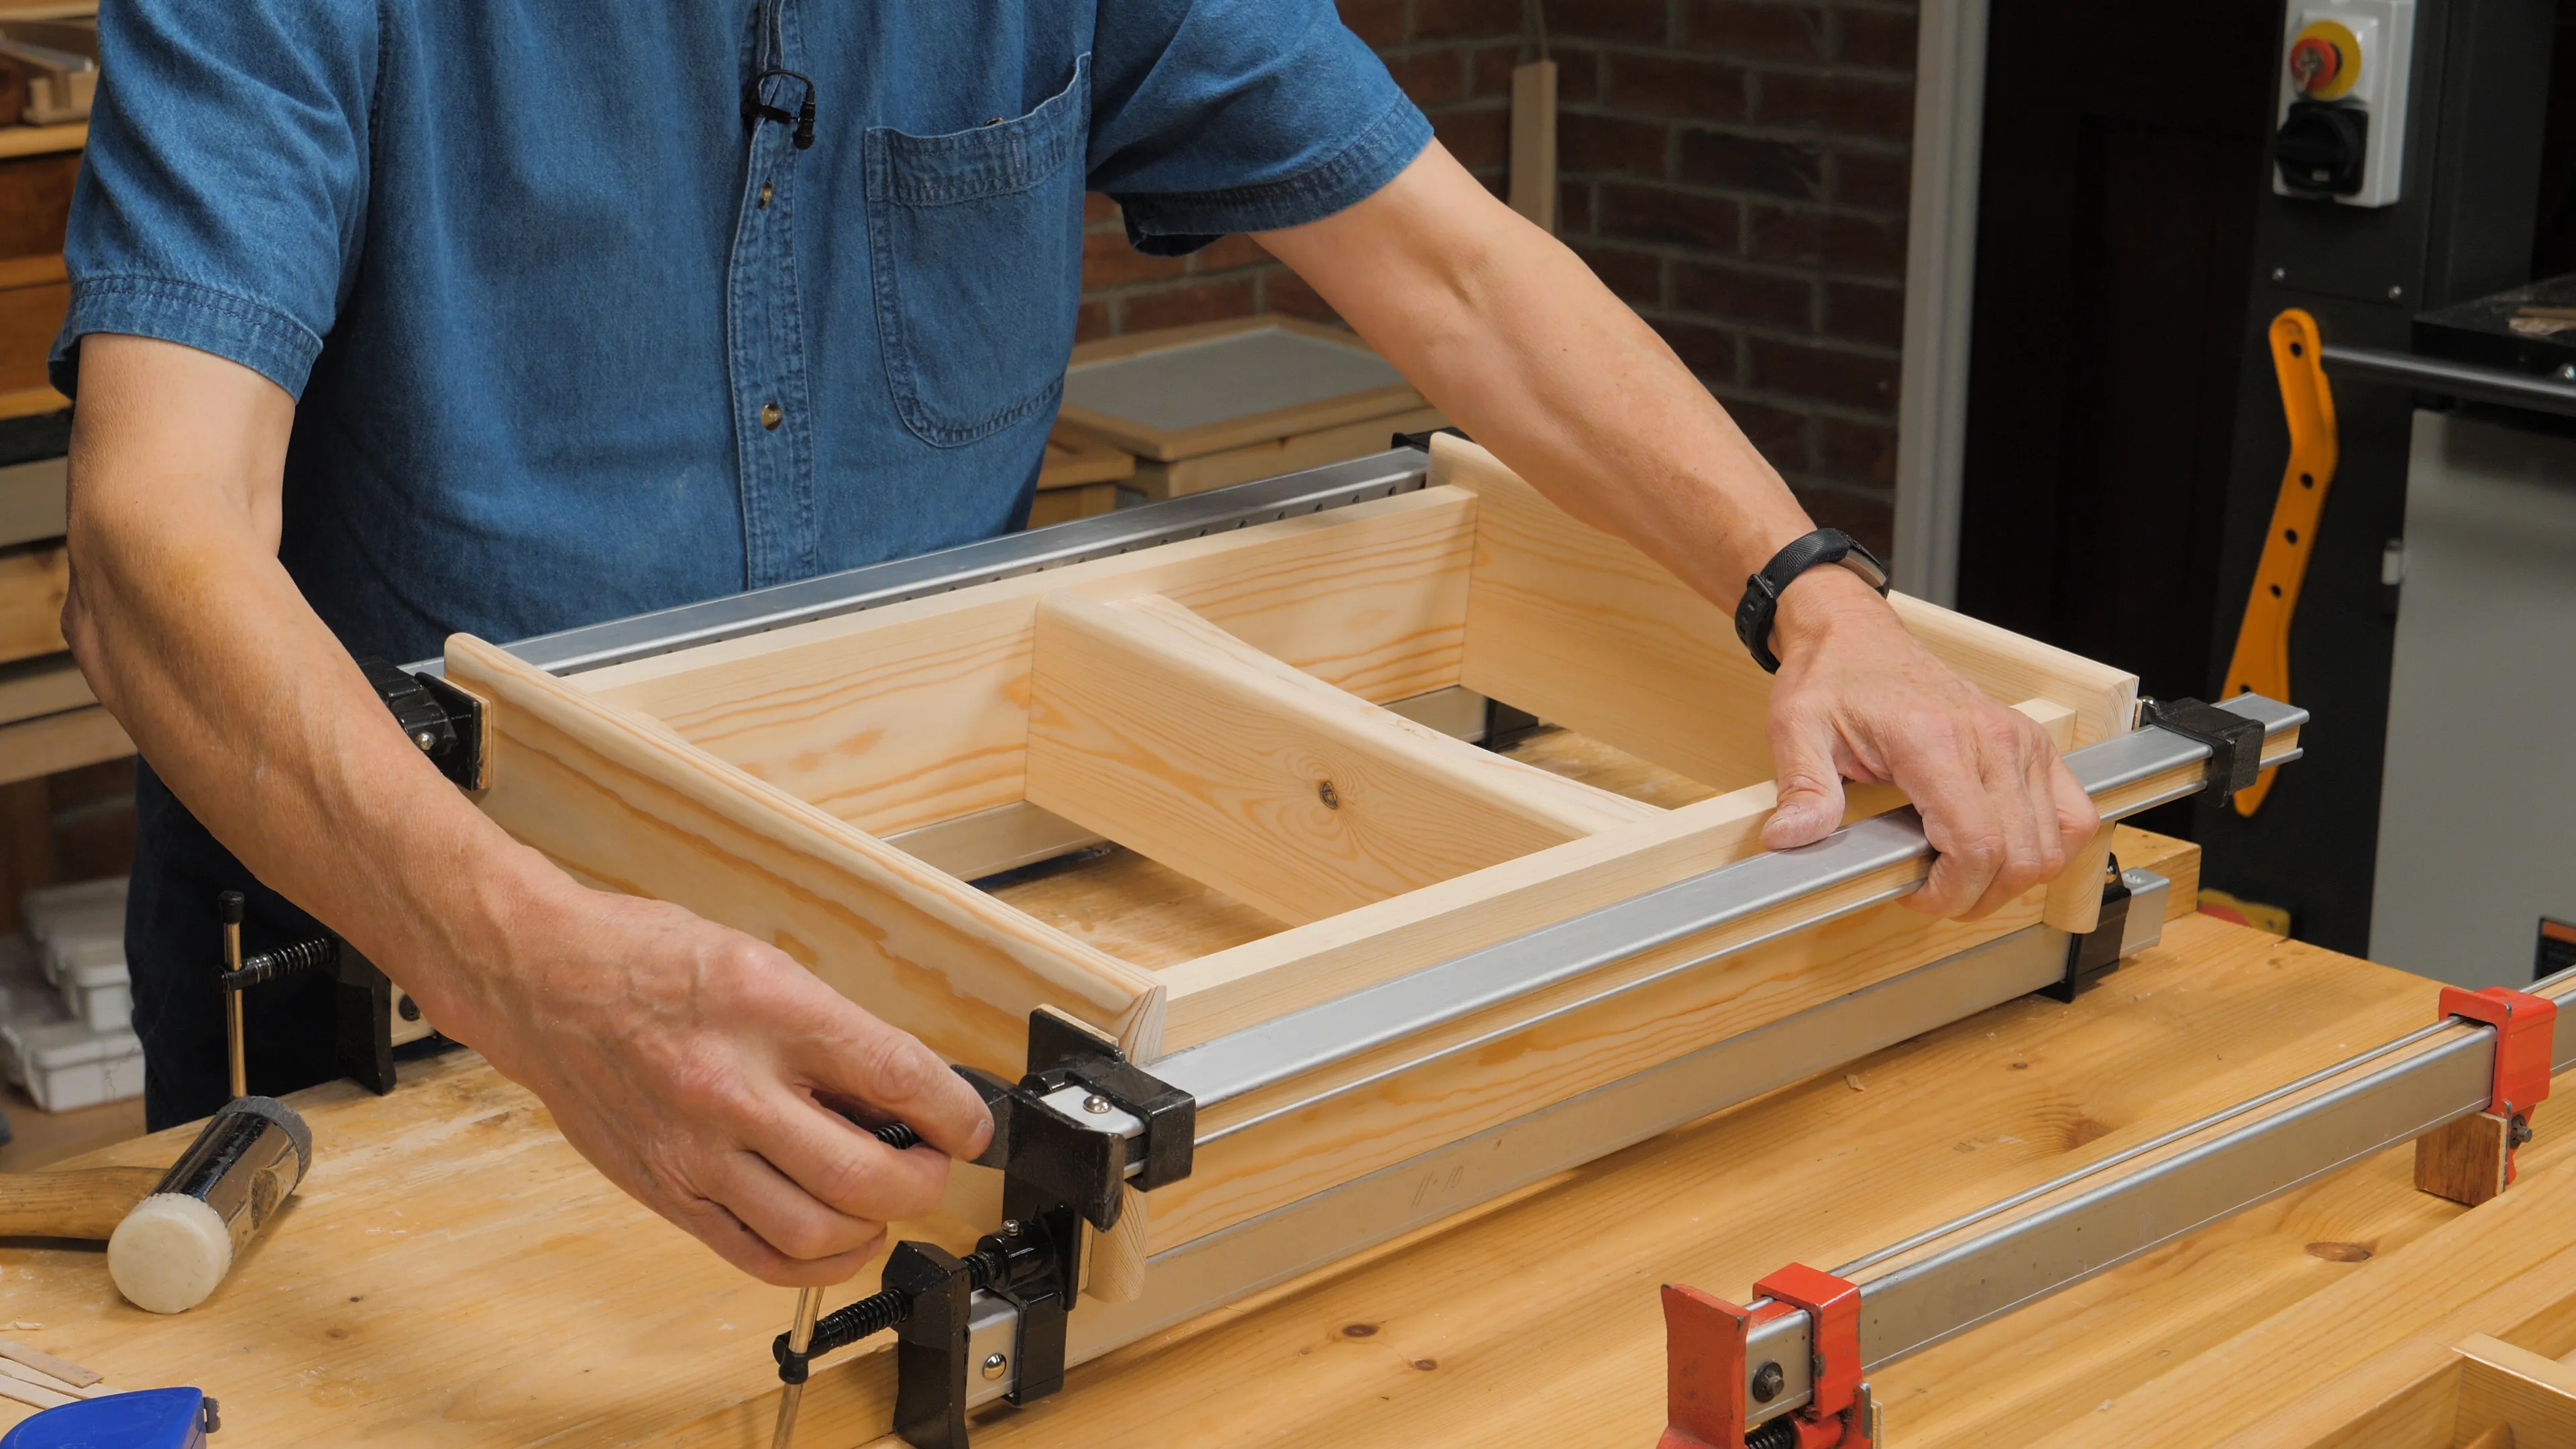
Then progress with the shelf piece and the top rail. Be sure to keep moving until the joints are seated in order to avoid glue freeze. When the three middle components are in, glue up the opposite ends to the remaining side piece. Tighten a clamp across the middle shelf to ensure the joints are fully seated. Remove and do the same for top rail.
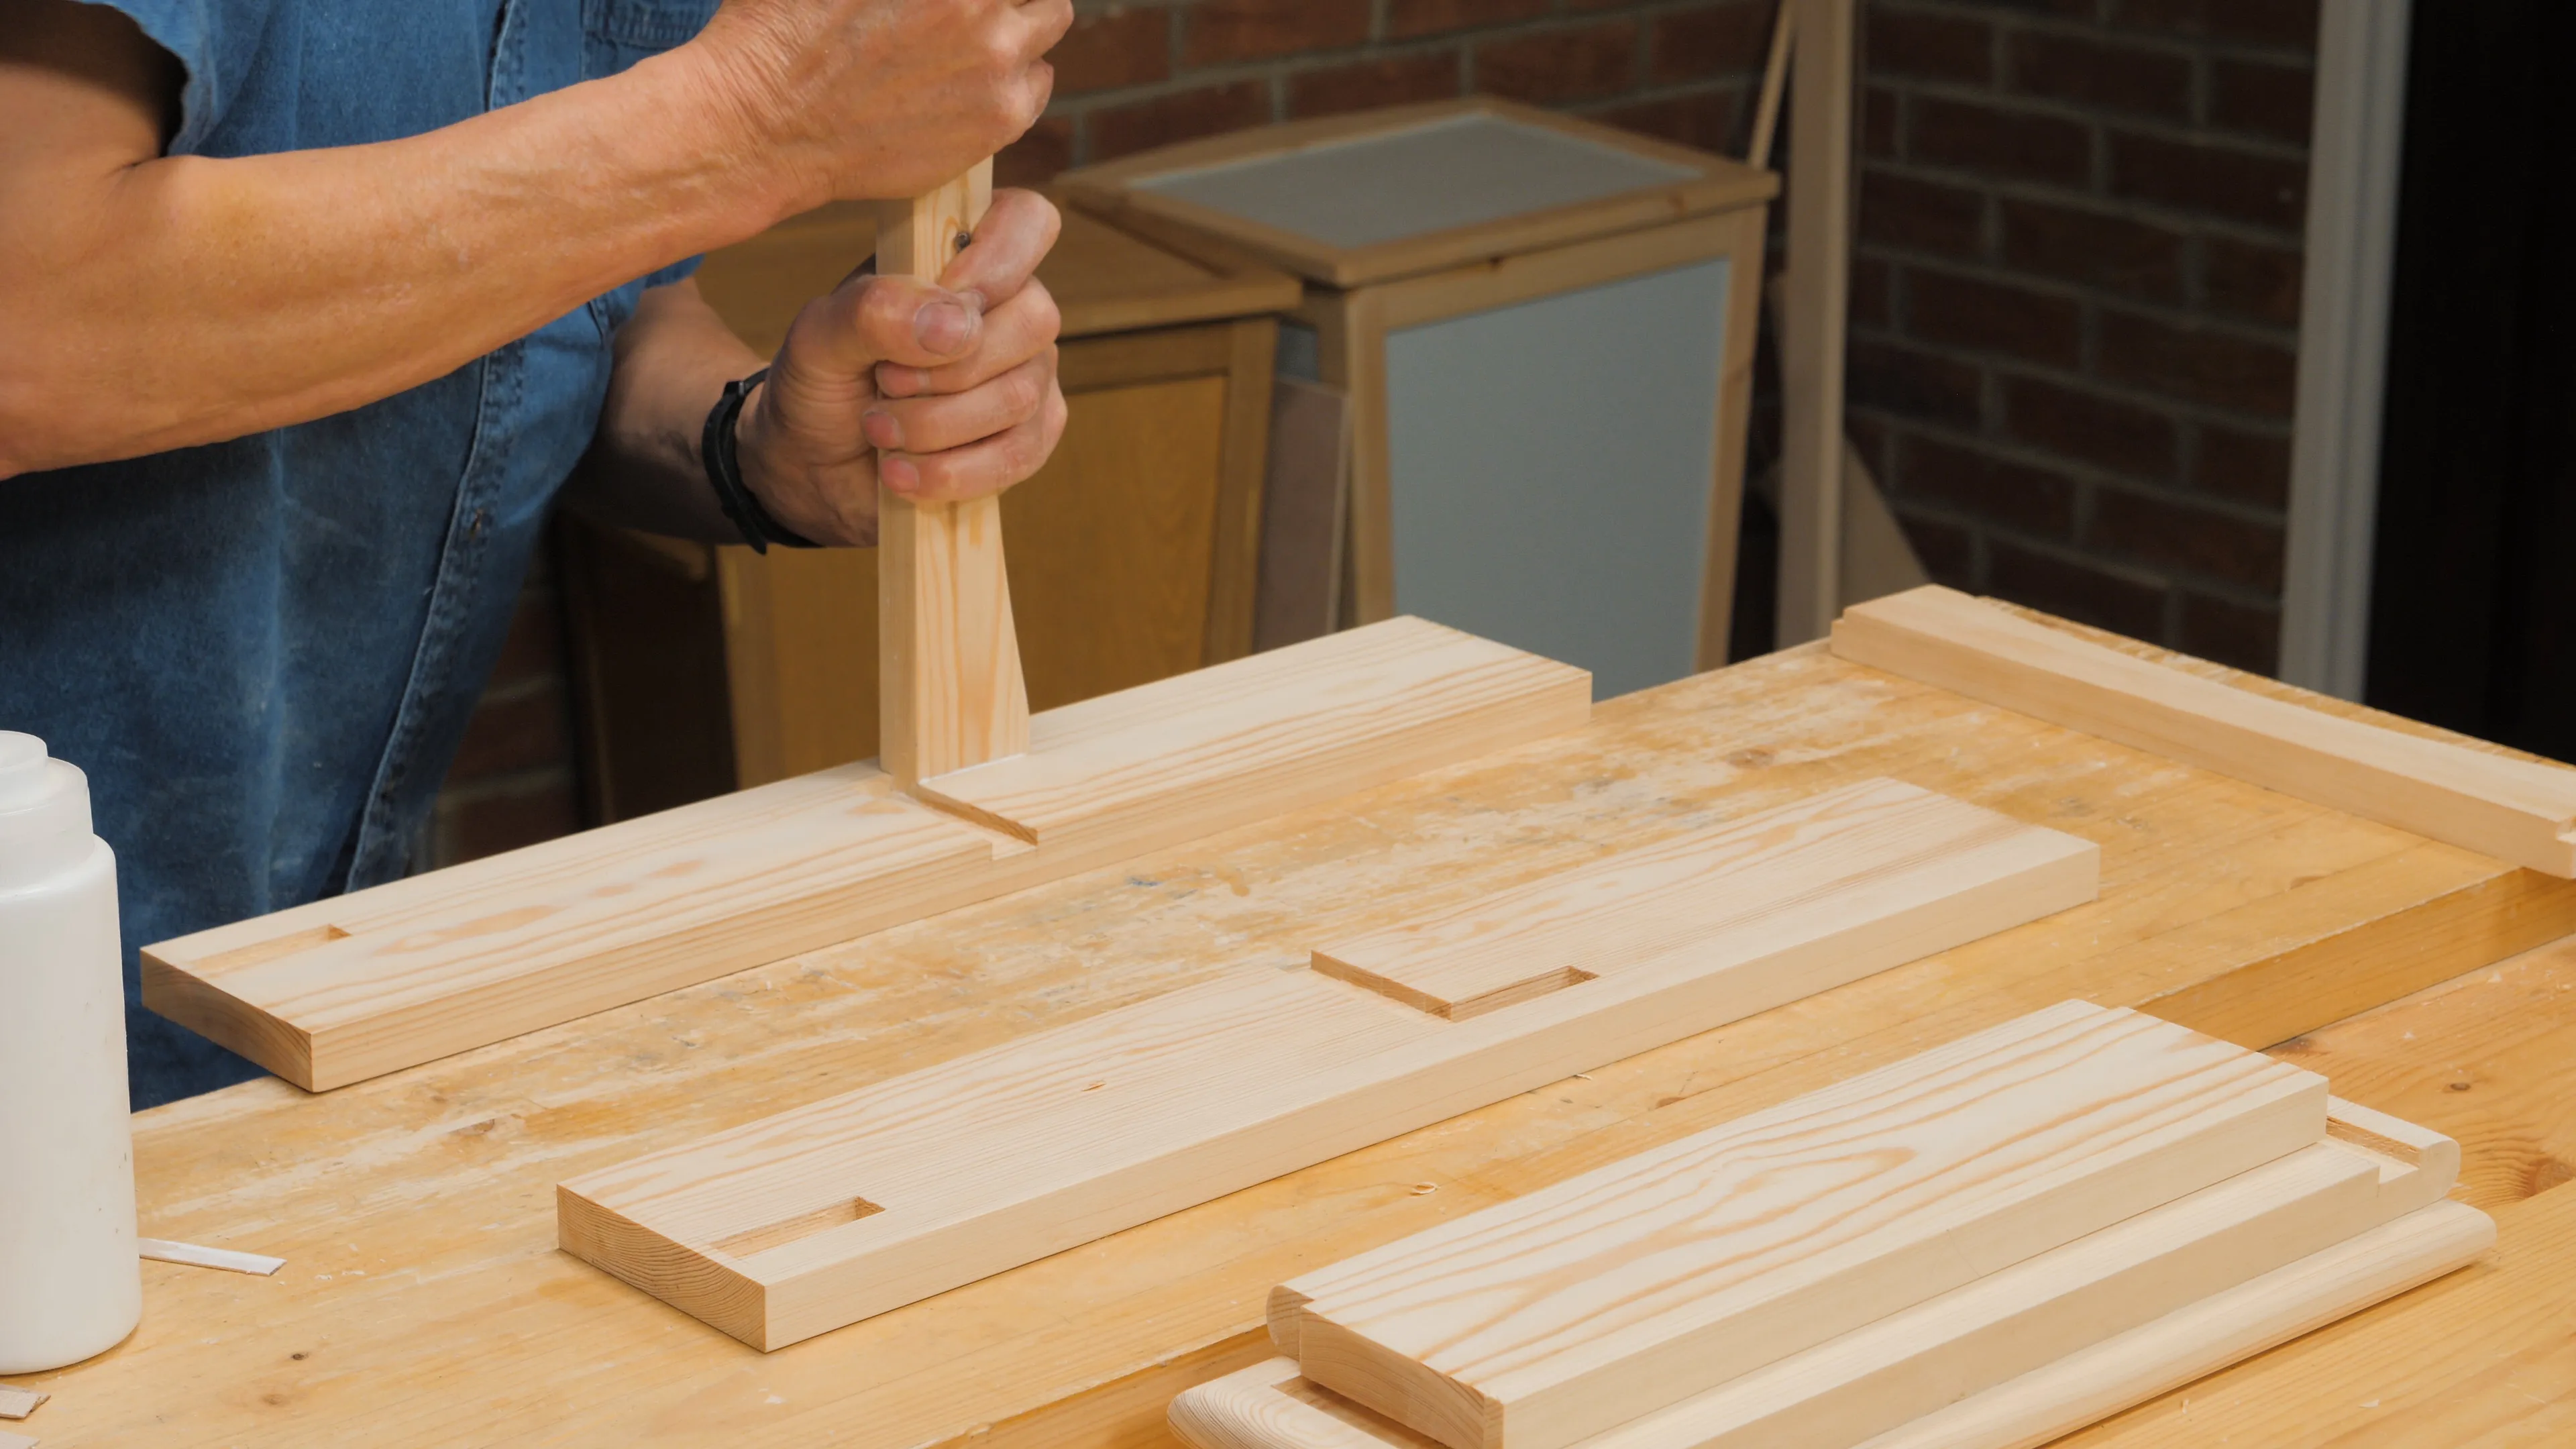
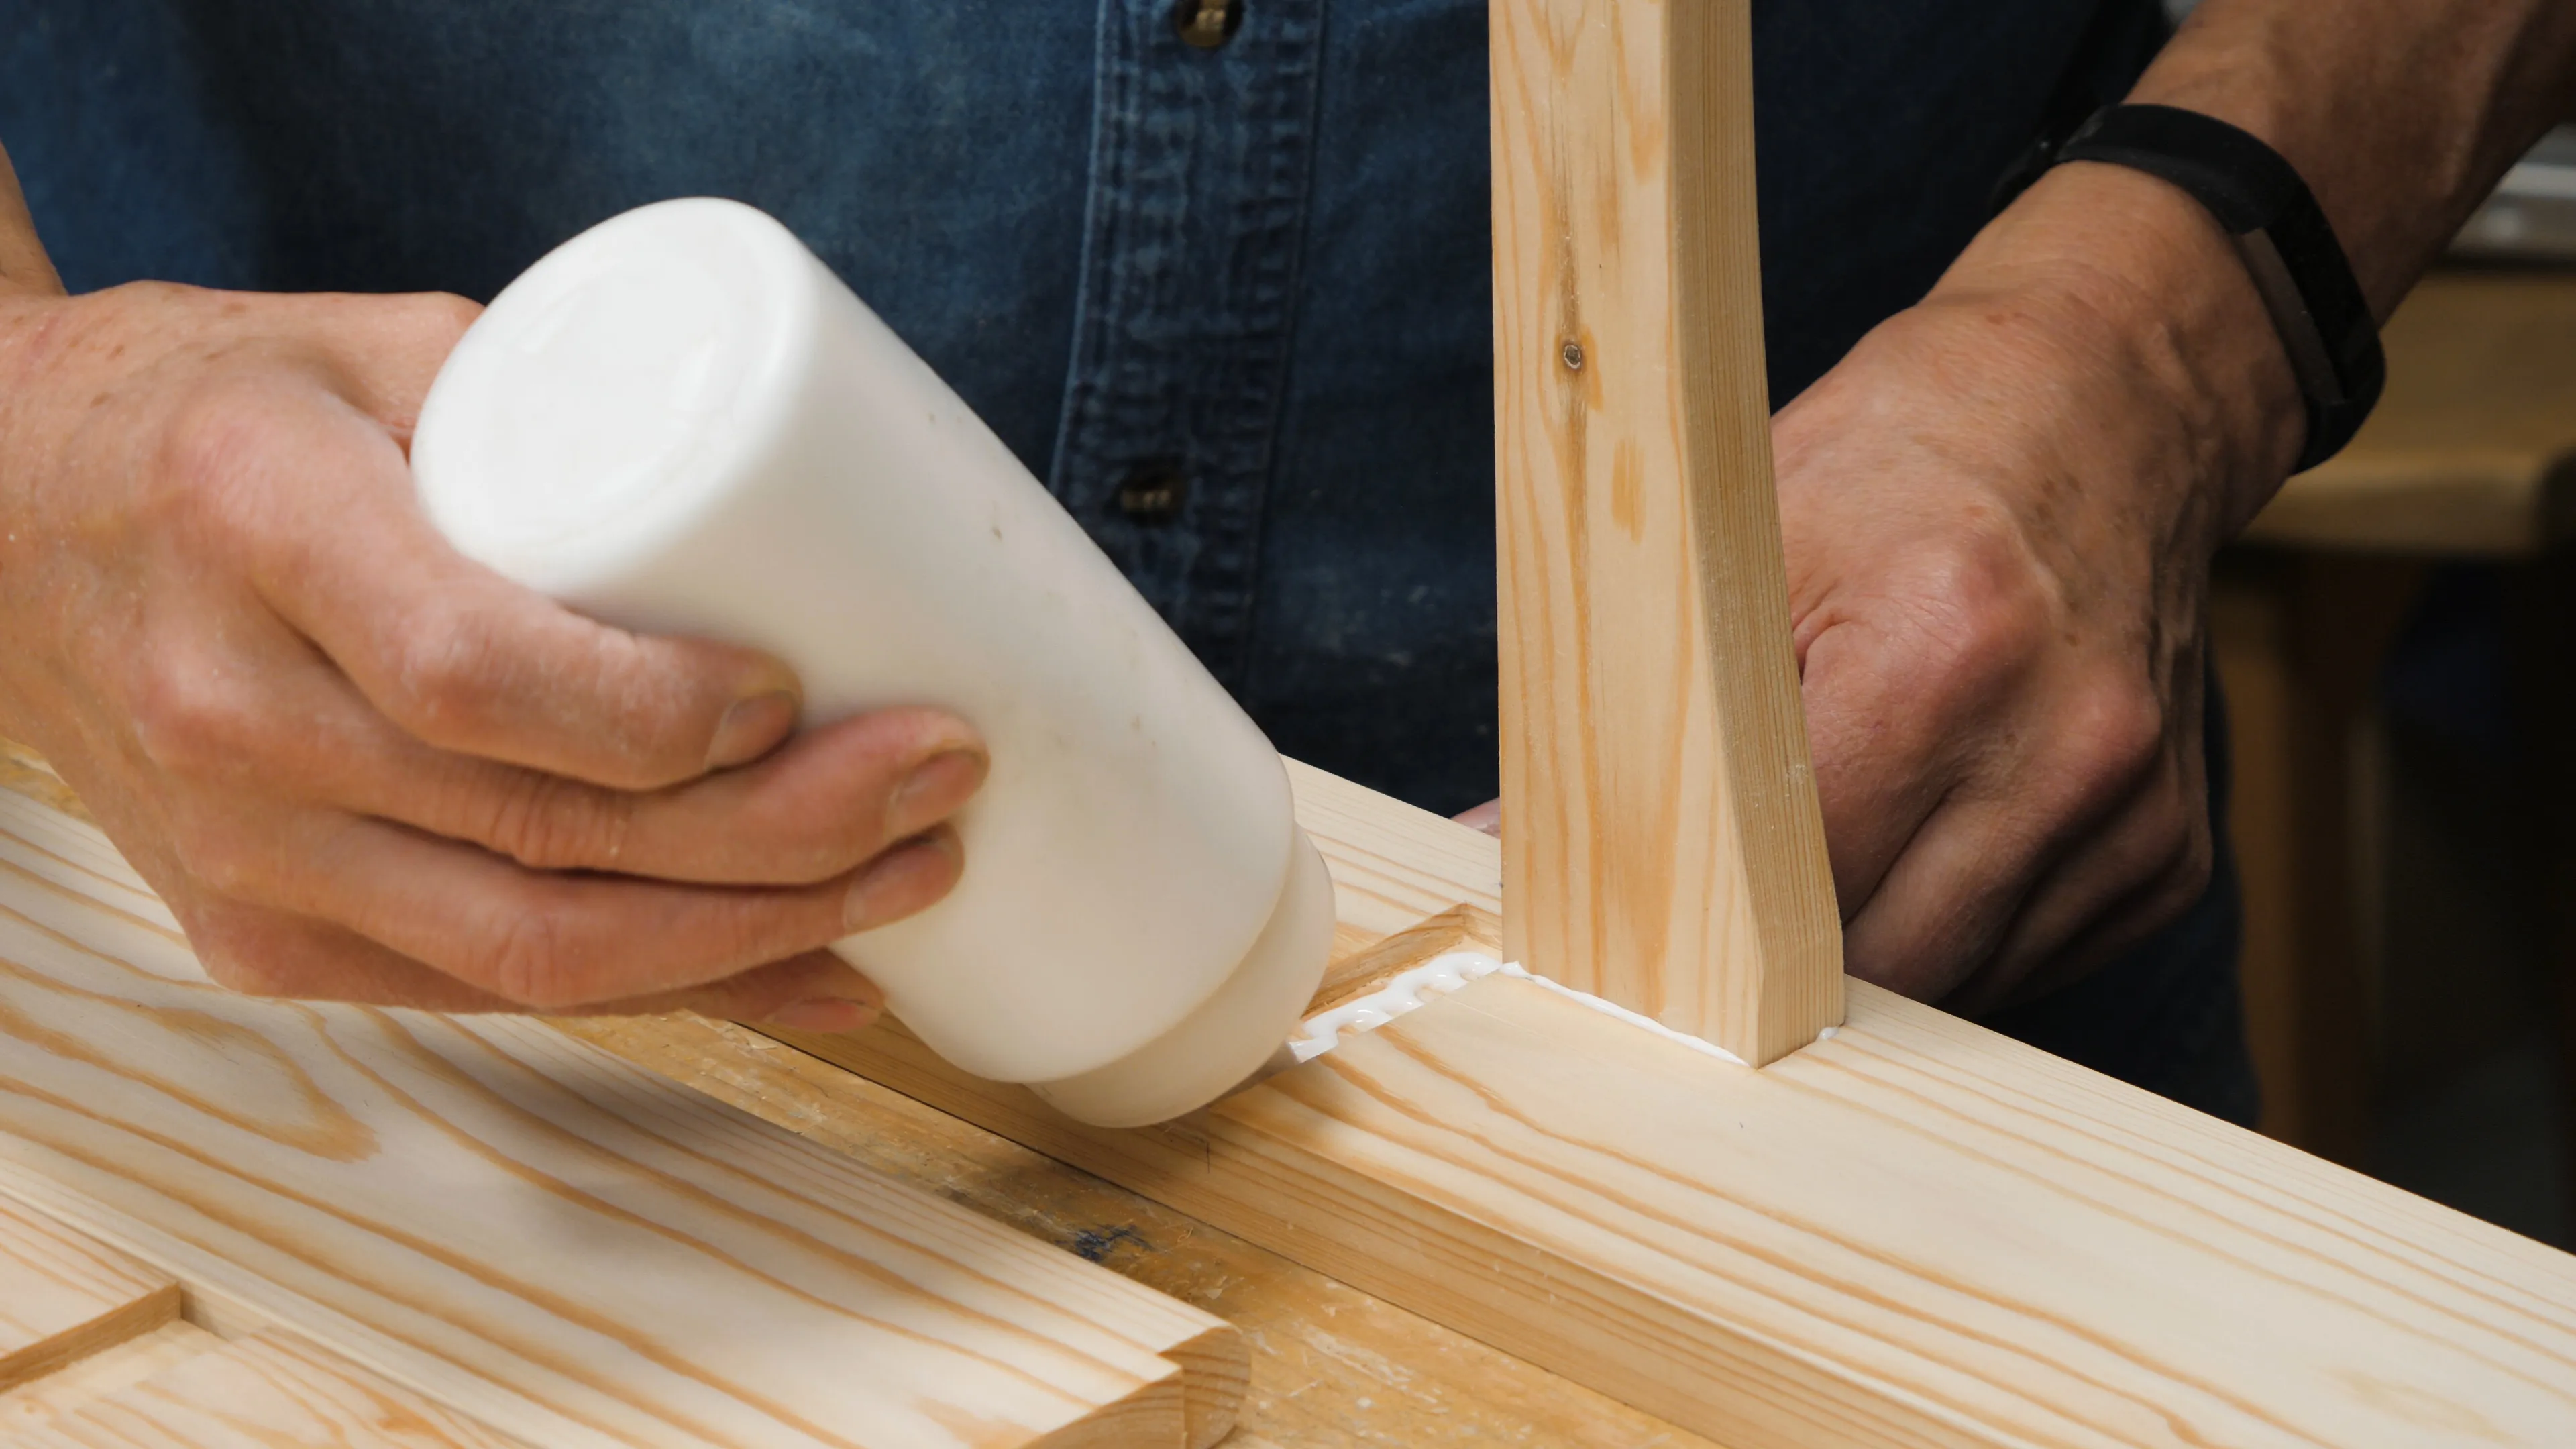
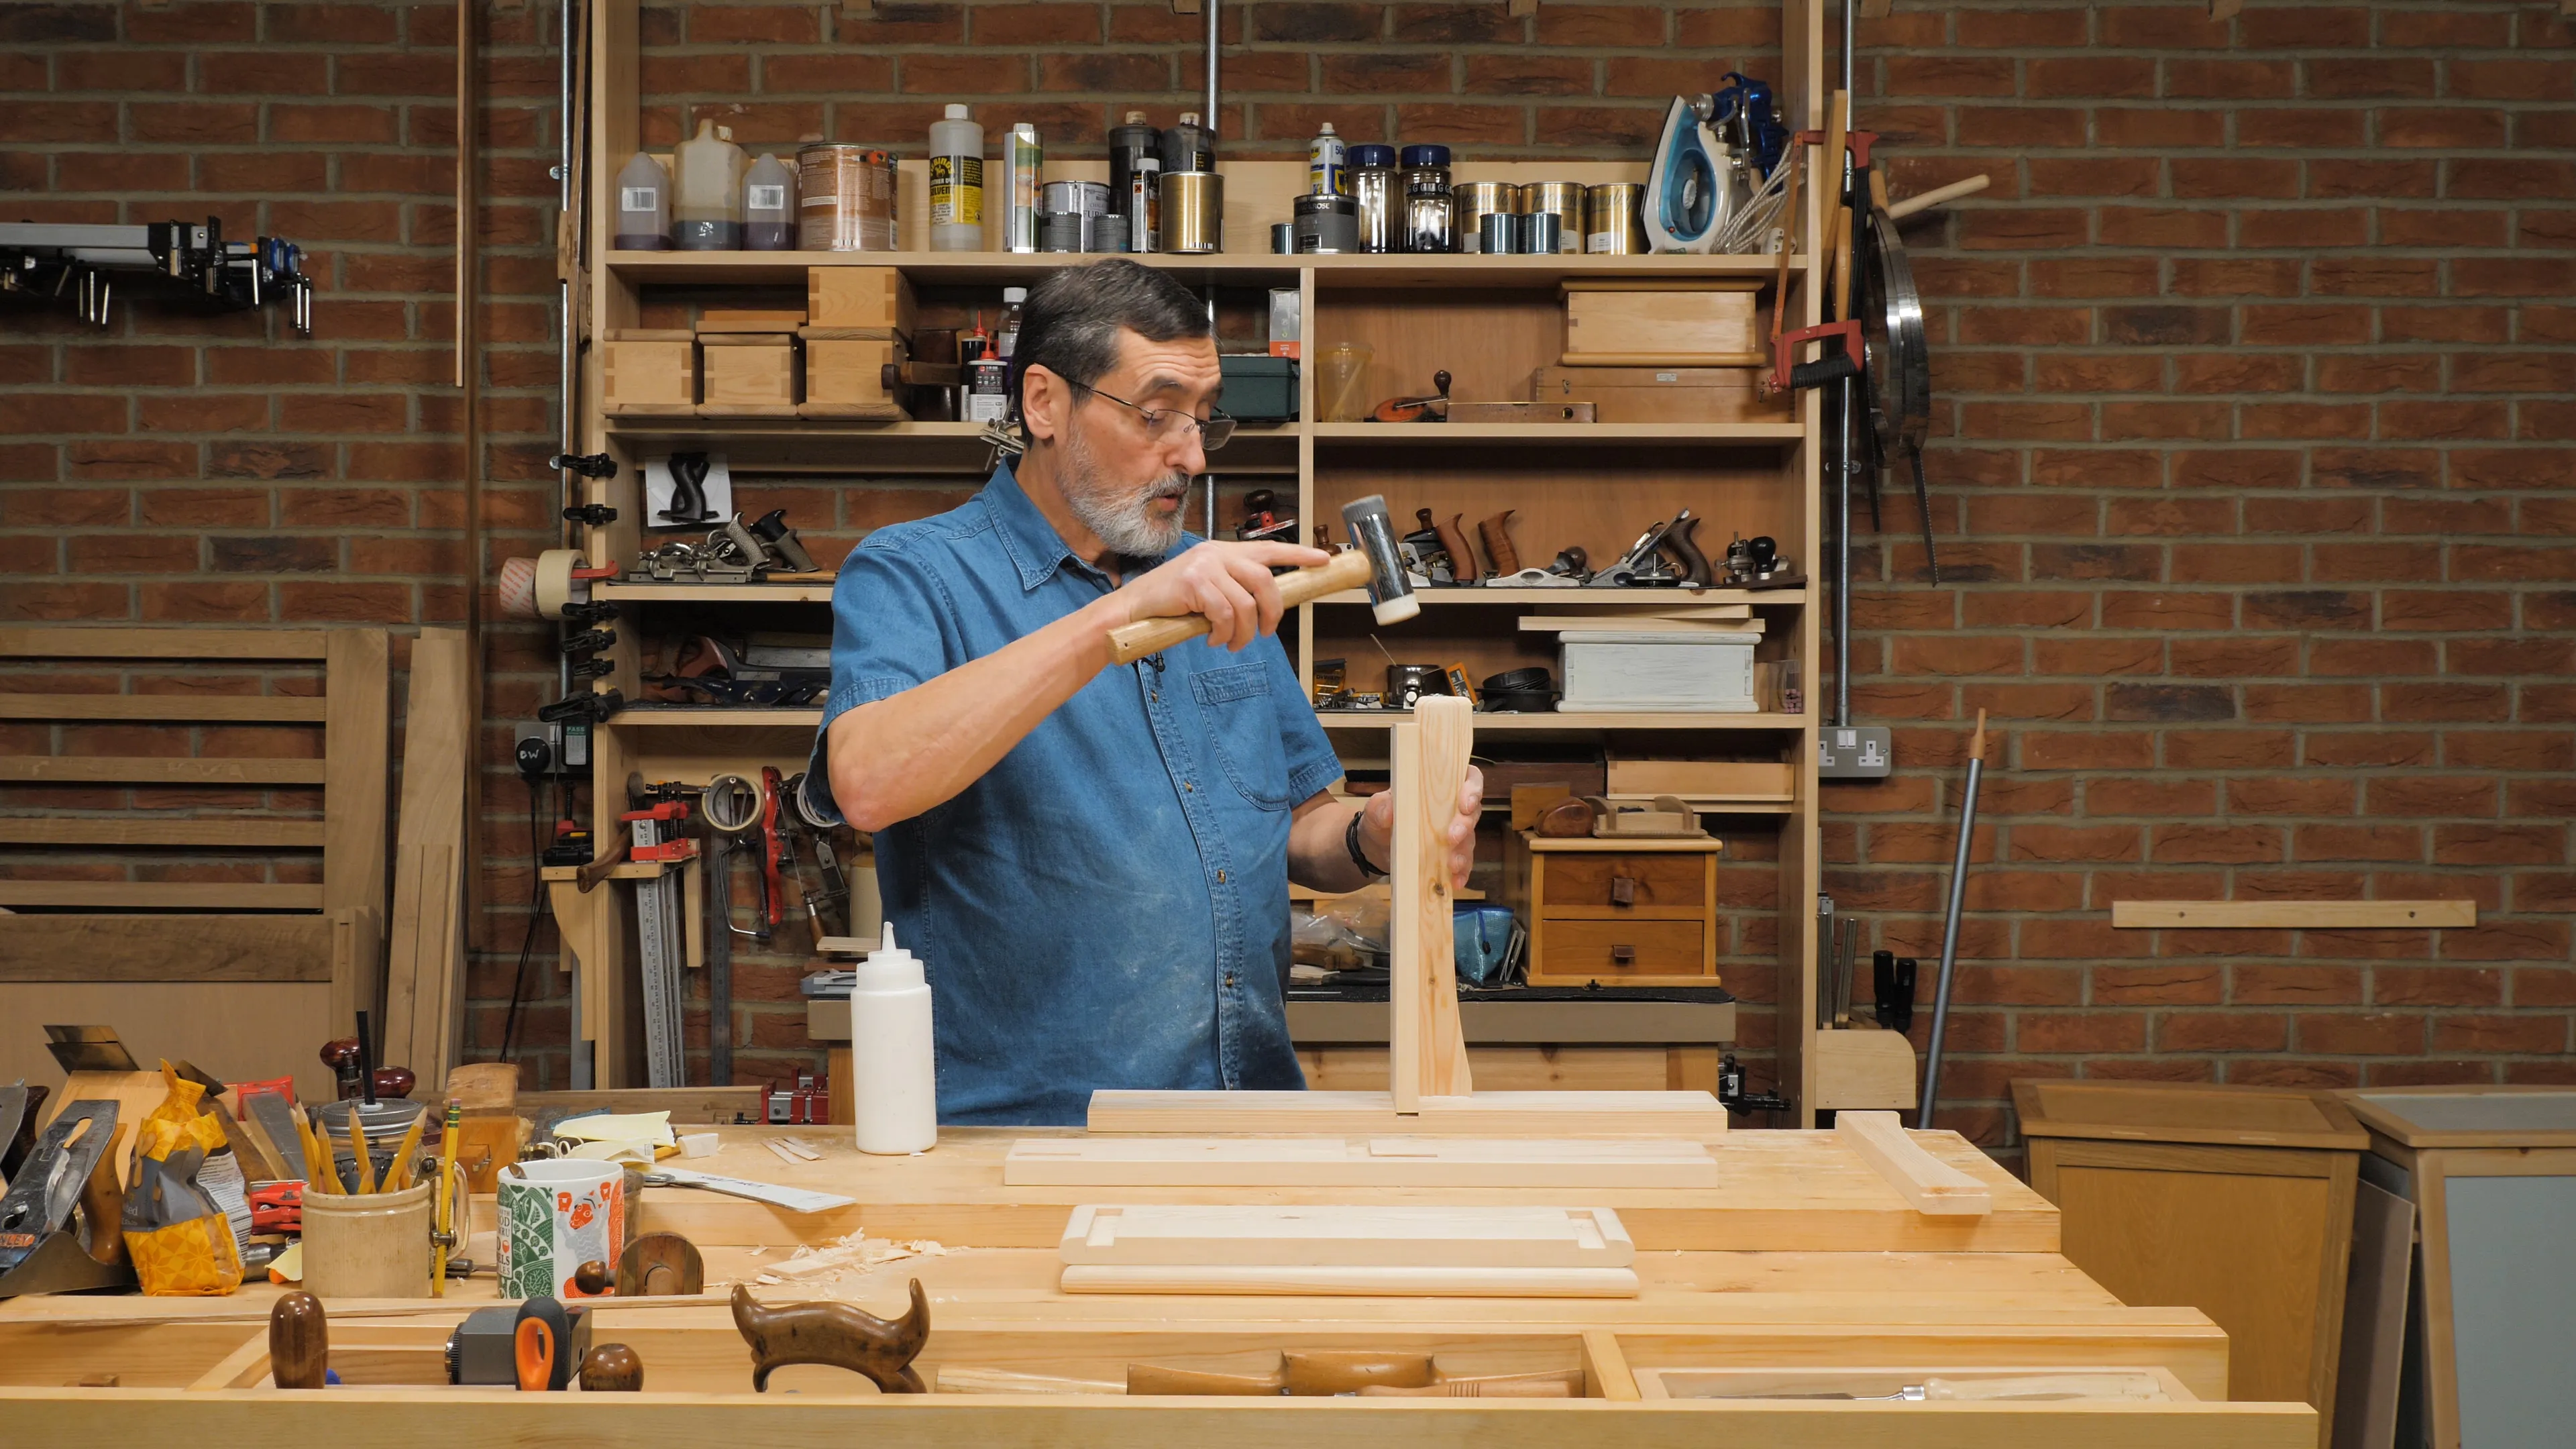
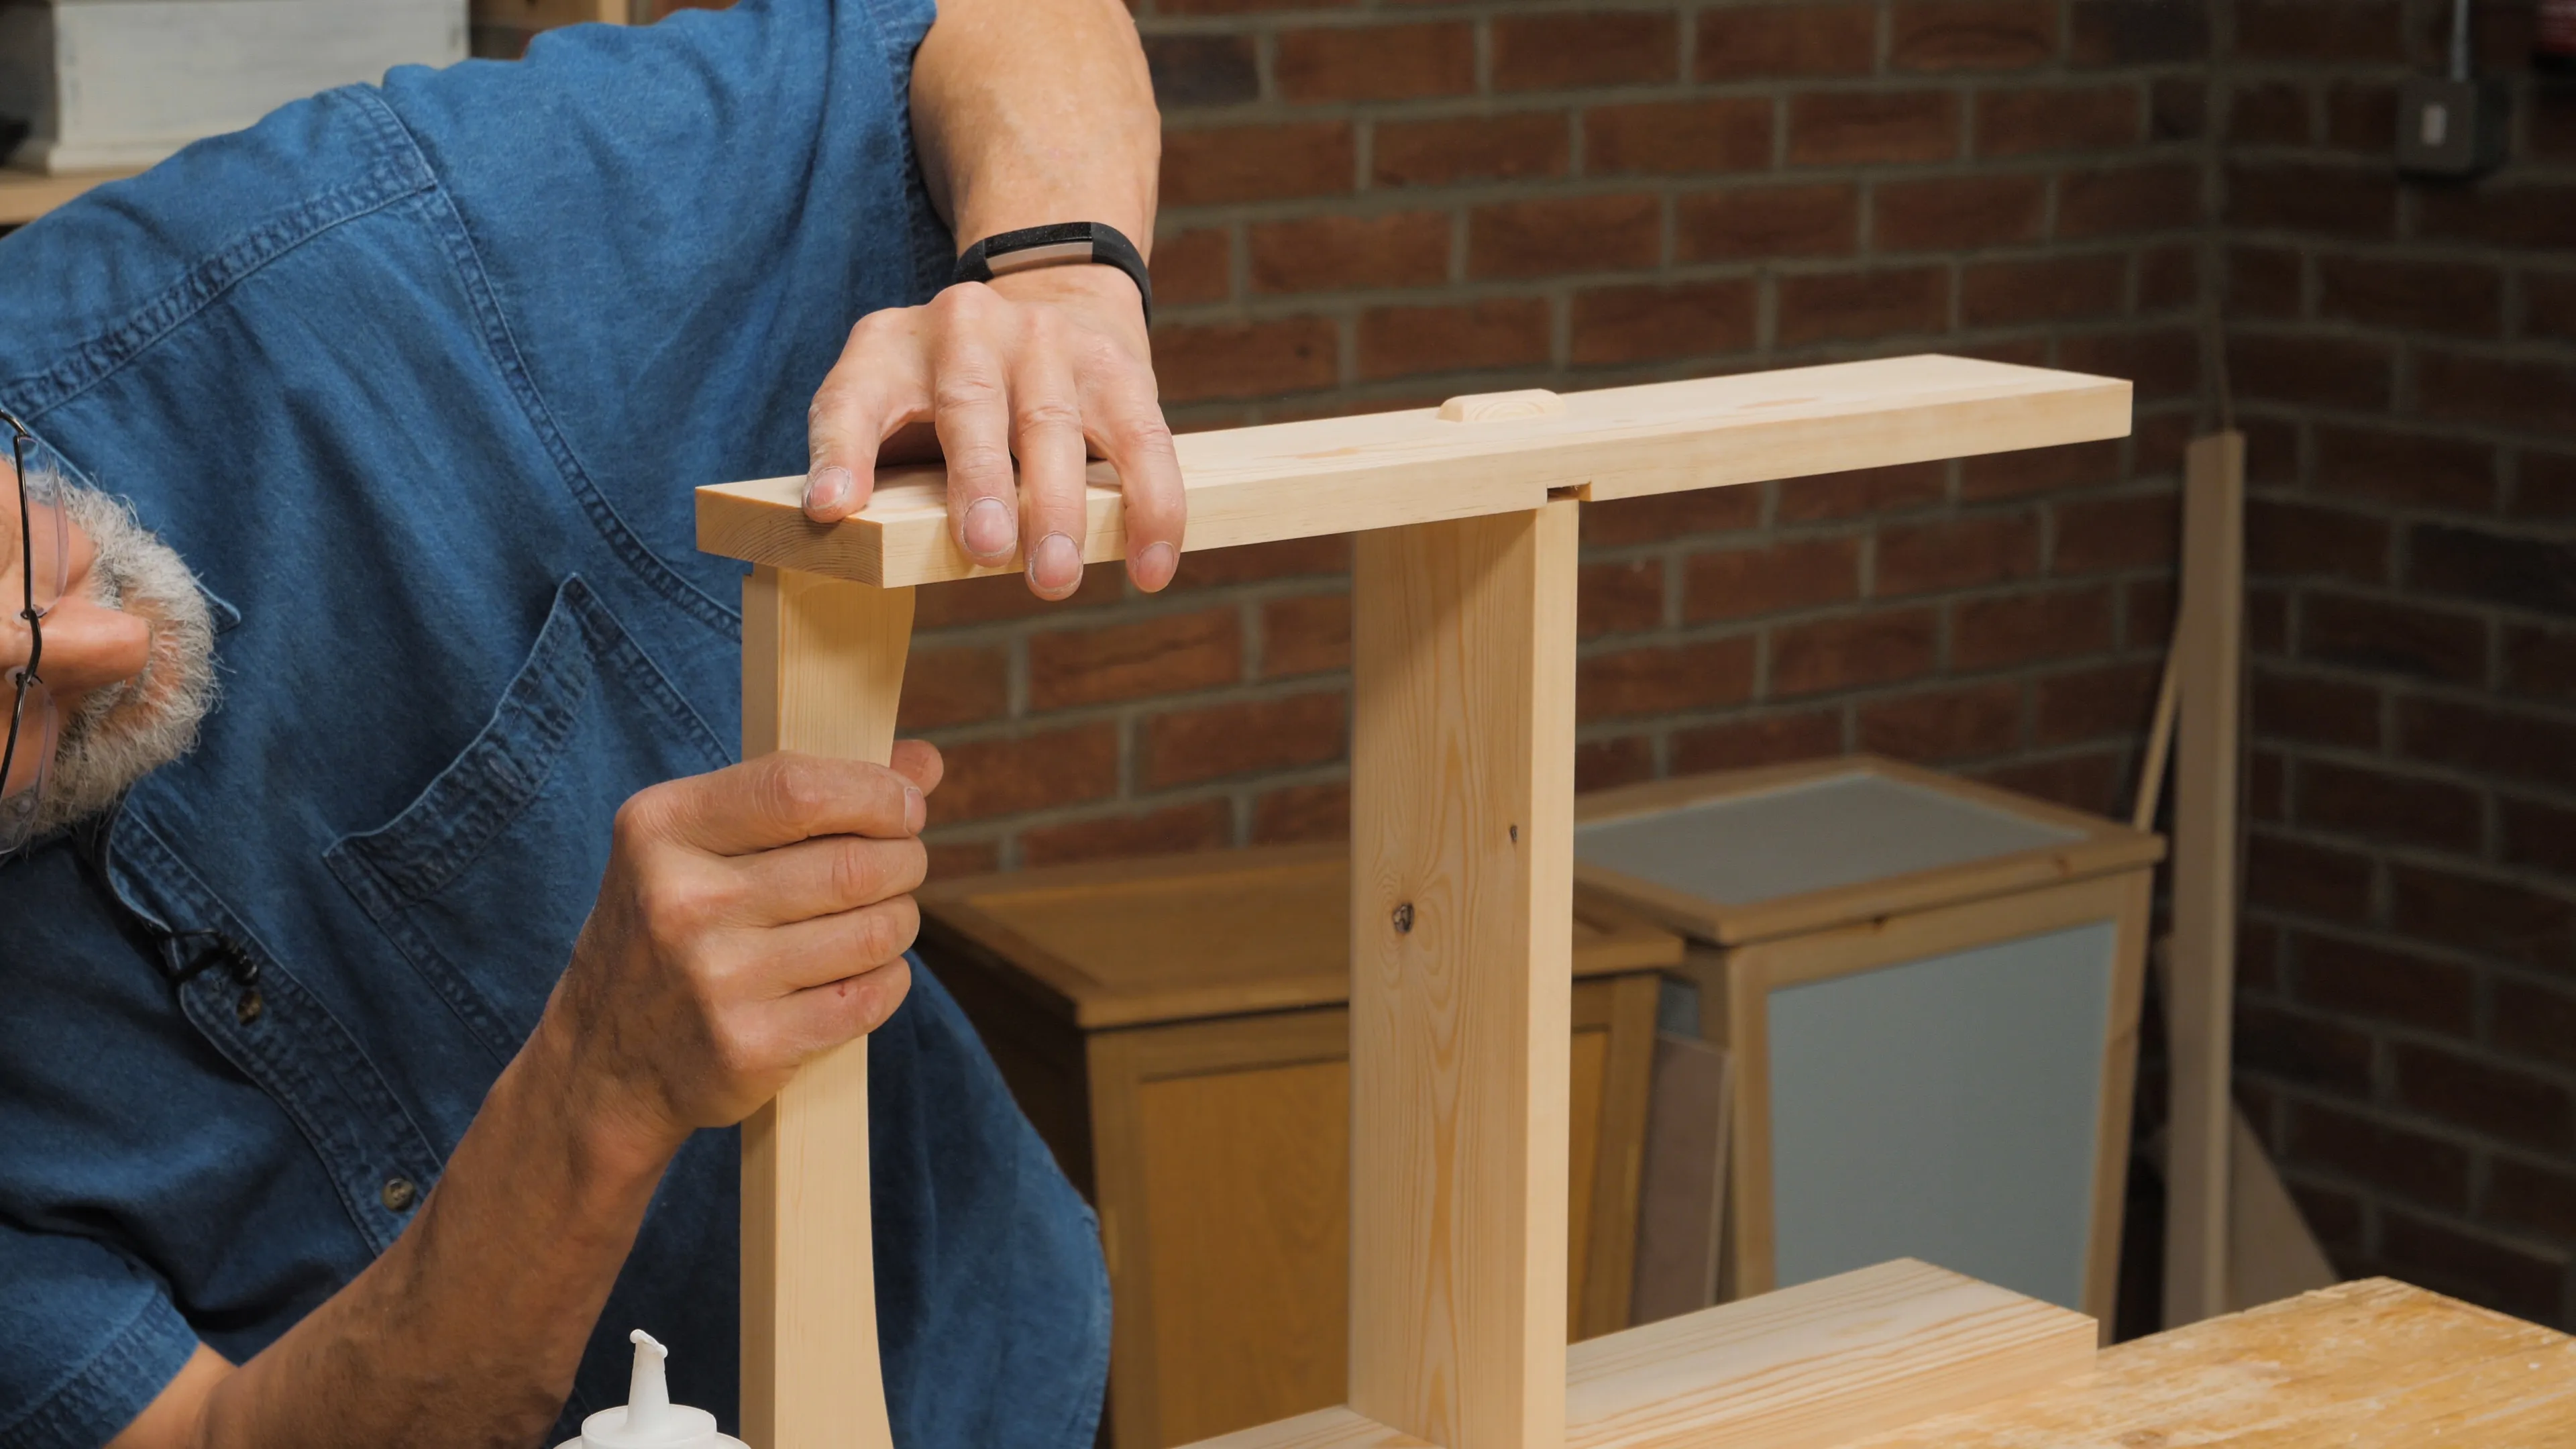
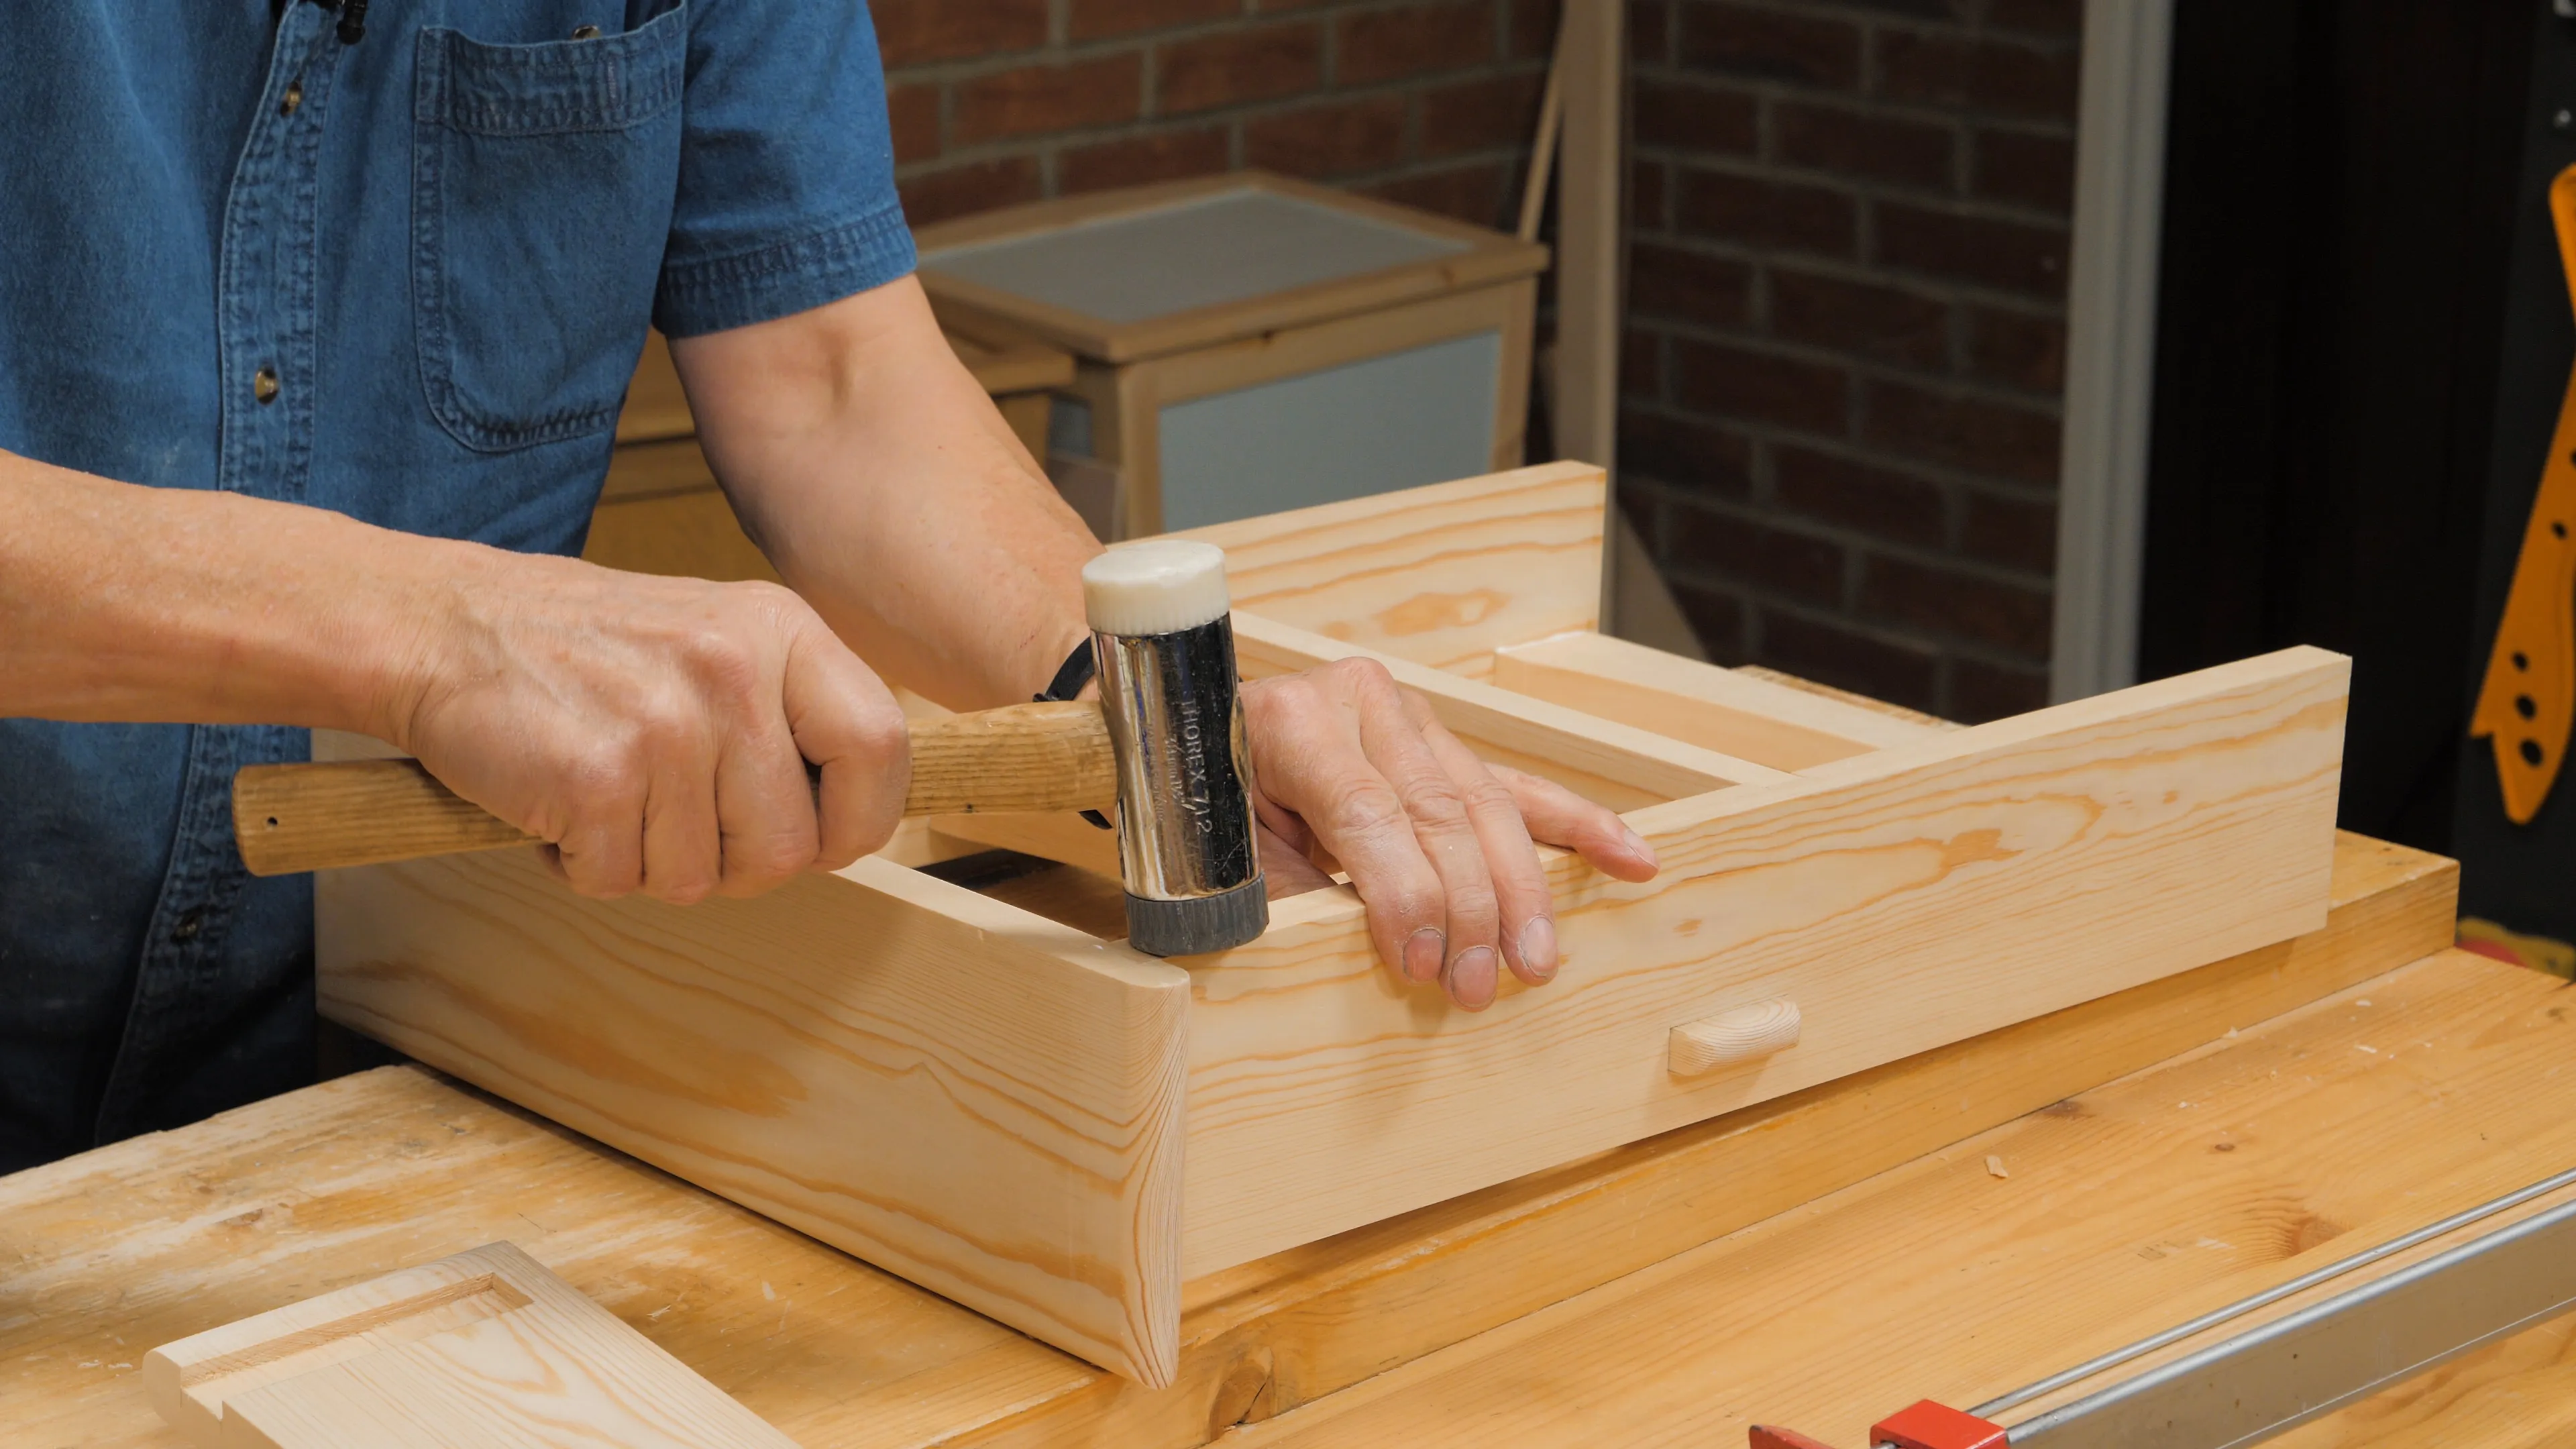
Next, glue up the bottom piece, applying glue in a zigzag pattern to the housing and standing your frame upright above it. Use the chisel hammer to fully seat the joints. Lay the shelf down on its face and tap the back of the side piece to make sure the joint is flush. Repeat for the top piece.

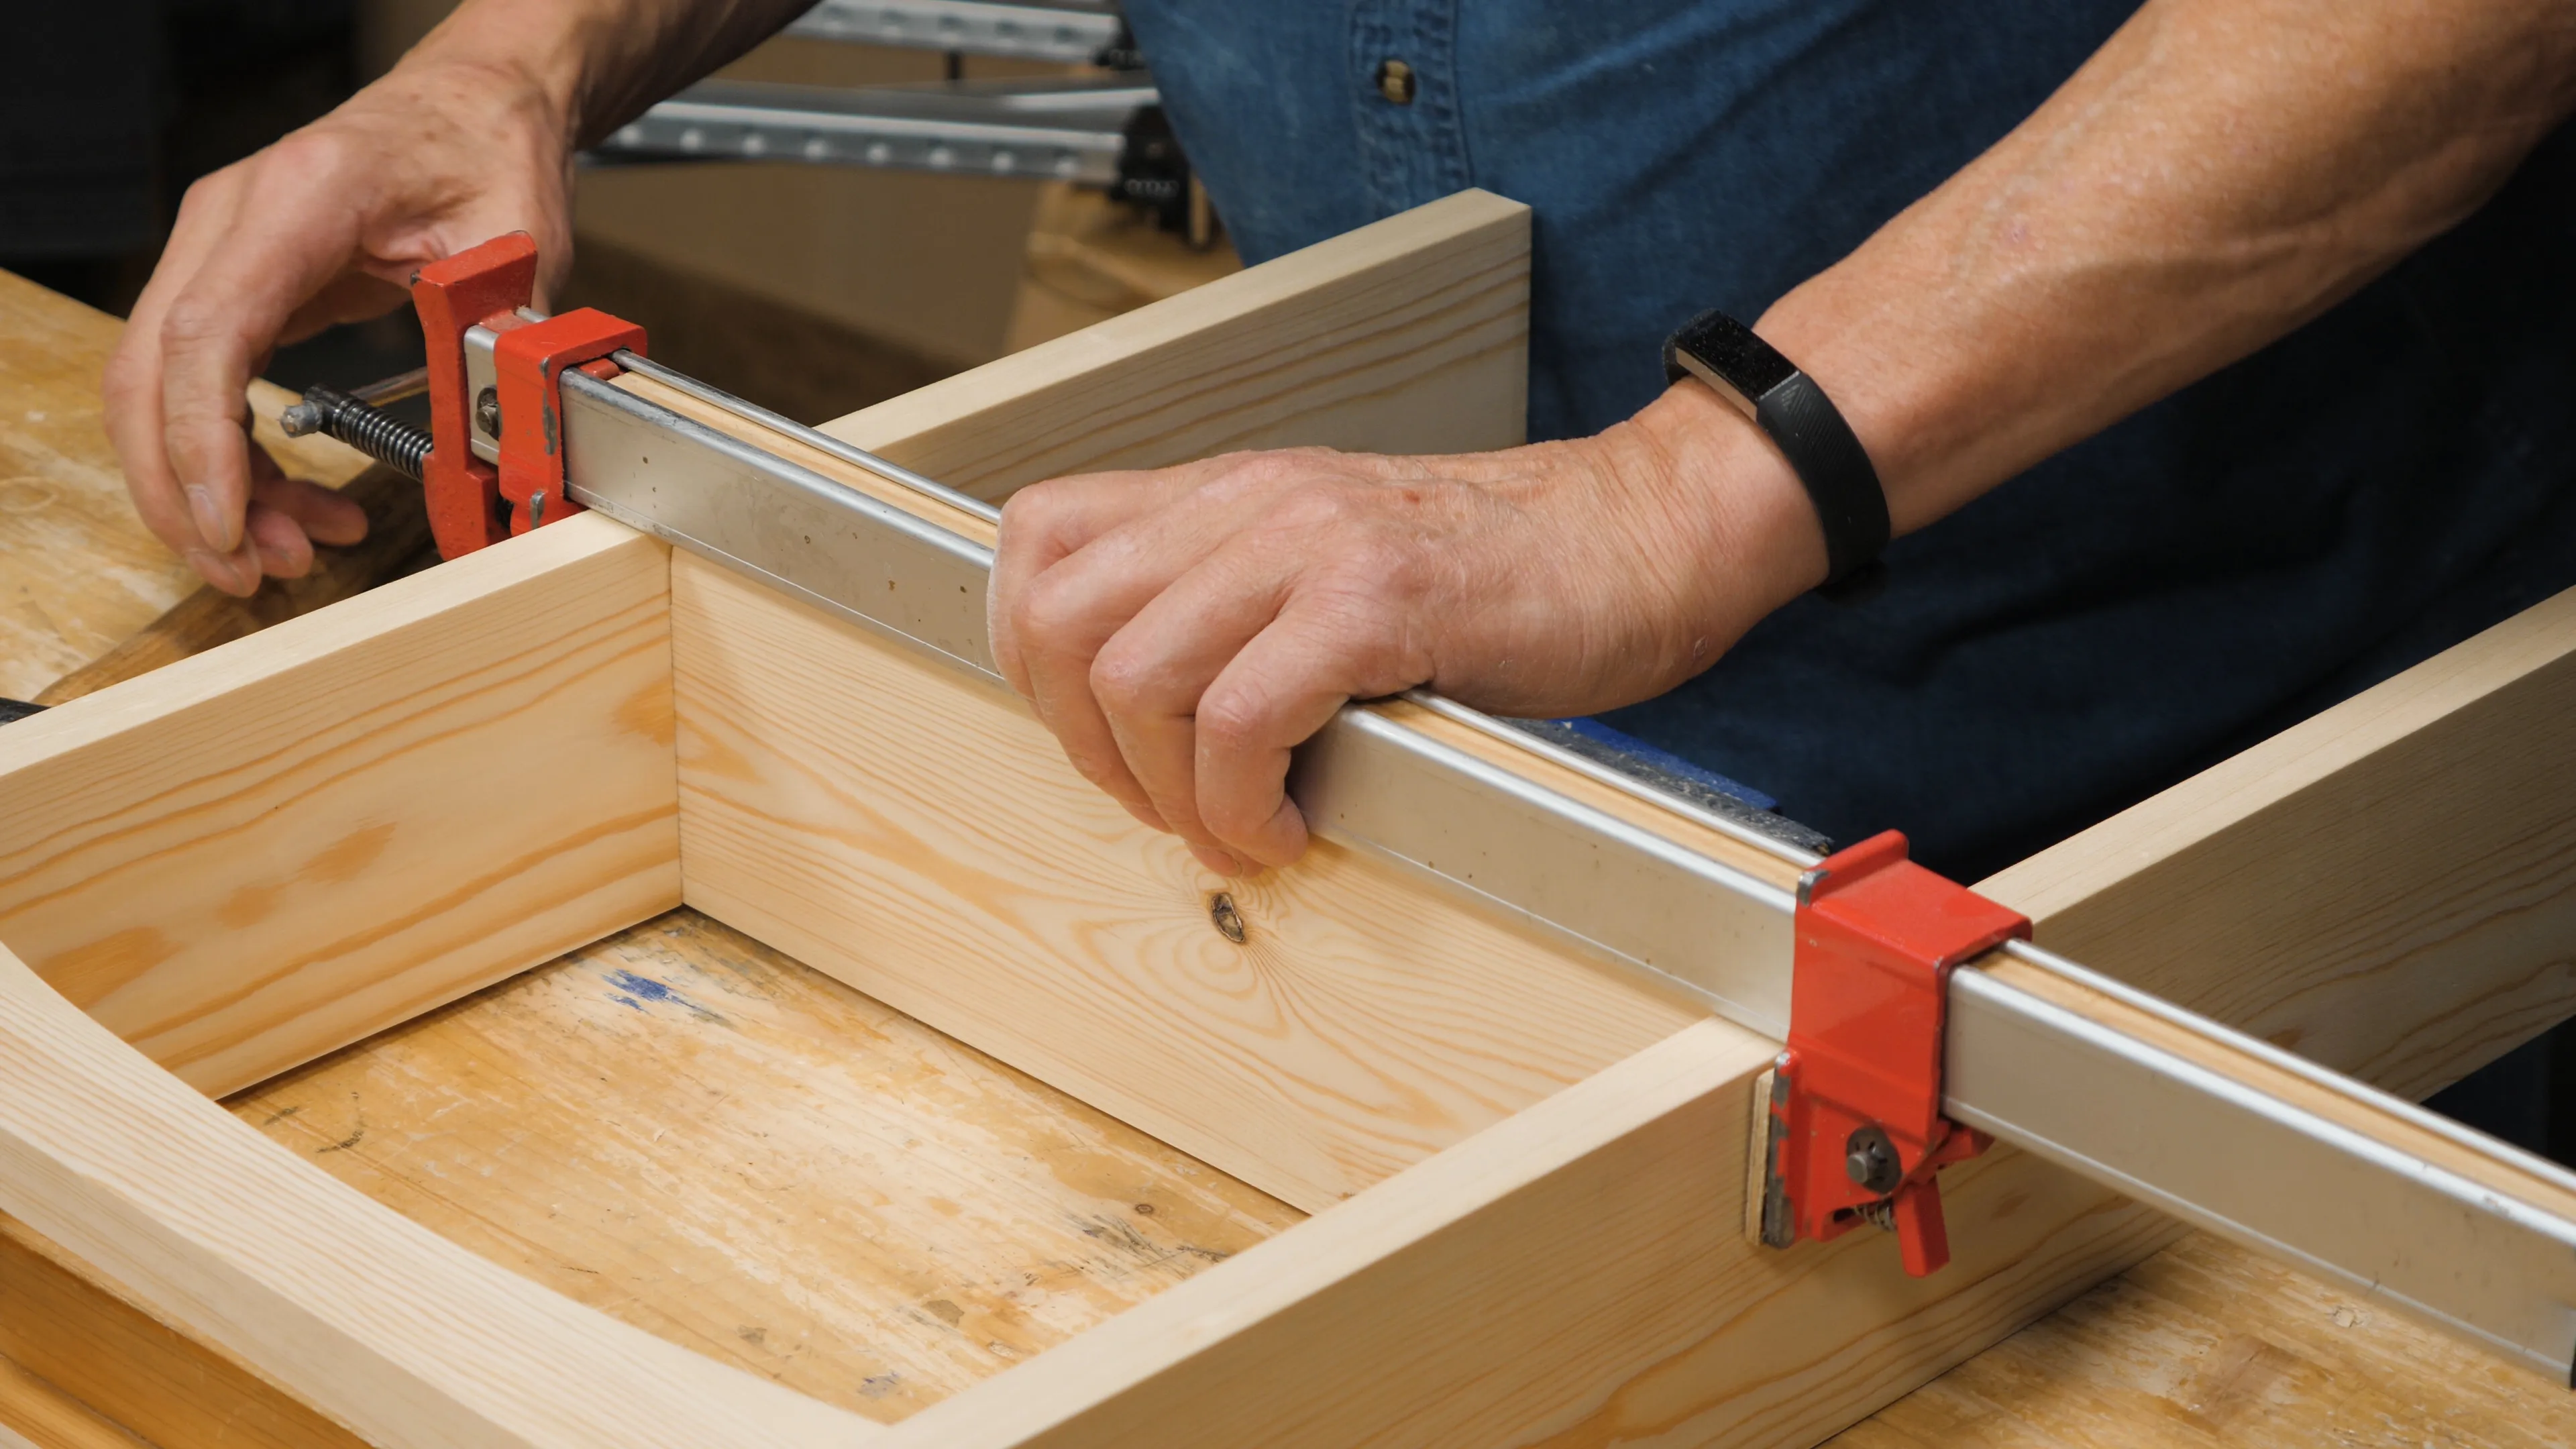
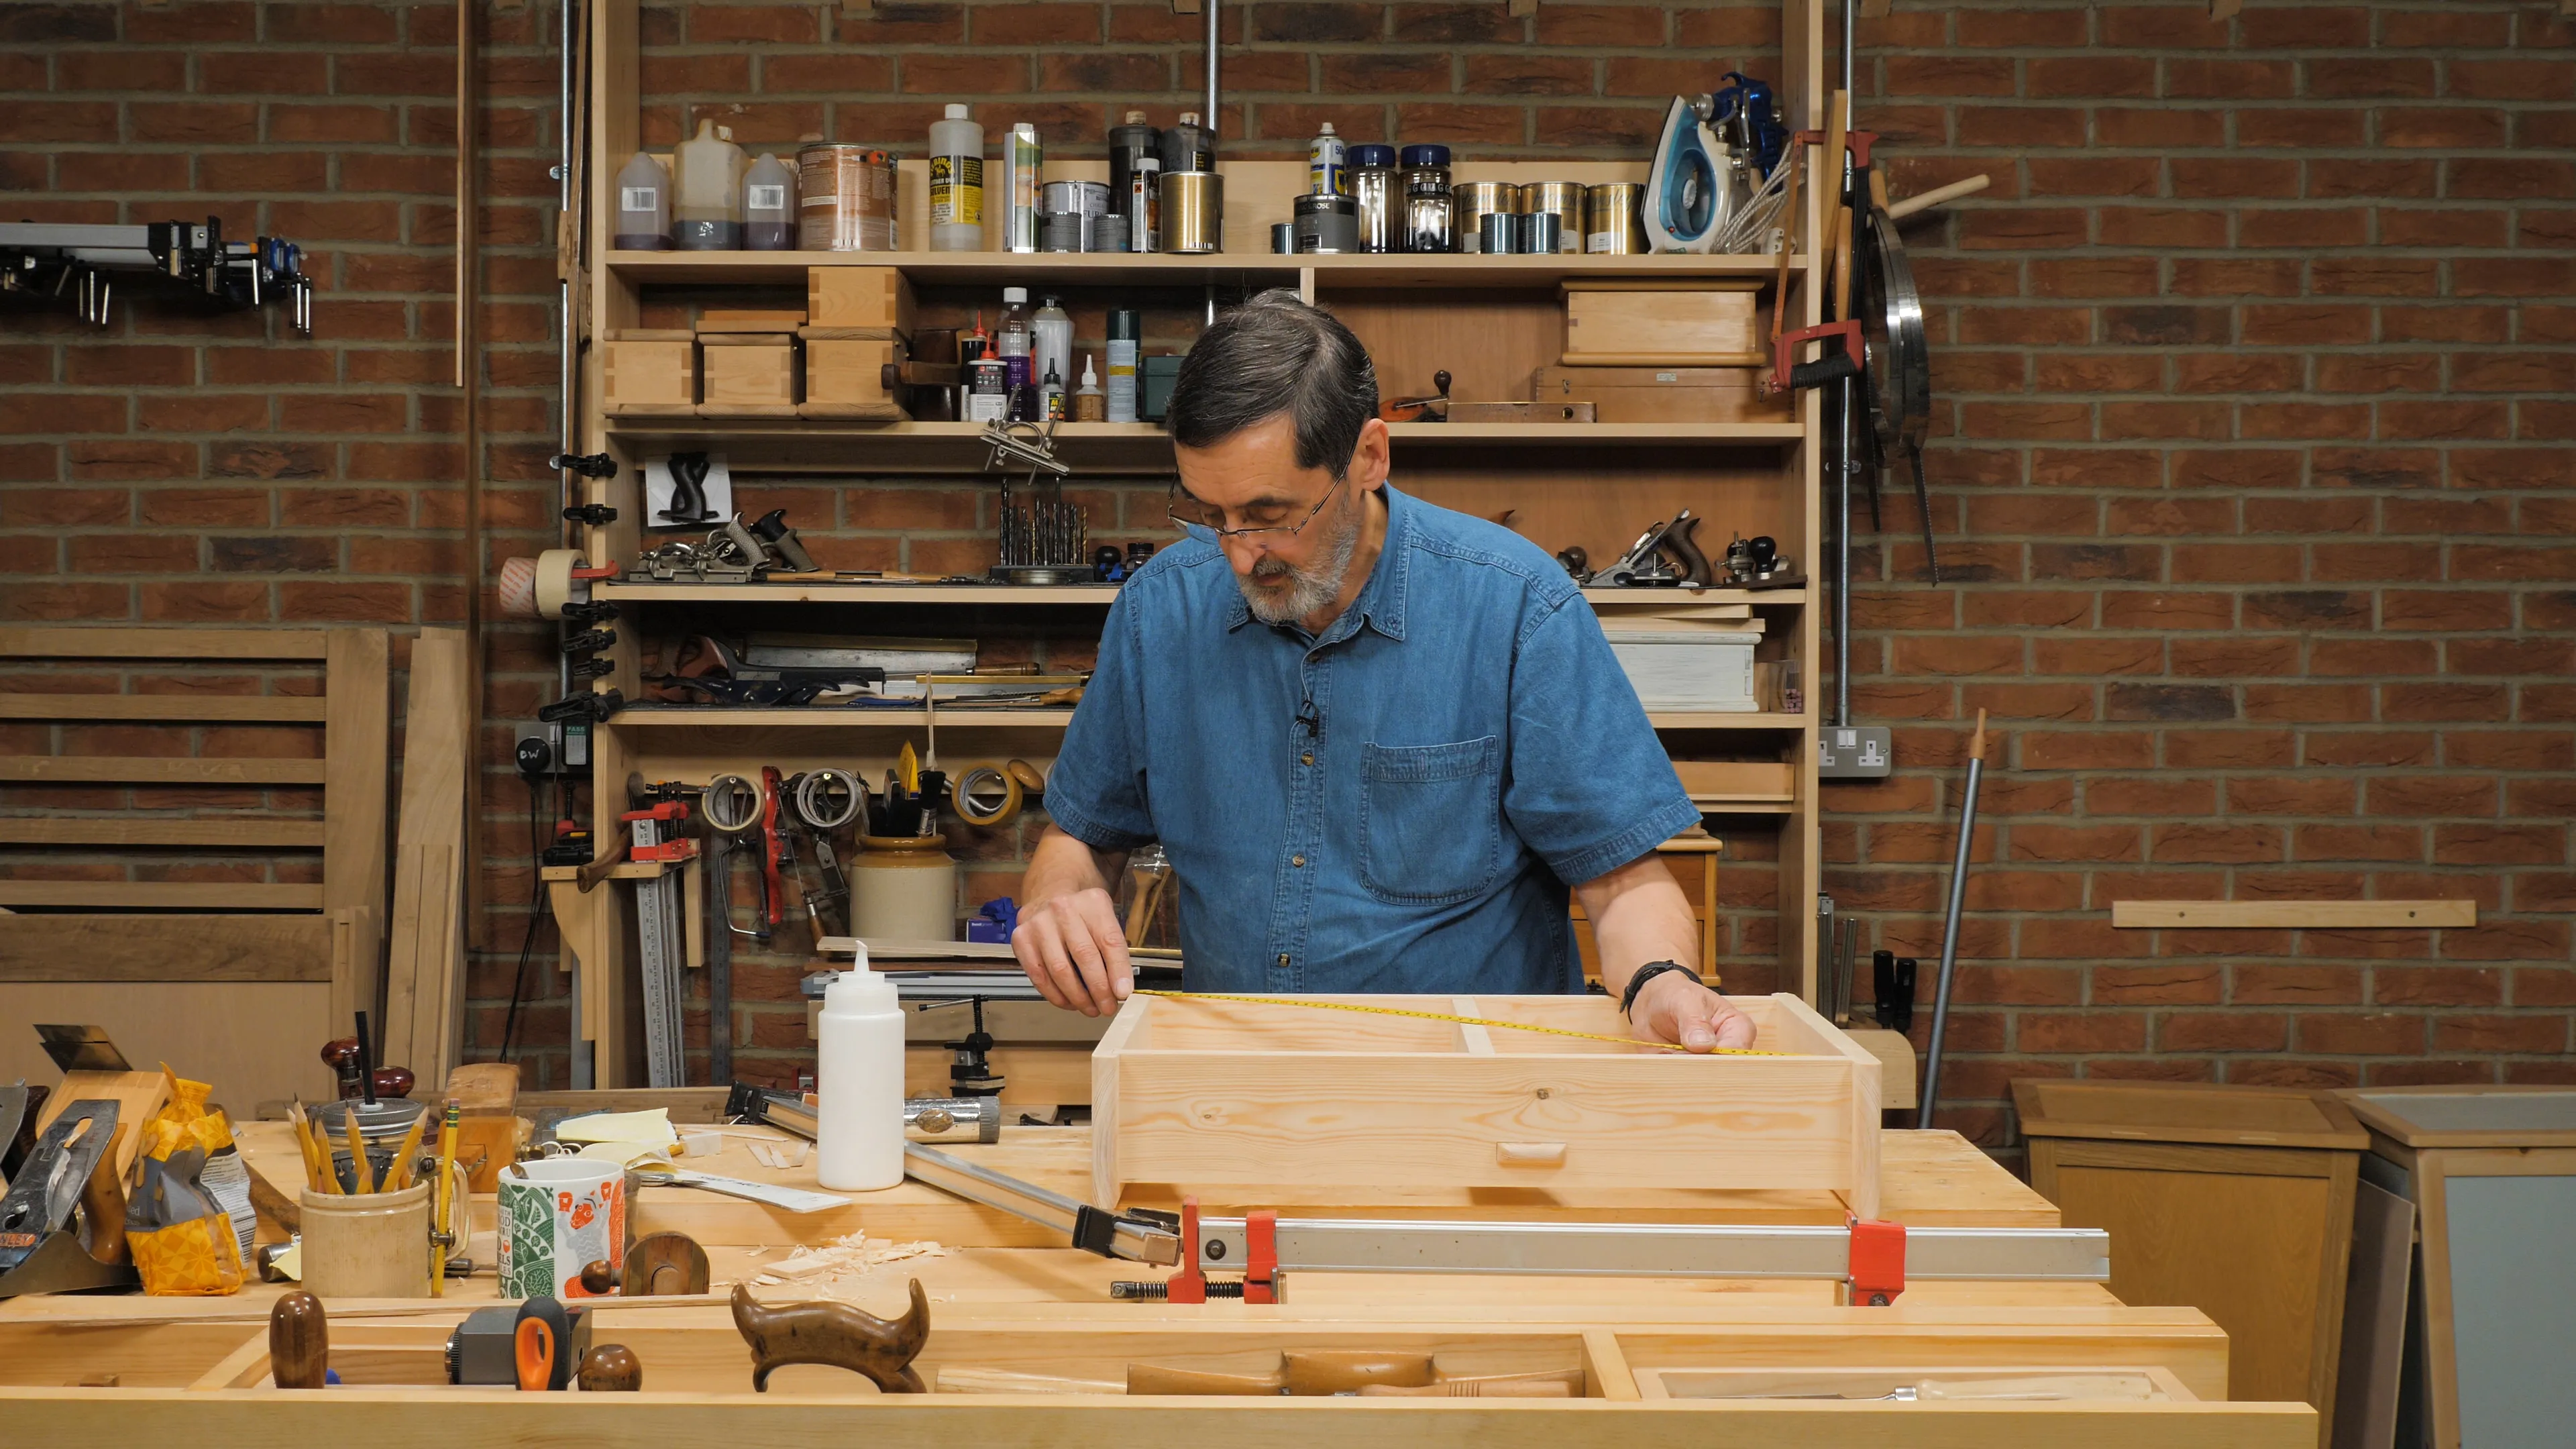
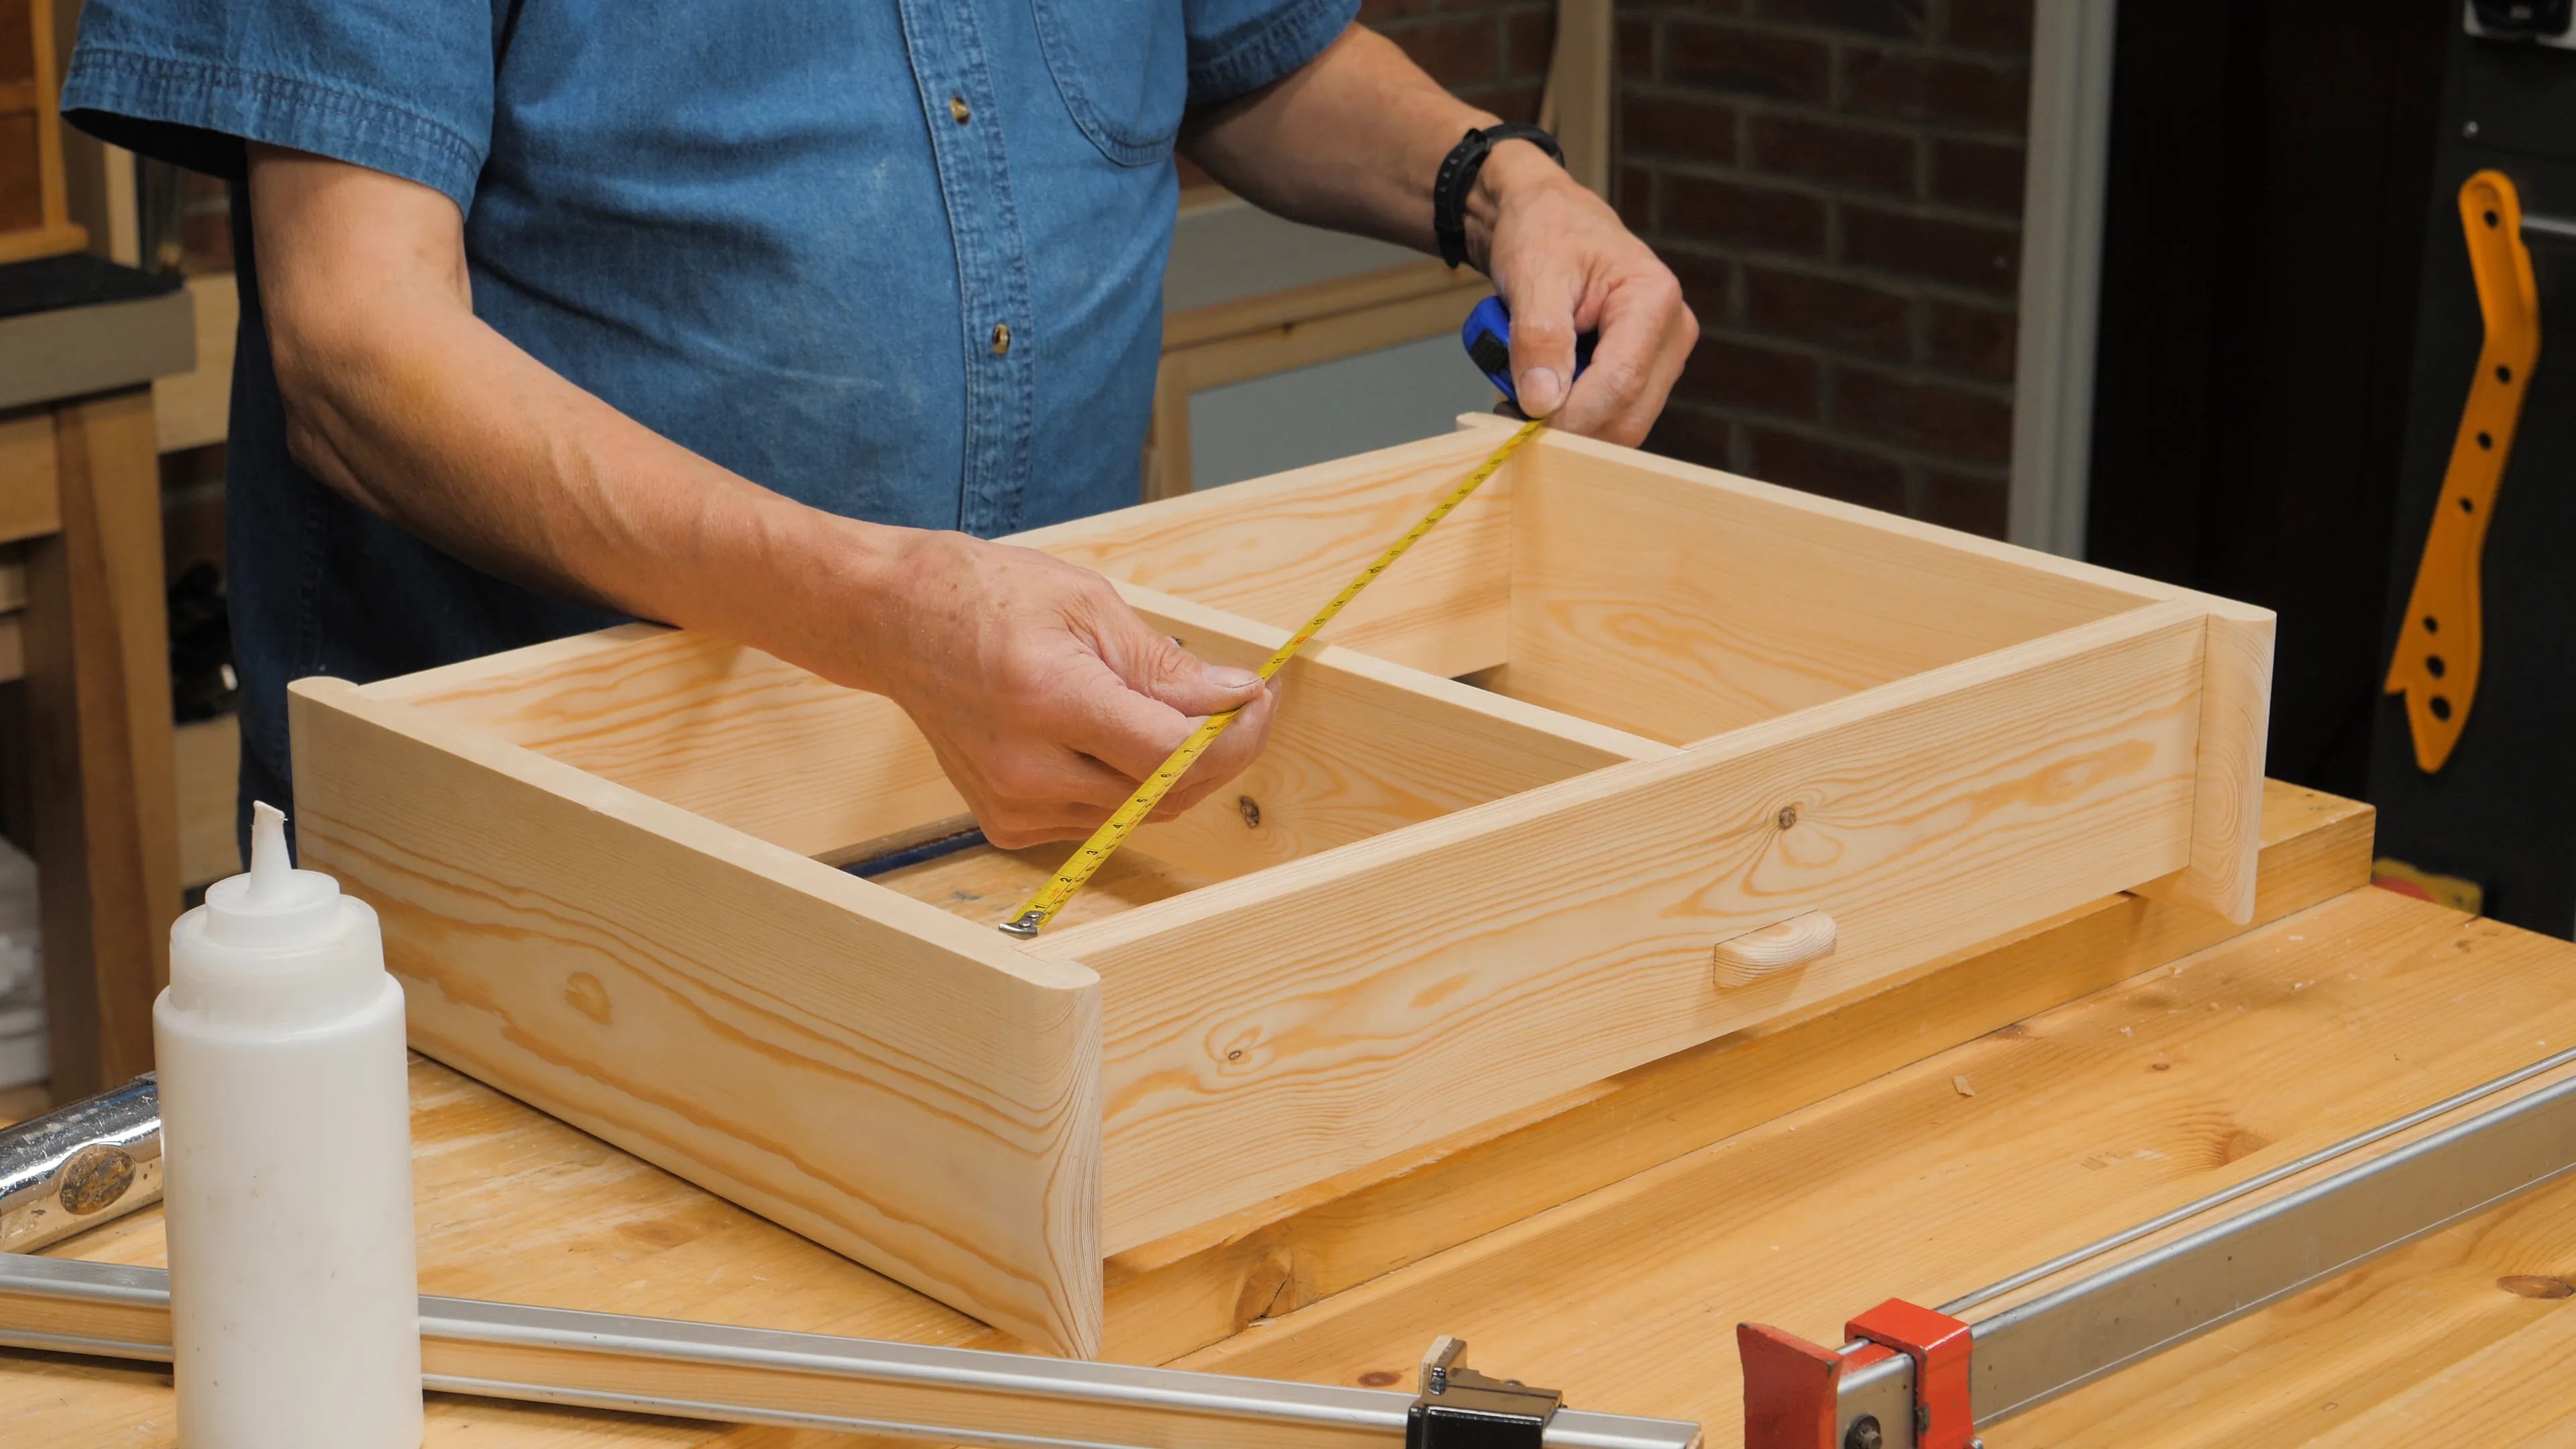
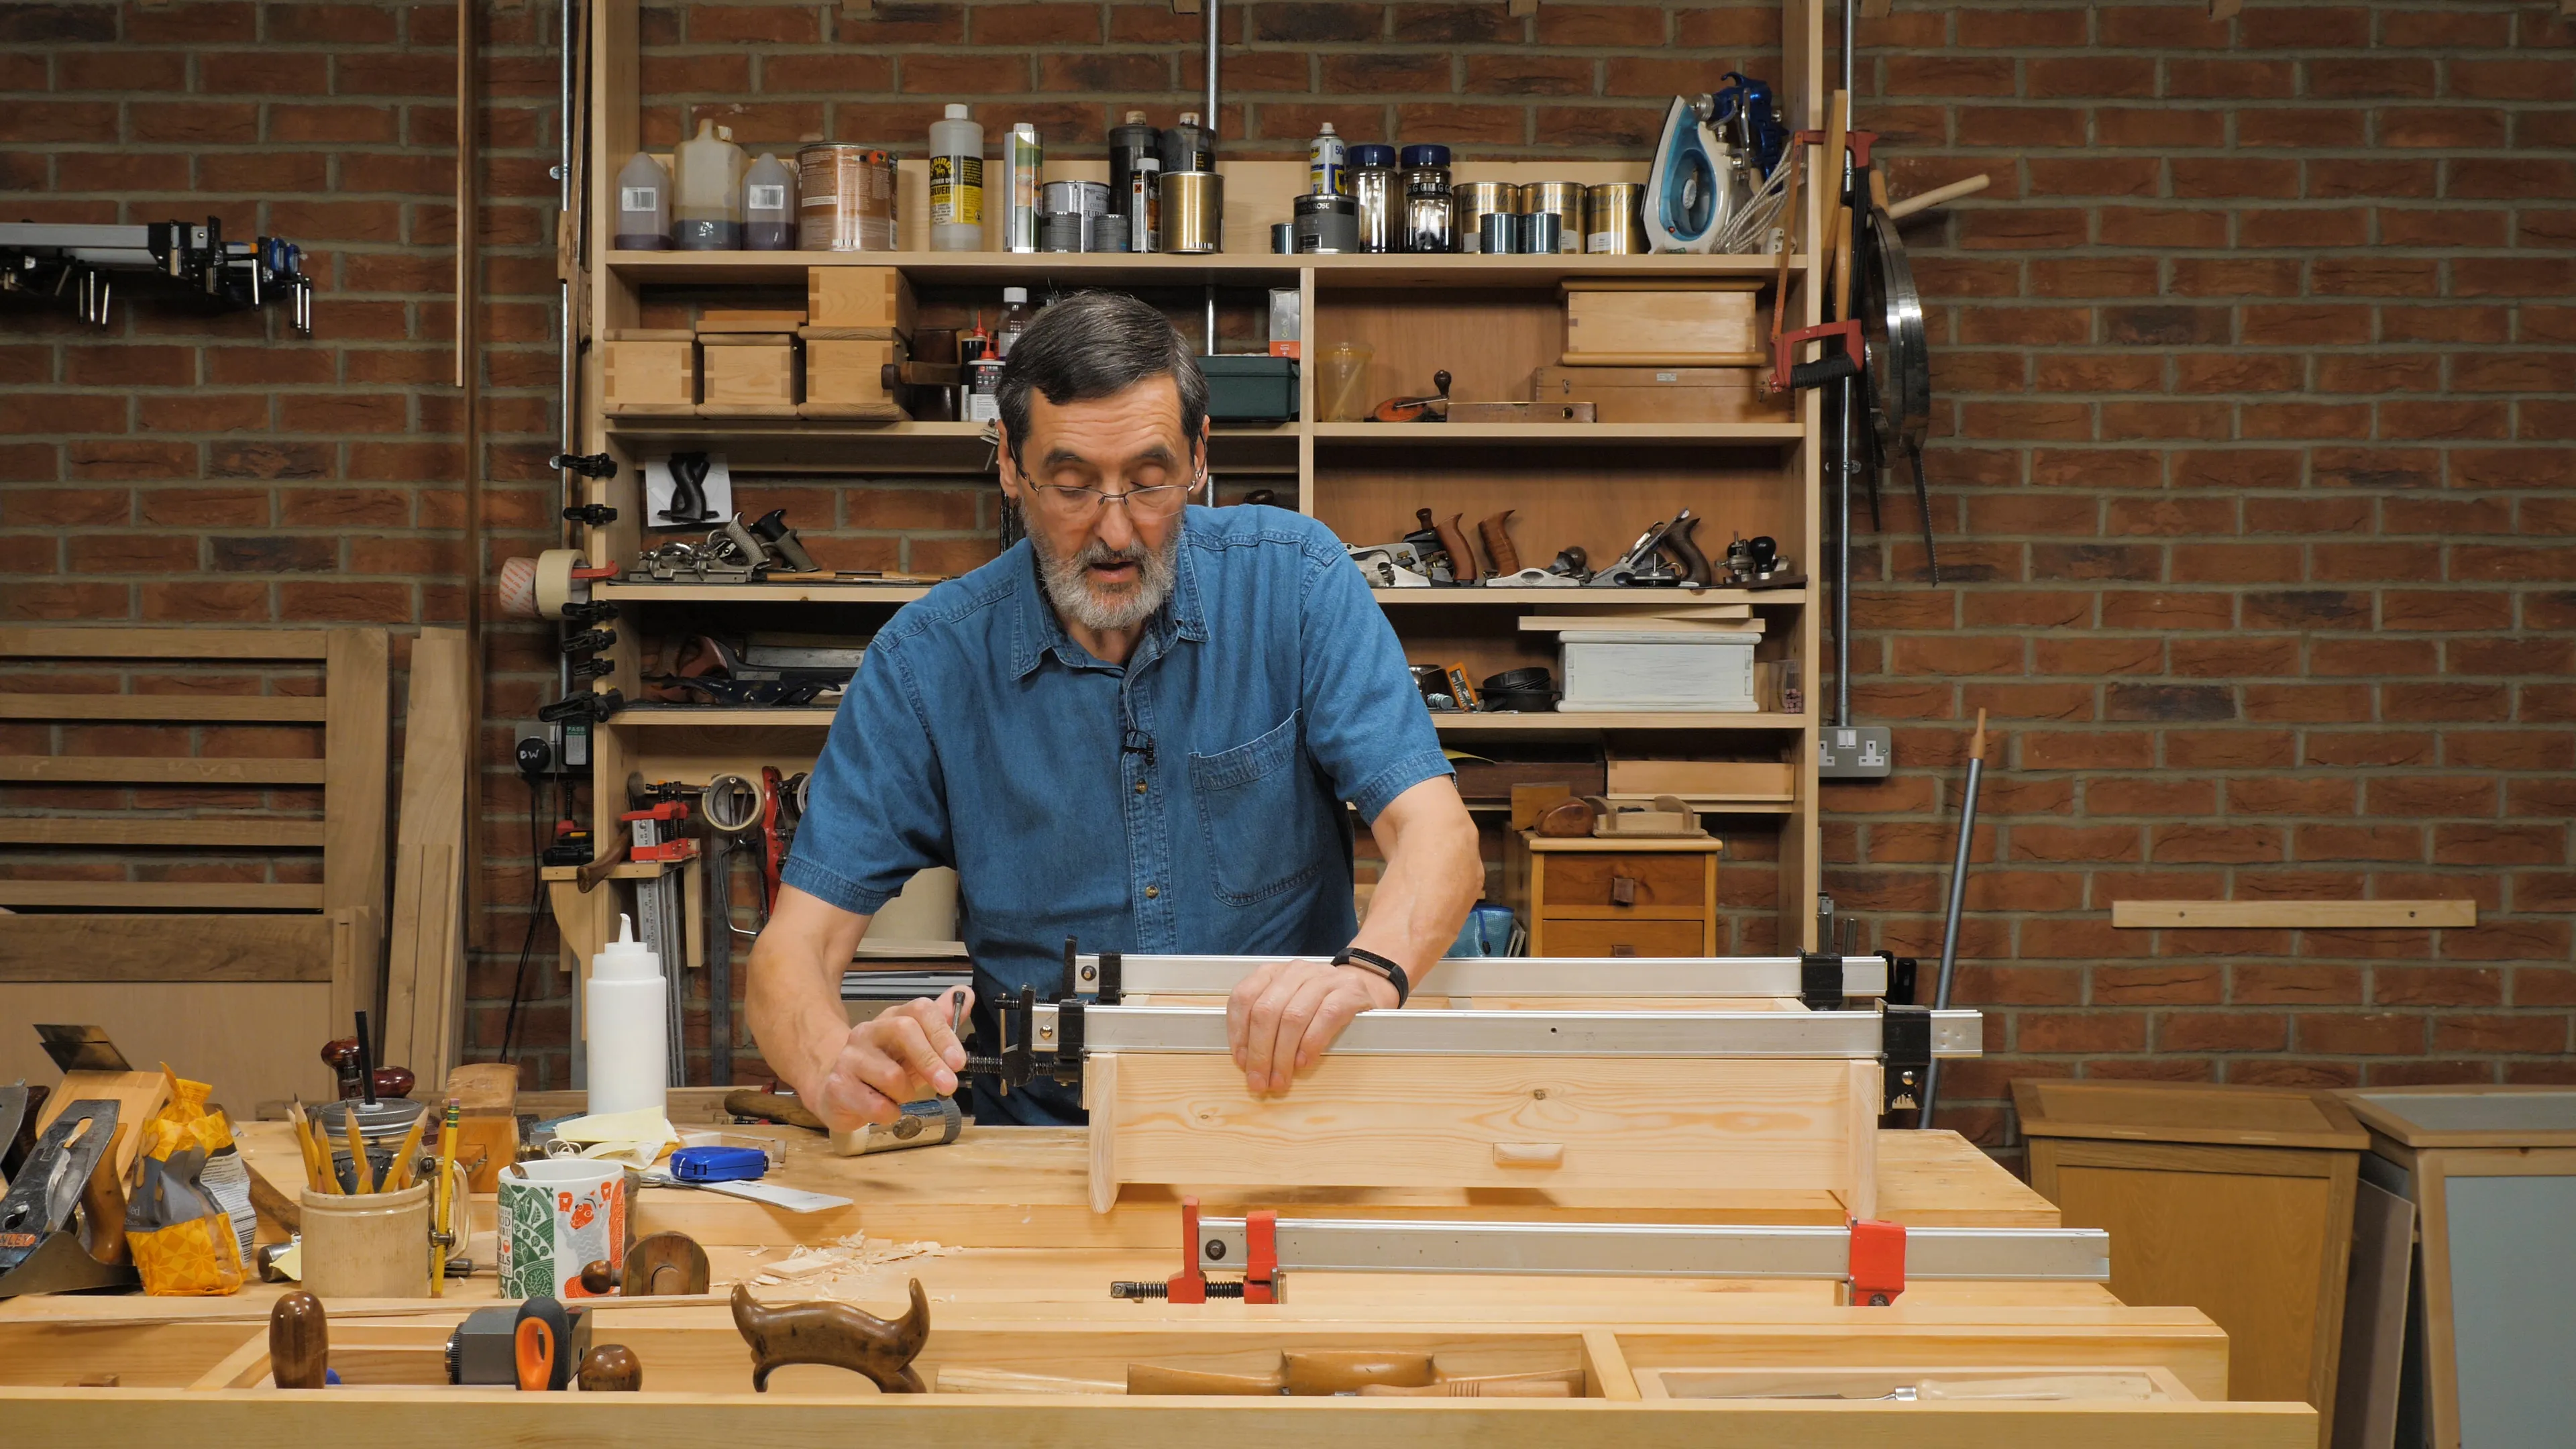
Before you clamp your project to dry, check that you are square by measuring corner to corner. If not, tap the long corner to shorten it until both diagonals match. (An acceptable tolerance in a project this size would be about 1/16” or 1.5mm.)
Apply at least four clamps evenly to ensure the top and bottom housing dados are fully bottoming out. (Structurally, these are the most important joints.) Make sure to line the clamps up parallel to the edge of your shelf to keep your project square. Leave to set overnight.
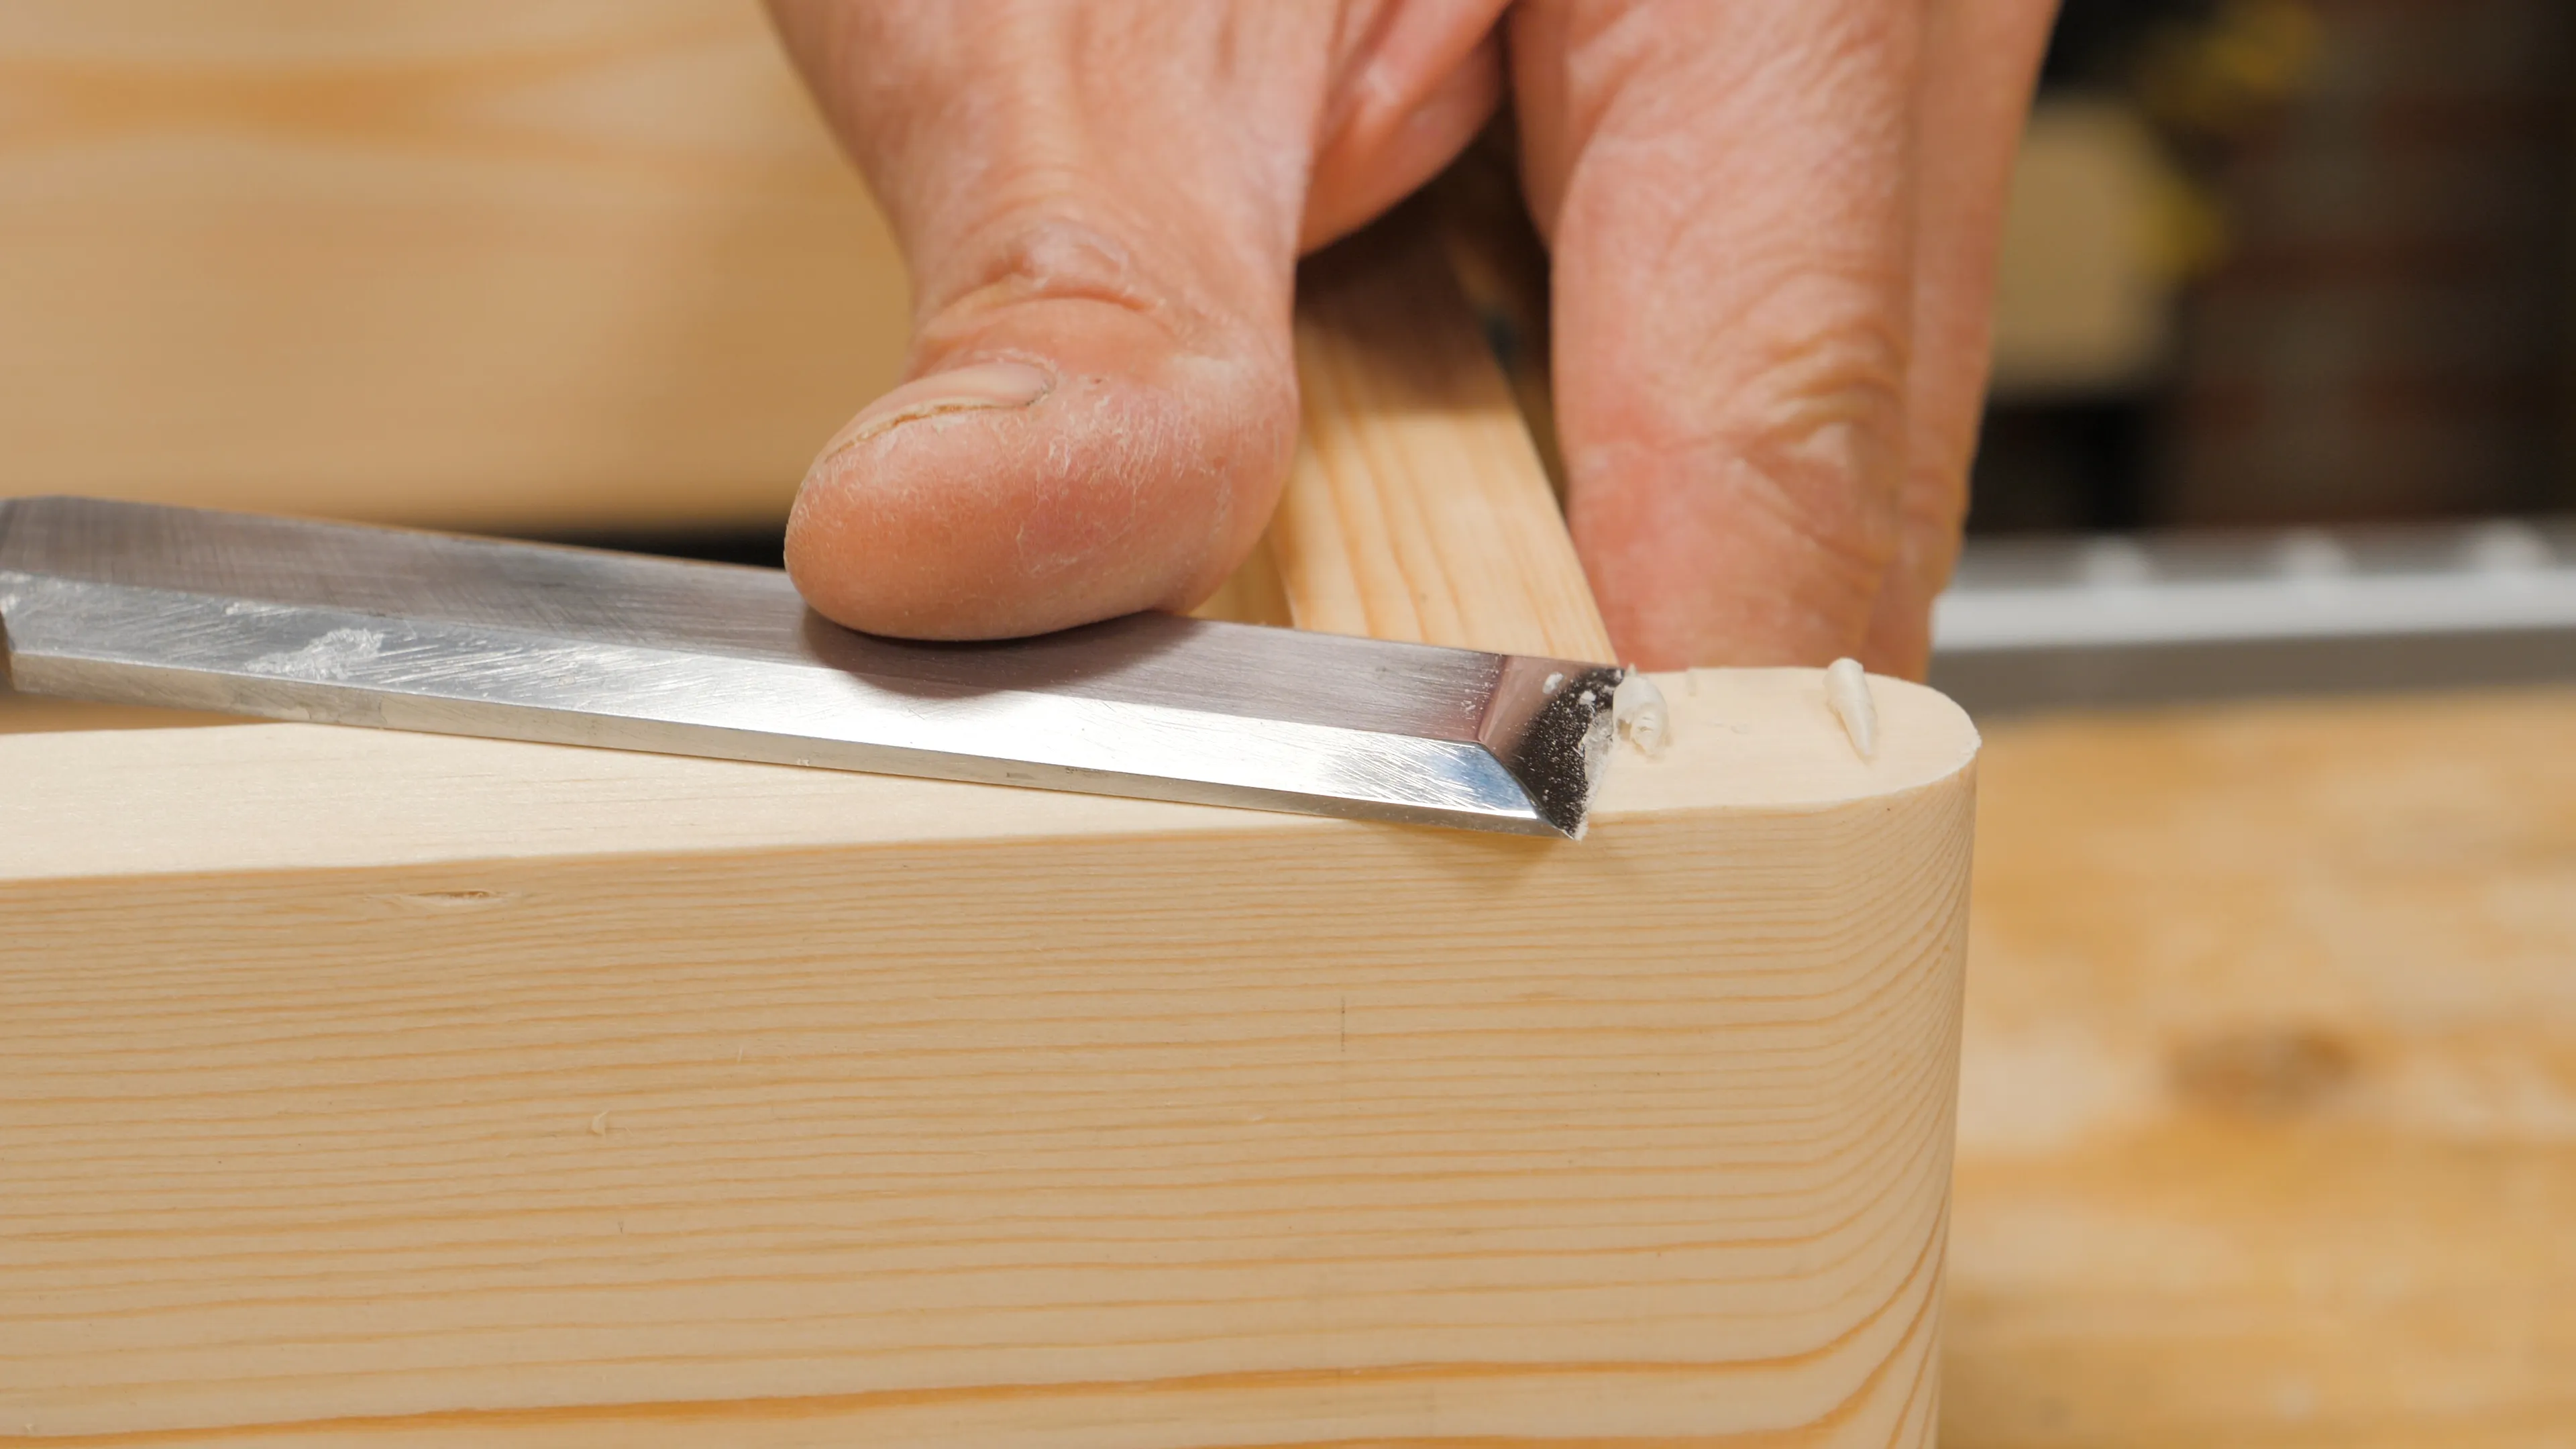
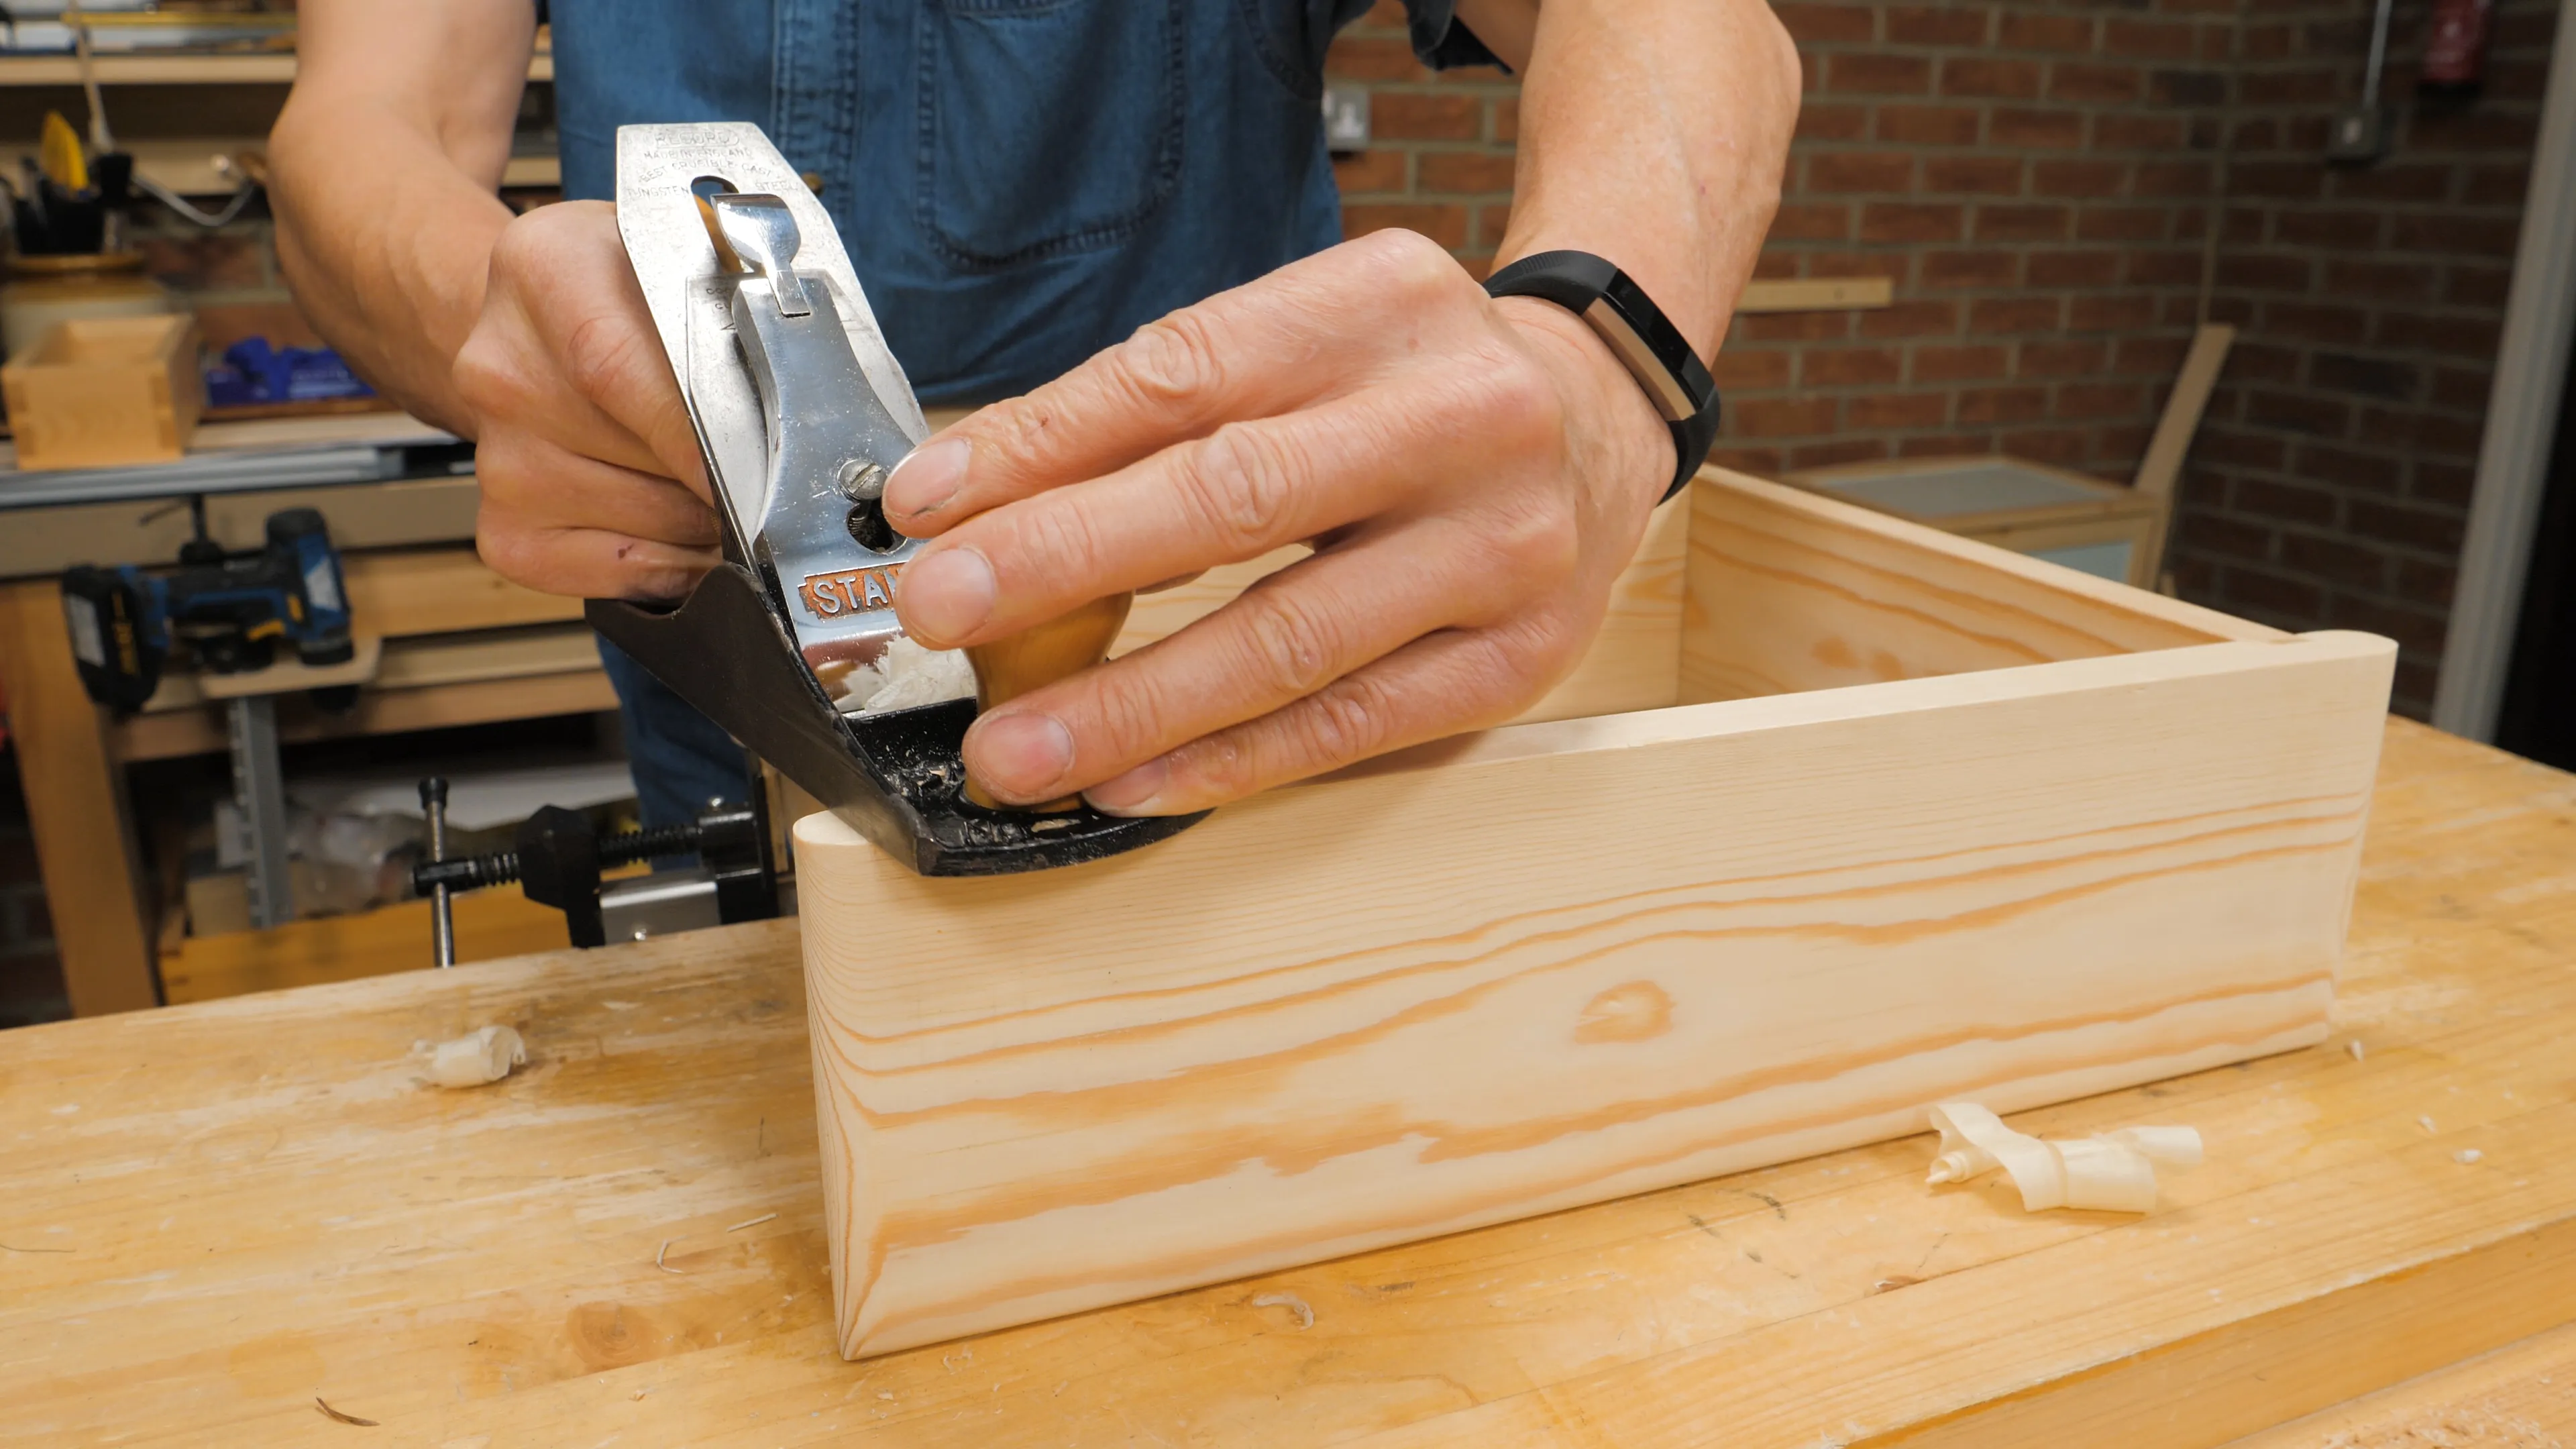
Once dry, remove the clamps and use a sharp chisel to slice off any excess glue that may have been squeezed out. You can use a plane to take a shaving off the edges and also use sandpaper if you need to. Finish with two or three coats of shellac leaving an hour between each coat and your hanging wall shelf is finished.

Sign in to track your progress