Laying Out The Dovetails
The layout for double dovetails follows the same patterns as for the single dovetail.
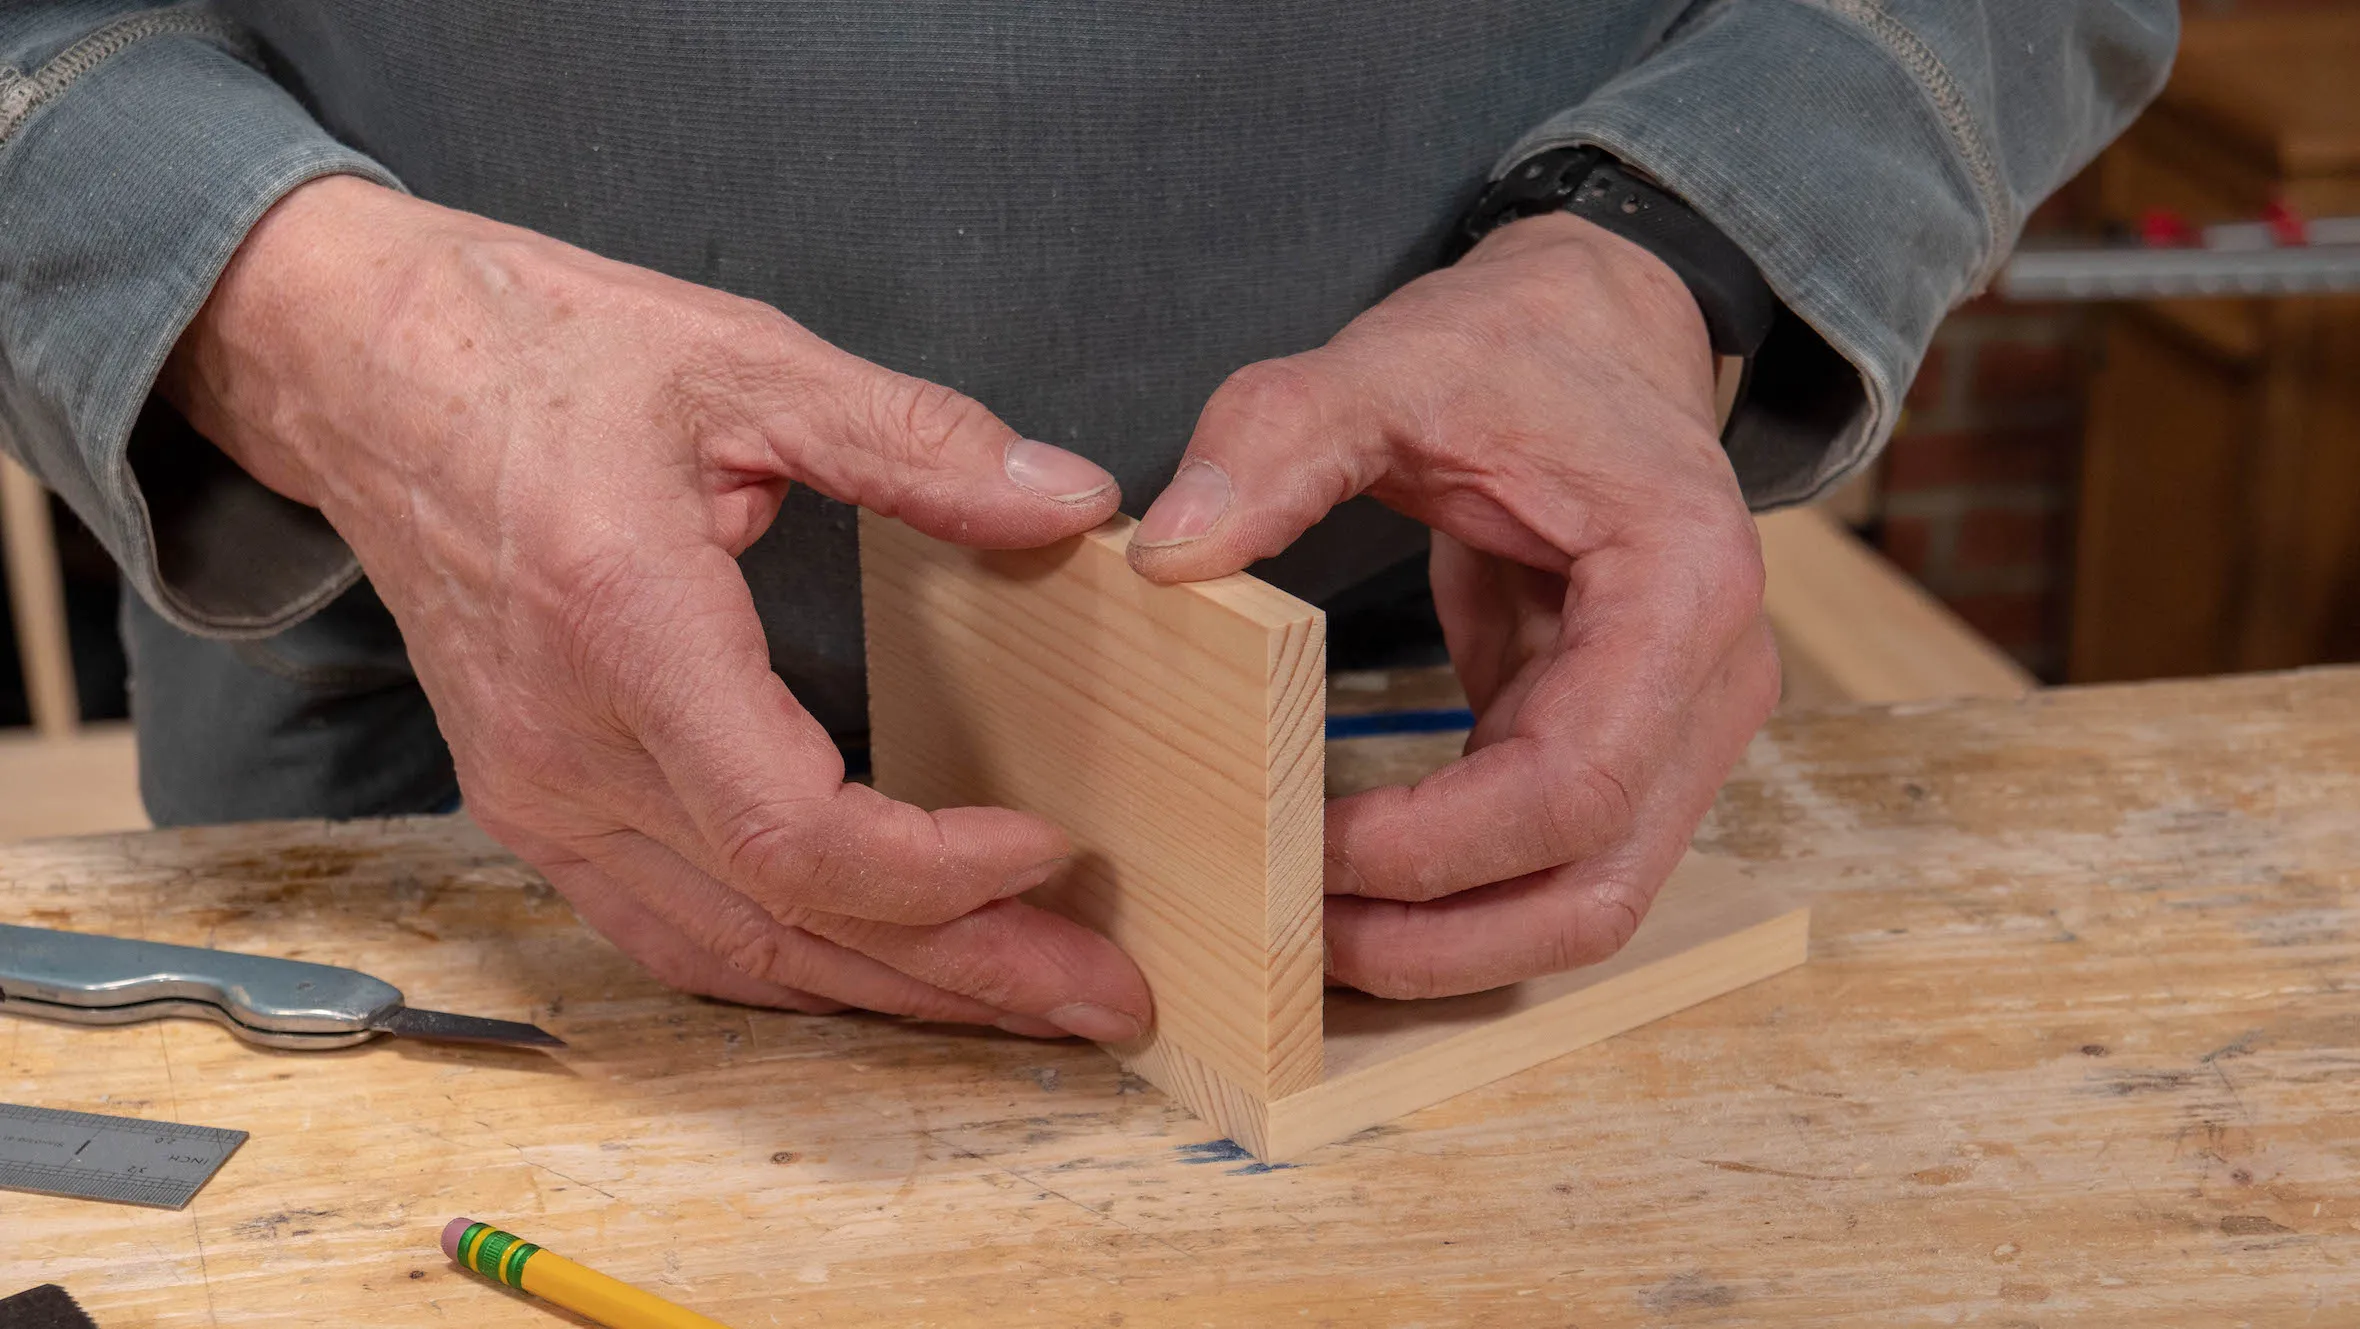
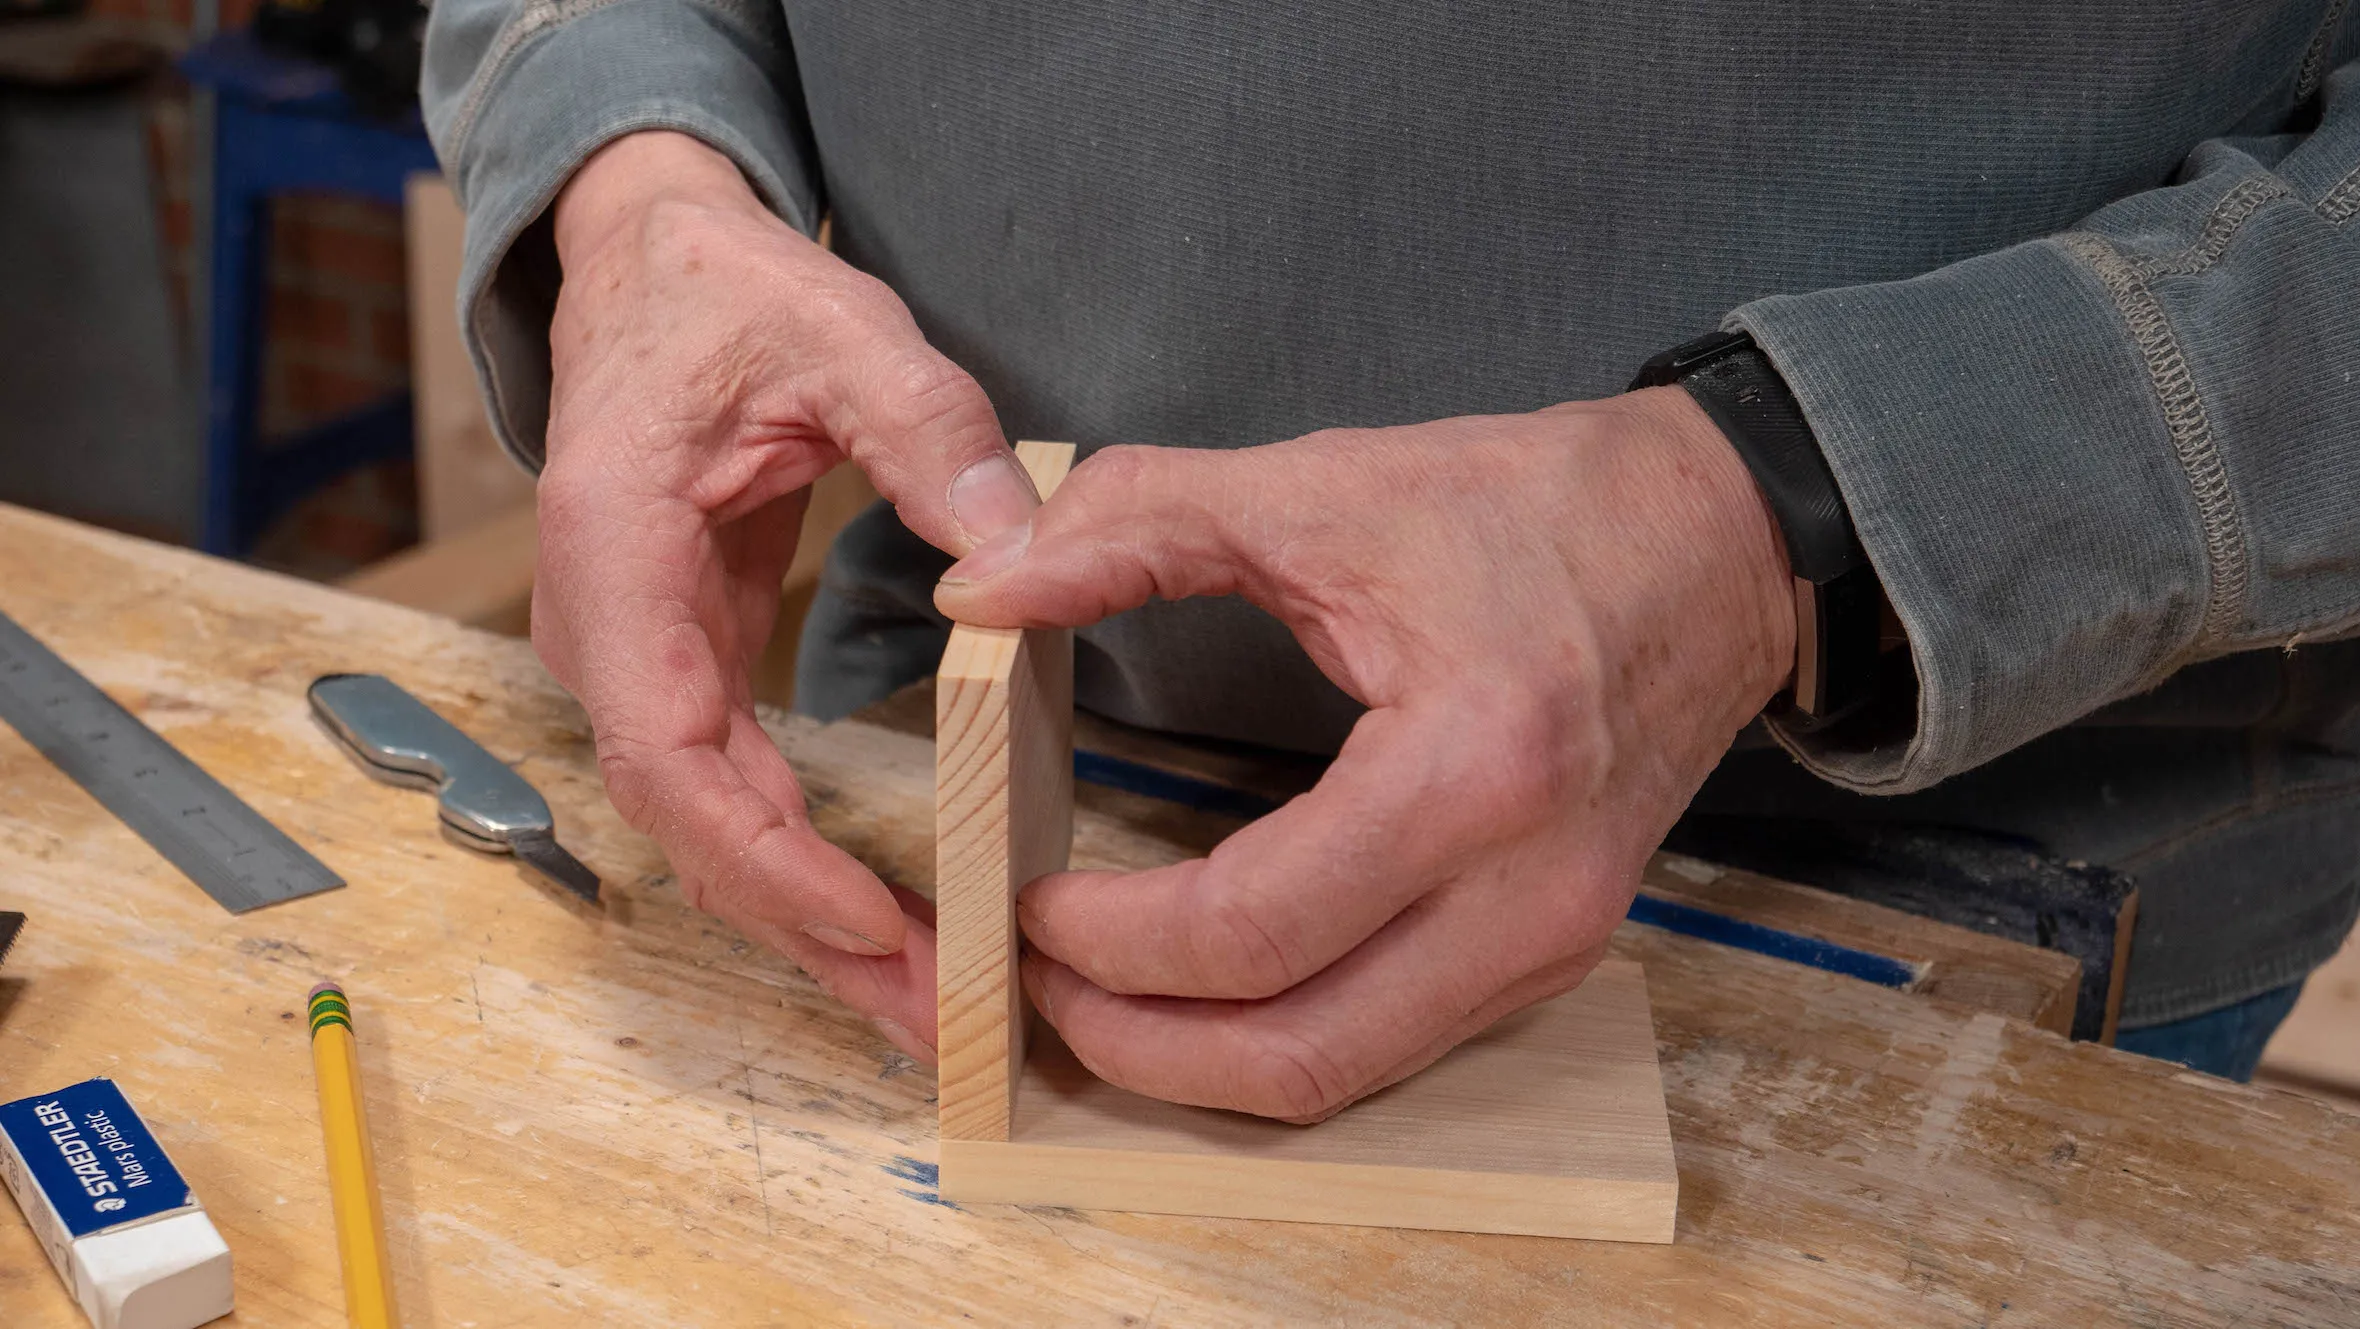
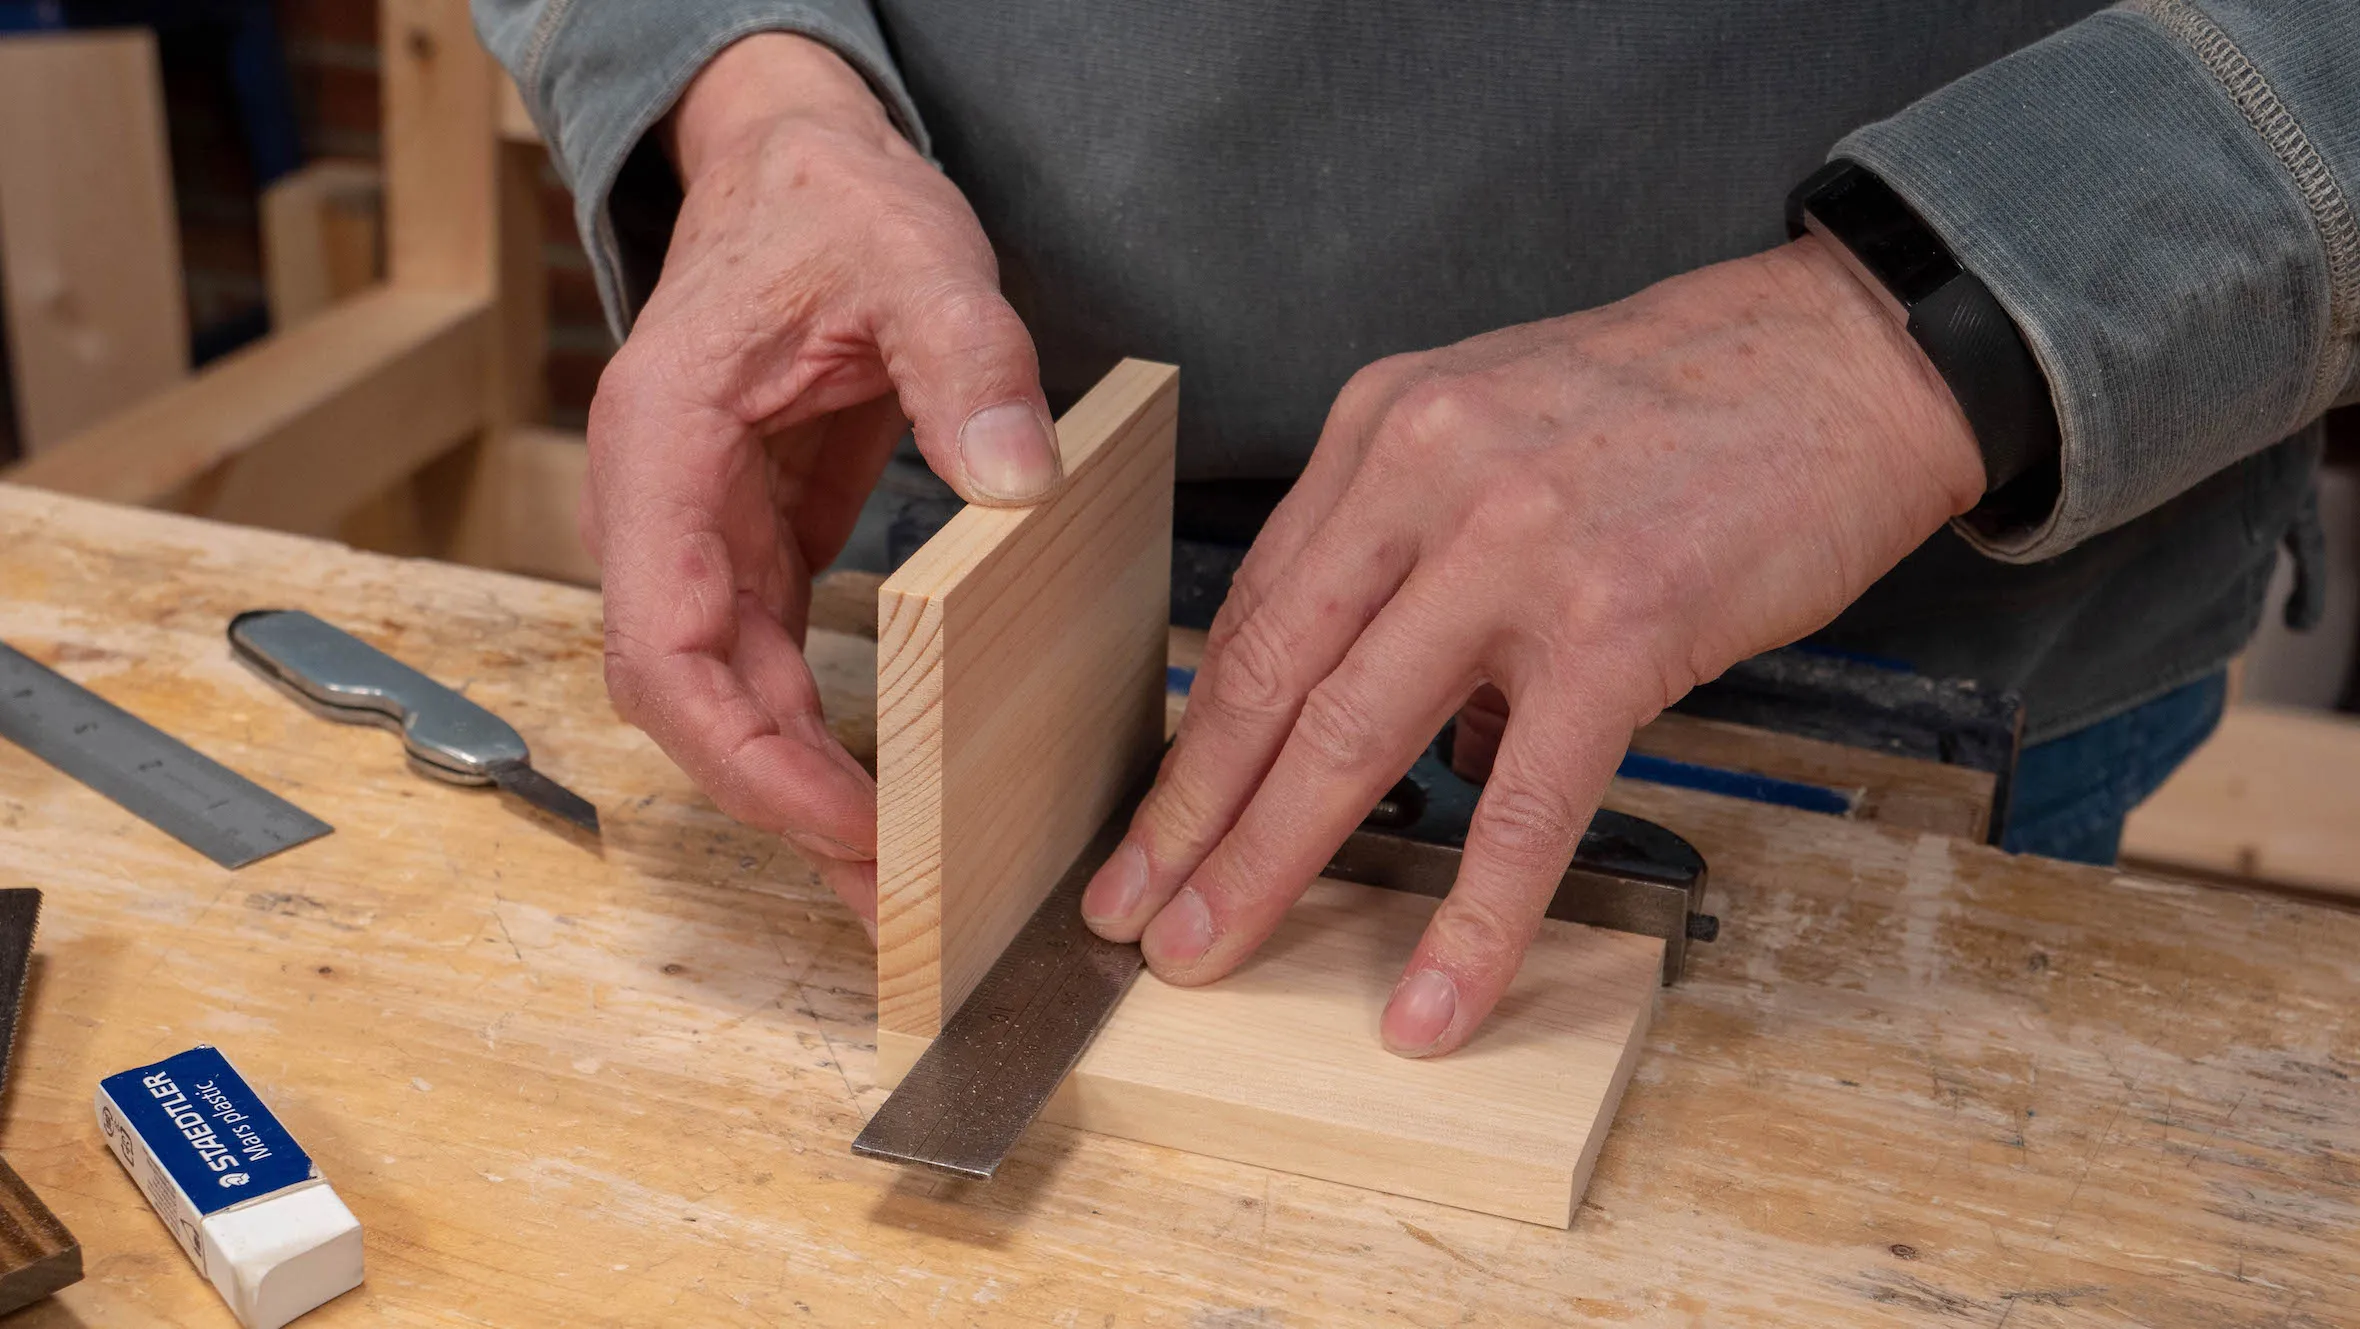
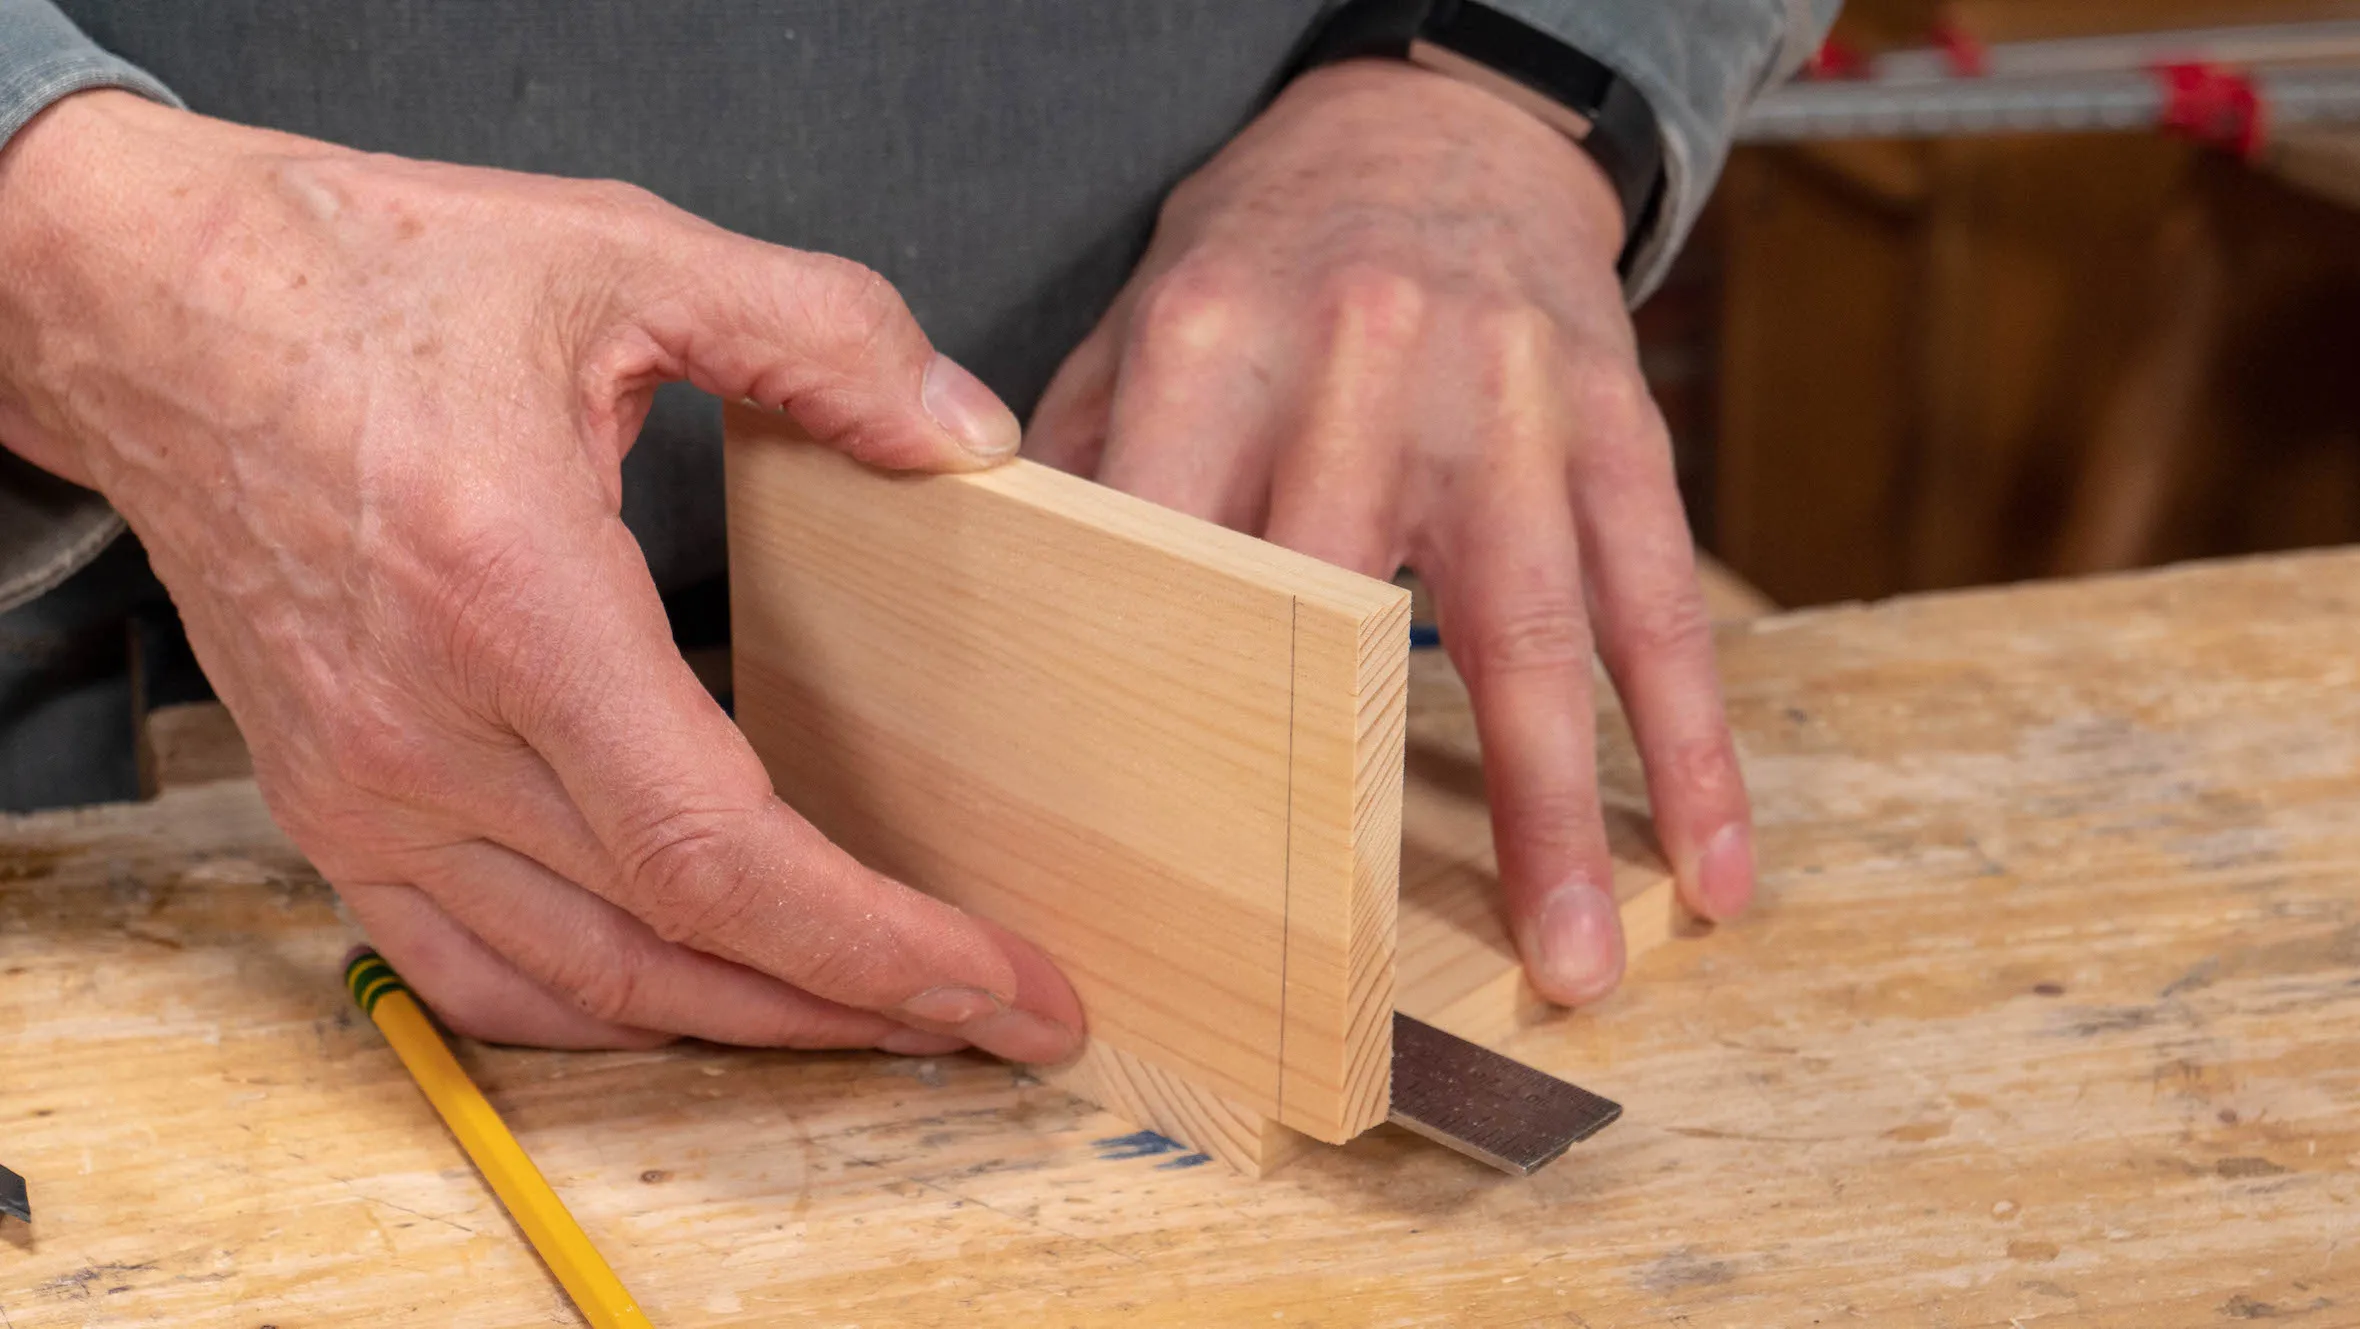
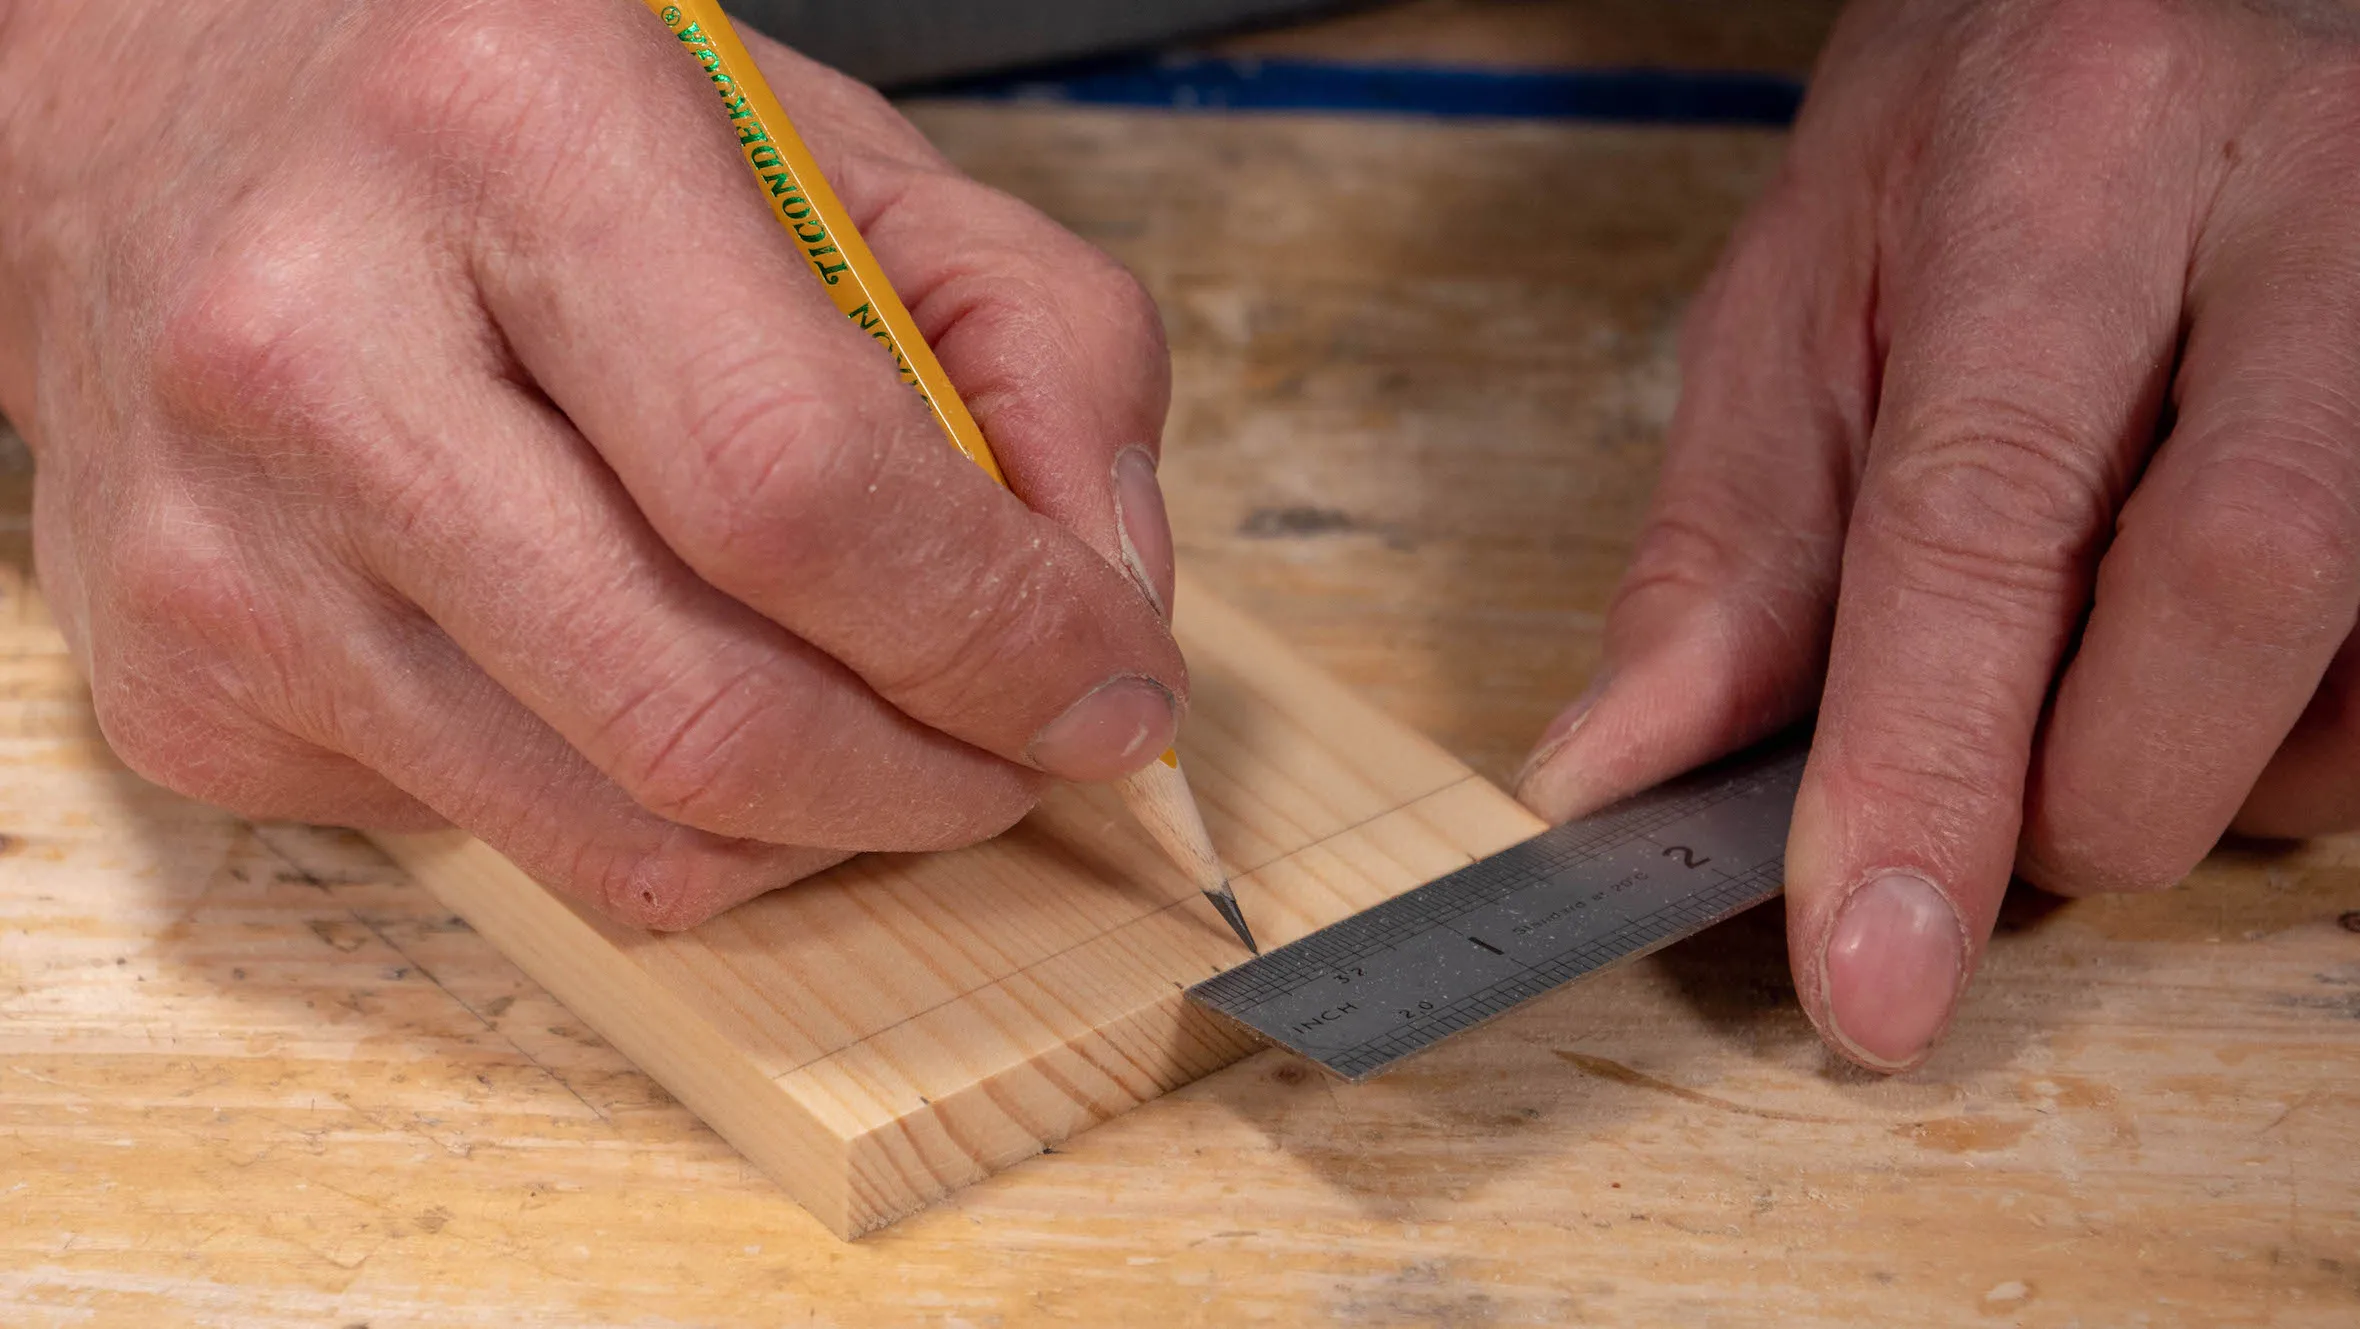
Start by marking a depth line across the ends of both pieces, so you know how far to saw down later. First, take one piece and stand it up on edge along the end of the other piece using a square to help you keep both pieces square. You can feel for flush with your fingertips, and then move the top piece to trace a pencil line, against the square, across the bottom piece. Repeat on the other piece.
Note: Though you should strive for exactness, it is preferable for your pins or tails to be slightly too long rather than too short. This is because, when the joint is assembled, it is much easier to pare down the protruding nubs if the shoulders are too deep, than to have to take down a whole face to reach the ends of the tail/pins if they are too short.
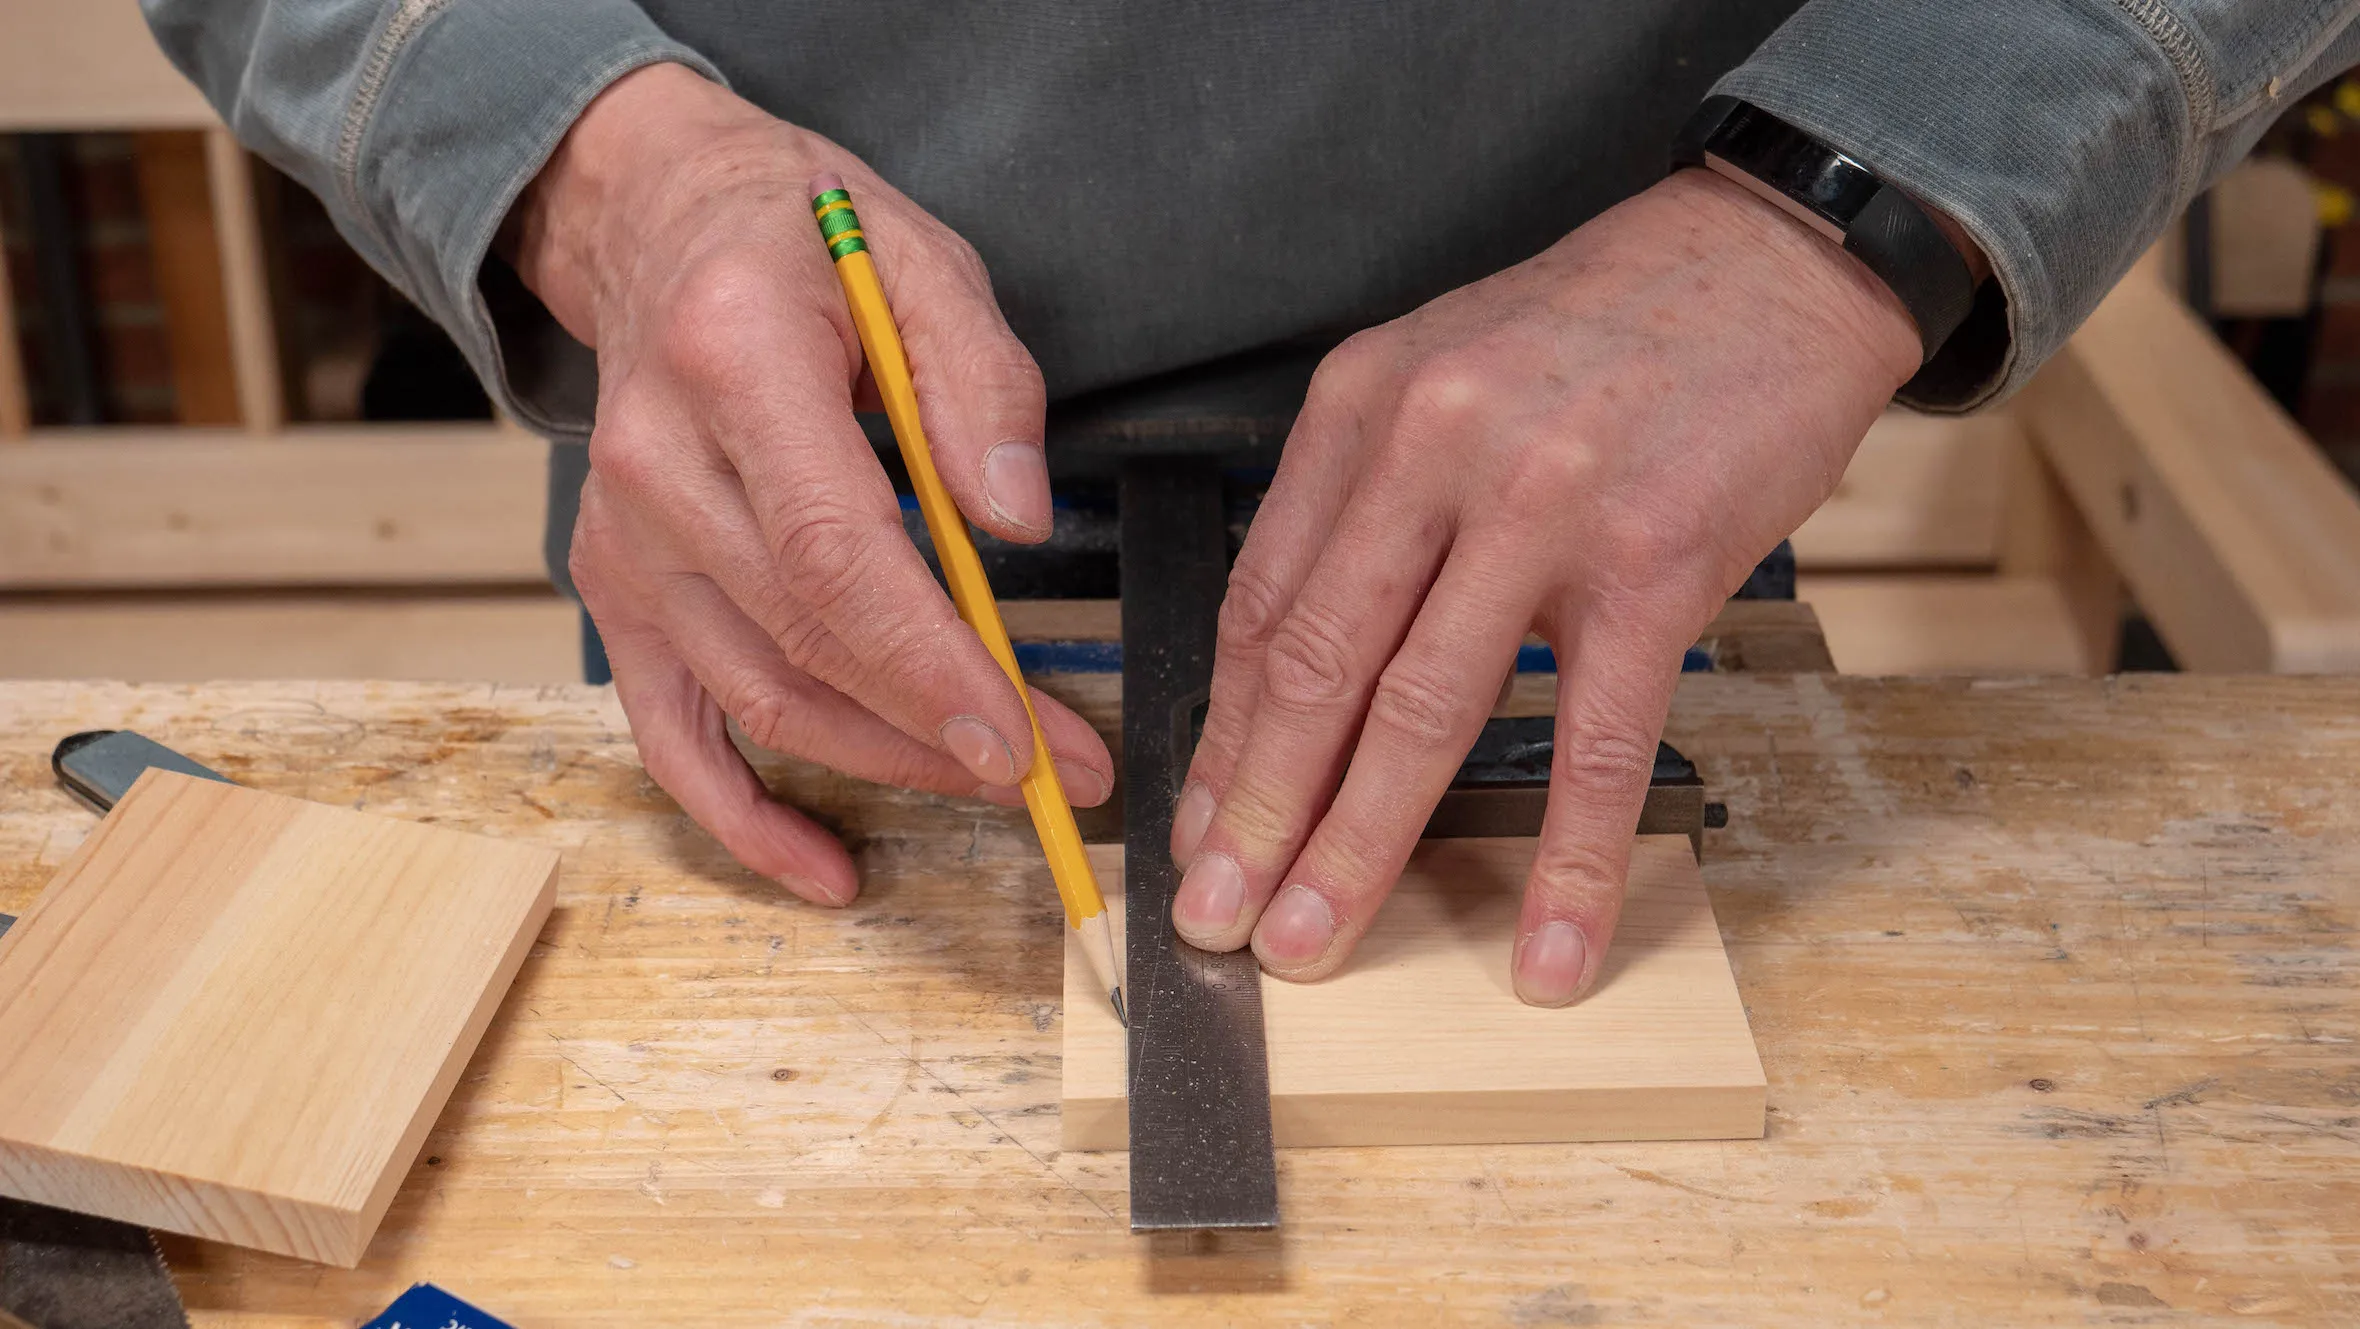
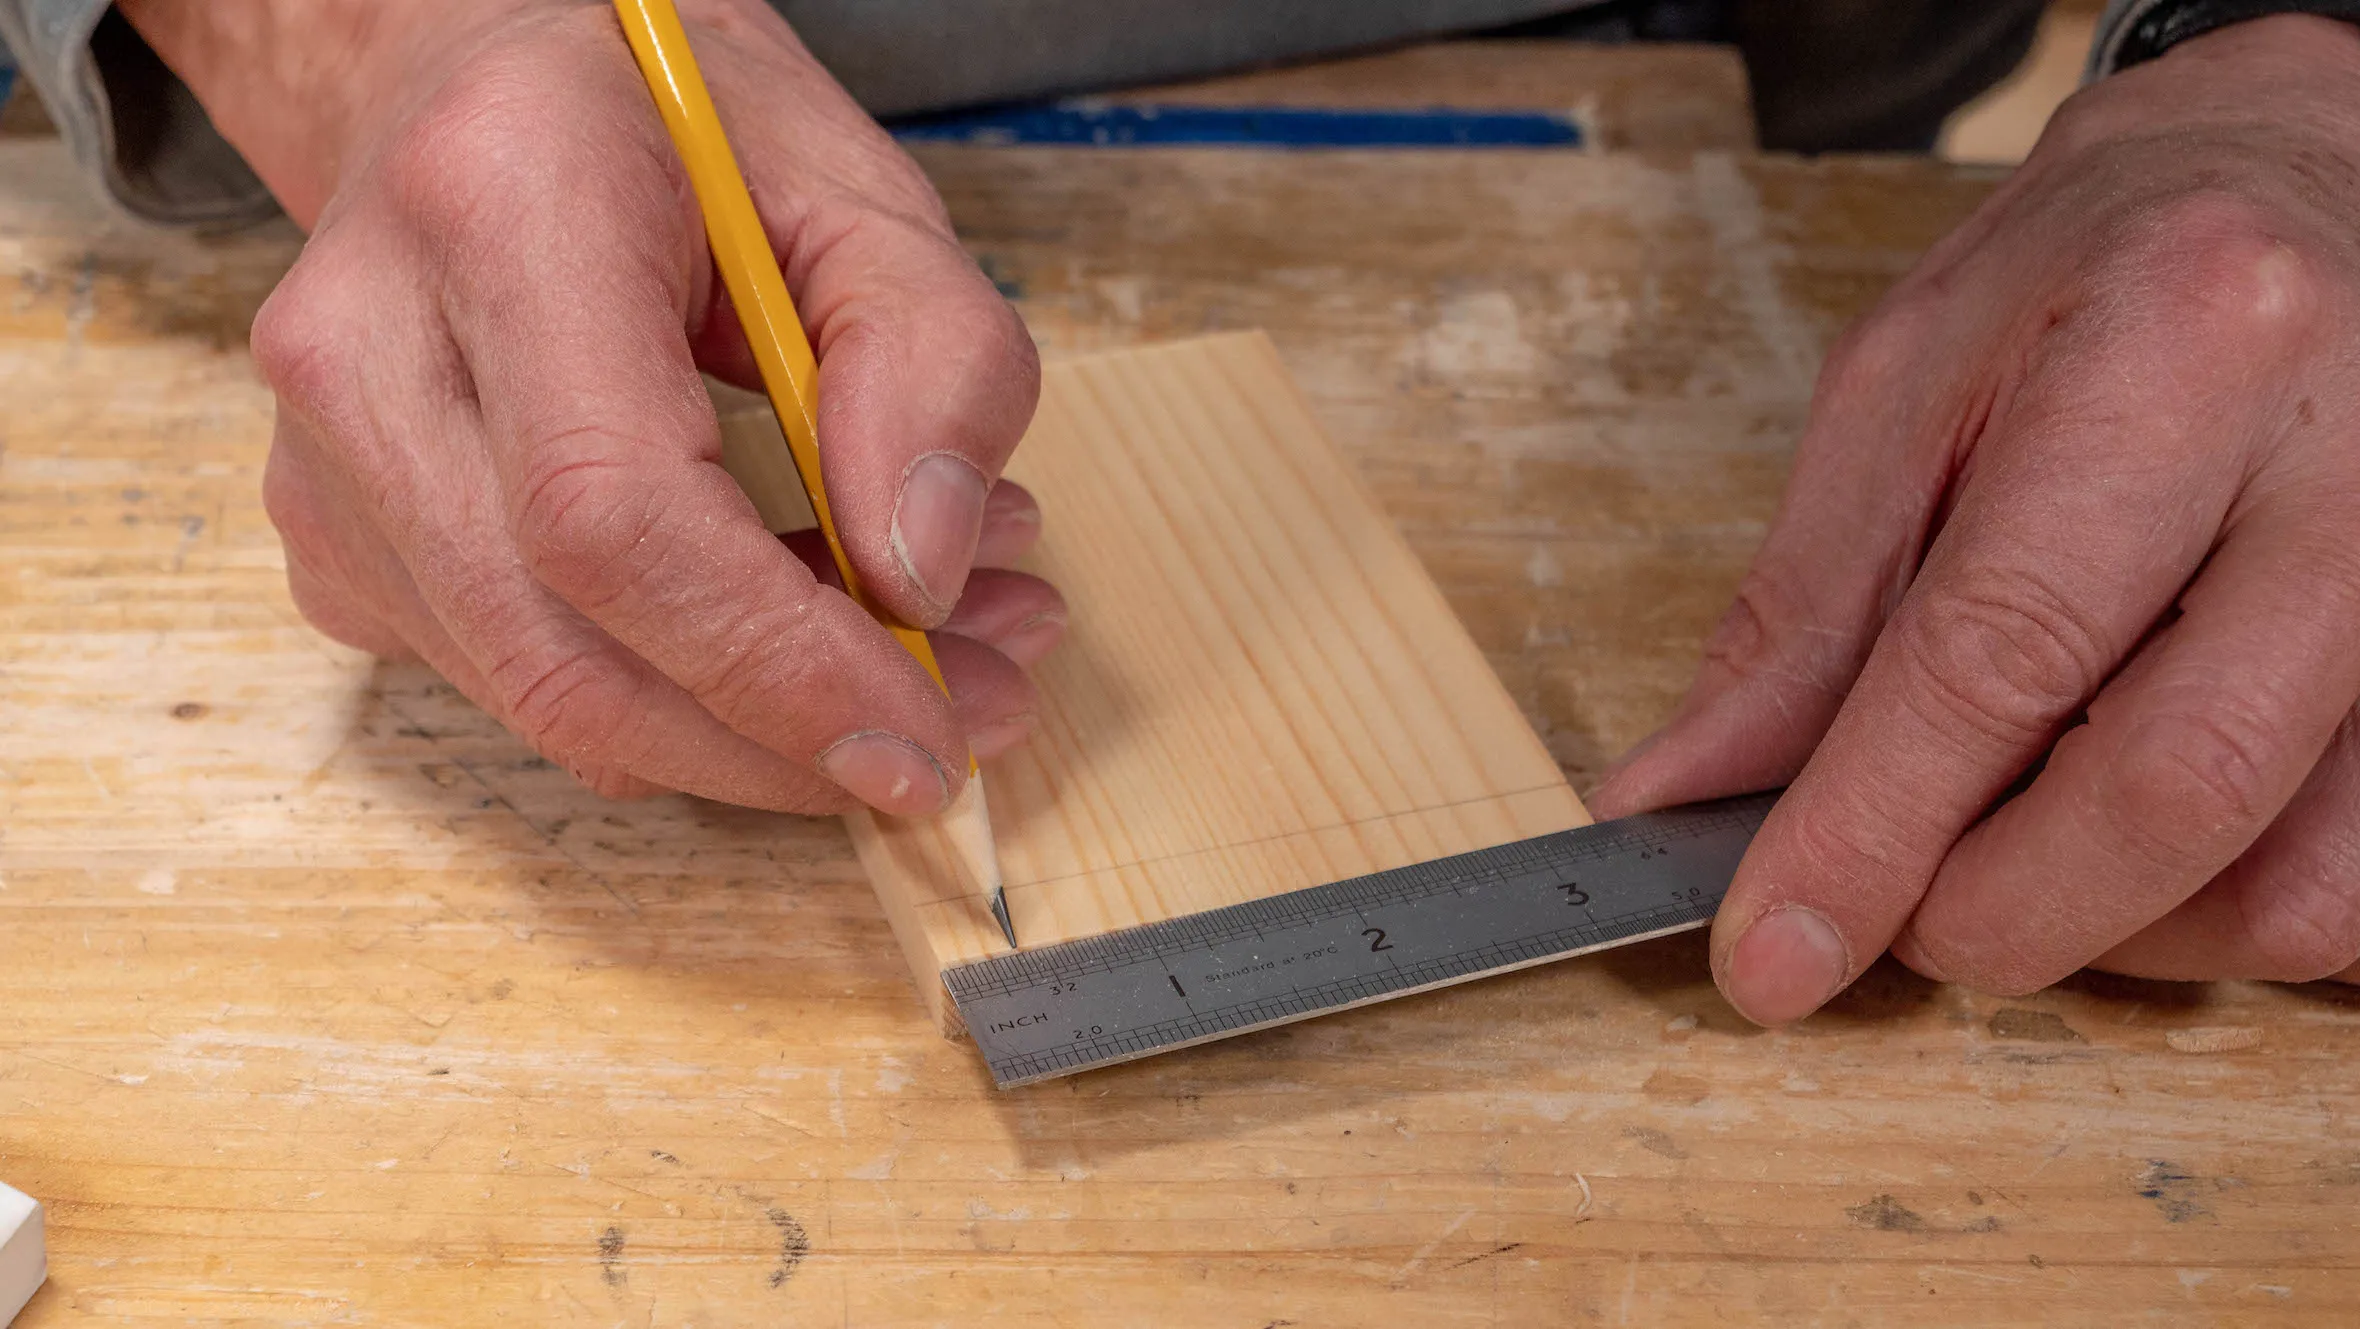
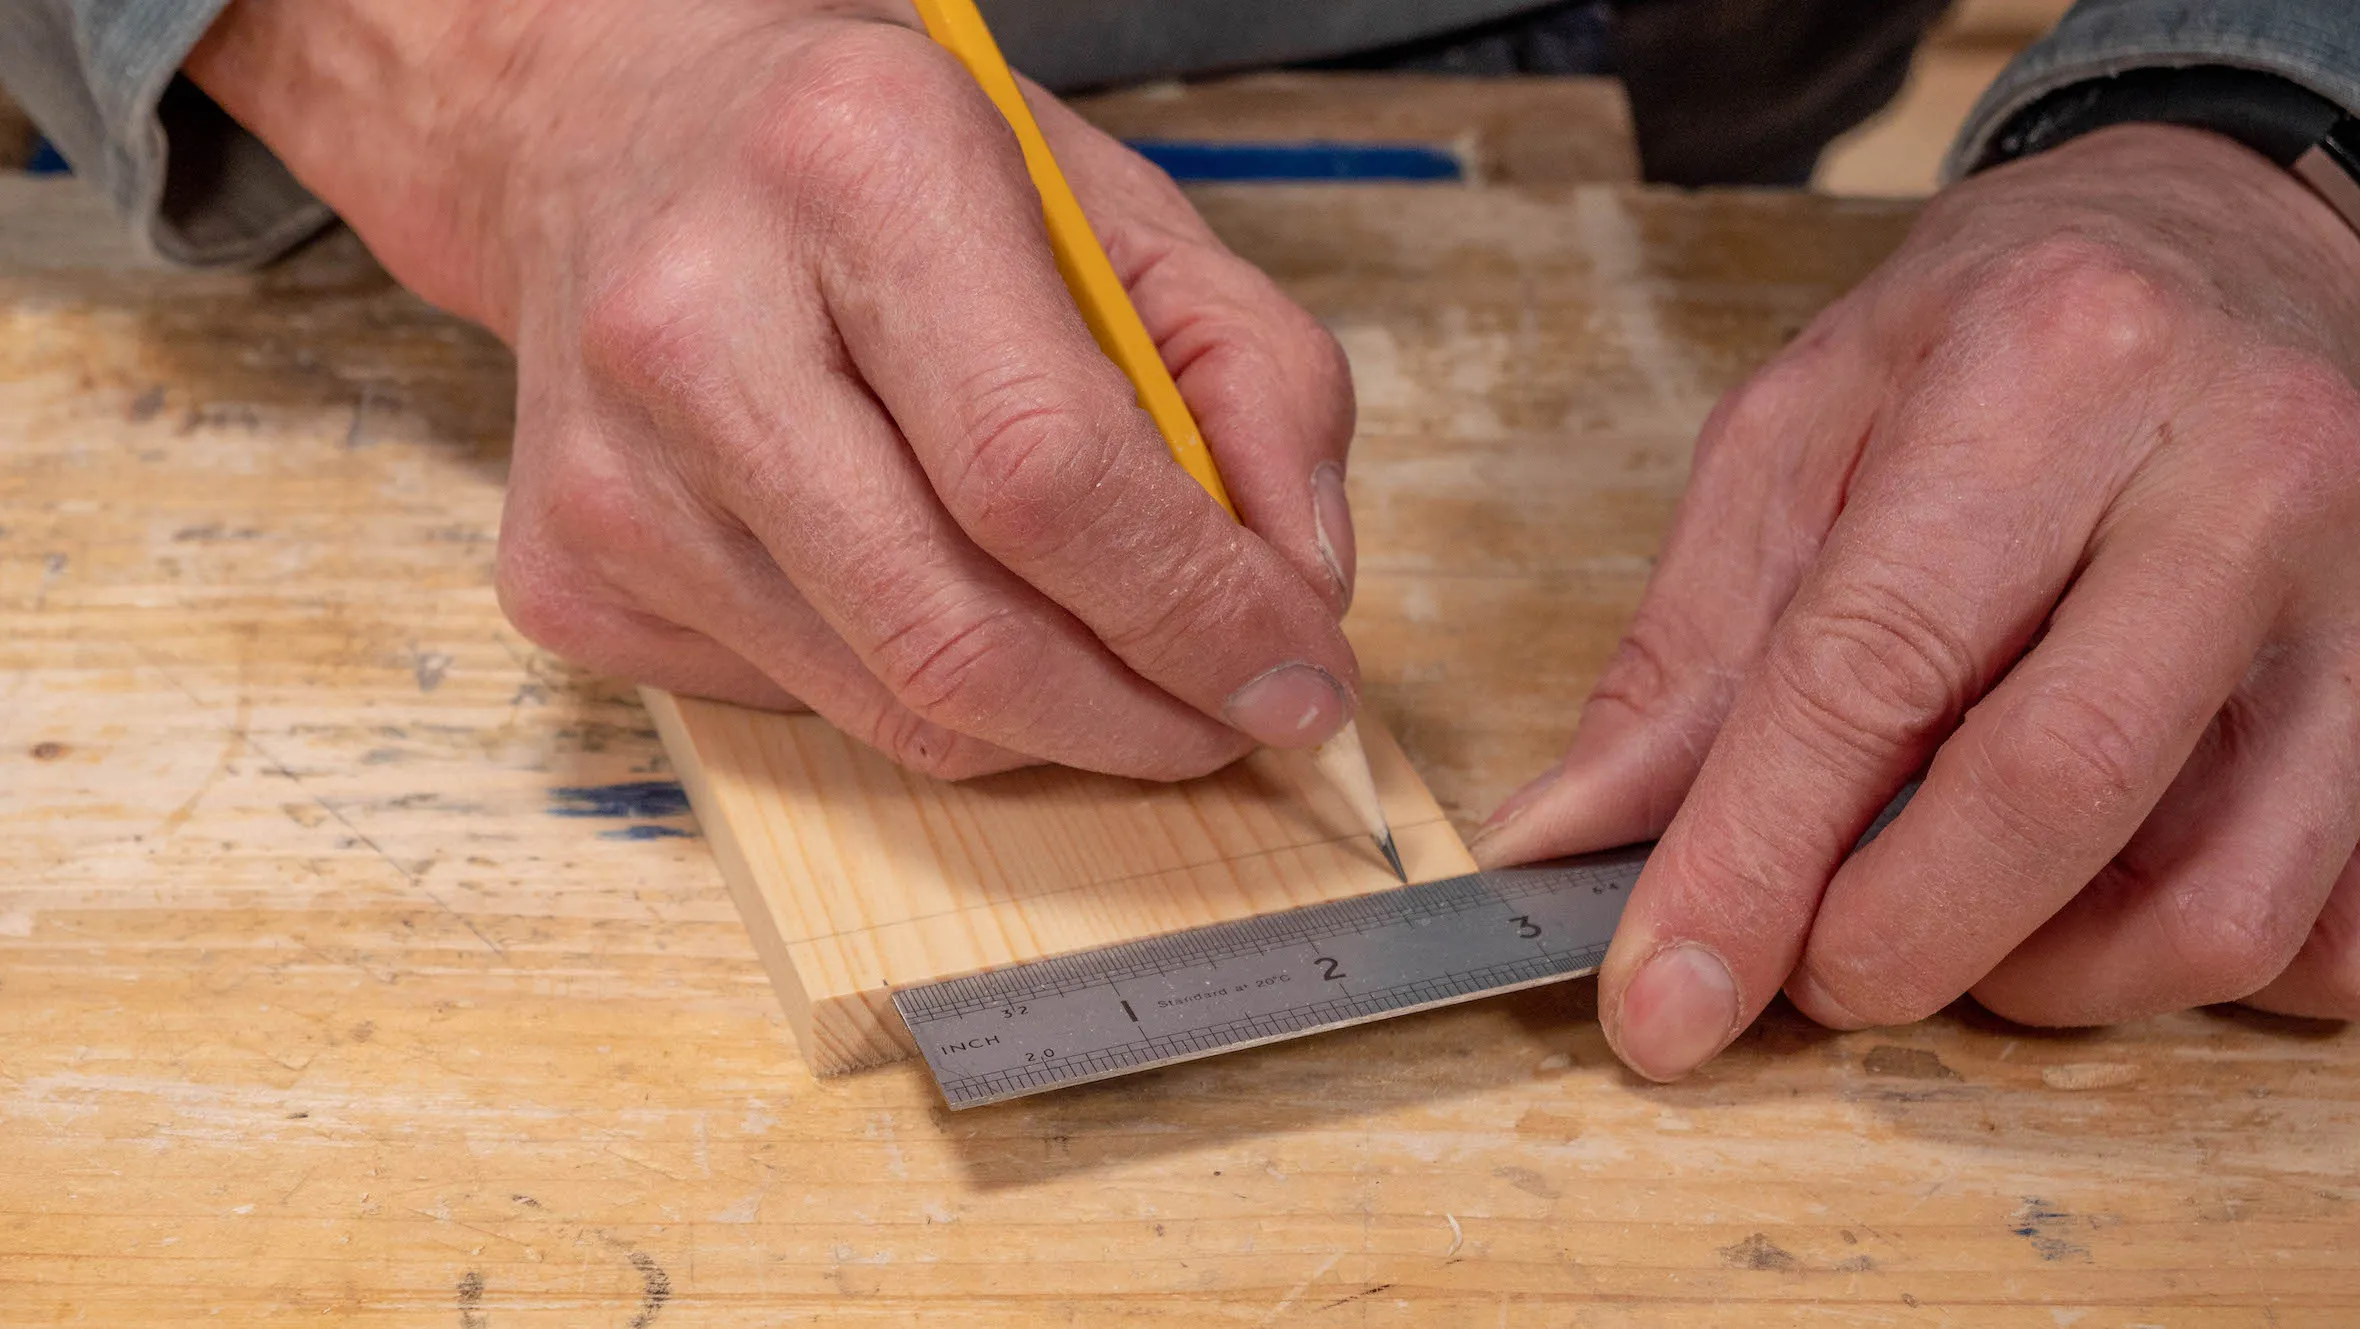
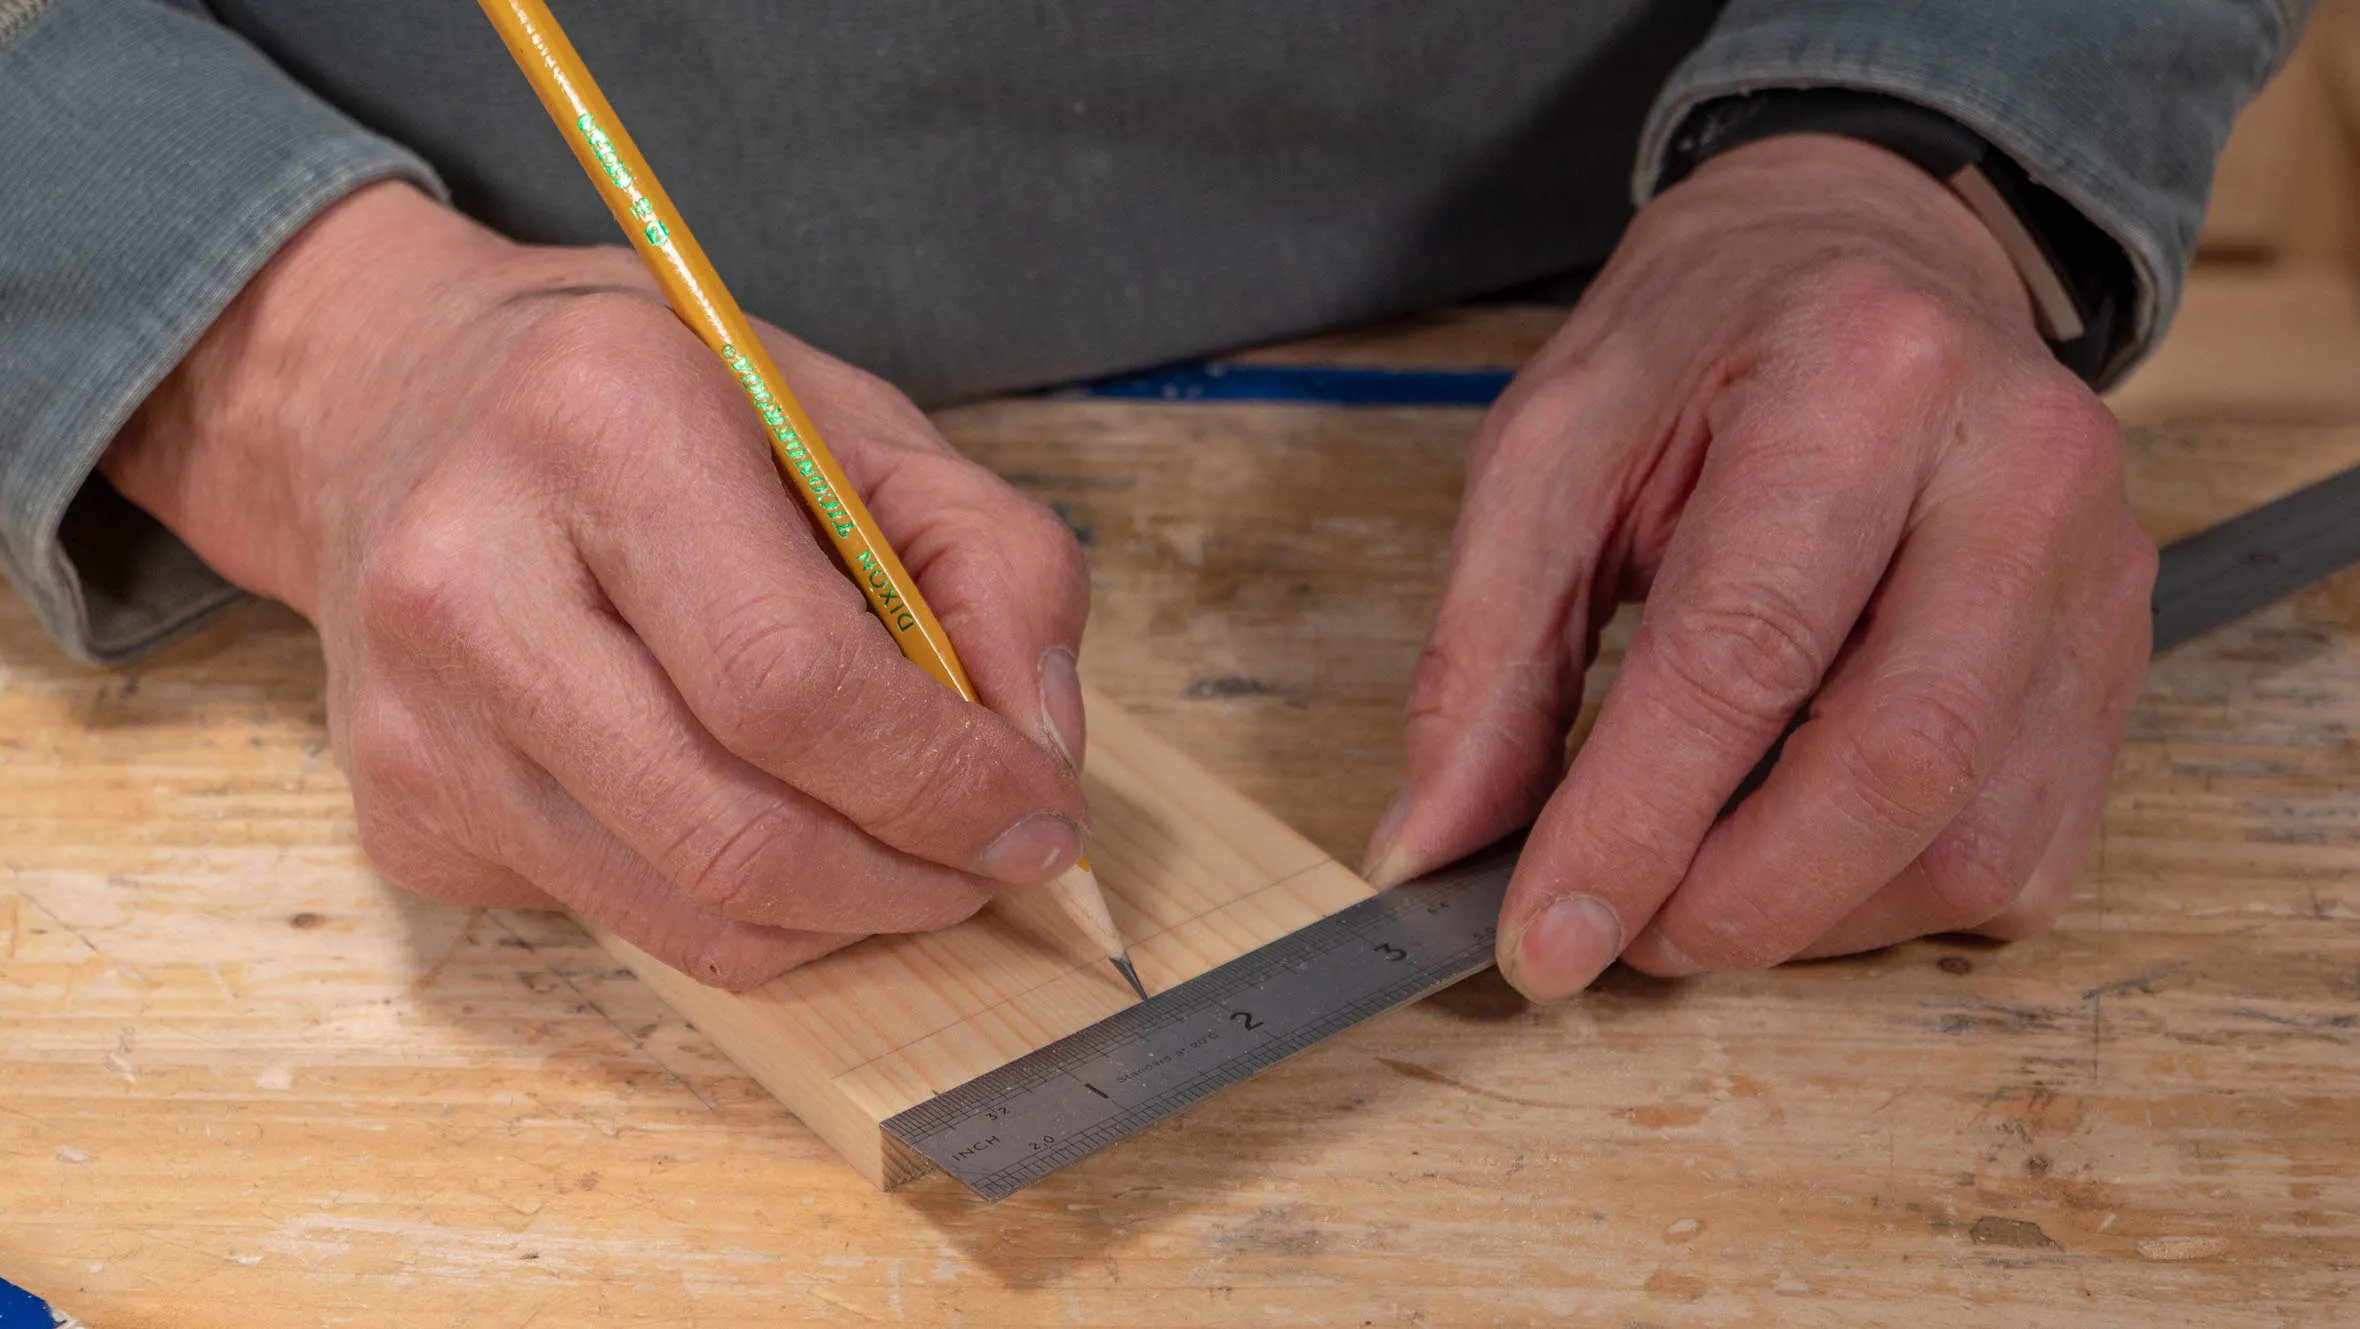
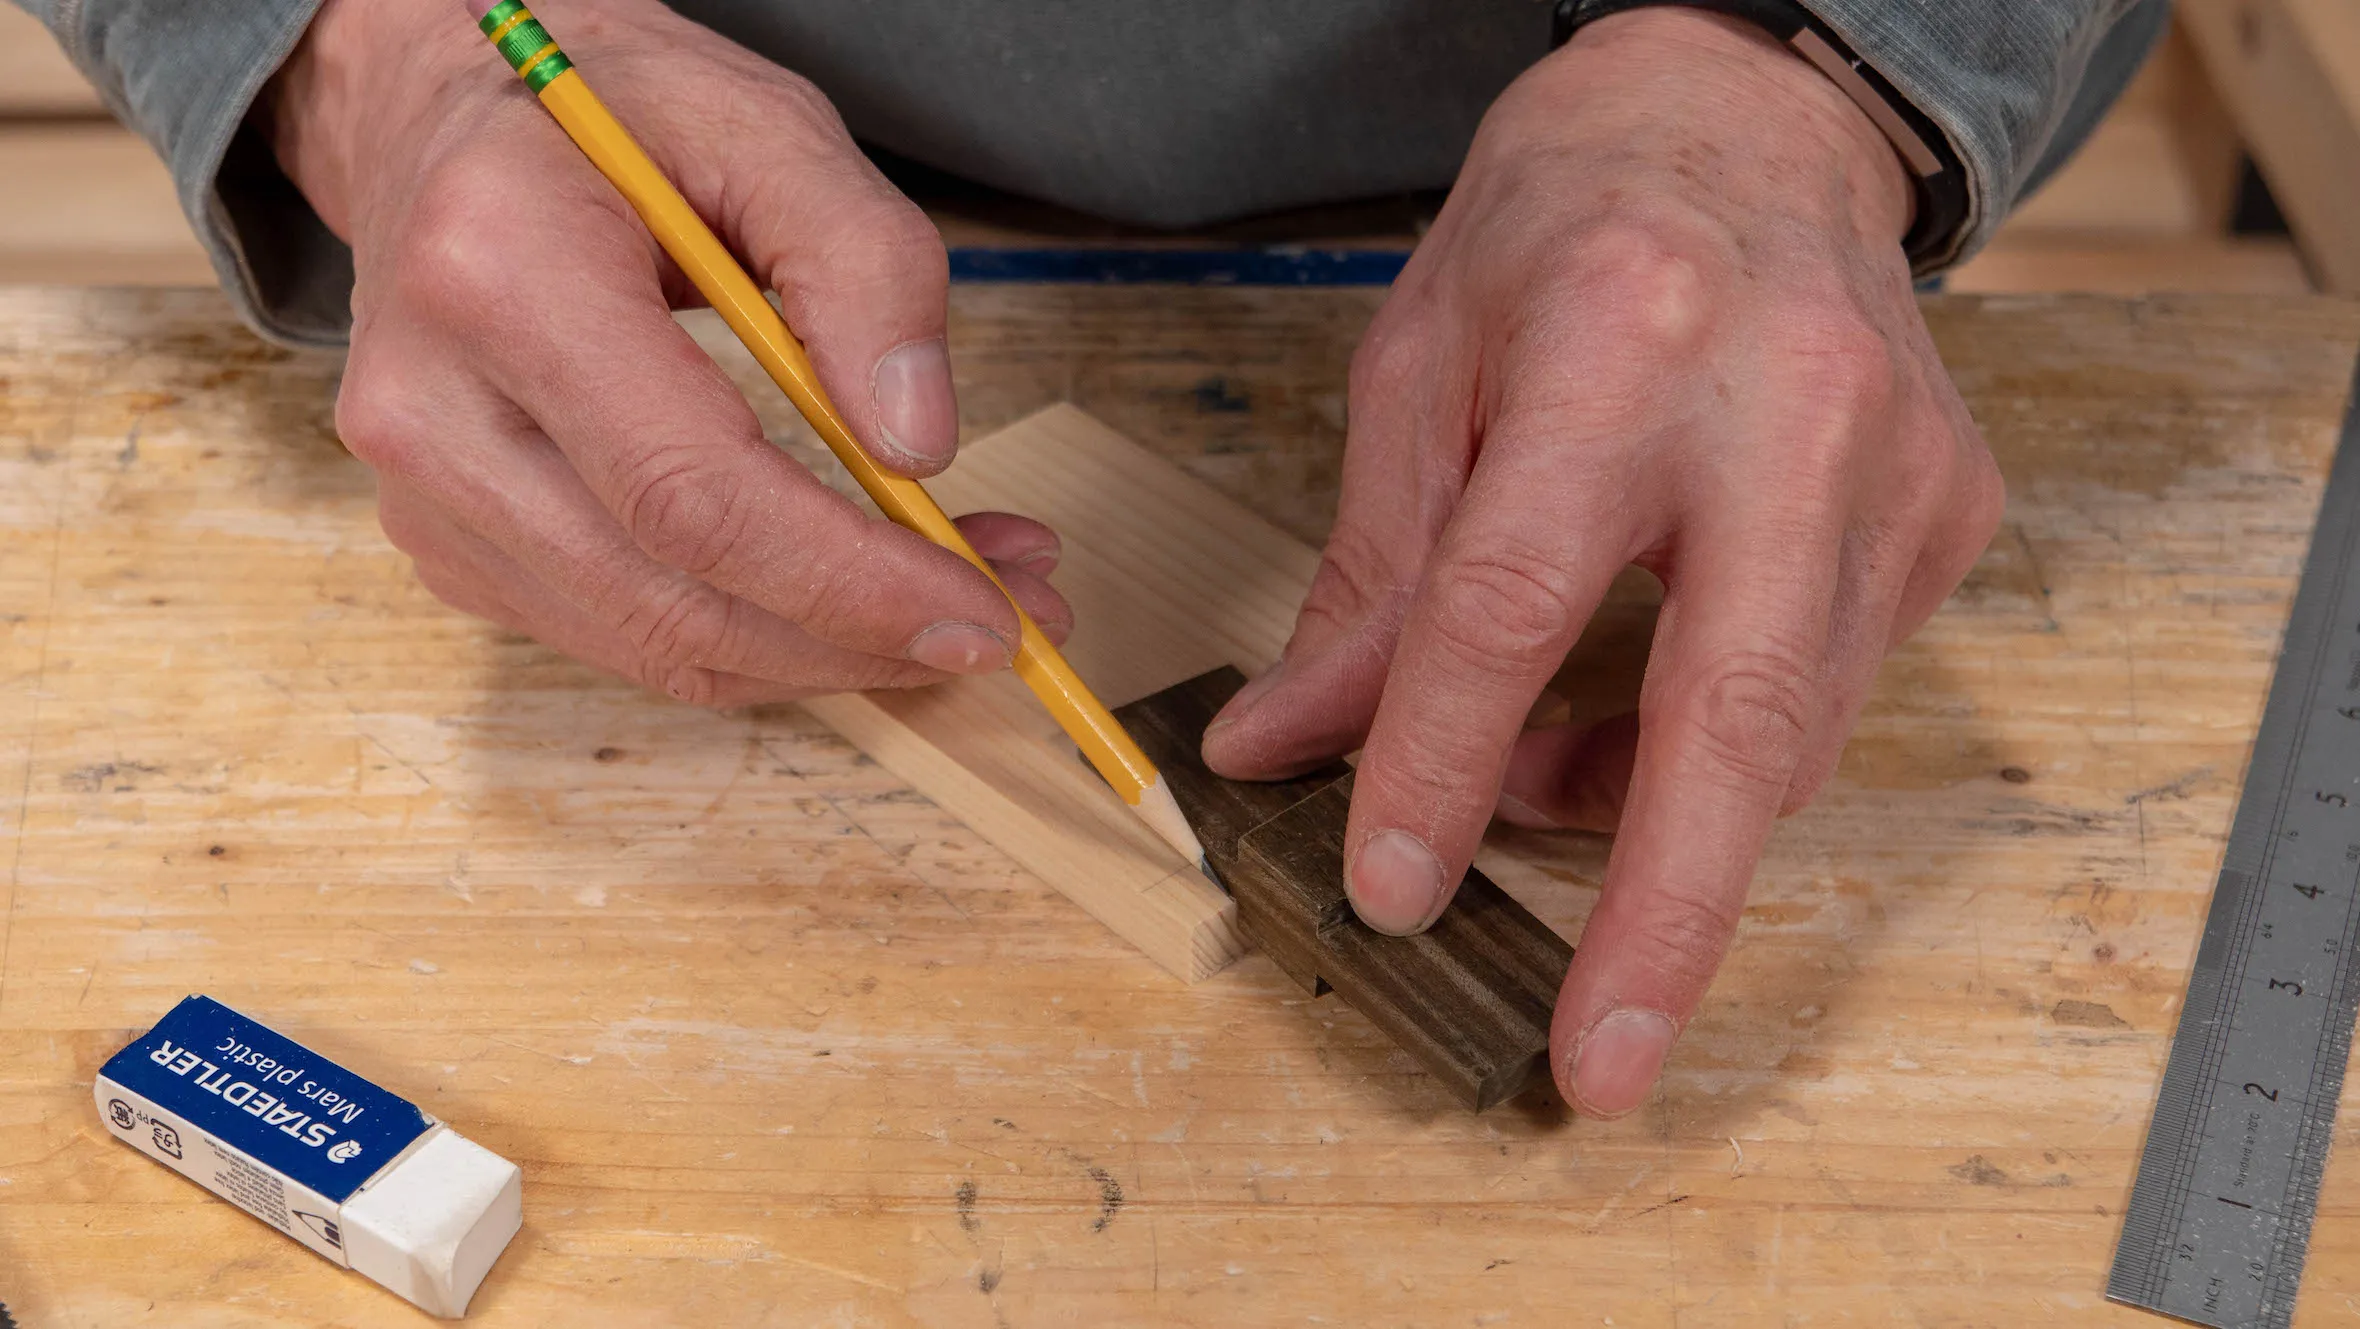
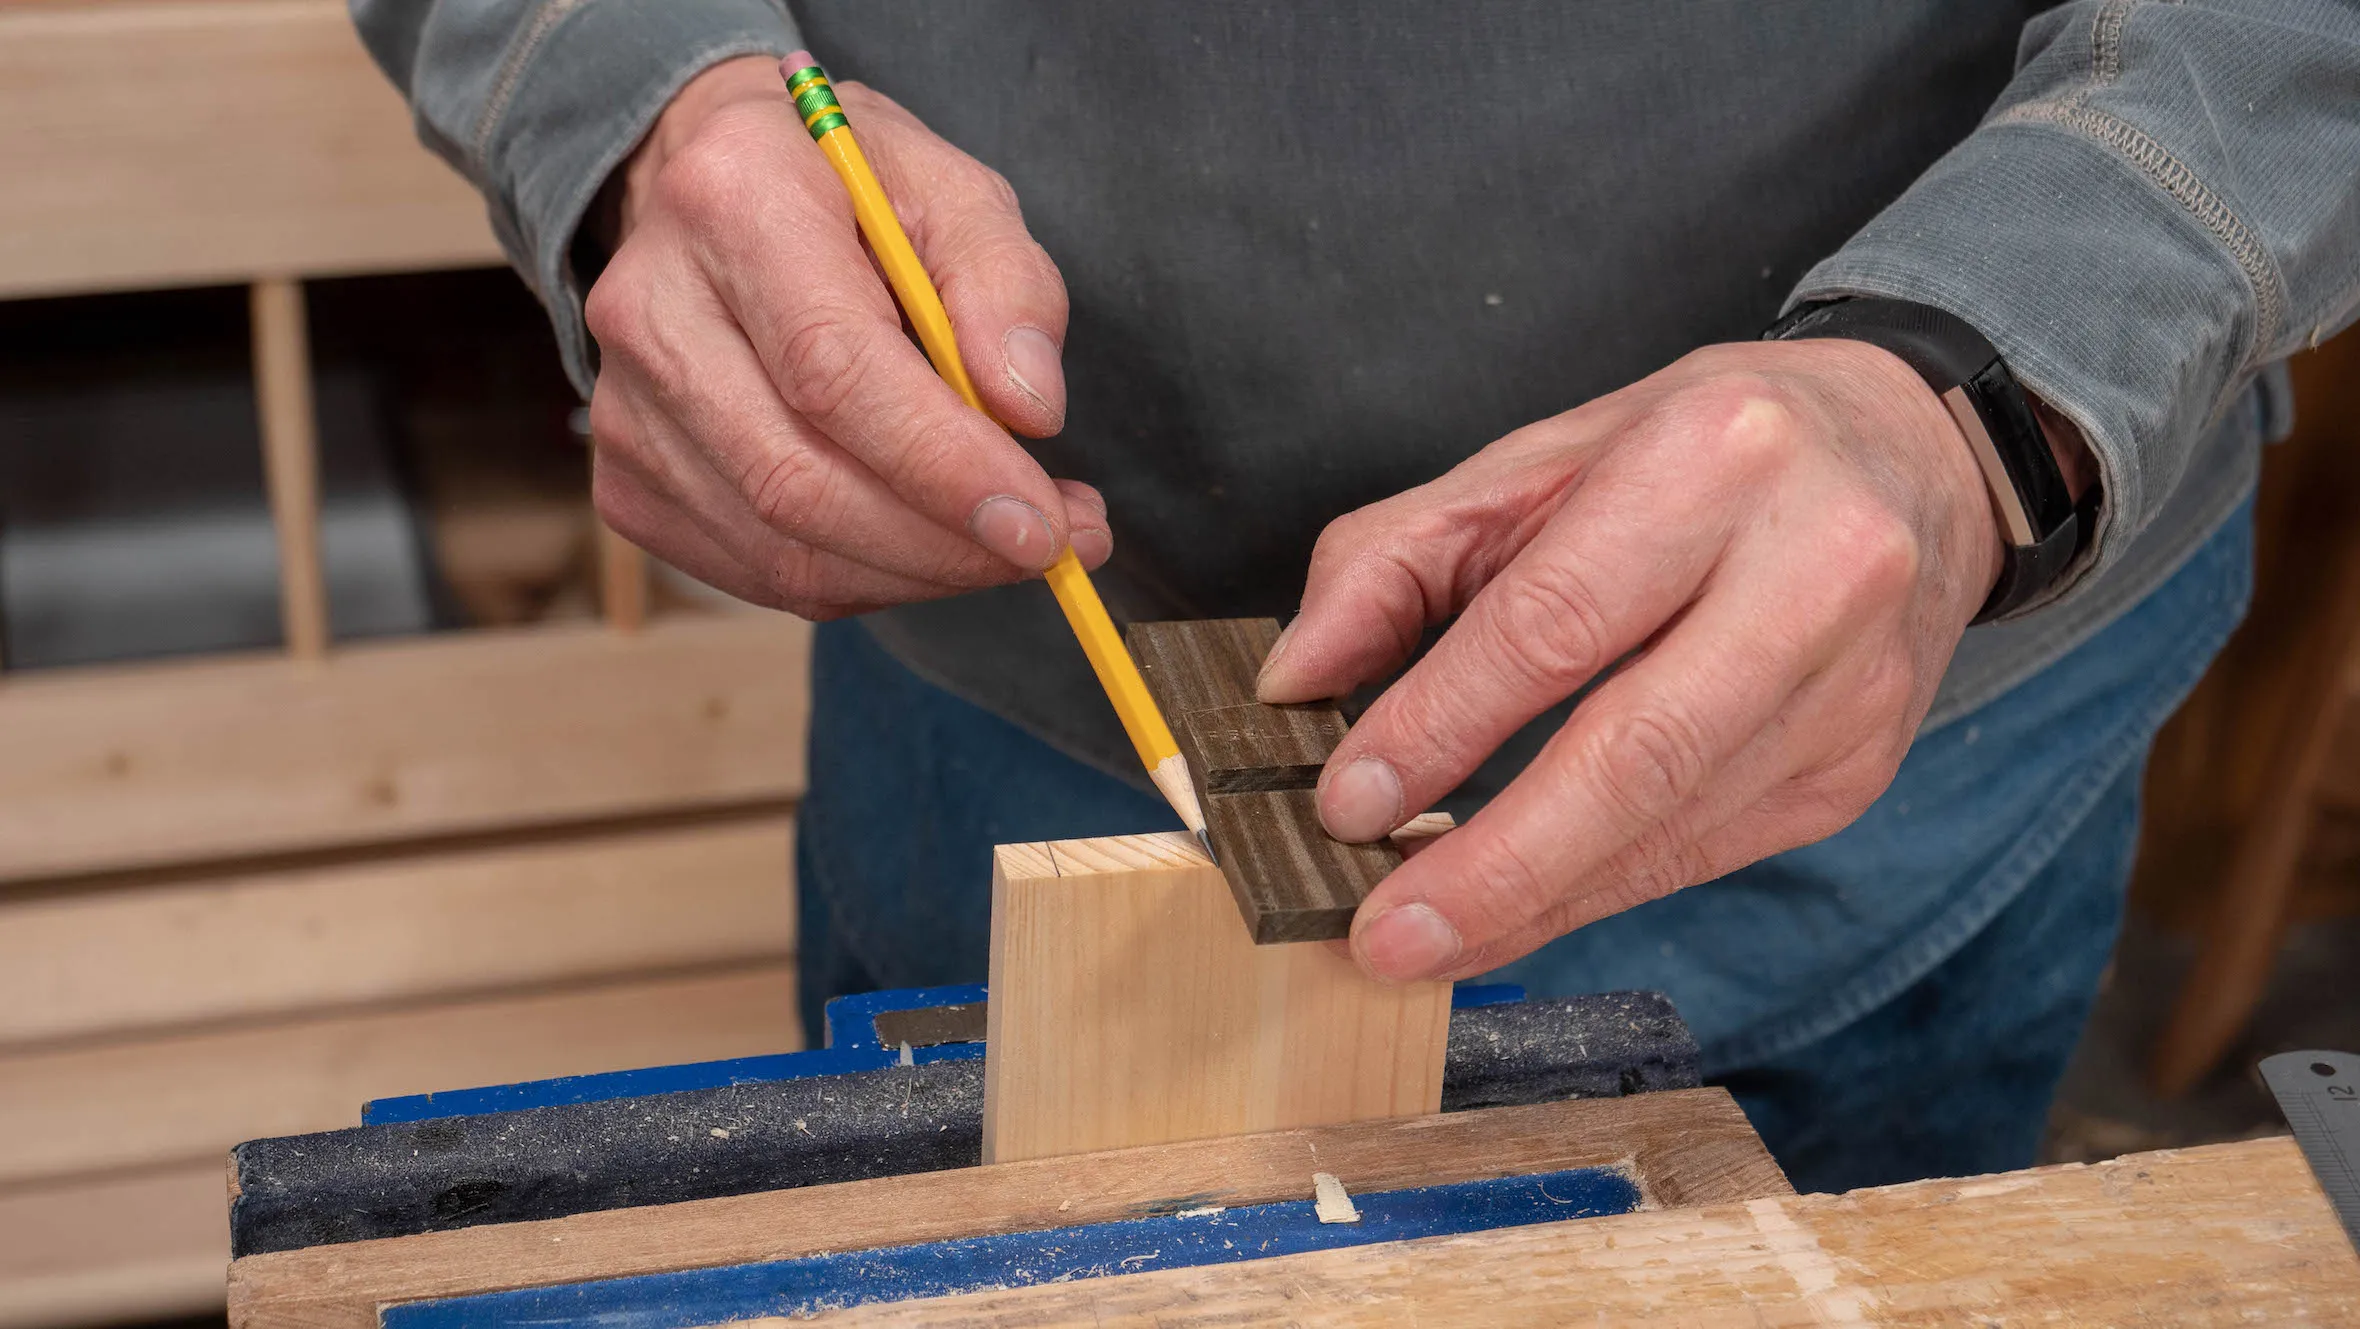
Mark in ⅜” (10mm) from each edge. Find the centre between the two points and then measure 3/16” (5mm) either side of that midpoint. Use your dovetail template (or a sliding bevel set to a 1:7 pitch, see link) to lay out the sides of the tails. Then use the square (or the square section of your dovetail template) to square these lines across the end.
Sign in to track your progress